Several different types of lace available today are created on a net background. This is very beneficial because it is possible to cut the designs out, or clip the net background, and appliqué it onto another piece of net or fabric creating shapes or designs you want. In this article I’m going to describe several projects and some materials that makes this process easier.
You do not need to have years and years of needlework experience or know the difference between Alençon, Chantilly or Embroidered lace to succeed at the process, just a really good pair of scissors and some patience. Two other necessities are a fine sewing needle and fine thread. You can appliqué lace on a machine or by hand, but I think working on a machine needs a little more practice and use of some special products which will be discussed later.
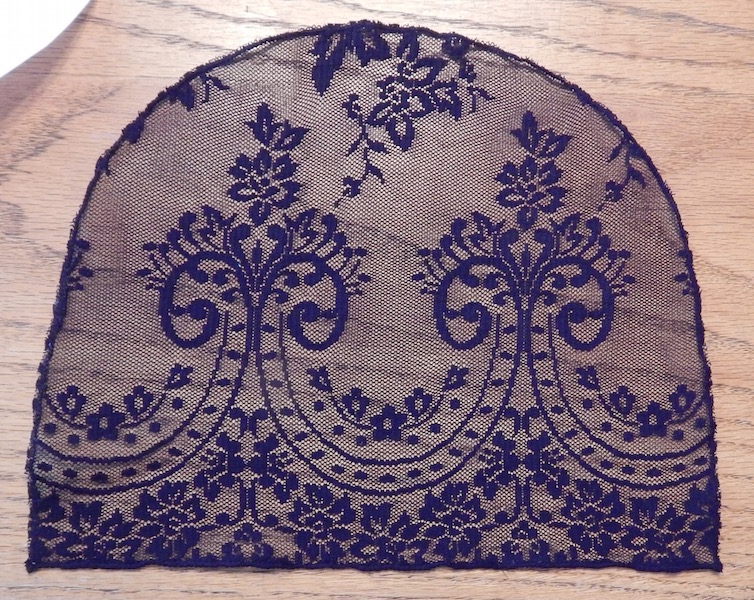
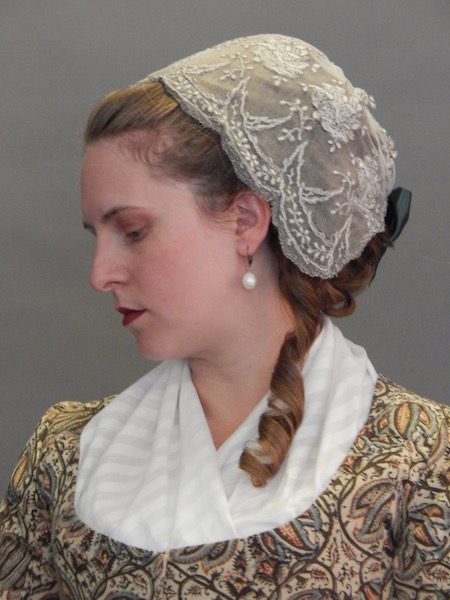
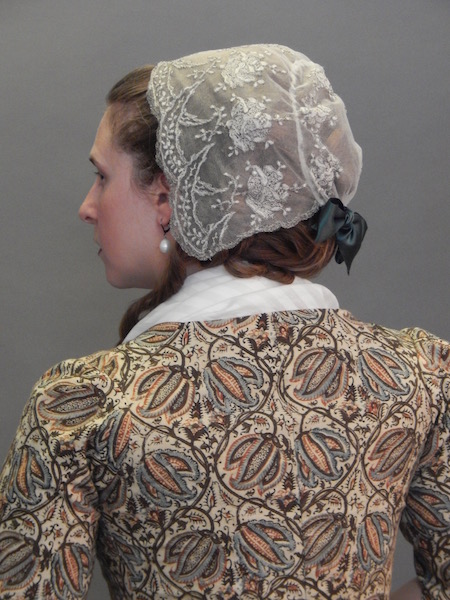
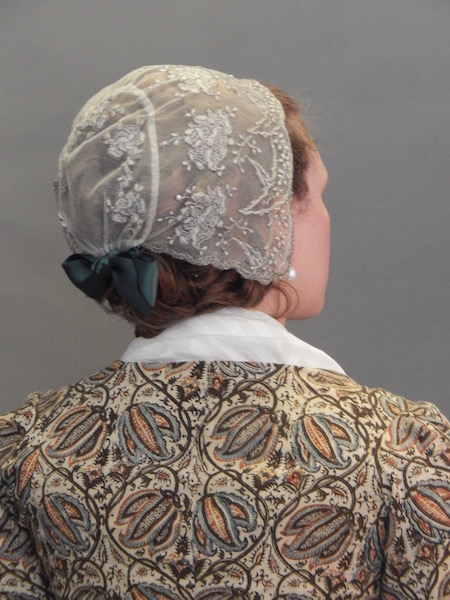
18th C French lace cap
This type of cap was popular around the years 1730-1750 or so. The surviving parts are often found separately, but the full cap consists of a half round, two long lappets about 24” long, and a ruffle of about 36” long that was attached to the half round in measured places along the edge. A pattern is attached as a pdf.
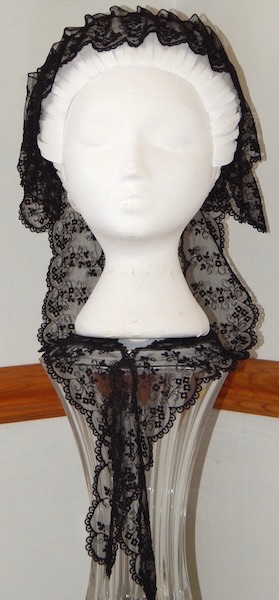


Sometimes the lappets were pinned up.
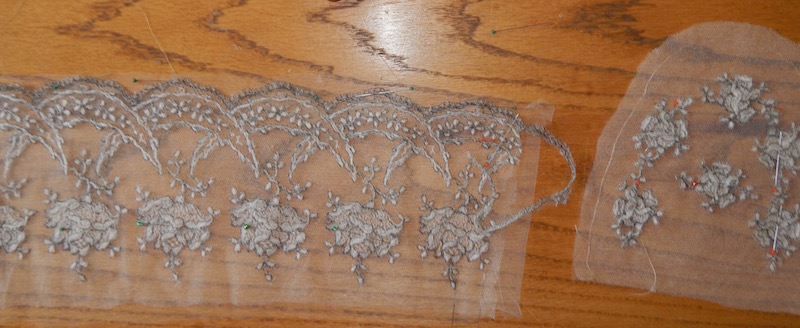
It is difficult to find a double-edged 3” wide lace, so I started with twice the length of lace for each lappet plus about 4”.

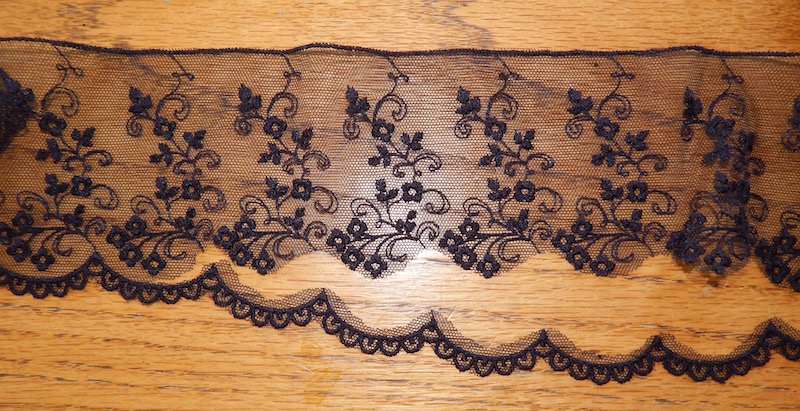
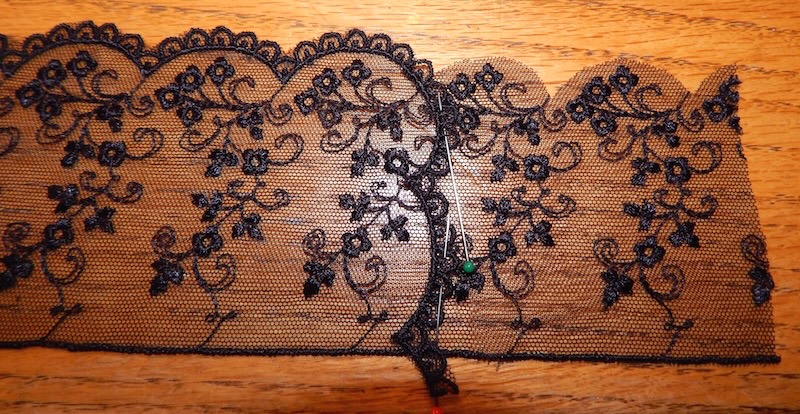
I trimmed away most of the lace on half the lace plus 4”, leaving the scalloped edge stitching attached to the other half of the lace.
I then placed the scalloped edge back around over the straight edge to figure out how it could match up with the design.

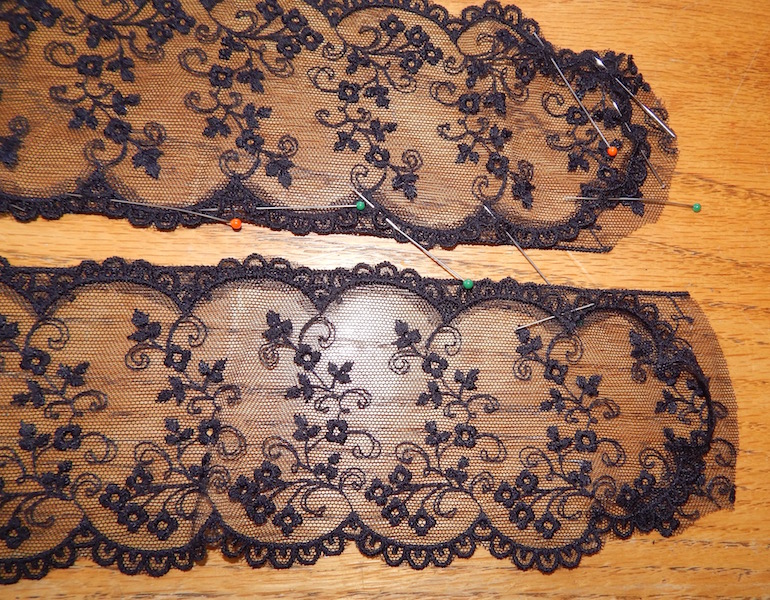
I then pinned it down to the lace so that it went across the bottom edge of the lappet and then up the straight edge. I did the second lappet in the same way, except for trying to make sure they where mirror images of each other, and then appliquéd the cut scalloped edge to the uncut edge. After it was sewn down, I cut away any overlapping net on both layers.
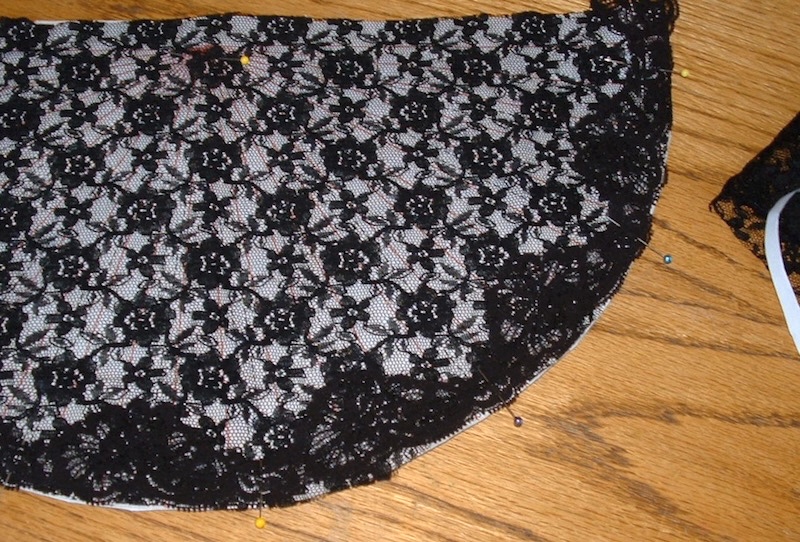
For the half round part of the cap I used a lace fabric that had a repeating edge design. With the pattern under the lace, I could see just where to cut.
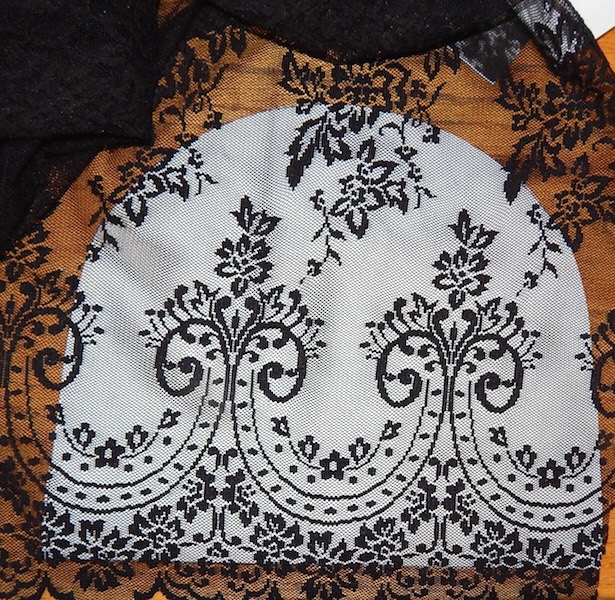
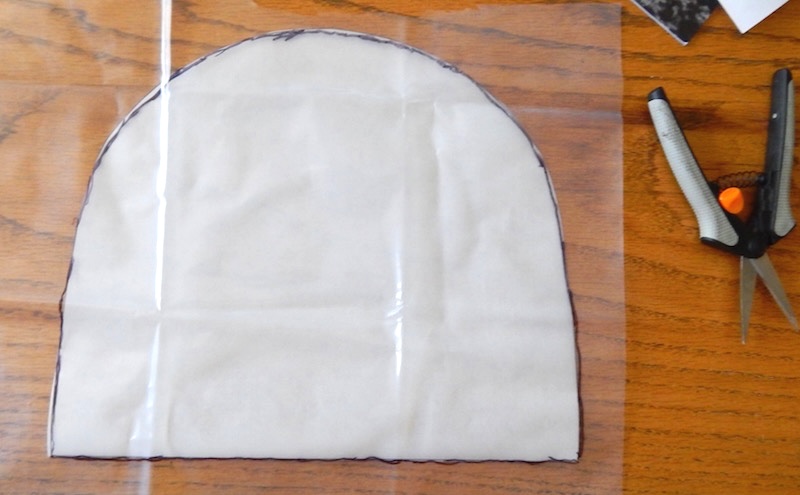
I also used the pattern to mark the heavy melt-away interfacing. Melt-away interfacing is like a dense sheet of gelatin. You can mark it with a marker and then you know just where to sew.
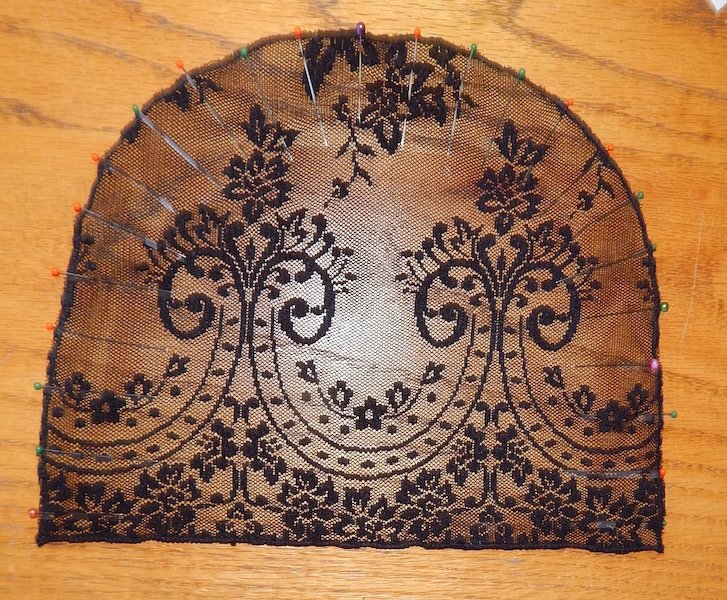
This is the lace piece pinned to the interfacing.
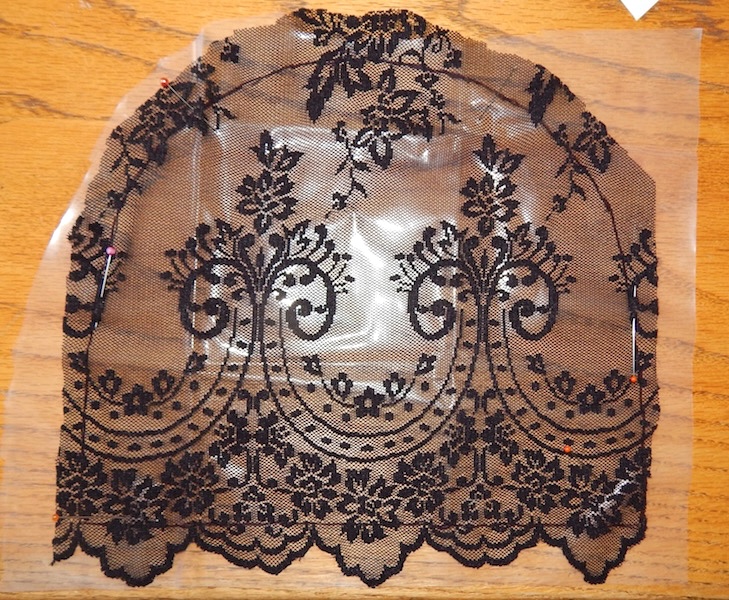
Here is a picture of the lace piece after a narrow short zig-zag stitch was sewn all the way around and the extra fabric was trimmed away.
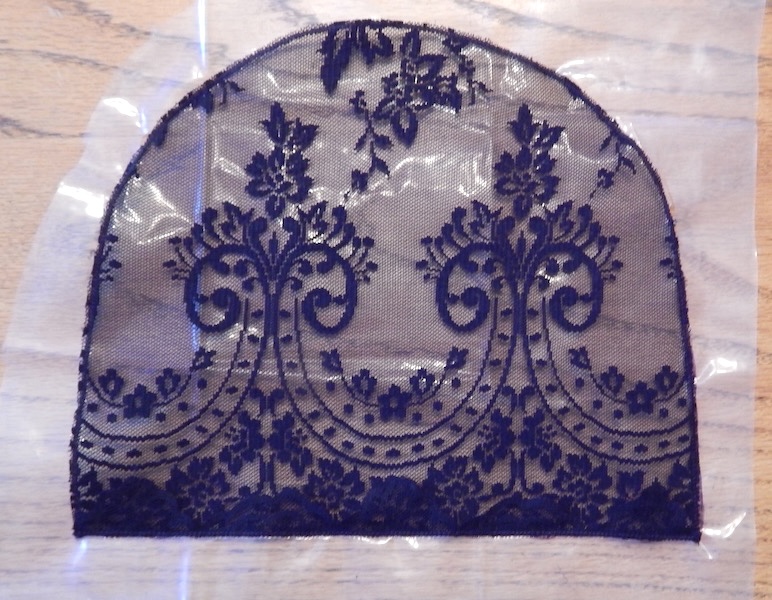
I trimmed away almost all of the melt-away on both sides of the stitching so that the center piece could be saved for another project.
The interfacing melts in hot water, which I did, and this was how the piece looked after that was done.
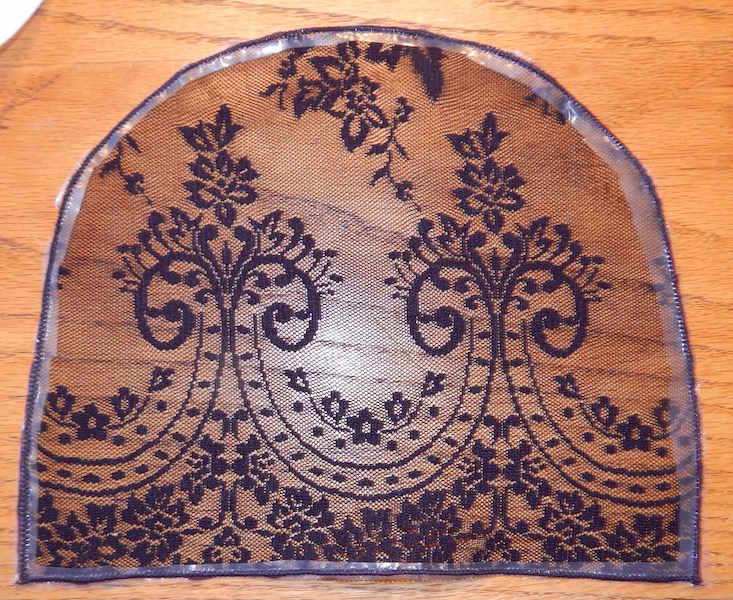
I used pins to divide the outside edge into 24 sections plus two shorter sections because this was what worked best with my ruffle lace. It had 24 repeats in the motifs plus two half sections at each end.
Because the ruffle lace needed to be straight where it attached to the half round I did not need to do anything along that edge, but I did need to have a finished edge along the two short edges. So, I appliquéd some of the scalloped edge to create a finished short edge and trimmed away the extra.
The ruffle was sewn onto the half round matching up the same place in the motif with the pins on the half round. I stitched thru both edges three times and then using a running stitch thru the edge of the half round sewed to the next pin and repeated those steps until all the ruffle lace was attached.
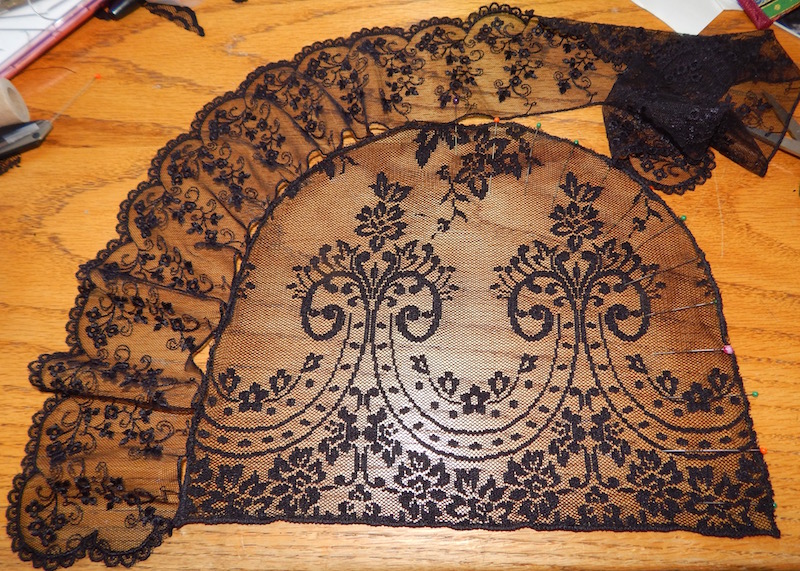
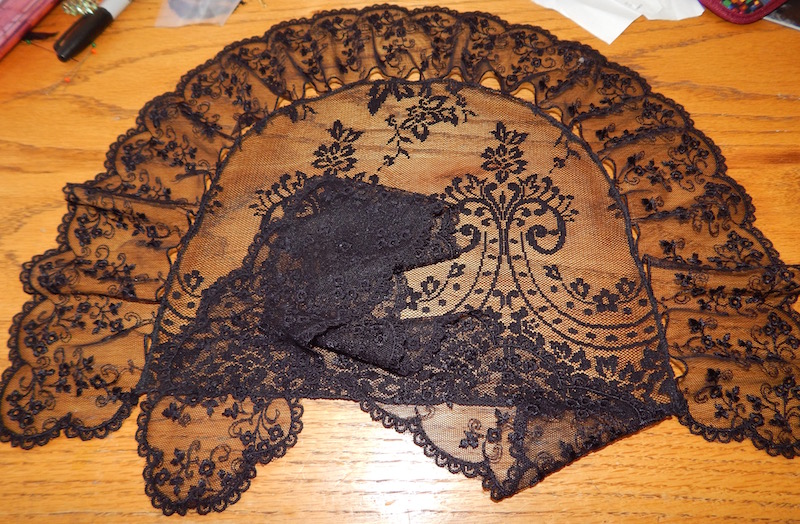
I attached the lappets to the straight edge of the half round on either side. Here it is with just one attached.
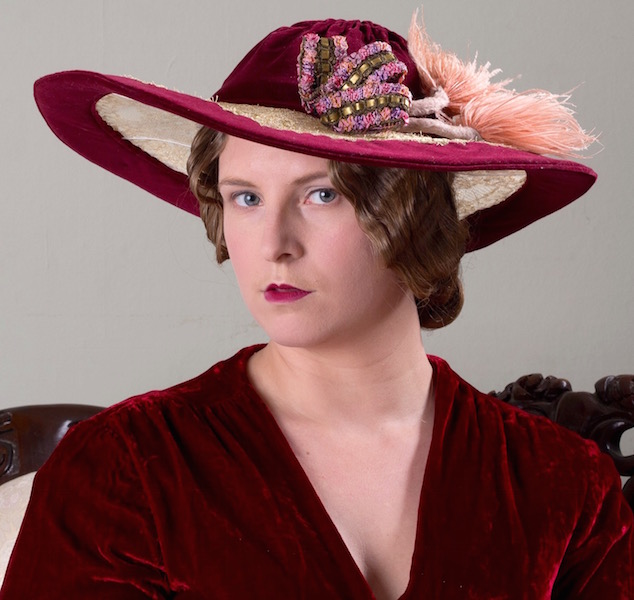
Adding lace fabric over solid fabric on the underside of a large Edwardian hat
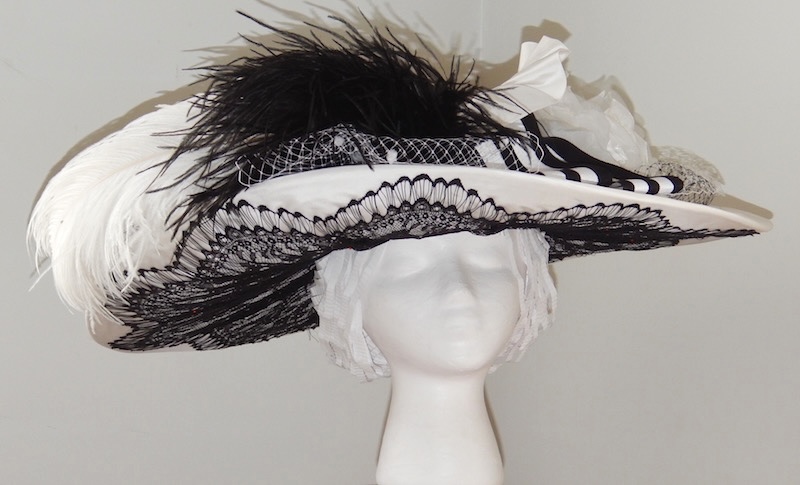
The inspiration for this hat was a hat from the first season of Downton Abbey worn by Cora at a flower show. It also had lace fabric with a scalloped edge and tucks between the scallops. I found a lace fabric that had panels about a yard long and ~45” wide
I cut the panels apart along the scallops.
I laid the lace over a pattern so that I could see if it was long enough to cover the under brim. I knew then that it did not, so the two partial scallops had to be cut away and two full scallops from another panel had to be added.
I sewed in the two scallops, hiding the join in the folds. The most difficult part was sewing the very outside of the decorative edge because it was not in the folds. This was done by overlapping the two layers by about 1/8 to 1/4” and taking small stitches thru the overlap and making a small knot on the underside.
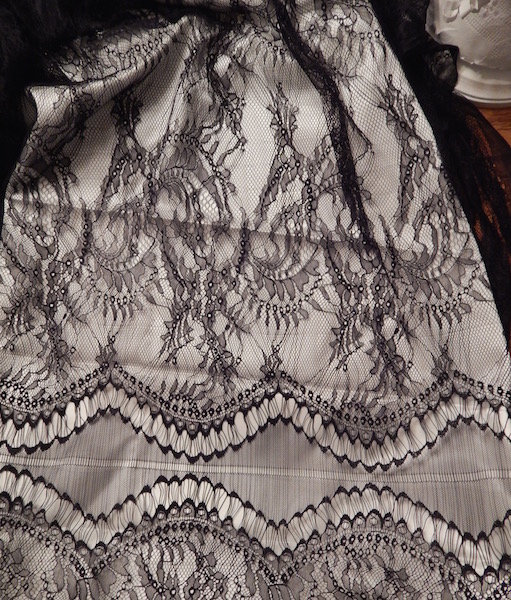
Here is a picture of the underside of the hat with the lace tacked down to the fabric in two lines of running stitches (one that catches the outside edge in the center of each small scallop and the second along the straight line that was just outside of the row of small circles). I then tidied the folds so that the rest of the lace between the scallops was flat against the fabric, pinned, and then tacked it down to the fabric along the folds and inside the head opening.
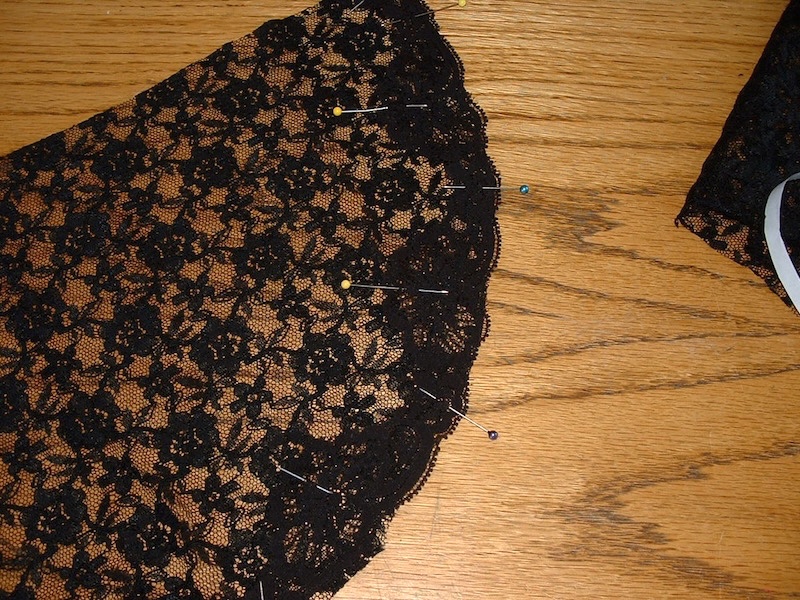
This is a close up of the pinned lace before it was stitched down.
This is how it looked after it was stitched down and after the lining was added. It has a drawstring lining of the type that was used in hats before WWI.
18th Century lace cap from fragile vintage lace
I used some of the same techniques described earlier to make the pieces of this cap. The most important thing was to create some support for the fragile silk lace so that it could be worn without fear of it falling apart.
The side was taken from the decorative skirt of a totally destroyed Edwardian lace overdress. It was a lovely fine silk machine embroidered net lace. The amount of lace you see in this cap was about the only usable lace left from the entire 80” skirt. The section I used had only one small hole, but the rest of the skirt had much larger ones. Laurie Tavan was my model for this cap.
The center back was created by appliquéing five motifs taken from higher up on the skirt to a good section of blank silk net from the vintage skirt over a layer of tulle. Tulle is the key to creating a backing that supports the fragile silk lace. It not only makes up the back of the cap but there was also a layer under the lace of the sides. I cut a length of the skirt edge that was long enough so that I could bring the finished edge stitches on the vintage lace around the corner to create finished sides as well as front edge. This edge was appliquéd down to the vintage lace and the tulle. Once that was done, any overhang was then trimmed away.
Lace for a fan leaves
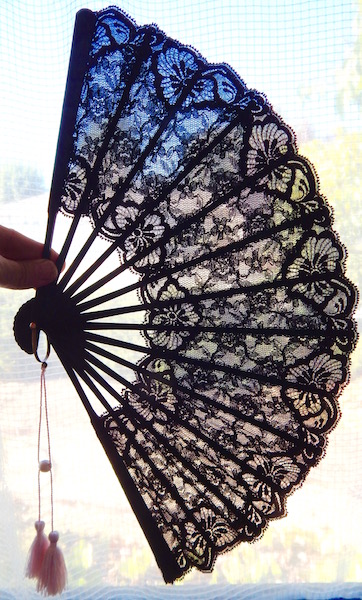
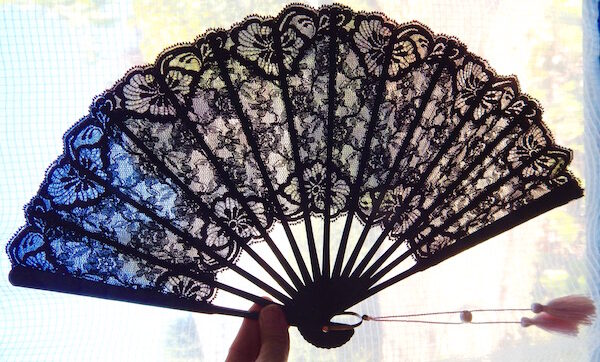
Using half of a strip of 3” wide double scalloped edged lace and a piece of lace fabric, I created this fan.
I cut the lace in half, long ways, down the “net only” division between the two halves of the lace.
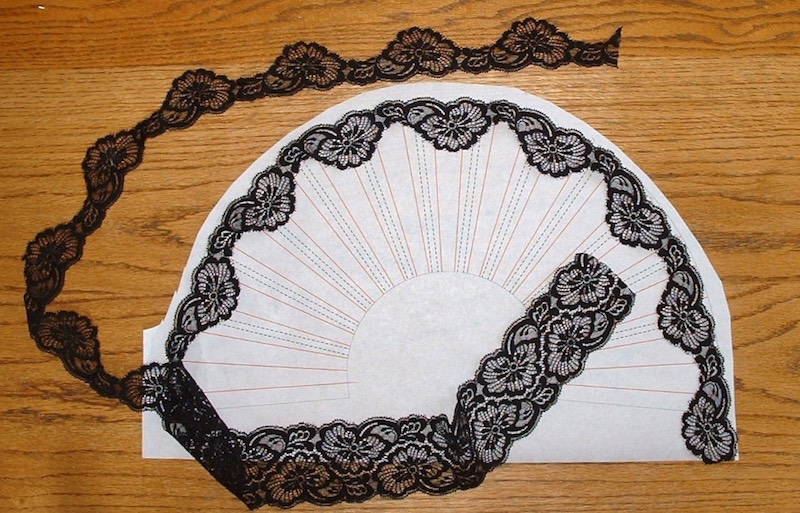
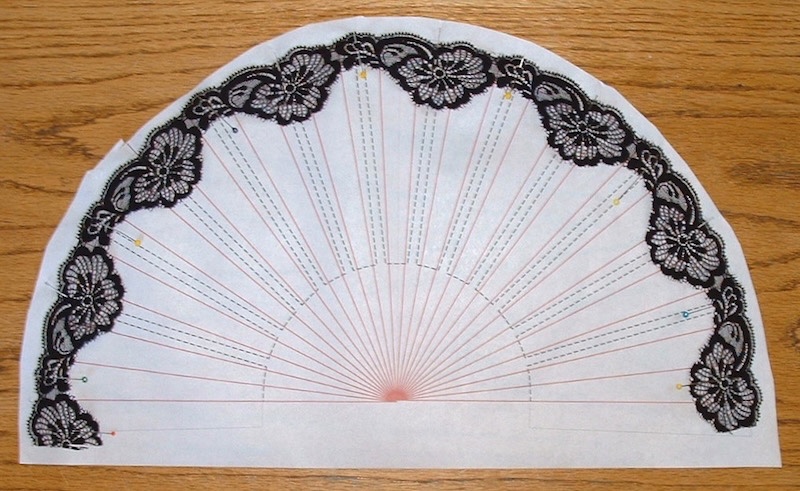
The strip was pinned to the pattern to decide just where the scallops should go based on where the ribs appeared. It was then trimmed on both ends.
Using the pattern as a guide, I cut a piece of lace fabric.
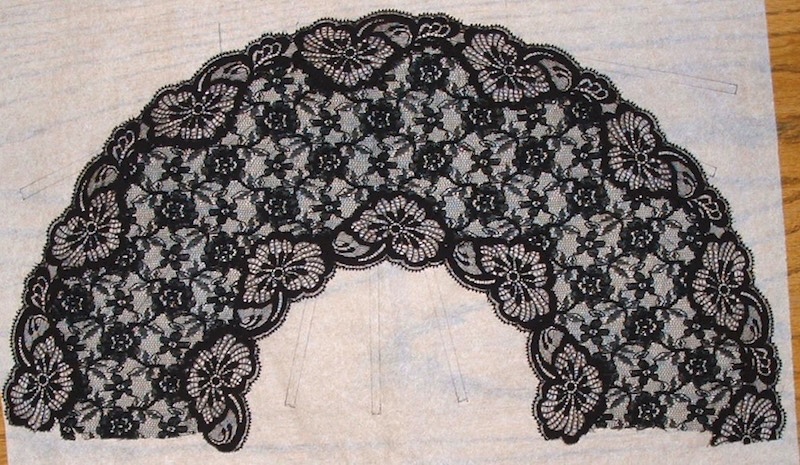
The lace fabric was placed over the pattern and the lace strip was pinned to the lace fabric, but not thru the pattern.
The lace strip was then appliquéd to the lace fabric right along its edge.
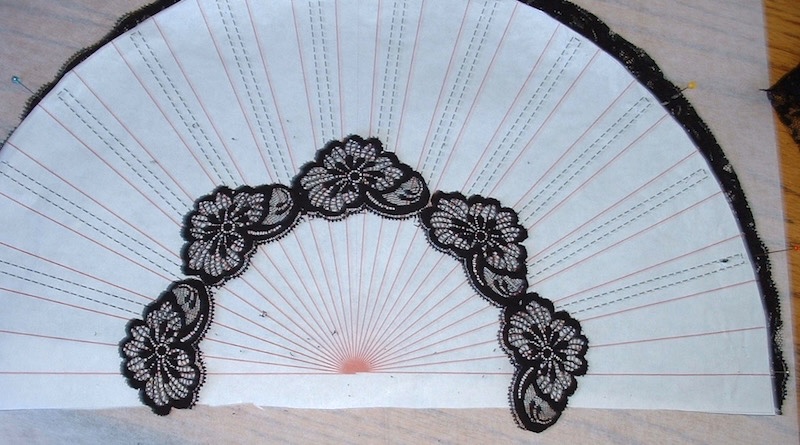
I cut out five motifs and placed them end-to-end along the small arc of the pattern. The motifs were basted together where they touched.
They were laid into position over the lace fabric with the pattern below and pinned. This was also appliquéd to the lace fabric
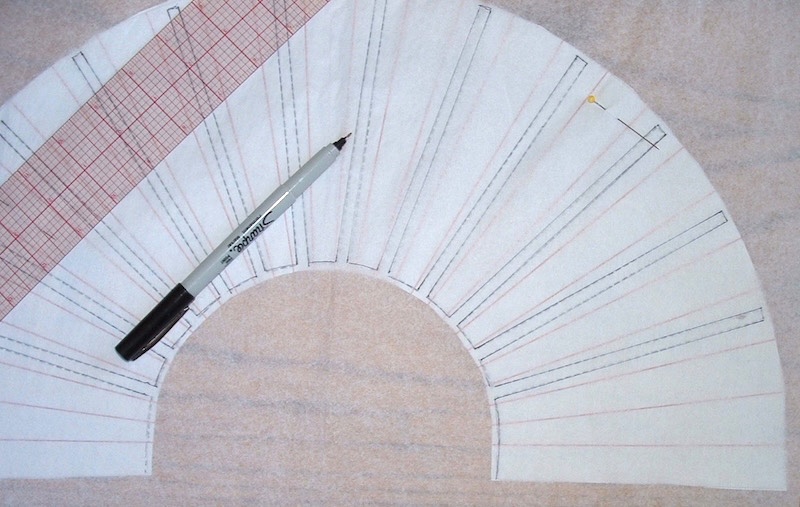
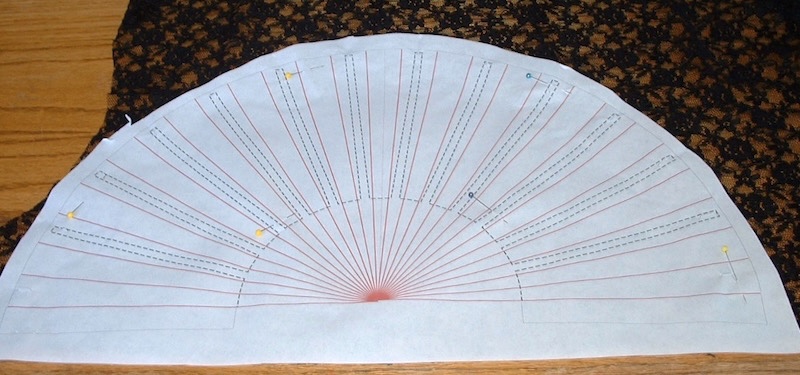
A piece of tissue paper was laid over the pattern, and with a fine tipped marker I transferred the stitch lines from the pattern to the tissue. The tissue paper stabilizes the lace so that you can sew the edge and the channels for the ribs.
All of the overlapping lace fabric was trimmed away so that the piece of lace was now only one layer except for a narrow 1/32” area where the appliqué stitches remain to hold the lace and the lace fabric together.
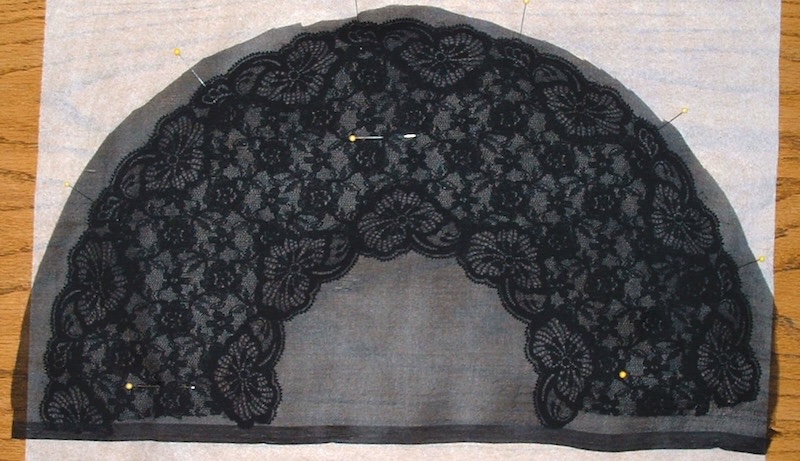
In order to make pockets for the fan ribs another piece of net or fabric is necessary. I used a sandwich of a piece of silk organza with the lace and then pinned them together along with the tissue paper. With the tissue paper on top, and using a short stitch length, I machine stitched along the lines that were transferred to the tissue paper.
After stitching, the tissue paper was removed and any overlapping silk organza was trimmed away. The stitching creates a pocket for each of the ribs to slip down. This is somewhat of an extra step because it is possible to glue the lace right onto the ribs. But if you have tried to glue lace in the past, you know that it leaks thru and looks terrible when dry.
Tissue paper is a secret weapon when it comes to using a sewing machine with really lightweight fabric or lace. It does two very important things: it supports the lace so it does not get sucked down the needle hole in the sewing machine’s plate, and it gives you a non-stretch layer to pin to. In other words, you can pin the lace or layers of lace to tissue to keep the lace from stretching out of shape as you are sewing. But you can only use tissue with a straight stitch. If you need to use a zig-Zag, or another decorative stitch, you will not be able to remove the tissue by pulling it away from the stitch line. Pieces of tissue will remain between the left and the right side of the zig-zag stitch. Enter melt-away interfacing. It was used in the next project.
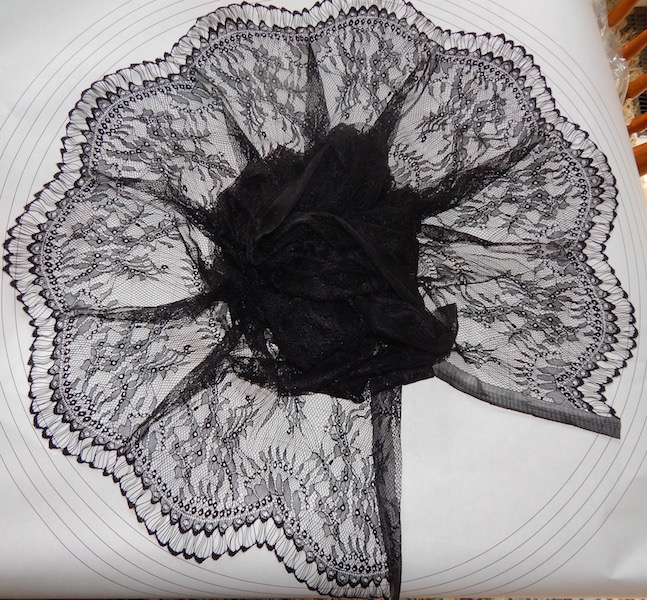
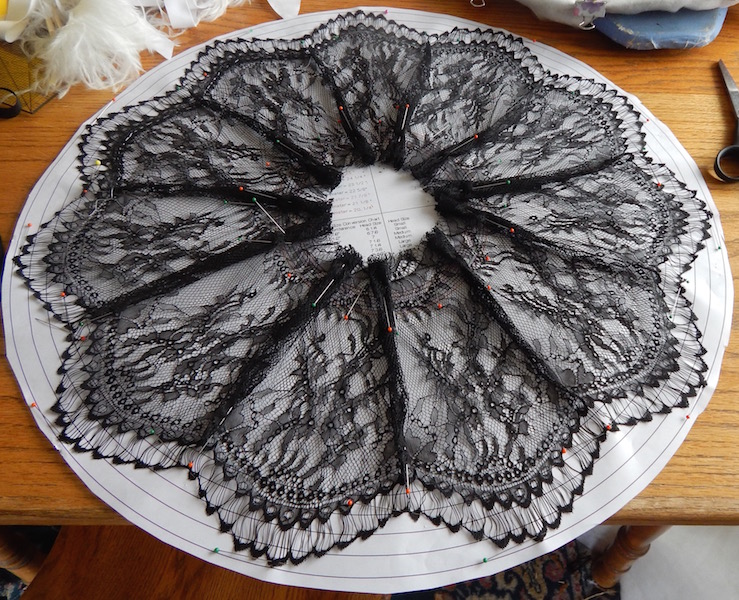
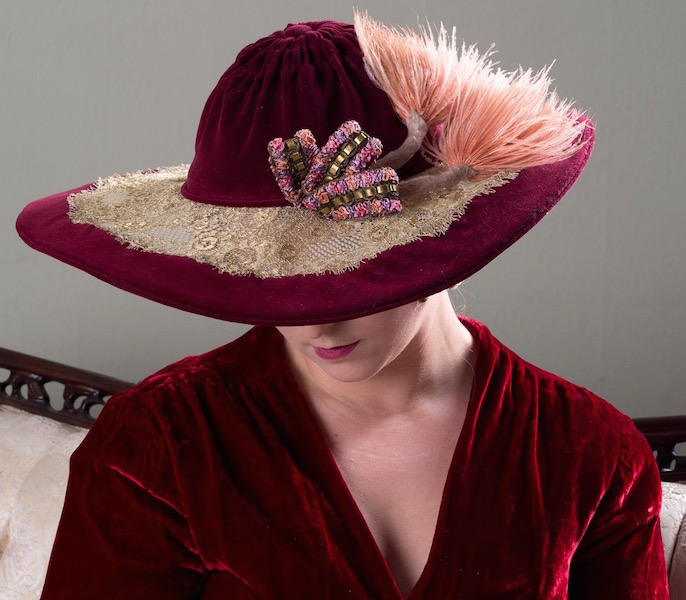
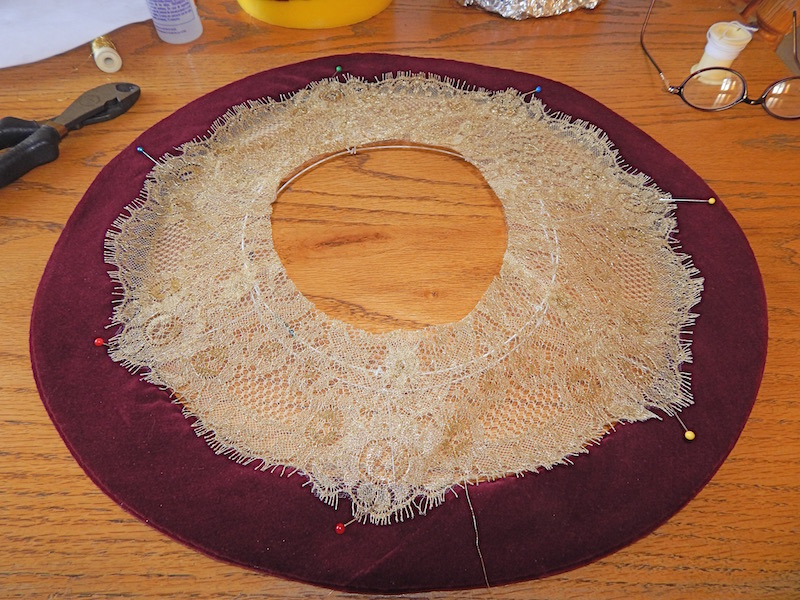
Creating a round piece of lace from a straight piece to recreate this 1918-22 hat
Reproduction with gold metallic lace
Modeled by Laurie Tavan
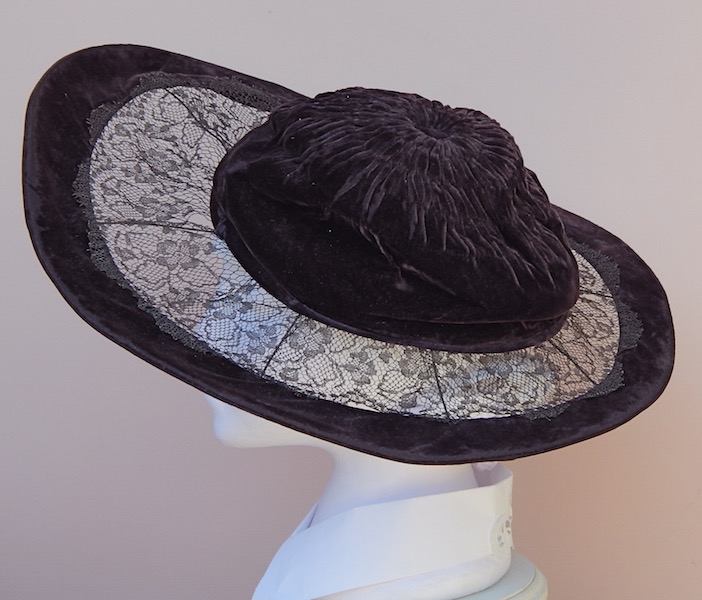
Original with silver metallic lace
Before trying to recreate this vintage hat, I never thought to look closely enough at the lace to see that it had joins. So I had no idea that the milliner must have started with a wide straight piece of lace with a decorative edge. But when you look closely, you can see some surgeon knots.
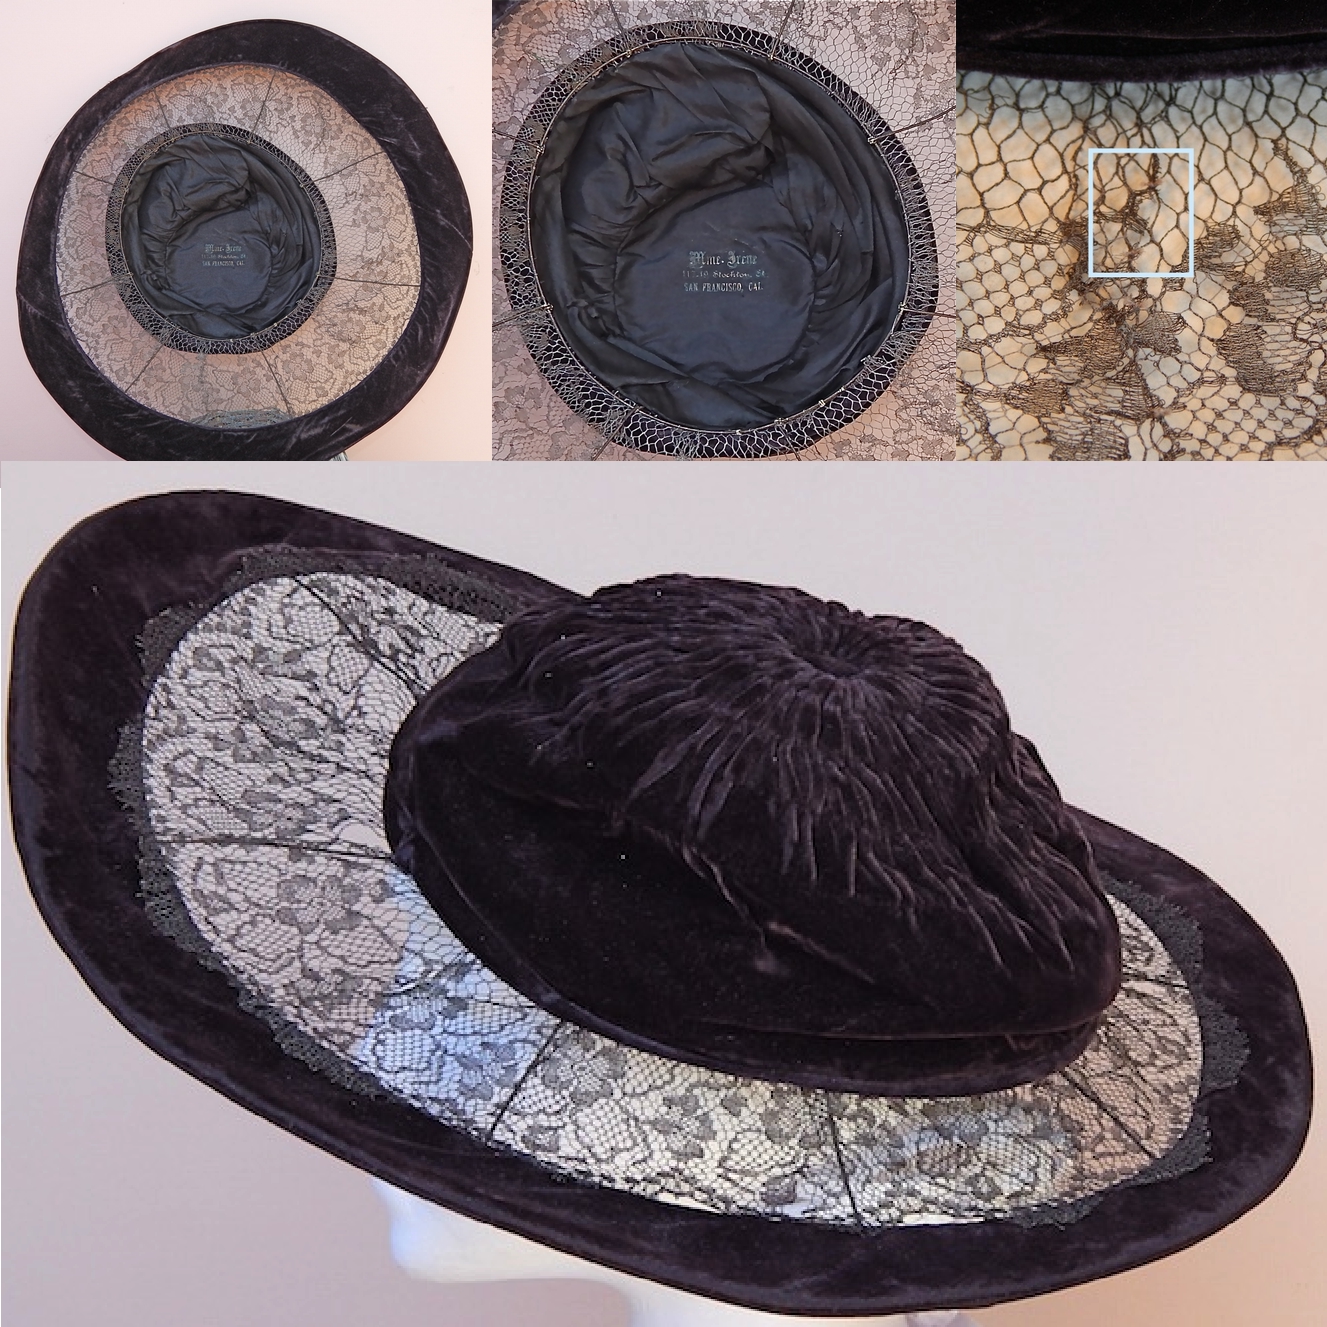
White box in the upper right corner of the picture shows a surgeon’s knot up close.
I wasn’t sure I had the skills to join my lace that way so I chose to back the sections with a fine tulle in a matching color to the lace. When completed, the tulle backing does not show in the finished hat but gives structure.
Start with a yard and a half of 9” wide lace. I cut it apart down the center in the net only area, saving the other half for another project.
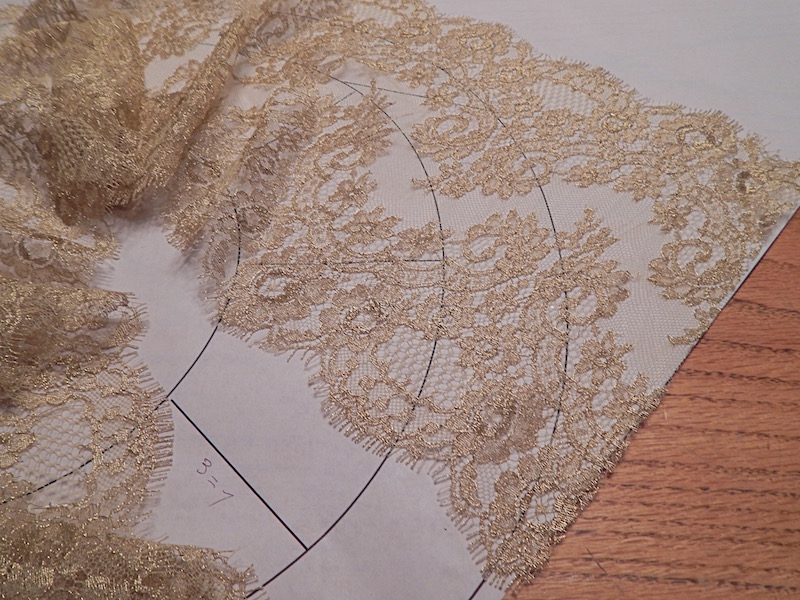
Then I pinned the scalloped finished edge along a circle on the paper pattern to decide the exact length it would take to wrap the lace around the widest part of the circle. This helped me to decide what areas of the lace would remain un-cut, and which would need to be cut away. I also trimmed the entire piece to length at this point.
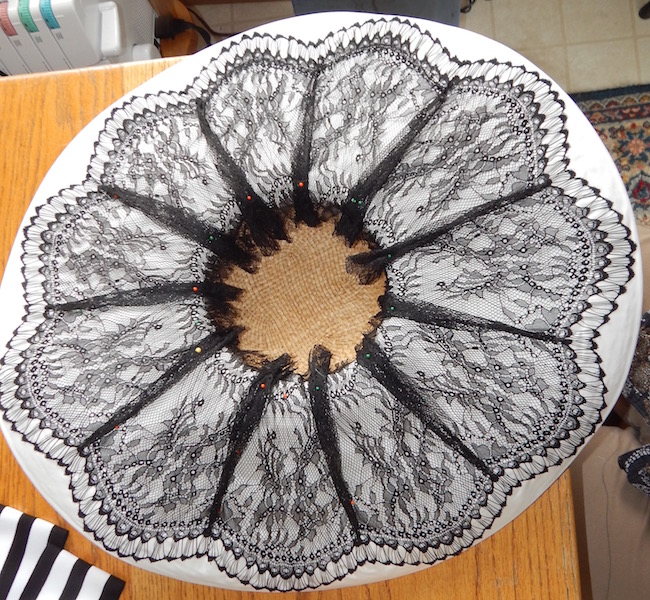
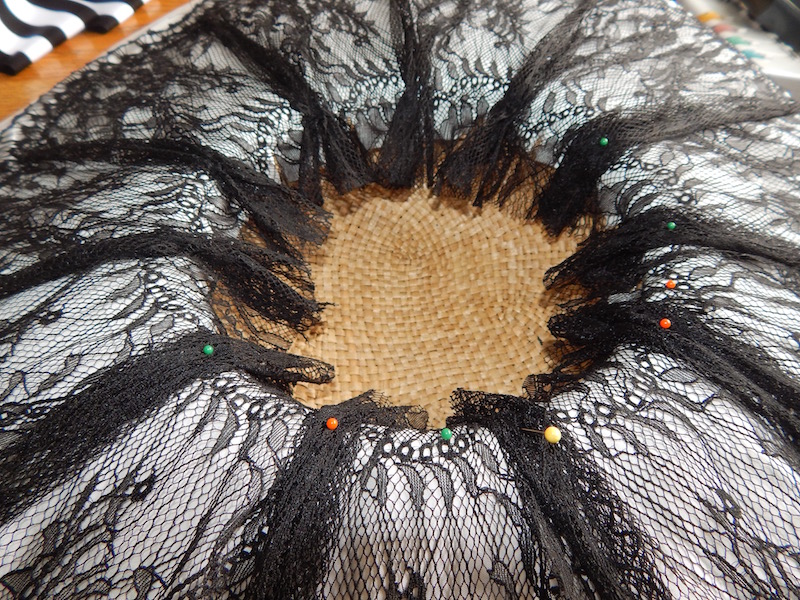
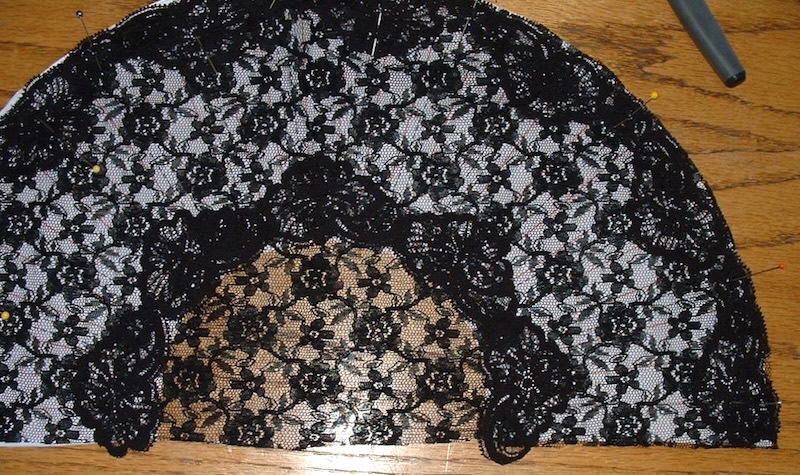
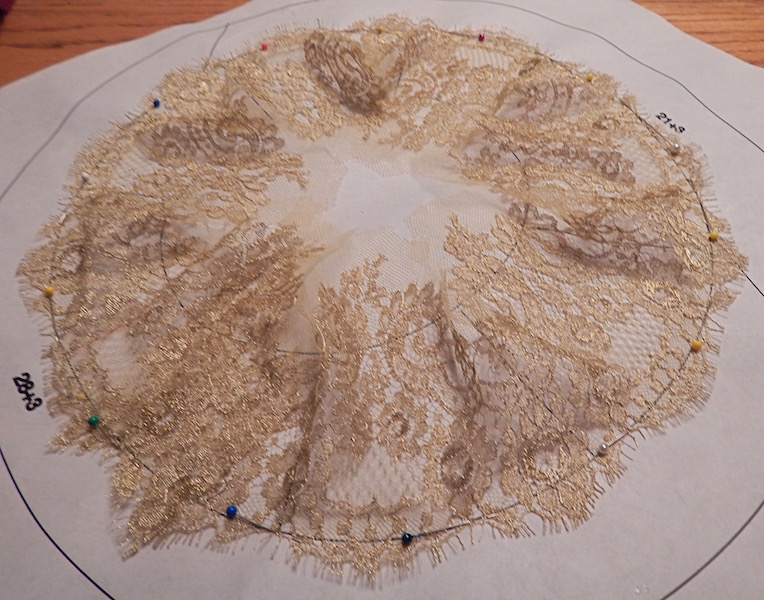
I briefly removed the lace and pinned my circle of background tulle to the paper. I then reapplied the lace replacing the pins where they were before, and made cuts in the net of the lace just outside the edge of the motifs to within an inch of the outside edge. This allowed the lace lie flat. For this lace, it took 7 cuts. They were not straight, but followed the flowers in the lace.
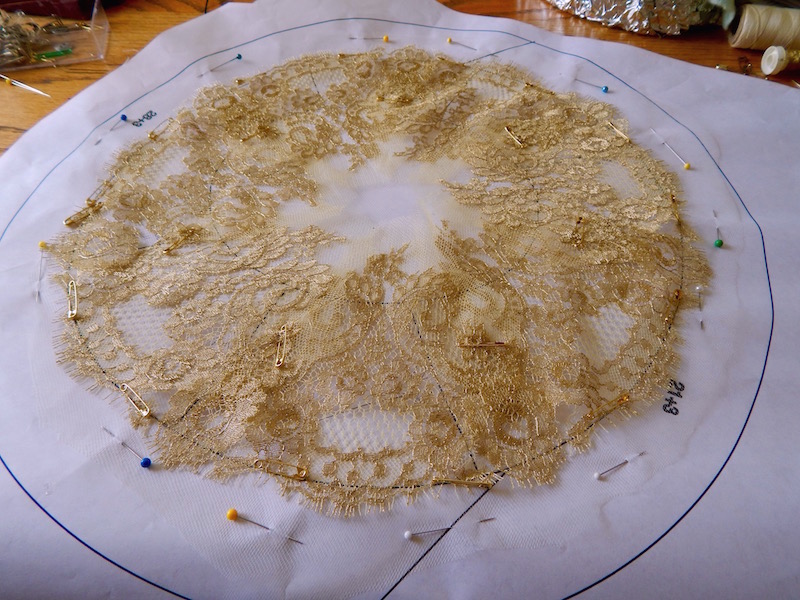
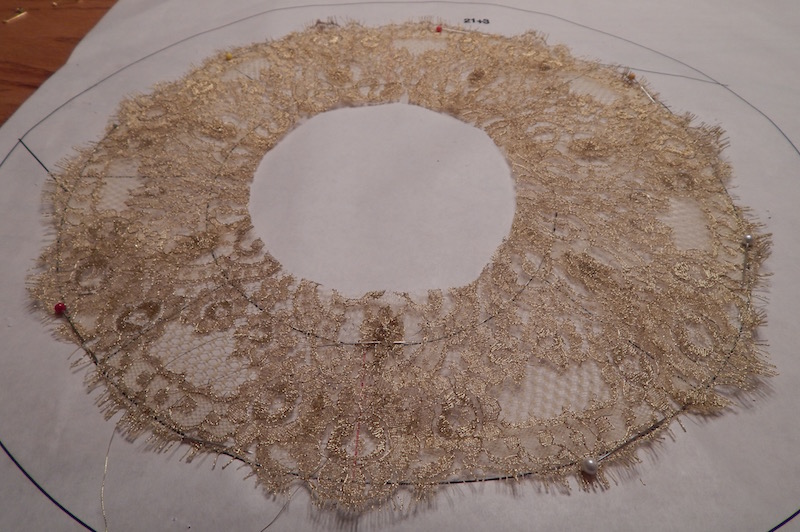
With a matching thread, I whipstitched the outside edge of the lace to the tulle below and trimmed away the extra tulle. I then adjusted the cut lace overlap so that the extra lace that would be cut away in the end was on the surface and the finished cut edge was under that. Then I whipped the overlap in the lace together matching the designs in the lace as much as possible. Once that was done, I trimmed away the extra lace net on the surface layer, and then basted the head opening line to hold the lace and net together before trimming the center hole.
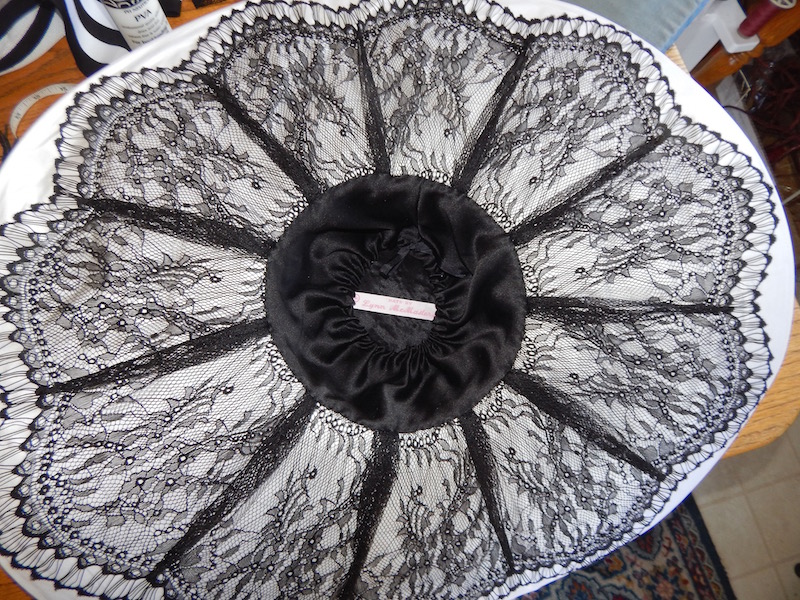
I pinned then I sewed the lace to the covered brim edge over the wireframe.
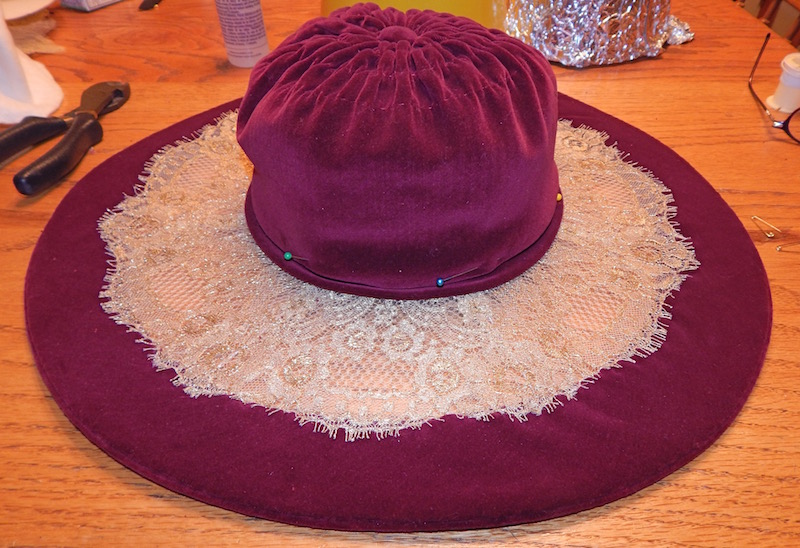
I then added the crown over that.
This is how I used the other side of the gold lace. I appliquéd it the some stiffened fabric to make a fan leaf.
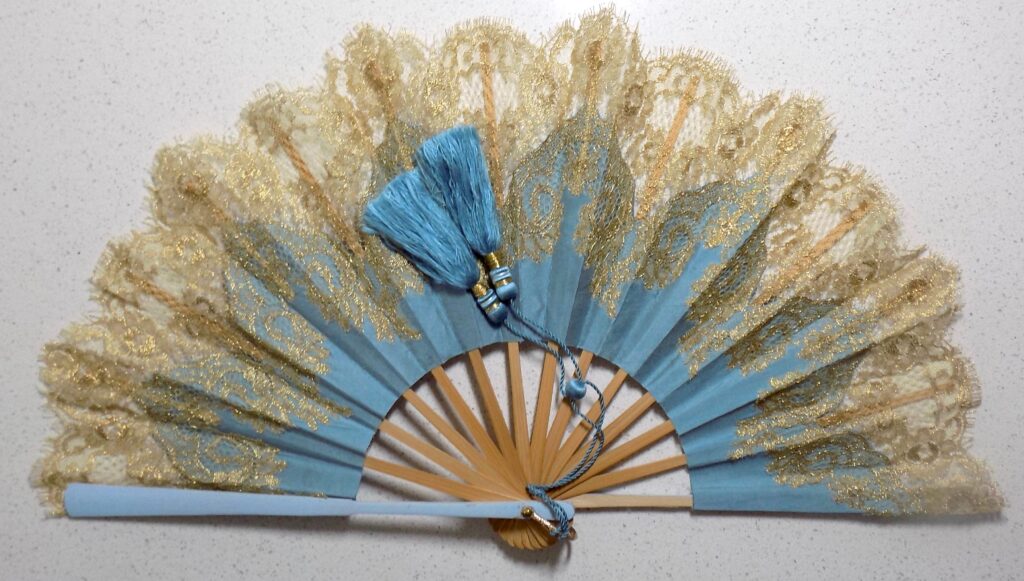
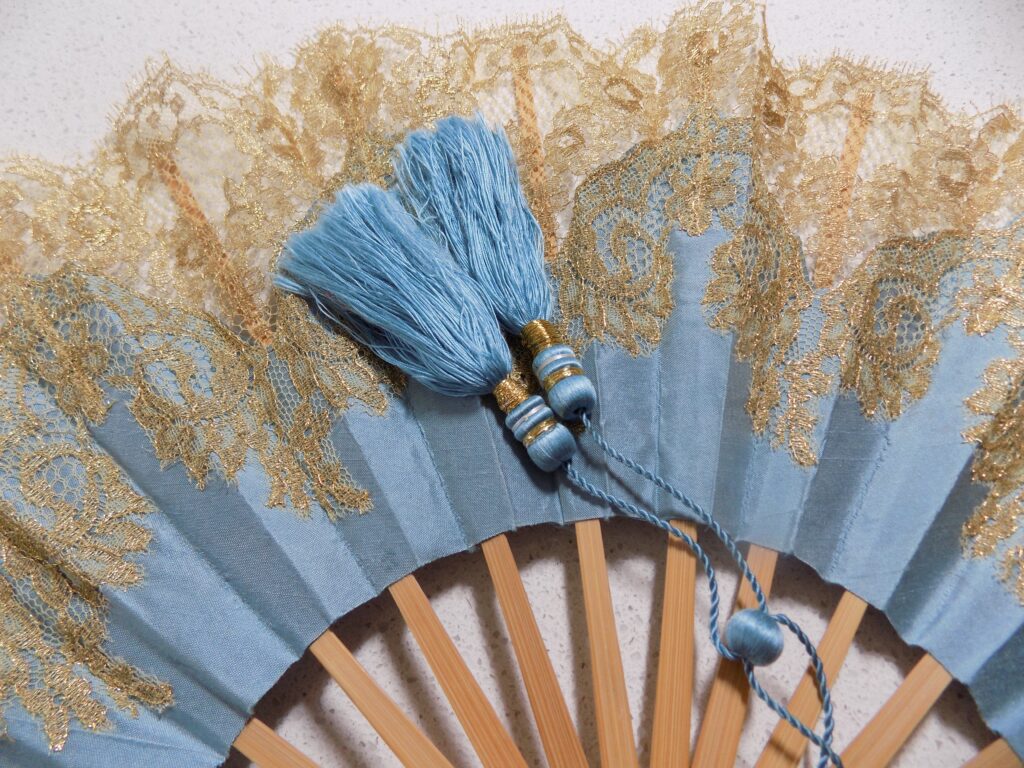
Close up of the fan.
Materials that can make working with lace easier:
Sulky Ultra-Solvy Water-Soluble Stabilizer:
Good when you need to use a machine zig-zag stitch to create and edge or appliqué a motif to tulle or English net. There might be other brands of the water-soluble stabilizer, but I have never seen them in the US.
Tissue paper:
Cheaper than commercial tare-away stabilizers but just as good for working with a machine straight stitch. I use a good quality acid free tissue paper it holds together better than the really cheep tissue.
Tulle or illusion net:
Good as a backing to support your lace. Do not confuse the course net you can get in fabric stores with the softer net. Both are synthetic and while tulle does not usually show in the final product, I don’t worry about it being a synthetic fabric, as silk illusion net is too expensive for most projects. This site is very good at showing the difference between the types of nets and can help with the confusion created by very similar names. Click here.