This half of the decade saw more changes in hairstyles that the first five years. Among them being the movement of the buns lower and lower on the back of the head as hats were being worn lower and lower on the forehead, the cutting of more and more of the hair in the front not just bangs and the cutting of all hair short a the Dutch bob style. Even in the first half of the decade some designers like Paul Poiret had their fashions models sporting bobbed hair and young Isadora Duncan Dancer’s also had bobbed hair but during and right after the Great War a few women clipped there hair. One thing that did not change was the passion for the Marcel wave and now that the permanent wave was being improved and was lower in price even women with straight hair could have one.

Hats that were tight to the head and worn almost to the eyebrows gave no room for any fullness in ones hairdo unless it was low on the head. Advertisement in Motion Picture News Lumiere – Internet Archive

This cover of Adventure, vol. 12 no. 6 (October 1916) shows that almost all the hair on the front half of her head is fairly short and curled and only the back half of the hair is drawn back into a low chignon.

American actress Clara Kimball, Witsel Young, L.A. (photographer) in the pages of May 10, 1919 “Moving Picture World” has only a narrow fringe bang while most of the hair is waved and drawn back.

While it is often difficult to tell with a front shot the women shown in profile seems to have short hair in front and the rest is drawn back into a twisted bun that stands out a couple of inches from her head.
Girls operate stock boards at Waldorf-Astoria. The Waldorf-Astoria Hotel is employing girls to operate tickers and stock exchange boards. The Waldorf is the first to employ girls in its various departments, in order to release men for war work. Underwood &Underwood, Photographer, U.S. War department photo 1917 (NARA: 1123804)

Kromo Gravure Photo Co. out of Detroit, Michigan shows an interesting fashion for a glamorous evening hairstyle, a large graceful French twist this style seems to have been more and more popular in the late teens.

This photograph in a 1917 issue of Les Modes: Revue mensuelle illustrée des arts décoratifs appliqués à la femme shows the high French twist.

Actress Gloria Swanson in a frame or production still from the film “Don’t Change Your Husband” (1919). This actress is sporting a bob and a wave she is also wearing the popular style of a band of gold embroidered silk around the head, inspired by Poiret.

An advertisement in Motion Picture News for The Forbidden Woman (1920 shows that the style of having long hair in back survived to the 20s. In fact, the majority of young women did not adopt the bob that was so iconic of the 20s, until 1924.
Creating a late 1910s hairstyles:
Again as with the early teens style I wanted to illustrate something that was simple for a costumer to do herself. With the late teens even more people with modern haircuts should be able to recreate a late teens style. With the addition of a fake chignon your hair does not need to be very long in front and only long enough for the hair on the back half of your head to be clipped back or drawn into a very short ponytail. I did not have any models with short hair but I have two daytime hairstyles and three evening hairstyles to show the steps you would take even if you have short hair. As with the first part of the decade evening styles are not all that different from daytime styles except for hair decorations; such as the feather decorations that fan out from a center core, Middle Eastern and oriental turbans, jeweled tiara or Russian and Byzantine inspired headdresses.
Step by step Laurie’s daytime hairstyle:

Laurie skipped the overall spraying of the hair, but did spray the section that was to be heat set.

She makes a center part.

She then divides her hair into three sections, from the center part down to each ear, and the back.

She isolates the back section and twists it. This worked fairly well but after the fact we decided that it might have been better to divide it into two sections and do two twists.

When she reaches the end she wraps the end over and secures it with a small latex rubber band.

She is preparing some hairpins by creating a fishhook end with pliers. The hook should be very near the end and only on one side of the pins.

These pins are used to anchor the bun.

She separates each side into three sections and clips then with long hair styling clips.
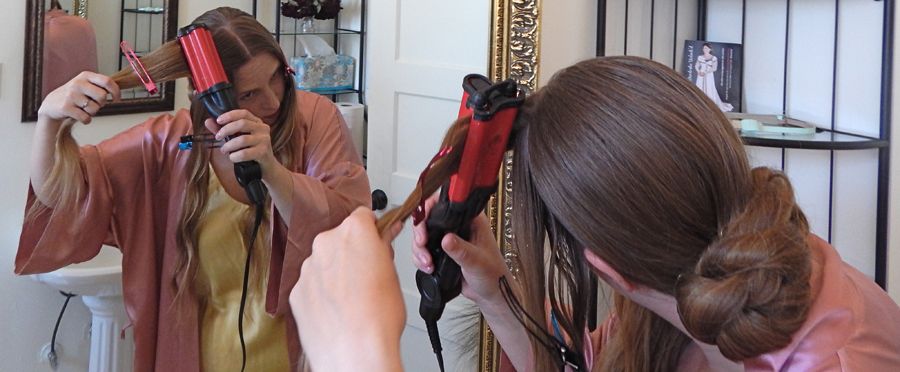
She uses a wave iron on the uppermost section.
She adds the next section to the hair she is adding to the iron. When she makes the second wave she moves the last down wave of her hair in the iron to the first down wave position.

(Note: each clamp of the iron has two down waves and one up wave between them, therefore to create a continuous wave you have to repeat 1/3 of the hair each time.)

She adds the last section of separated hair to the hair she will be putting in the iron.

This is the third wave in the iron.

This is her hair just out of the iron.

This is her hair after the fourth and final wave was set. If a hairdresser were doing Laurie’s hair, they would continue the wave ironing over her entire head.
If she was doing this early in the day for an evening event, she could use the clips to clip the waves in place and leave it for a longer time perhaps even using the steam from the shower to set them even more, but we had to move right on to the next step.

She supports the waved section of her hair while adding long clips to hold the wave close to her head.

She adds another four clips but from back to front while pushing down the up wave forcing it forward.
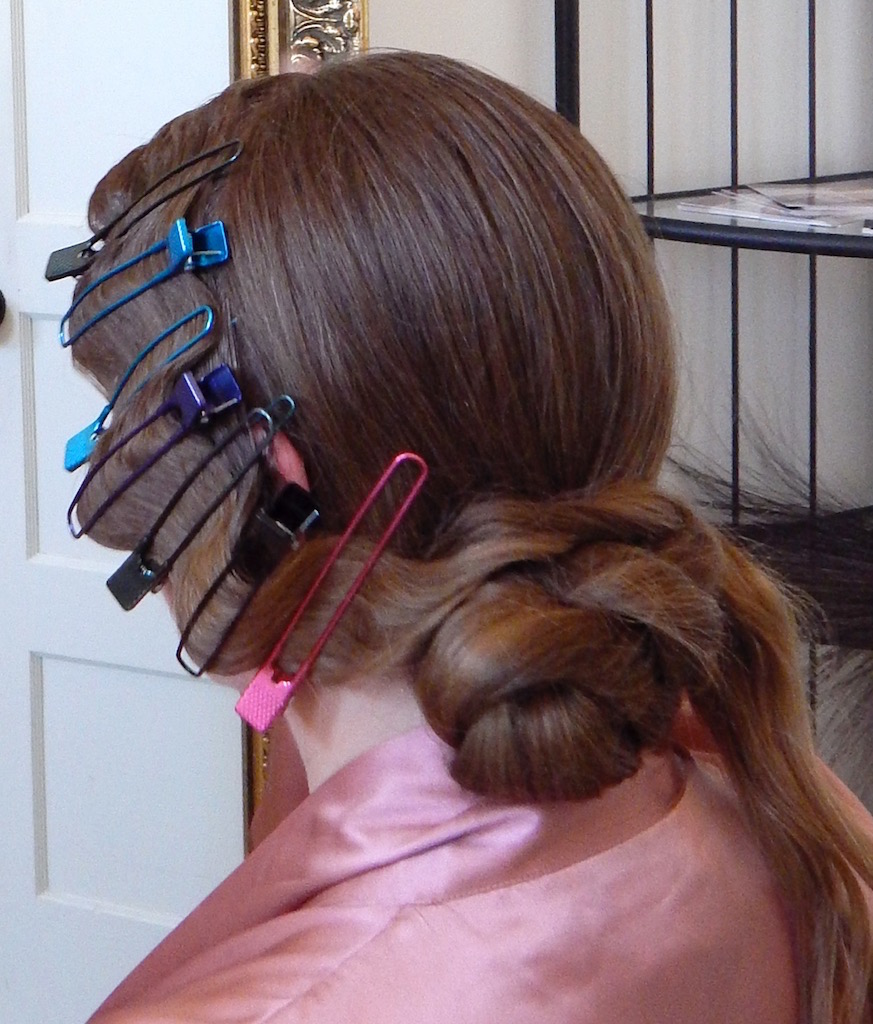
She twists and wraps the tail end of her hair around the chignon, tucks the very end in and pins it. She then repeats the wave ironing steps on the other side and adds another coat of hair spray, if she had had the time she could have left her hair in the clips for more time for a better set and would have been able to use much less hair spray.

Here is Laurie modeling a lace brim hat ca.1918-22.
Step by step Katherine’s daytime hairstyle:

After a good overall spray of hairspray and comb out Katherine separates and clips her hair into four sections in the front and one section for the back half of her hair.
She is going to do the wave iron for the majority of her surface hair so she gets waves in the back and not just on the sides as with Laurie.

She has a special spray she uses to protect the ends of her hair from heat setting so she uses that with each section.

She waves the sections starting in the side section behind the ear first, then the other side behind the ear and, then moves to the two front sections on either side.
She completes all the steps that Laurie did above except Katherine will be adding a faux chignon so she has to gather her own pony tail and ends from the side hair into a small bun and pins that into place.

This is a series of photos that shows her wrapping her switch into a circle. She slightly twists the hair as she wraps it around the hand that is holding on the end.

She slips a hair net over the hair.

She smoothes it and makes sure that the edges of net are in the back

She flips it over and grabs the elastic of the hairnet at opposite ends.

She flips it around several times to twist the ends of the net. This helps take up the loose spots in the net.

She ties off the twisted ends.
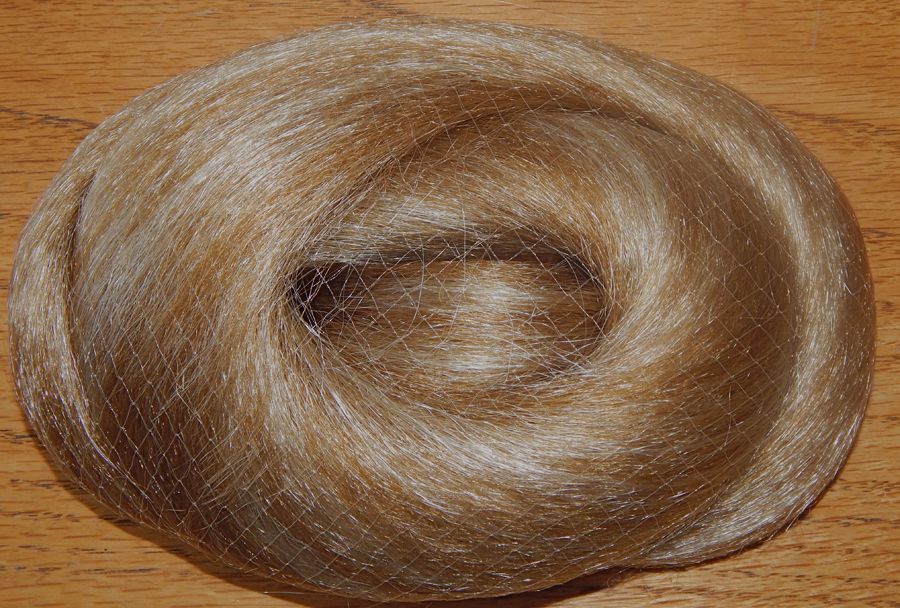
This is what the chignon looked like before she added it over her own small bun.

Final check. You can see how someone with hair that only reaches the tops of their shoulders could do this style.

Katherine models a different lace brim hat ca.1918-22.
Transforming Katherine’s daytime hairstyle to evening:
This was fairly easy all that was necessary was to remove her large chignon and add a Poiret style turban.
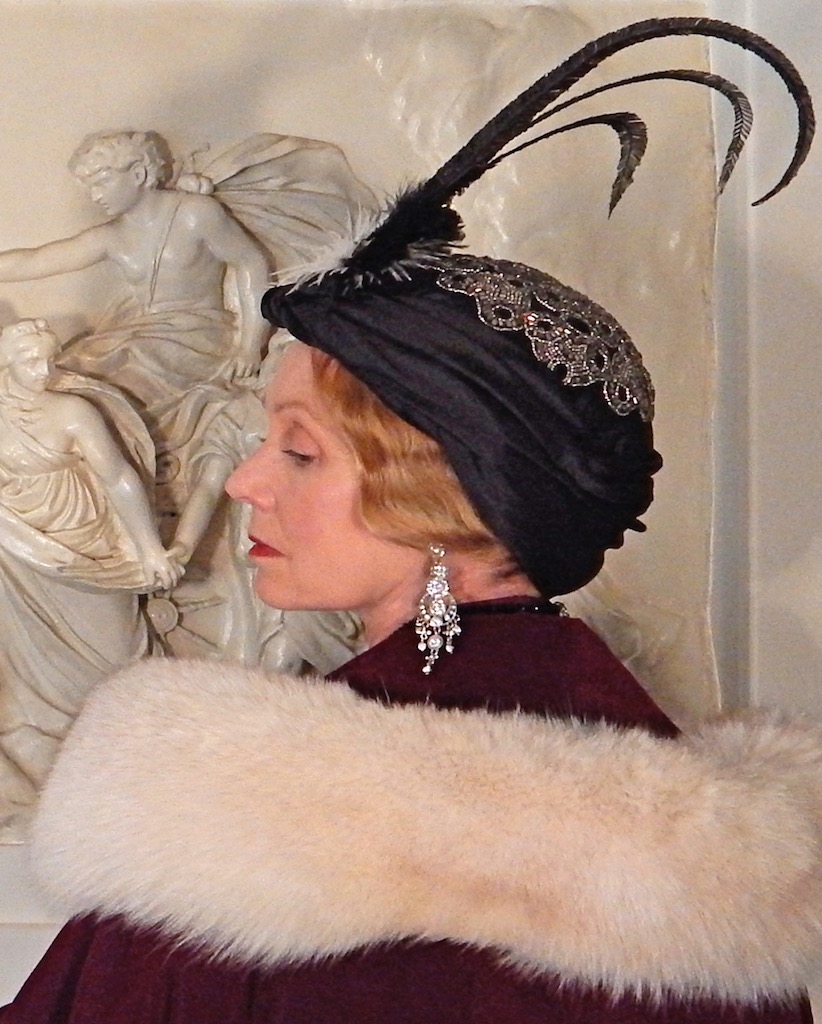
Transforming Laurie’s daytime hairstyle to evening:
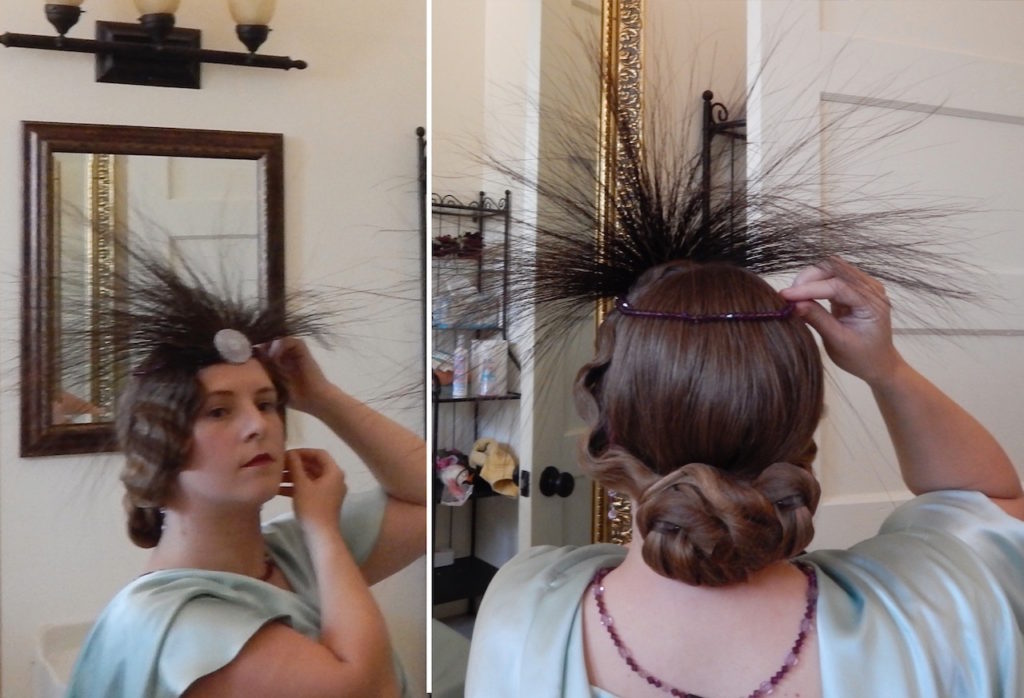
To follow the jewels and radiating feathers trend of the late teens she adds this headdress of burnt hurl radiating from a beaded dish. She does this by pinning the band of crystal beads in with fishhook hairpins.

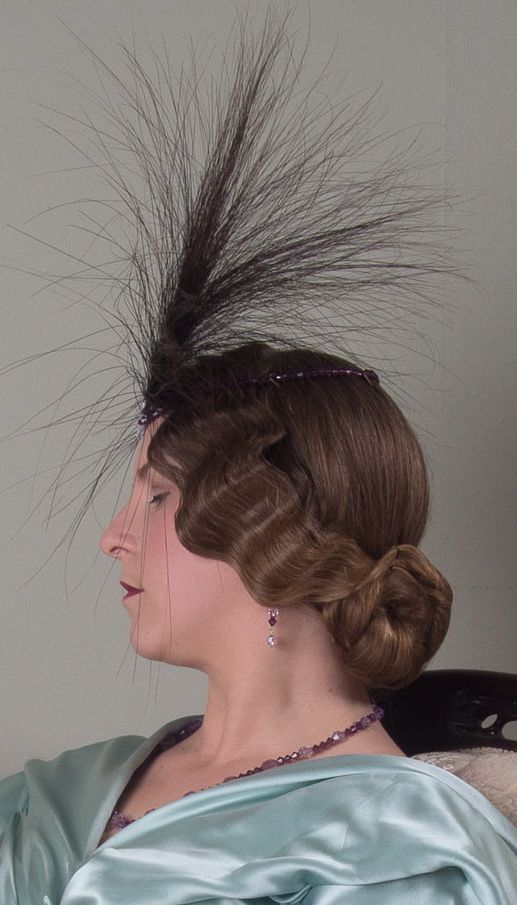
She models the finish hairstyle from the front and the side.
An avant-garde evening style with Claudine:
Many people do not consider wigs as an option, they think they will look phony or be difficult to put on correctly or be too expensive. I wanted to include this section as an option to styling your own hair. There is one very important thing right from the start that is to get the right wig. This wig was quite inexpensive at 29 dollars US but even at that price there where other wigs to pick from that would not have been as good first, I think it’s a good idea to stay with your own color and make sure you get the wig with the most rows of weft per inch. This one had rows about every ½ inch and you could see that the area at the base of the bands looked natural with no wig cap or stitching showing. In an inexpensive it is more difficult to find a good wig with a center part so you might want to avoid those. There are some other important things I will point out as we go.

First off she pulls the hair in the front half of her head back and pins if down as smoothly as possible.
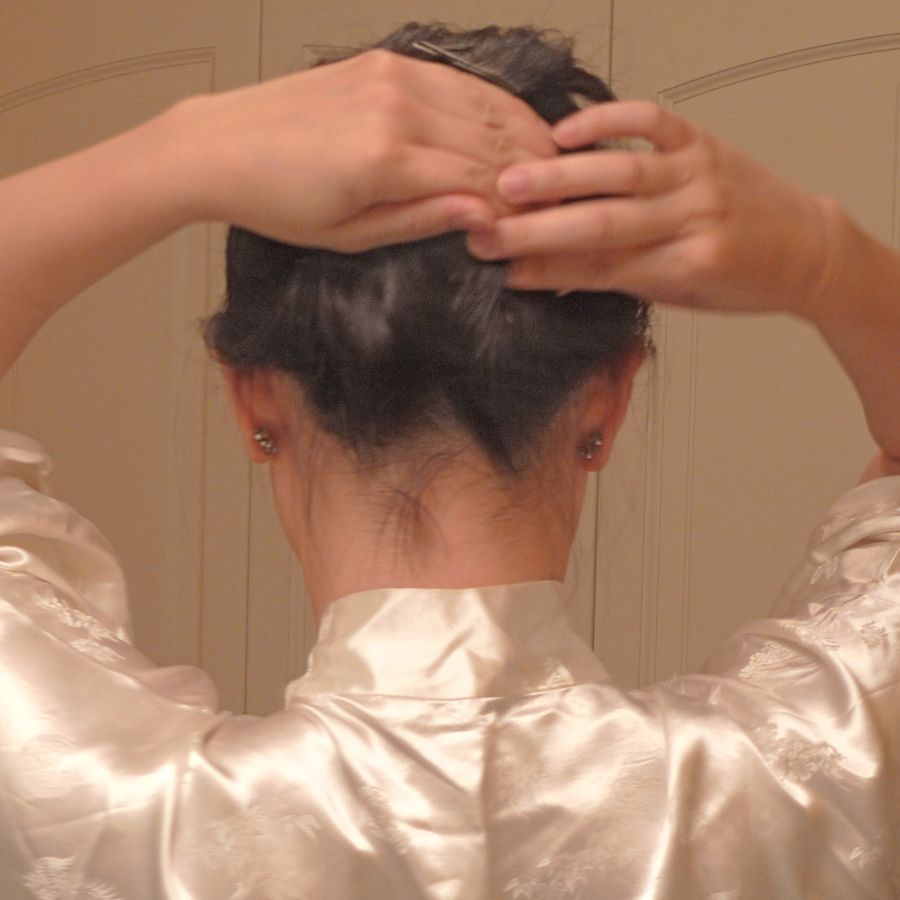
Then she starts the same process with the hair at the back of her head. First she pins it down about two inches from her hairline.
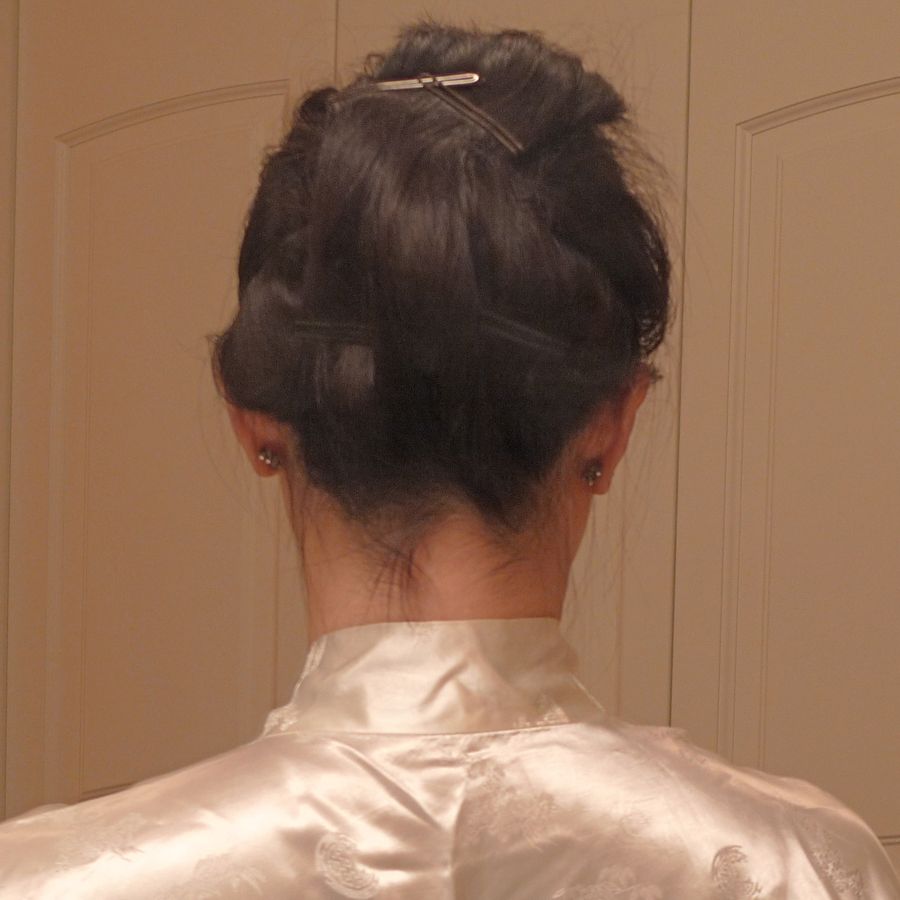
Then she pins it down farther up.
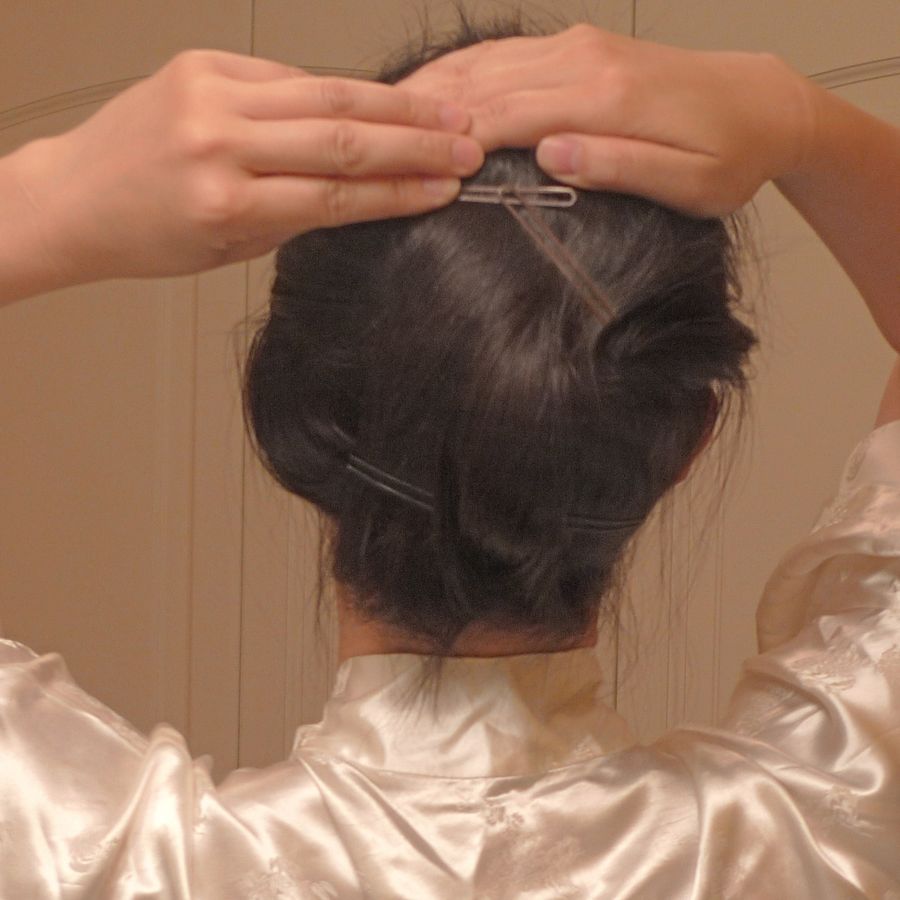
If you want pins to stay it always a good idea the cross them over each other this is the best way to get your own hair as tight to your own skull as possible. This is important if you twist or do your hair in a ponytail you will create a strange bulge in you final style, which will show in the final wig.
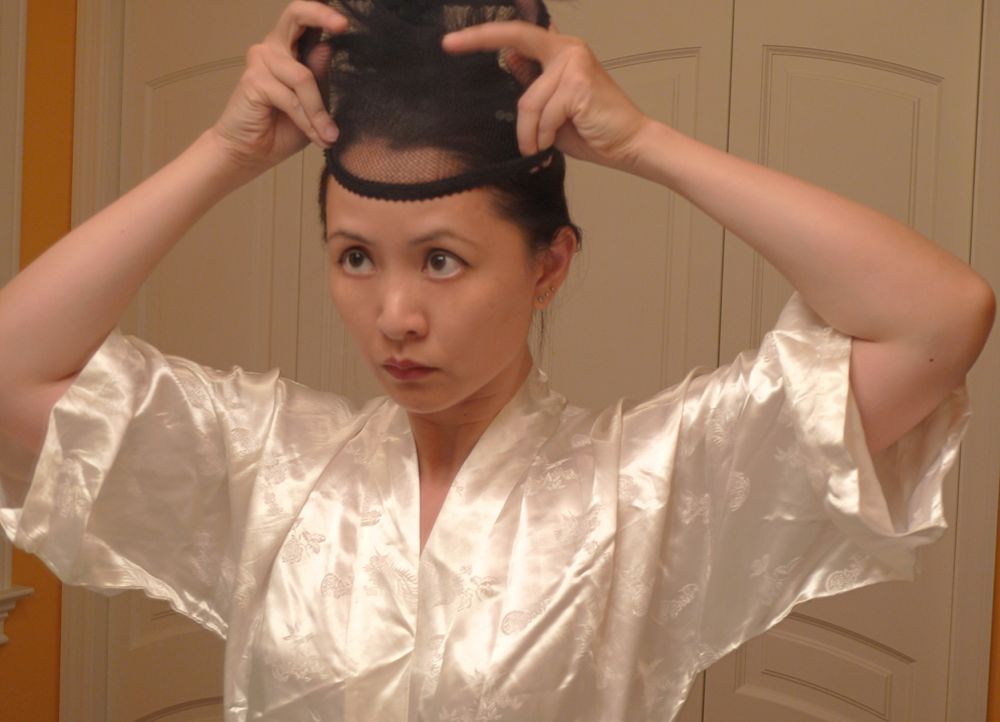
Claudine uses a wig cap this also helps flatten her hair and gives a band so she can tuck in any stray hairs.
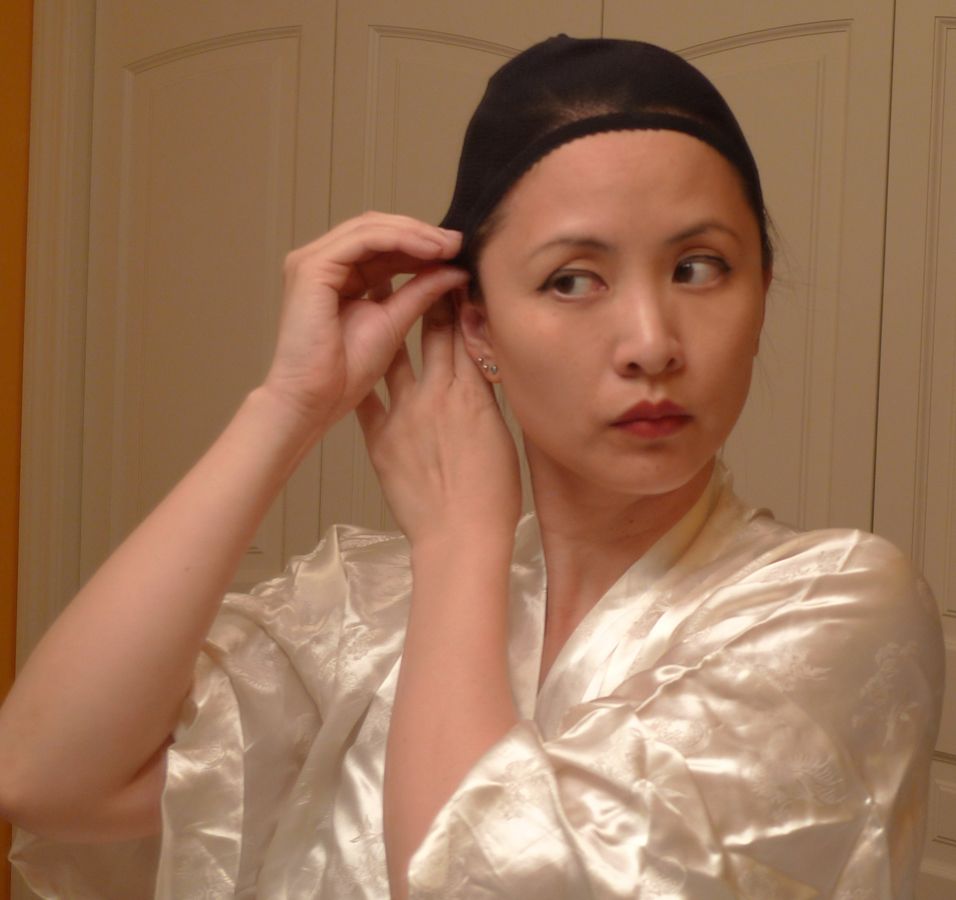
She tucks under adjust the fit on the cap making sure it is near her natural hairline.
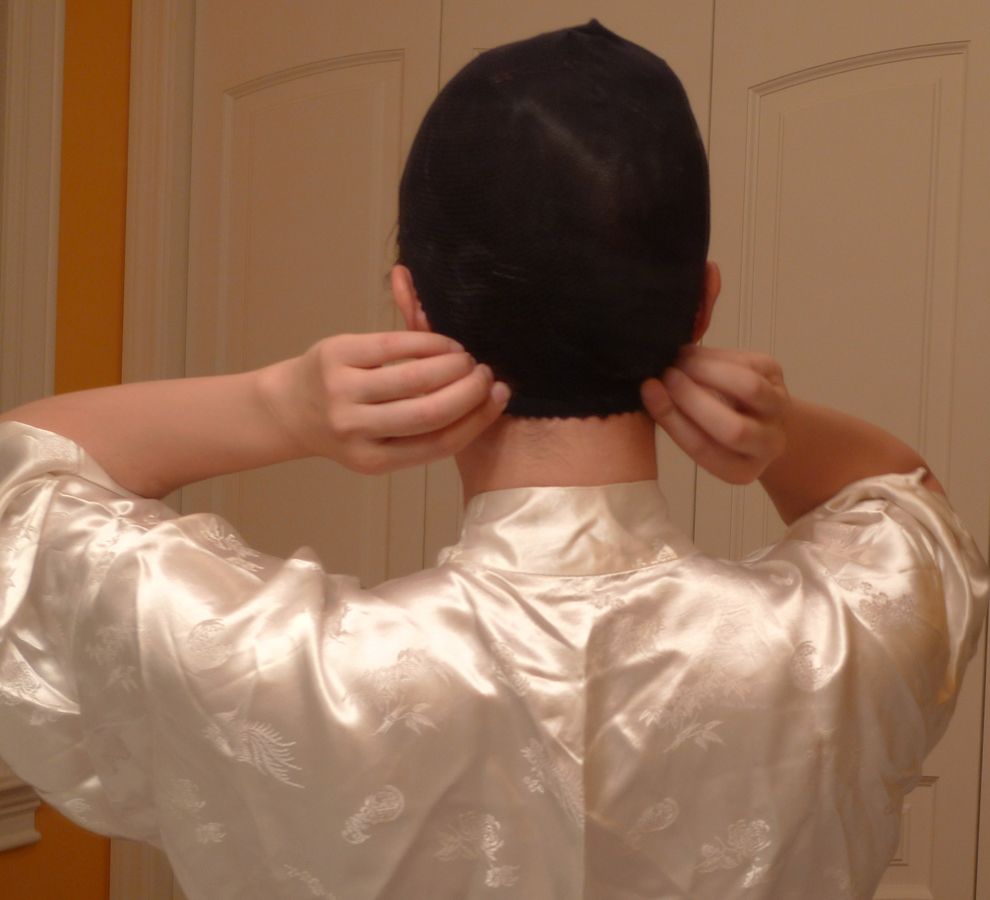
She adjusts the back.

She slips on the wig from the front and matches the center front and center back of the wig to her head by holding on to those spots with her thumbs.
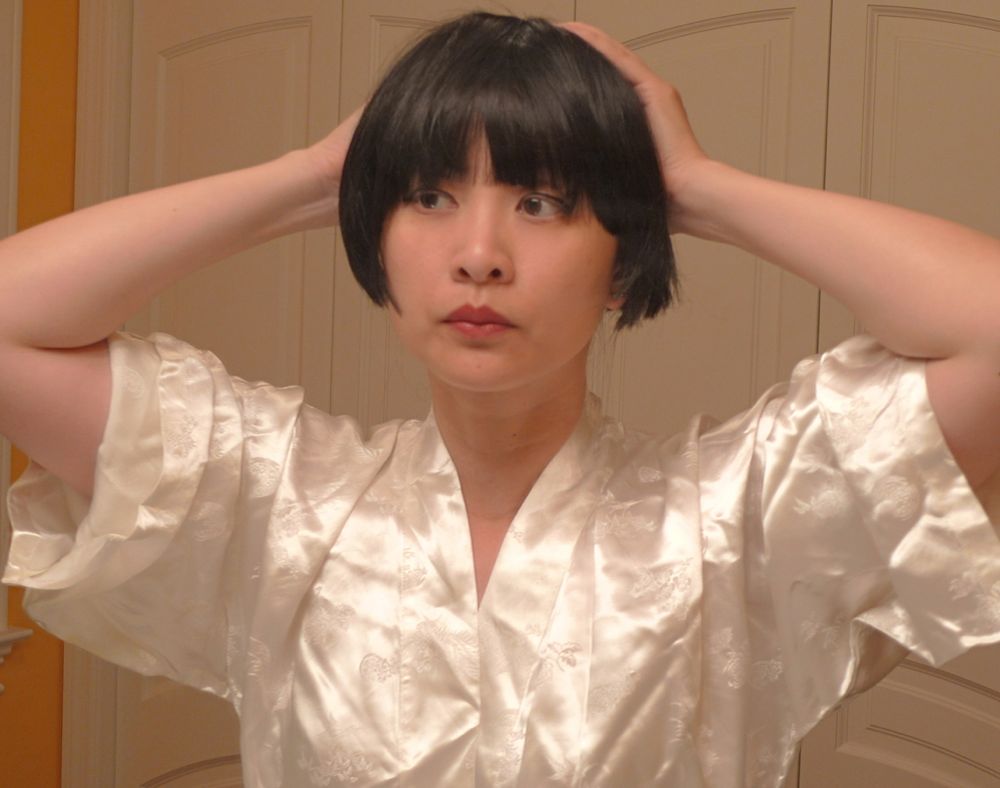
She settles it into its proper place.

Then gives it a combing.

She gives it a final check from the front.

She gives the back a check with a hand mirror.

Claudine models a Poiret inspired turban.
Ornaments:
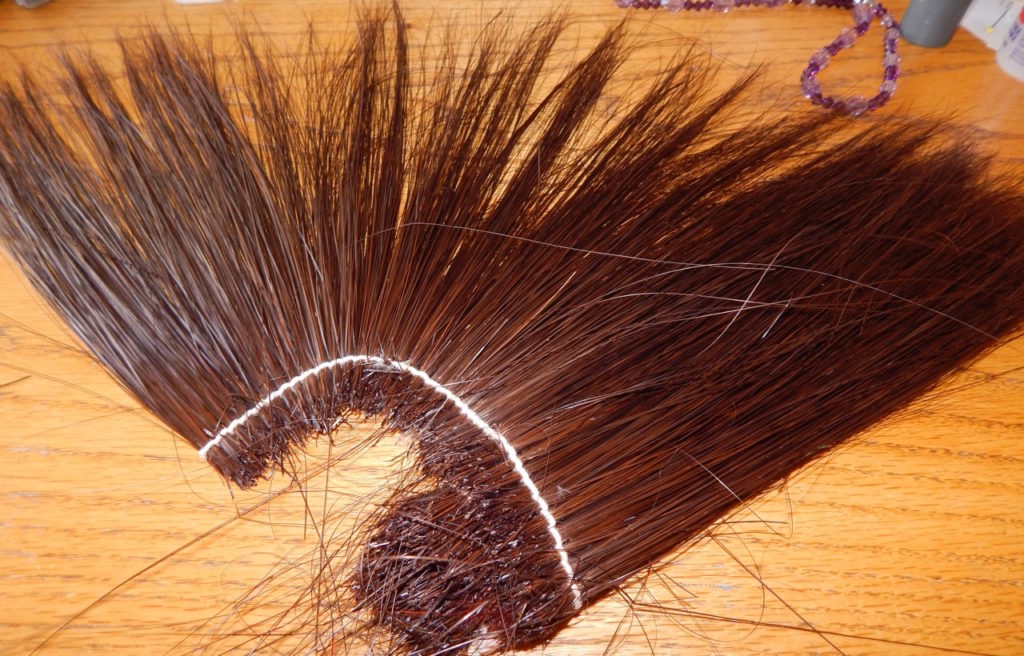
This headdress was made with a length of long burnt hurl (just the stems of feathers that have had their barbs chemically removed) but the same style of headdress could be made with individual narrow feathers as long as the stems stay straight something like pheasant tail feathers or narrowly trimmed ostrich.
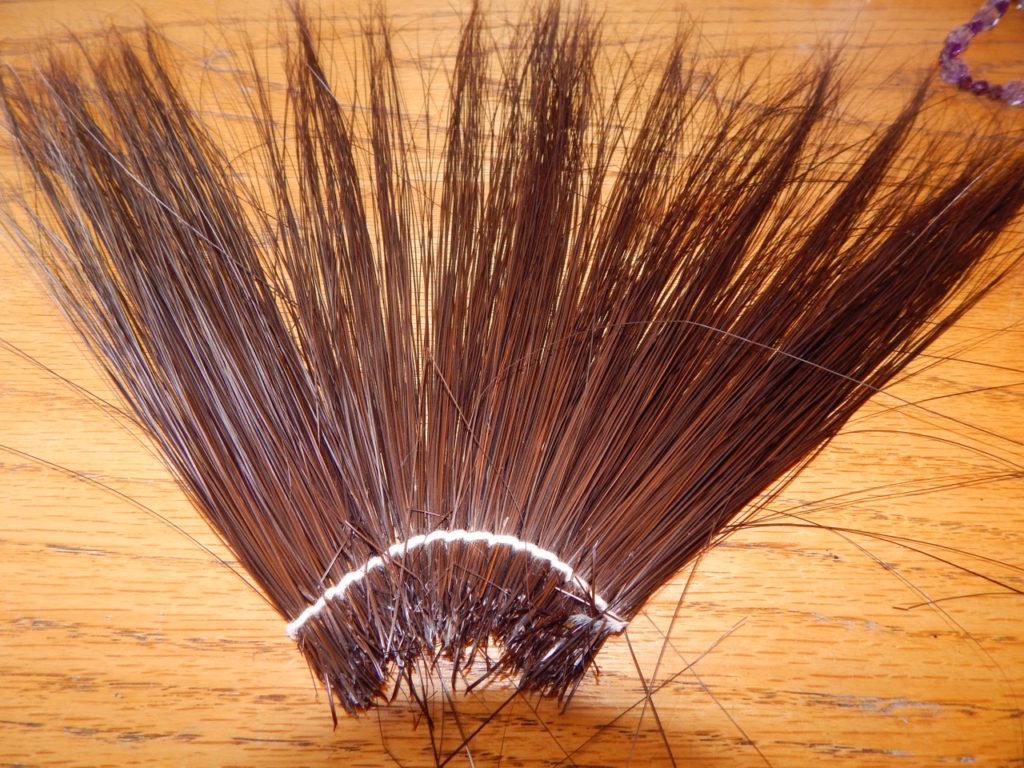
I cut a length of the stems that would give me an arc that was a little more than ½ my beaded disk.
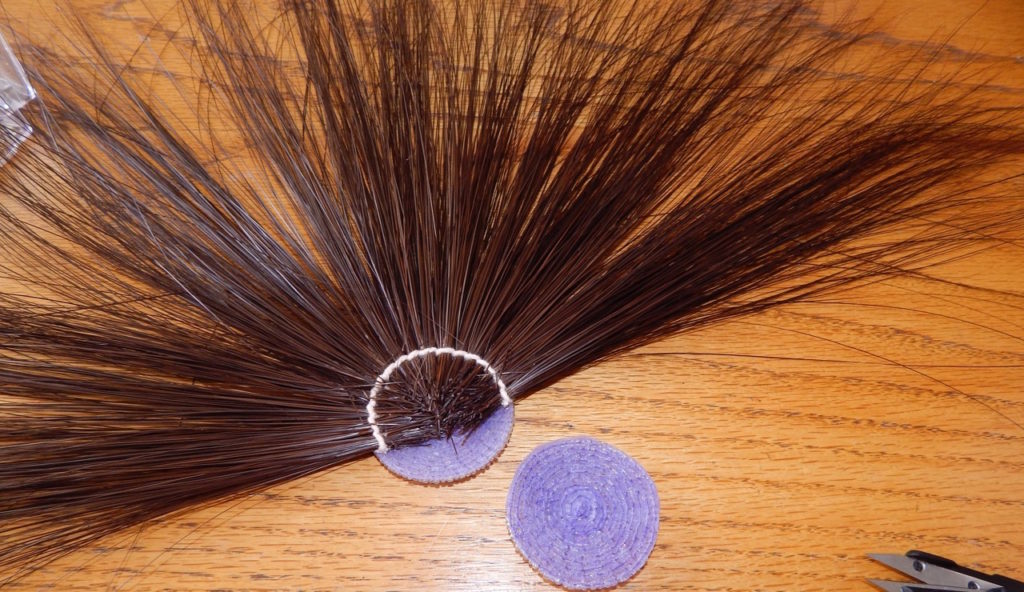
I glued the feathers to the back of the first disk.
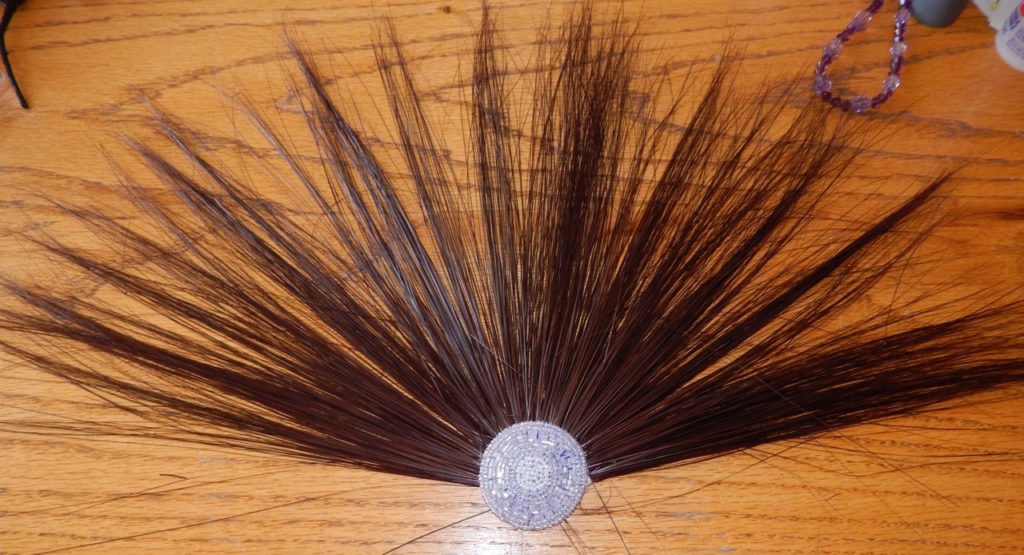
I glued the second disk to the front. I made sure not to get glue on the bottom section of the disk because I had to sew thru this area to sew the disk to attach the disk to a circle of crystal beads to turn it into a headband. I saw several ornaments like this some were worn in the back without a band so this might be attached to a comb and worn just above the chignon.
References:
An Illustrated Dictionary of Hairdressing & Wigmaking
by Cox ISBN 0713442093
An Illustrated History of Hairstyles 1830-1930
by Marian I. Doyle ISBN 0764317342
The Mode in Hats and Headdress
by R. Turner Wilcox ISBN 0486467627
For this two-part article Lynn McMasters made all the hats and headdresses using patterns from her line. Laurie made her mint green evening dress and Katherine and Deborah made their Titanic gowns. Lynn made the black hobble coat, muff and hat and took all the photos but those from the wig series; Claudine took those by propping her camera on a shelf and using a timer. I would like to thank them all as well as my editor, Laura Dippold.