The series “Patterns of Fashion” by Janet Arnold is such a wonderful resource. All of the drawings in this article are from one of the books in the series. I spent so much time looking at all the material in the front of the book, the text, figure captions and photos that I almost wore out my 1560 to 1620 edition. Meanwhile, I did not ignore the back half of the books which has scale patterns. I have used many of them from small items like chemettes to full costumes. The patterns are on graft paper which is ~one square to one inch. You can think of it as 1/8th scale. There is no one way to make use of the patterns I have used two very different ways. Testing your sized up pattern by making the garment up in muslin or a similar fabric to your final fabric is always recommended.
Using measurements to get a pattern in your size
Early Victorian Dress
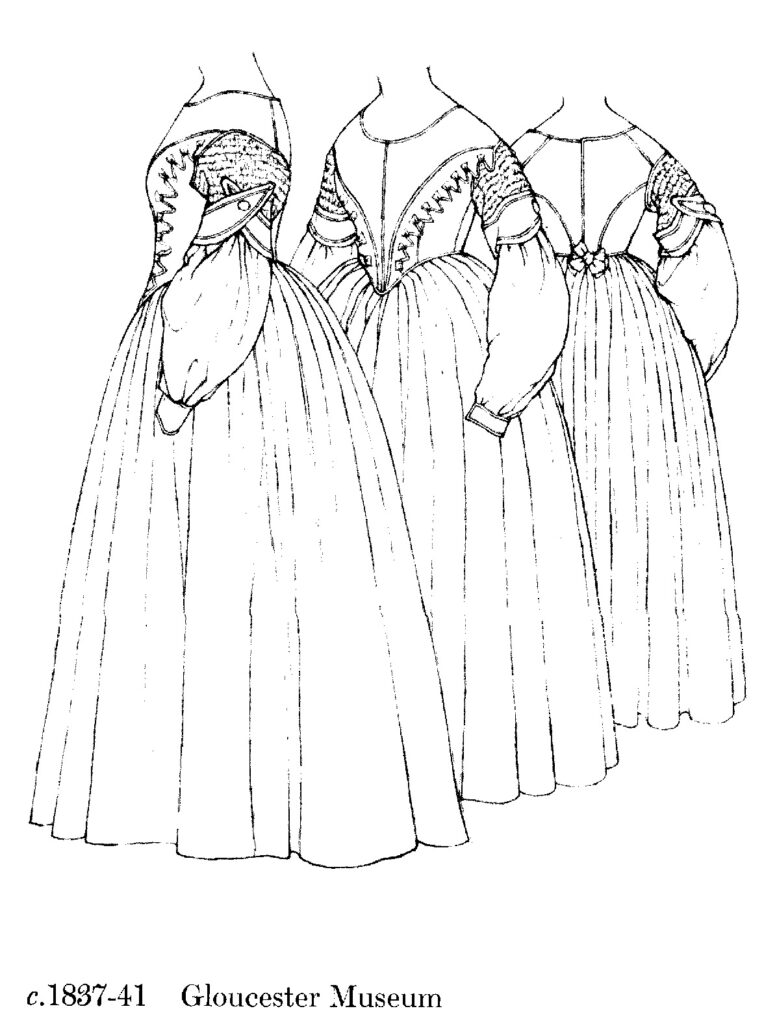
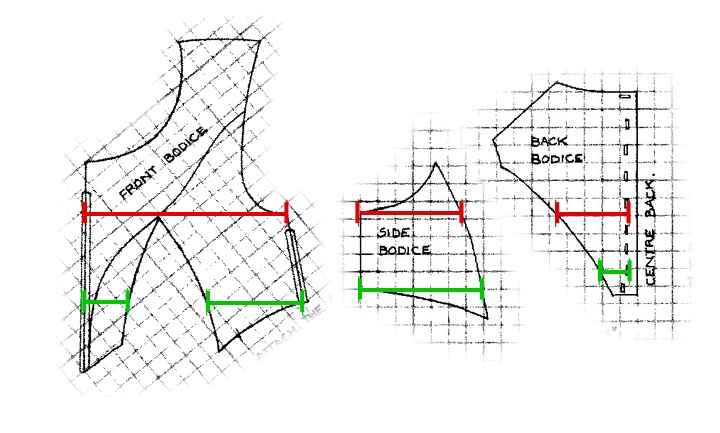
You can scan them and use your computer to enlarge them. You could take them to a copy place and have them enlarge 800%. This is a good starting point. That will only get you to the size of the original pattern for the garment. That may or may not fit you. If not you need to either enlarge or shrink it to your size. The first step is to get your measurements then, compare your measurements with the pattern pieces. Usually that means adding the measurements over several pattern pieces as in the pattern above for the bodice of the gown on the left. There are two measurements that you need to know go get a good starting point for this pattern, the chest and the waist. For the chest measurement you need to add the three red lines and for the waist you need to add the three green lines.
Then you need to get a ratio. Which is as simple as comparing your measurements to the ones off the pattern. Let’s say that your waist measurement is 38 and the pattern’s measurement is 34. You just need to divide 38 by 34 to get 1.117 which means that you need to enlarge the pattern 112%. That is of course from the book pattern that has been enlarged 800% already. If you are going from the page size book pattern then you will need to enlarge to a percent of 912% or 800% plus 112%. You can’t go only by the waist you need to check several measurements. I find that I check the measurements around a person and enlarge to that and deal with the vertical measurements after the first paper printout of the pattern. Below is an example of a gown above made up.
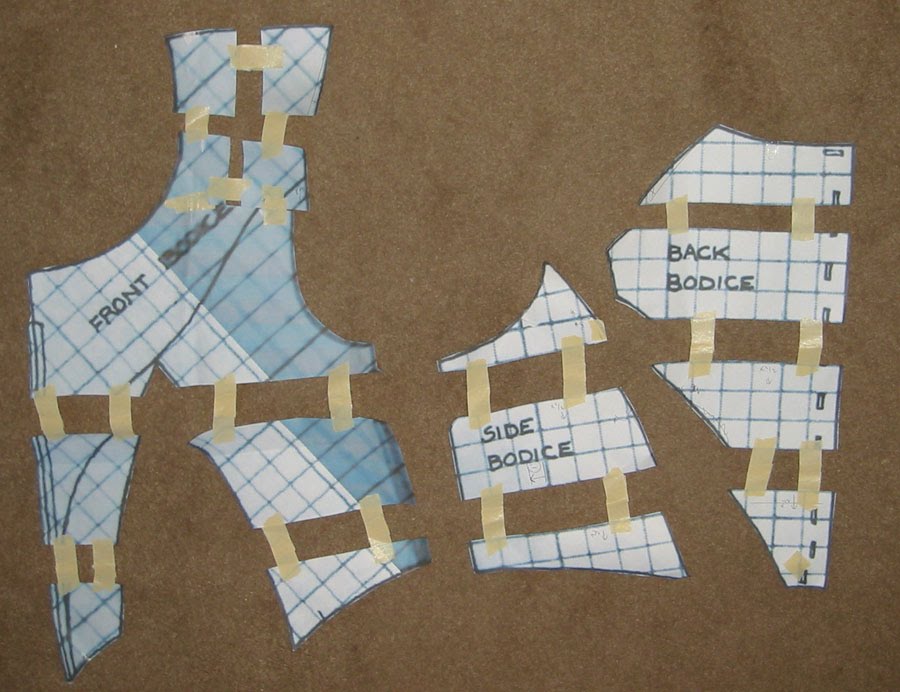
After I enlarged the pattern for this gown to Steph’s bust and waist measurement (with her corset on). I printed it out and compared it to her body with her corset on. We needed more length and chose these places to spread the pattern. If you have experience with commercial pattern you will have noticed that patterns always have lines running across that note where you can shorten or lengthen the pattern. This deals with things like if you are long waisted or short waisted.
Because we added length near the neck on the bodice back which also has the shoulder slope seam as part of the pattern, we also had to widen the corresponding seam on the bodice front. Then it was on to adding seam allowances, cutting it out of the brown paper and then cutting a muslin to sew together and get a real fitting.
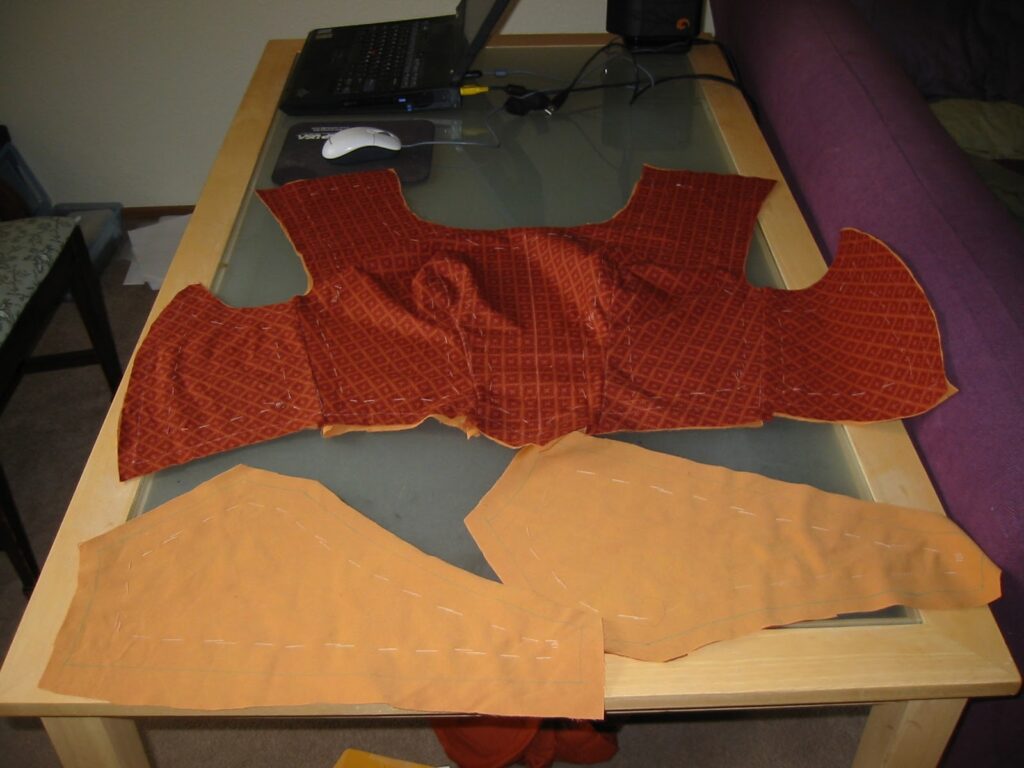
The fitting on the muslin went really well with very few modifications. So Steph went on the sewing the fashion fabric, interlining and the linings together.
This is the first test on her padded dress form with the corset also laced up to her measurements. She still has the basting stitches that held the interlining to the fashion fabric in place.
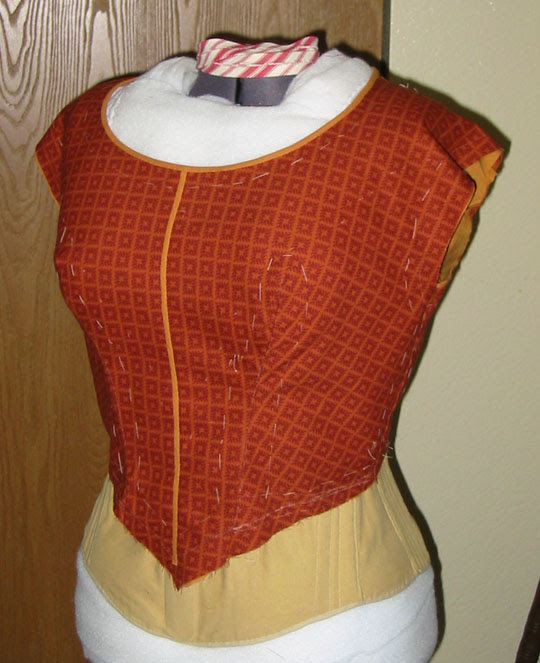
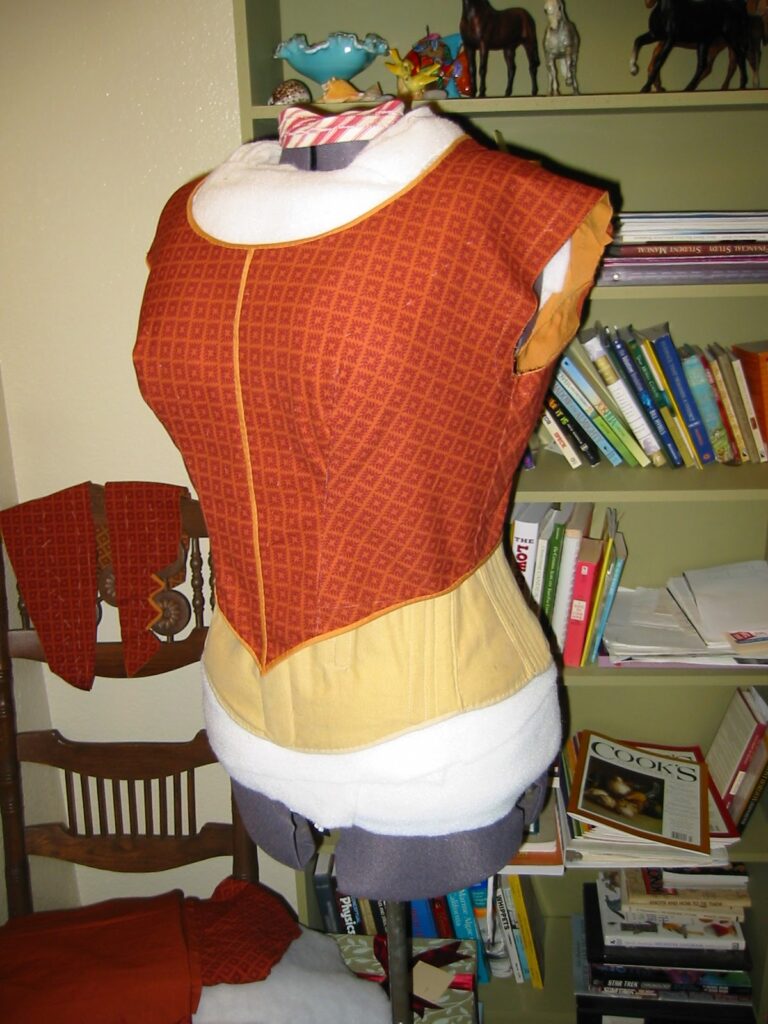
Here it is with the basting removed.
Here it is from the back. If I remember correctly it closed in the back with large hooks and eyes.
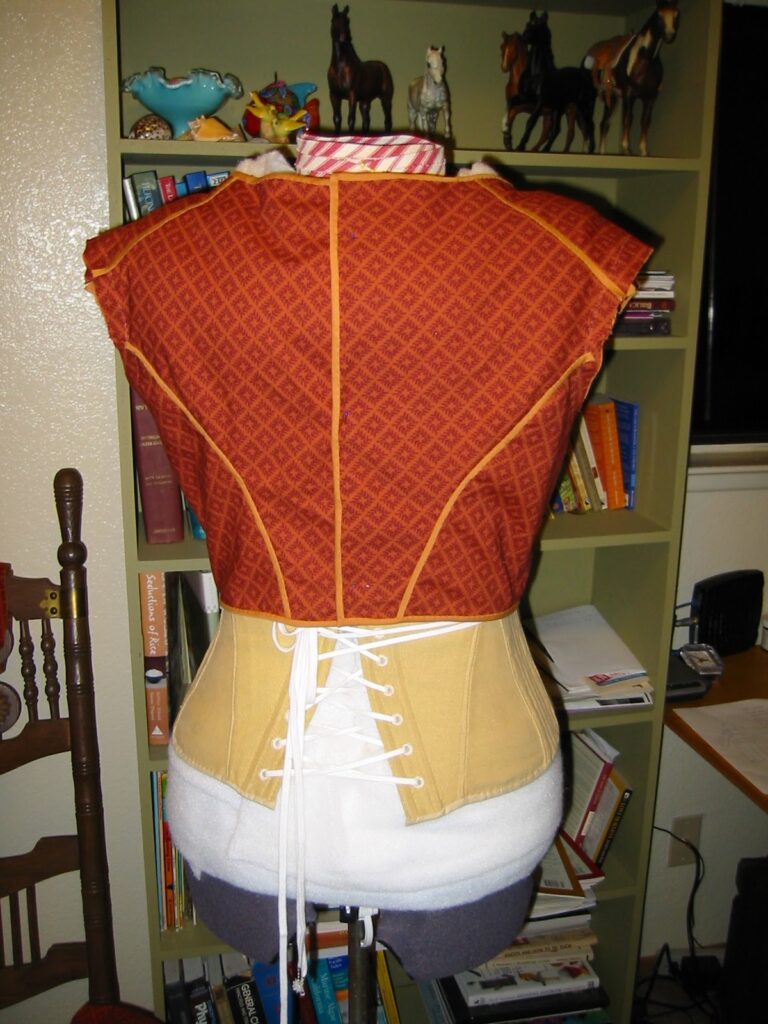
.
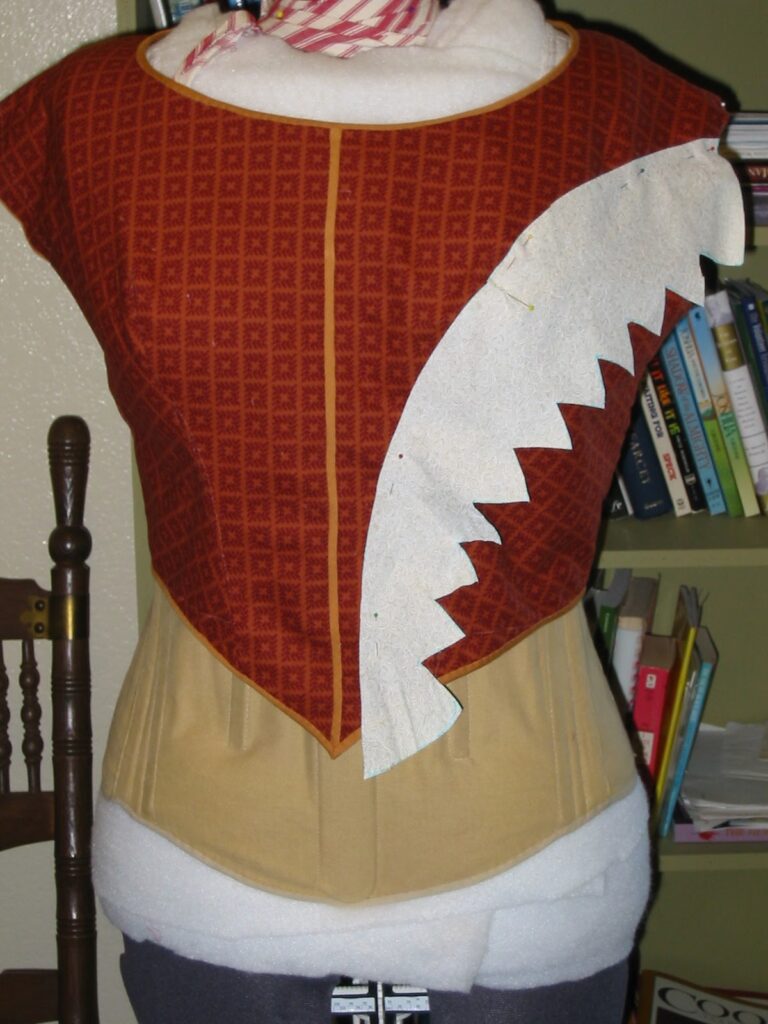
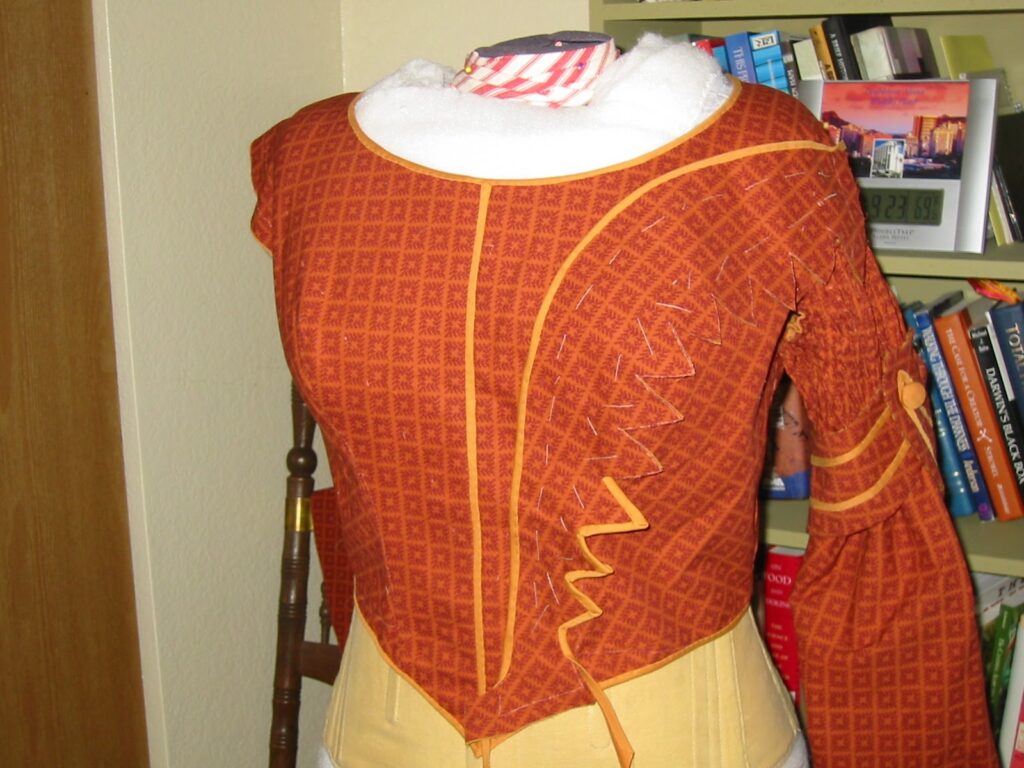
The pattern piece for the front decorative flap also needed to be lengthen at the same spots as the bodice front pattern.
Because she had a dress form padded to match her figure she could alter the flap right in place.
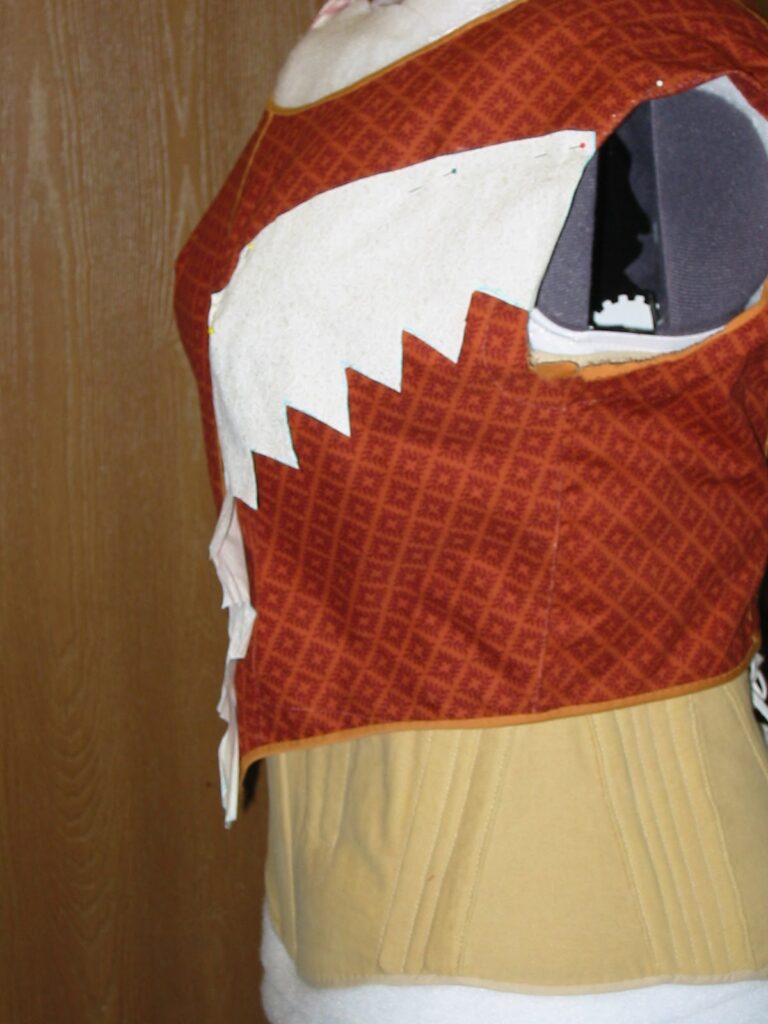
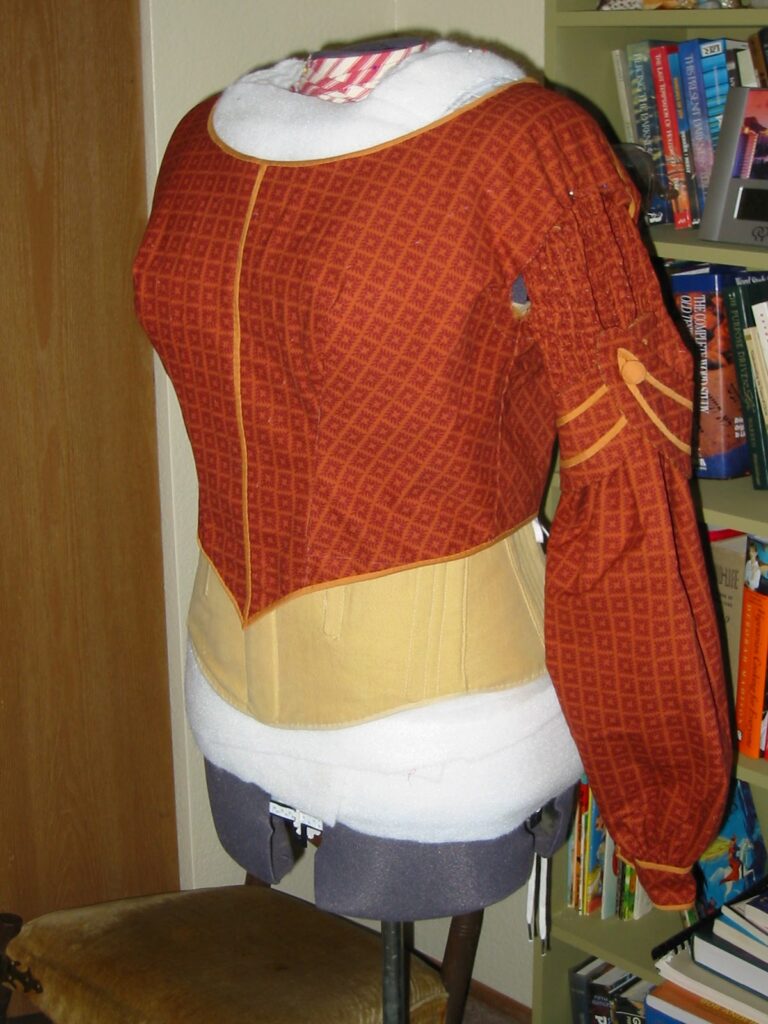
The same thing goes for the sleeves. They were sized up the same percent as the bodice and then lengthened as needed. In the upper arm and in the lower arm sections.
It’s important to check things as you go. This dress at first looks really complicated but there is so much information gathered into the drawing, pattern and text in the book it never stumped us. It turns out it lended itself to hand sewing which is logical because the original was made in the 1830s before sewing machines.
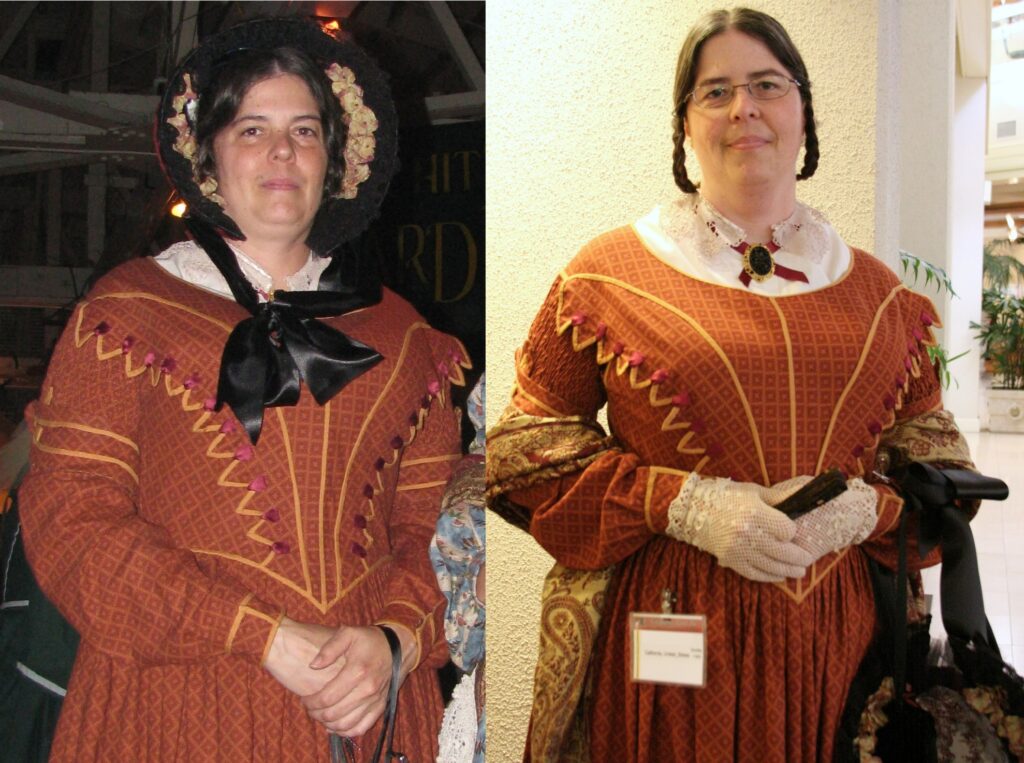
Here is a picture of the finished dress on Steph (right) and her twin sister Stacy (left). Even thought I helped with the patterning and some constructions steps, Steph sewed this 100% by hand and by herself. She won a “Hall Costume” award at Costume Con, Santa Clara.
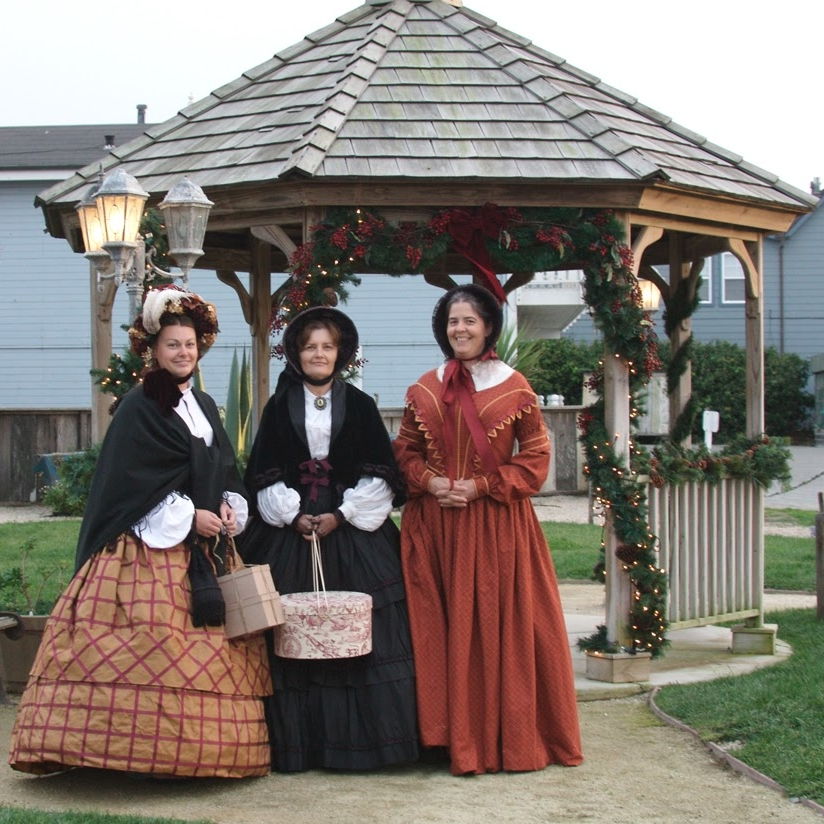
Steph and the girls in Moss Landing, CA. Thanks to Stephanie for saving all the process shots. It really help me remember the process.
Chemisette from the Snow Hill Collection
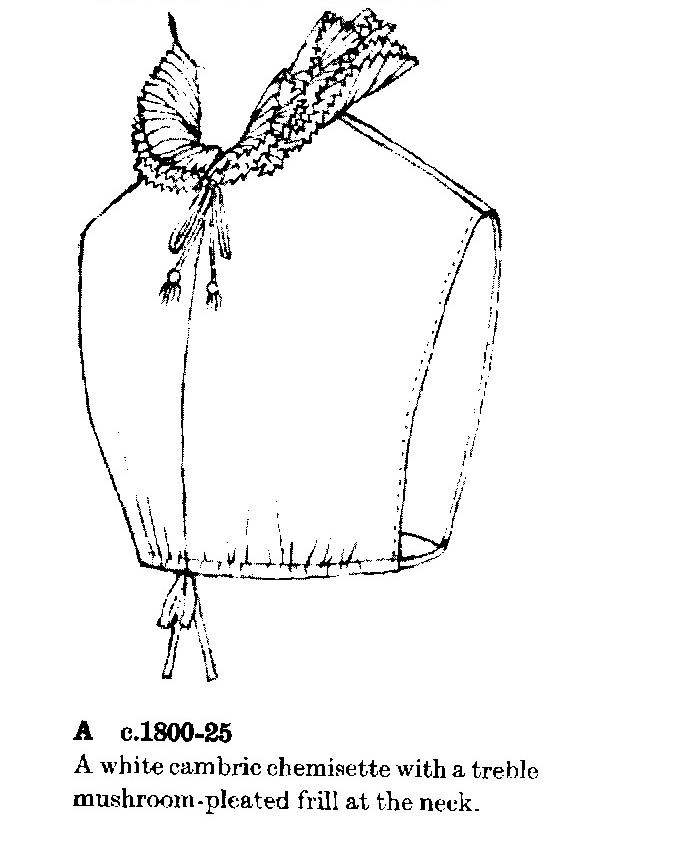
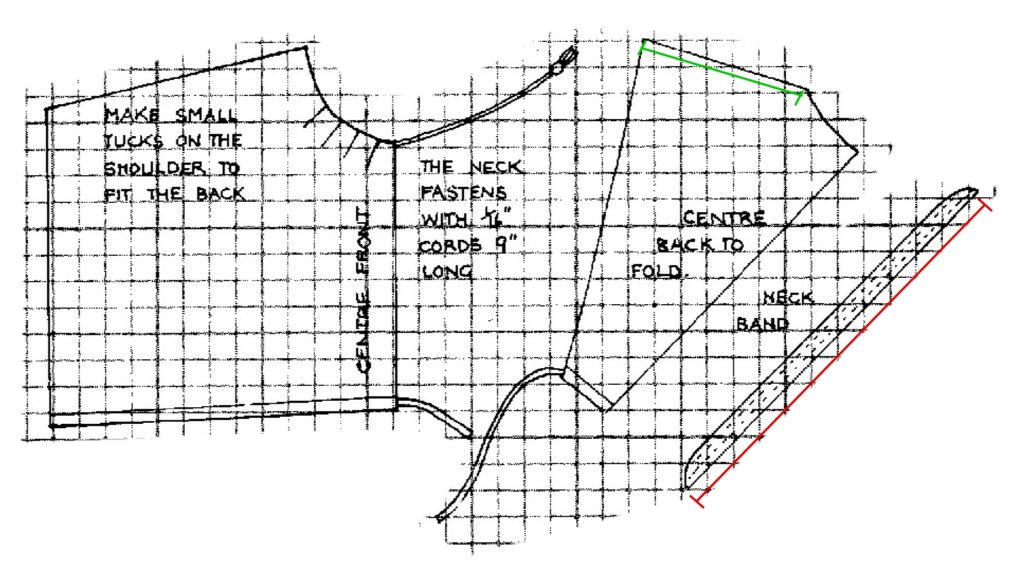
With each pattern you need to decide what measurements are critical for fit. In the case of something like a chemisette it will be the shoulder length (green) and the neck (red). So you need to get measurements from the person and the pattern and do a ratio to get the percent enlargement.
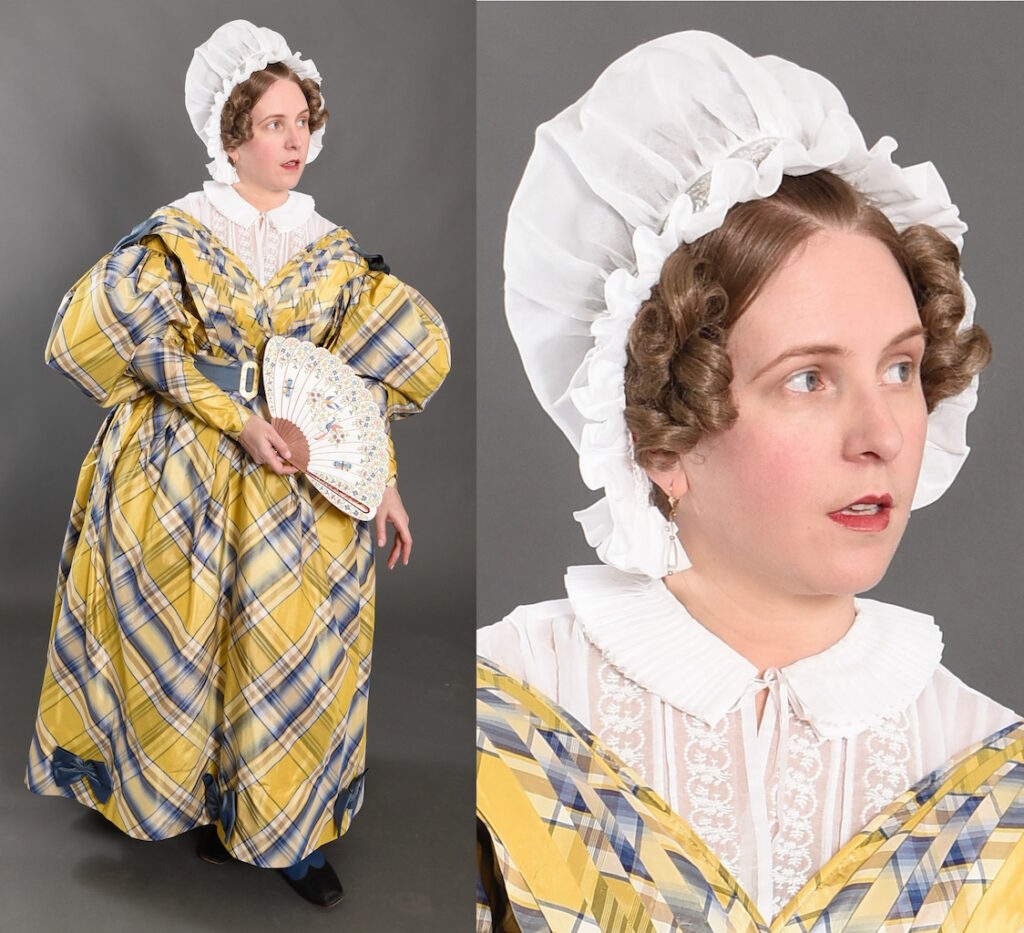
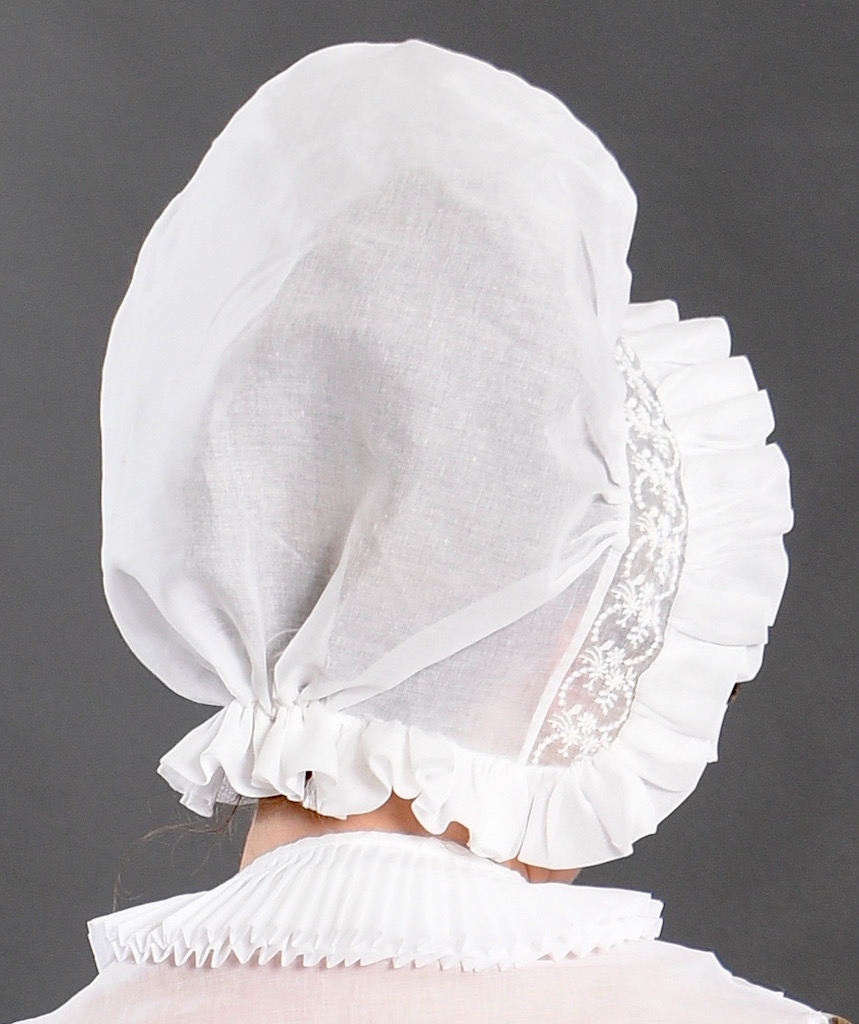
For this chemisette I did not follow the pattern and chose to only do one ruffle, a pleated band. Laurie Tavan is modeling.
Man’s Elizabethan Doublet
From the Victoria and Albert Museum.
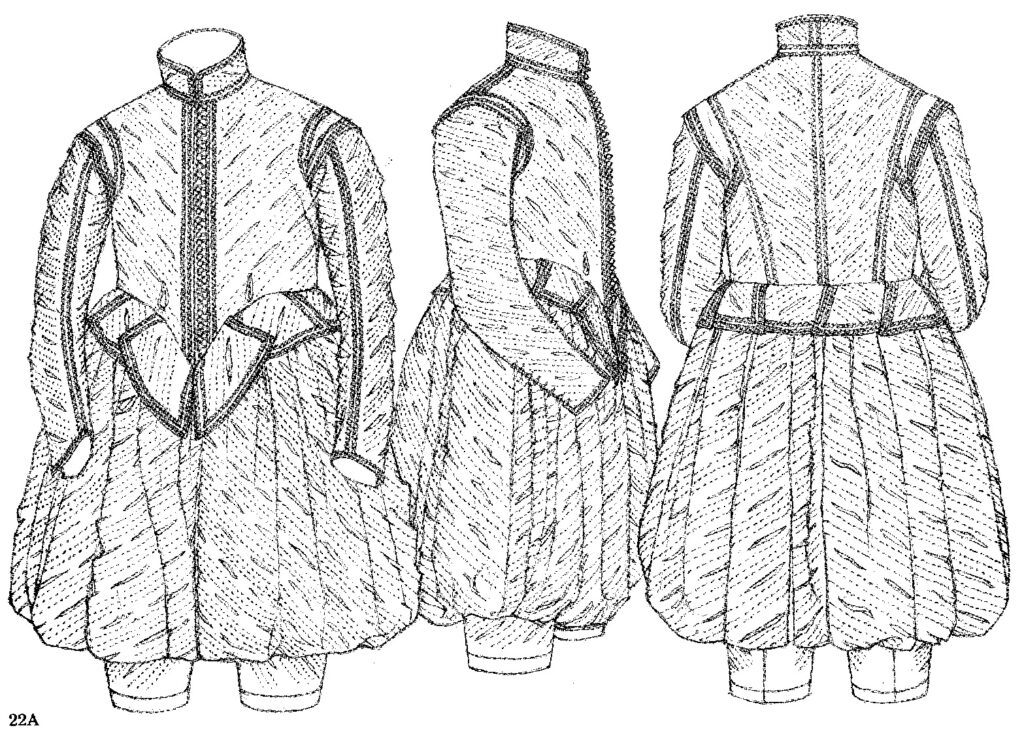
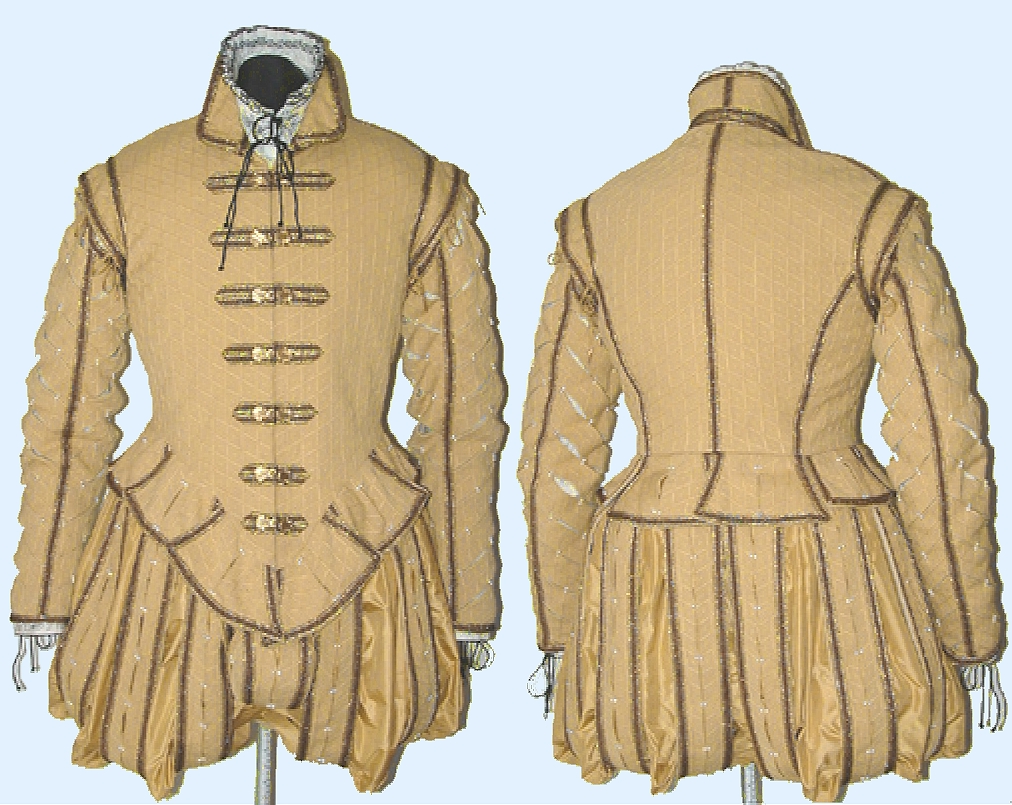
For this I used the ratio method to determine the size I needed to enlarge the pattern. I only used the pattern for the body of the doublet. I made the sleeve pattern myself and it is one of the views in my spiral sleeve pattern. I also made the pattern for the pained slops which are mostly just strips.
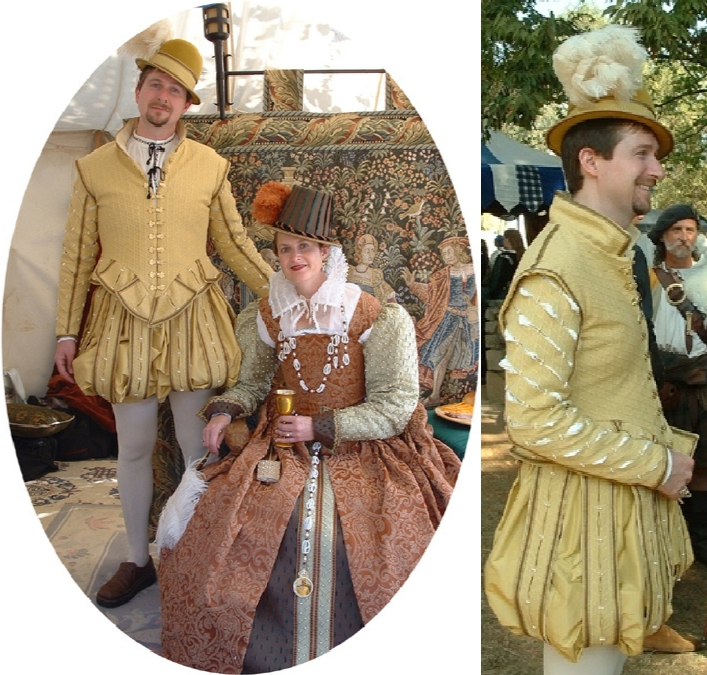
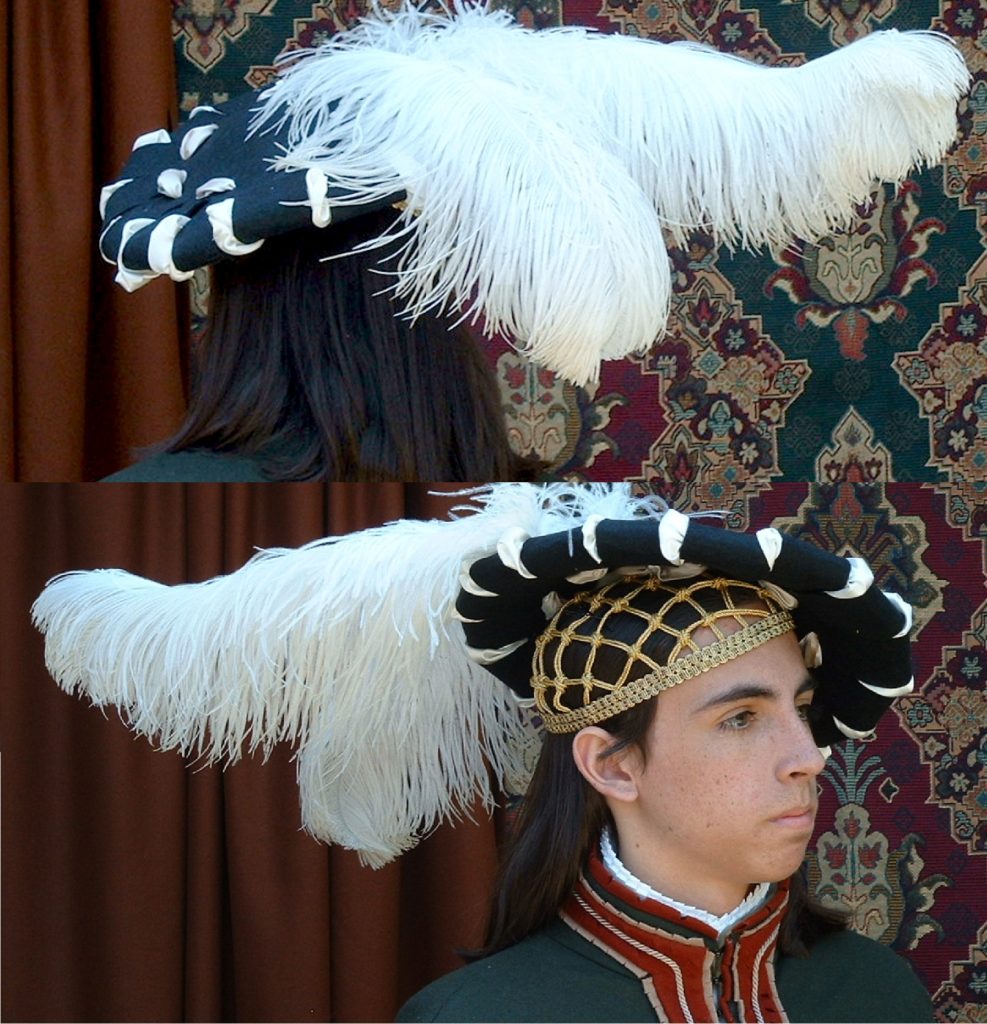
Here are Richard and Susan at faire in costume. With two of my favorite hats.
1890-01 The Museum of Costume
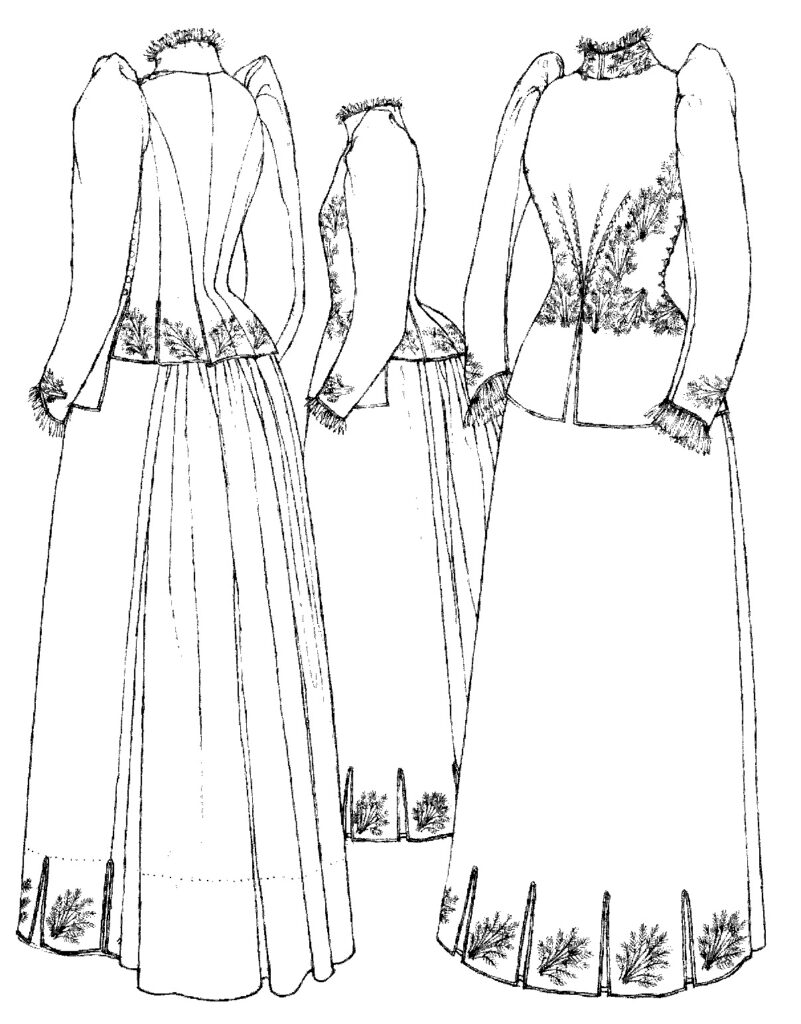
This is another pattern enlarged with measurements only. Steph worked on this one as well. We did only the skirt without the tabs at the bottom but with a band of black wool below the dark mahogany wool above. With full skirts getting the right waist size and height are almost all you need to do.
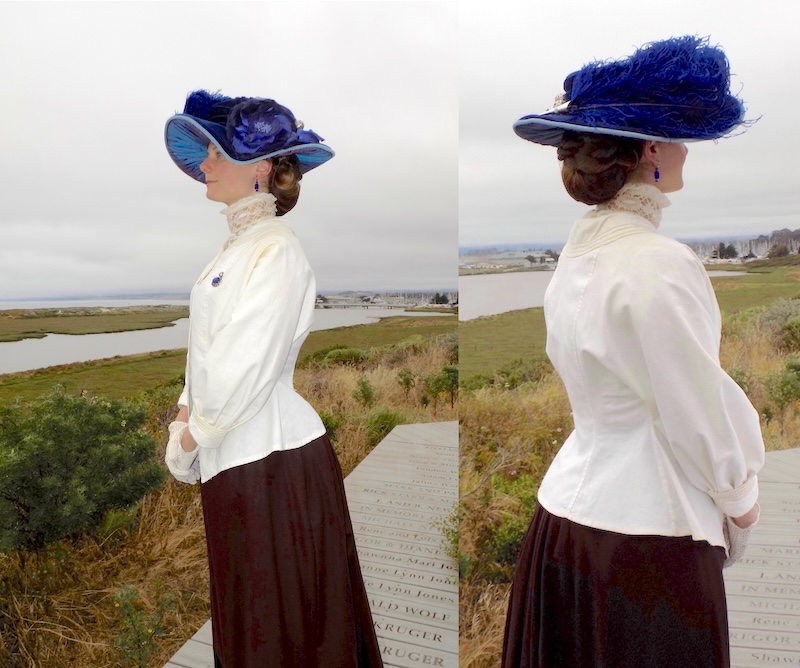
Even without the decorations this is a complex skirt with all the panels and the very clever built in pockets.
Transferring the pattern to a Tape & T-shirt.
1567 Doublet and Pluderhose worn by Svante Sture from Upsala Cathedral
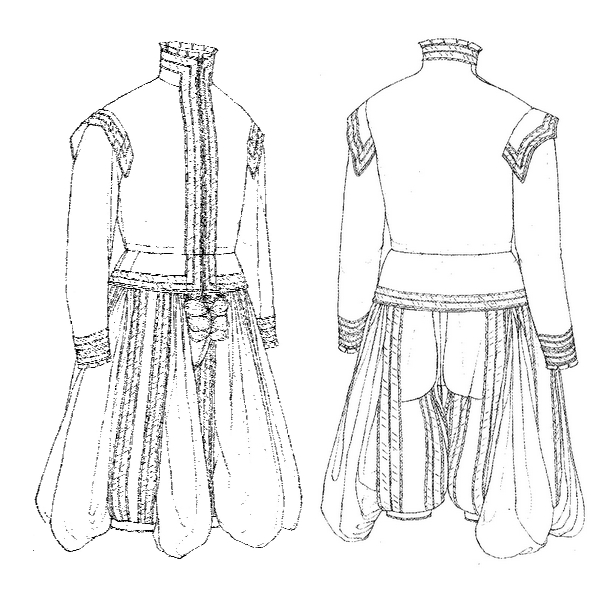
The body of this garment has such simple lines I chose to use the “tape & T-shirt” method to get a body fitting pattern for this doublet.
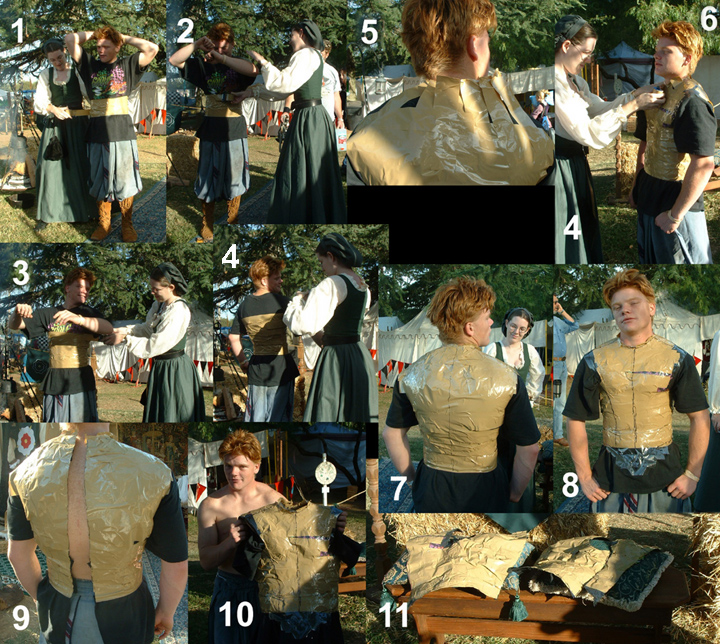
Steps to creating a custom doublet or bodice pattern with the tape and T-shirt method
1. With the subject wearing a regular tee shirt wrap 2 to 3” wide tape around their torso starting near the waist. Continue just barely overlapping until just under the arms picture 1-4.
2. If the tee shirt has a large neck you might have to add some pieces of doubled over tape as shown in picture 5, to fill in so that there is some to tape over all the way to the neckline.
3. Continue taping across the upper chest in the front and back photos 7&8
4. Tape below the waistline as shown in photo 8 (in clear tape) in the approximate shape of your finished doublet.
5. With a felt pen draw the historical seam lines that you will want. It is best to have a reference book such Janet Arnold’s Patterns of Fashion in hand for this step. It is difficult to see in the photo but I also marked the waistline including the center point, neckline and armhole.
6. Carefully cut the subject out of the tee shirt Photo 9.
7. Photo 11 cut one side up (right) and keep the other side (left) for reference.
8. Trace the pieces onto drafting paper and add seam allowance. I use 1/2”. Always try this pattern on cheep (1 to 2 dollar a yard) fabric of similar weight to your finished garment. As a rule, it will need to be taken in a little, depending on how fitted the garment will be ie. a tight fitting women’s bodice vs. a looser man’s doublet over a blousy chemise.
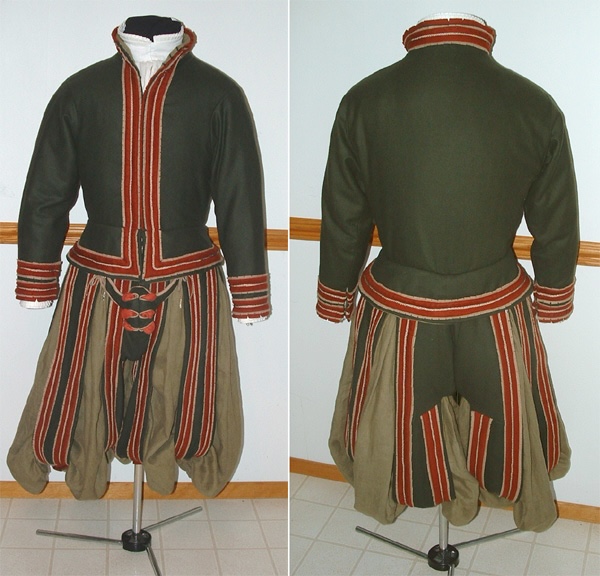
This is the finished garment. To tell the truth after I drafted a pattern from the taped shirt I went and tapped the entire thing back together so I could use it as a cover to my padded out dress form. That way I could work without fittings. Alas, I never got a picture of Gordon (the tape and t-shirt model) in the garment. I did get some pictures of it on Nick but it was a little large on him (below).
Women’s Italian Gown
Eleanora of Toledo 1562
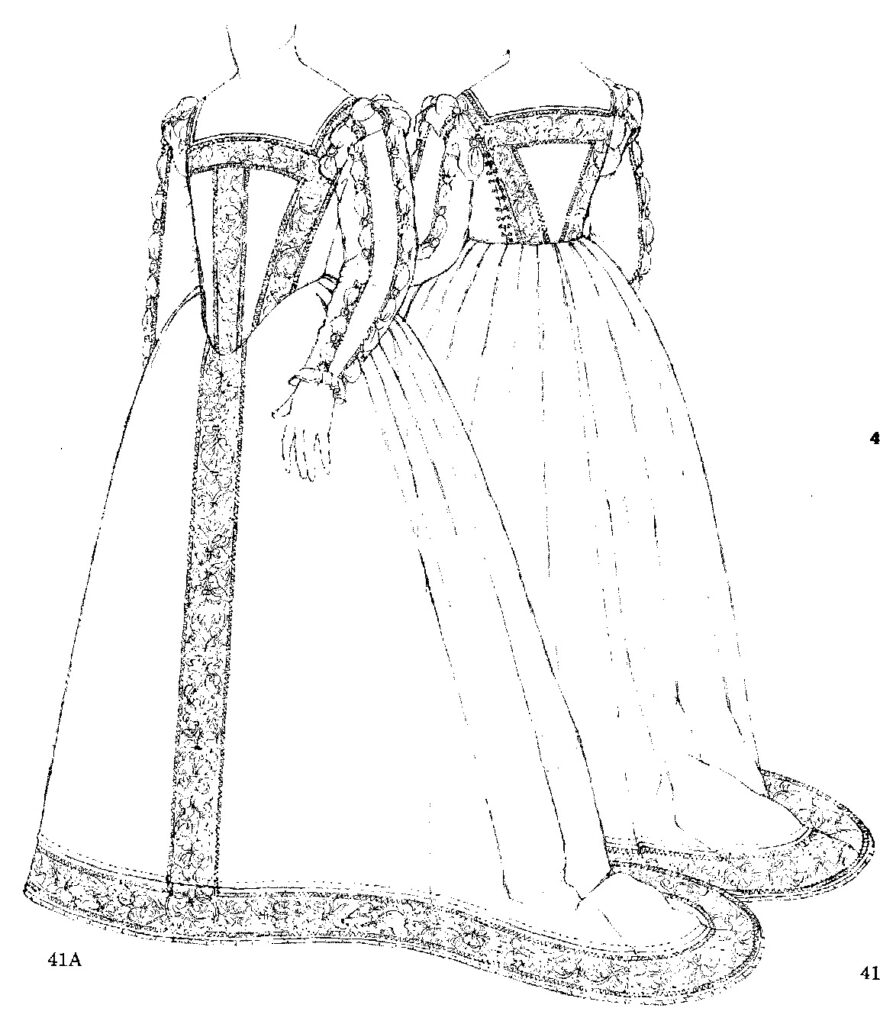
Here is another gown, I used the “Tape & T-shirt” method here as well. Using Janet Arnold more as a guide for where to place the seams. It is a fairly simple bodice. The pattern page in the book gives you what your pattern pieces should look like and where the seams should fall.
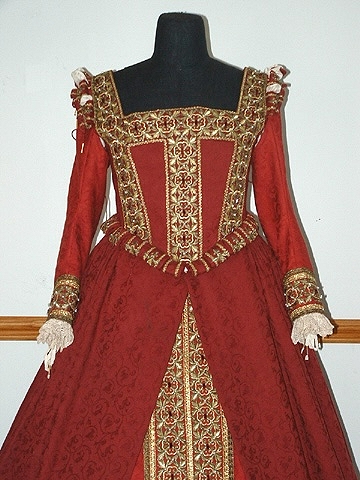
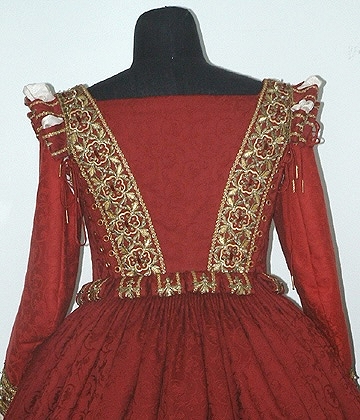
Because I did a separate bodice and skirt I added tabs at the waist. And a skirt that opened in the front and an underskirt.
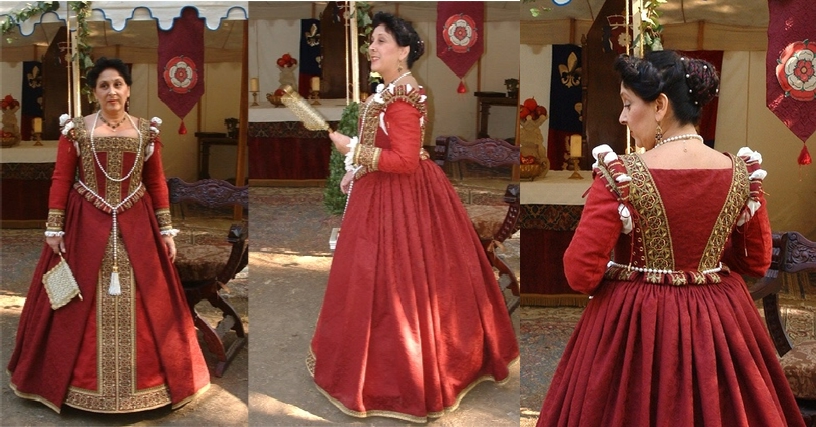
At Faire.