I’m going to use the term Corded Appliqués for all things in this category even if it has a knot and a loop and can be used for a closure. Corded because we use cord to make them and appliqué because that is how they get onto your clothing. In this article I will cover several general things such as 1) types of cord that can be used, 2) how they can be put together and 3) how they should be added to a garment.
1) What types of cord can be used for Frogs and cord appliqués?
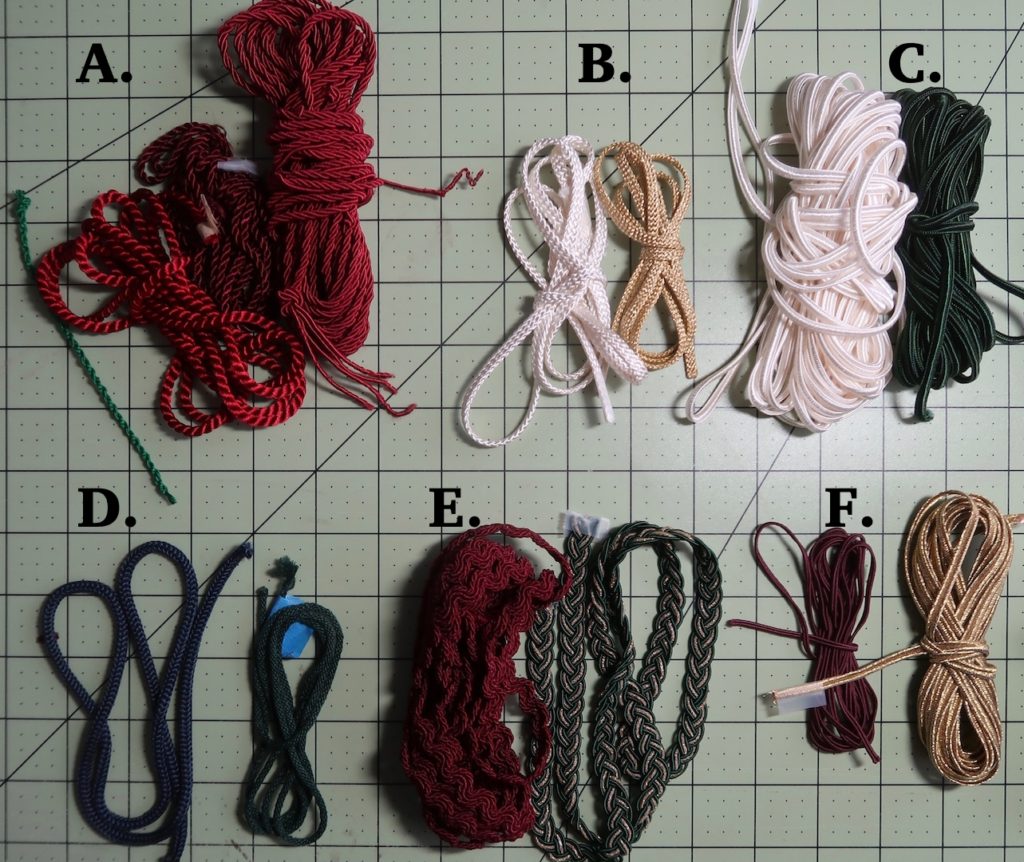
Here are 6 general types of cord that can be used: A. twist cord, B. flat braided cord, C. standard modern frog cord, D. round braided cord, E. Gymp and F. Soutache. As a general rule round cords don’t make good appliqués if the applique has a lot of crossovers it’s better to use a cord that is flatter in cross section like the soutache, flat braided or standard frog cord. any cord can be used for appliqués as long as it can make a loop and continue to lay flat and not buckle. Besides what is shown here you can use narrow bias fabric tubes to make Frogs and appliqués.
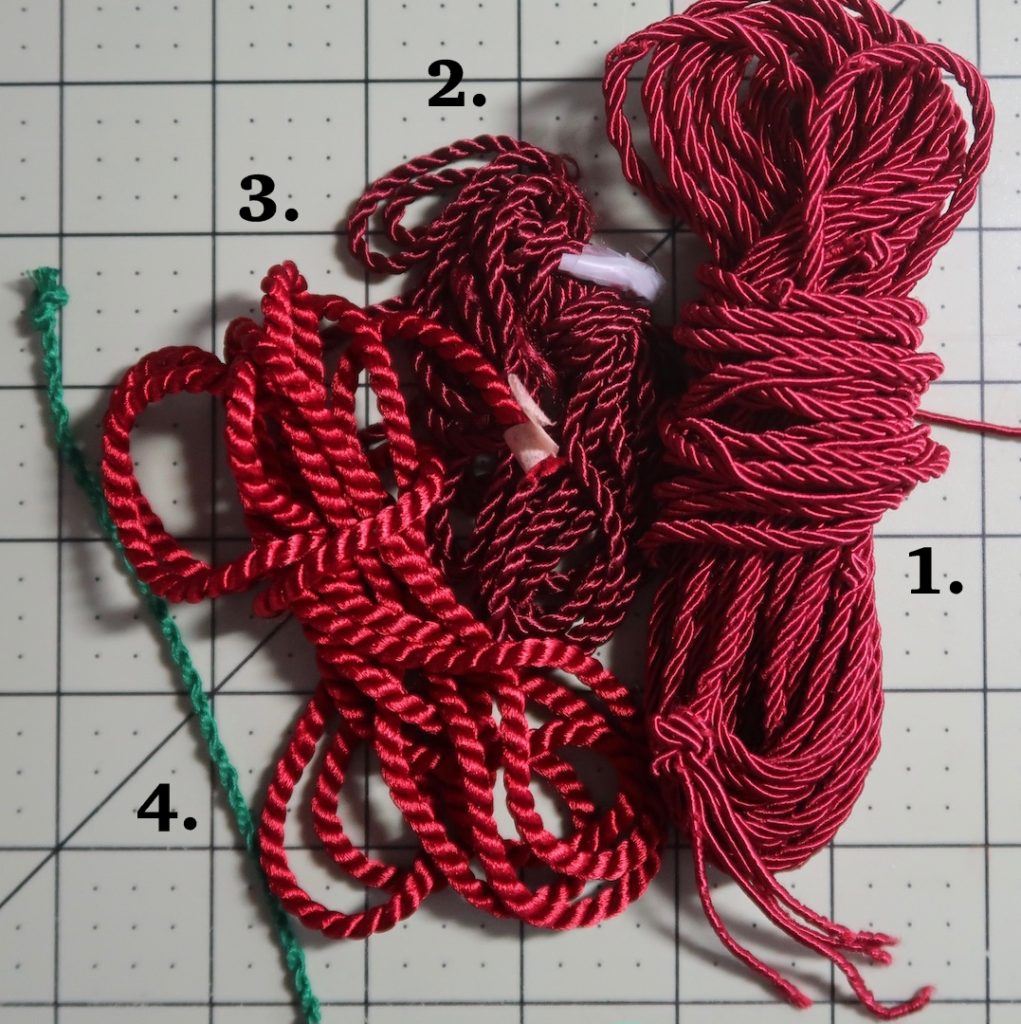
Shown here are a variety of twist cords. 1. A twist of thread covered cords, it’s very stiff and would make a good choice. 2&3. would be OK but 2 in particular is rayon and very snaggable, therefore not as good. 4. Was made with DMC 6 strand thread following the instructions in Janet Arnold for the cord for Elizabethan “Froglings” so yes it should be good.
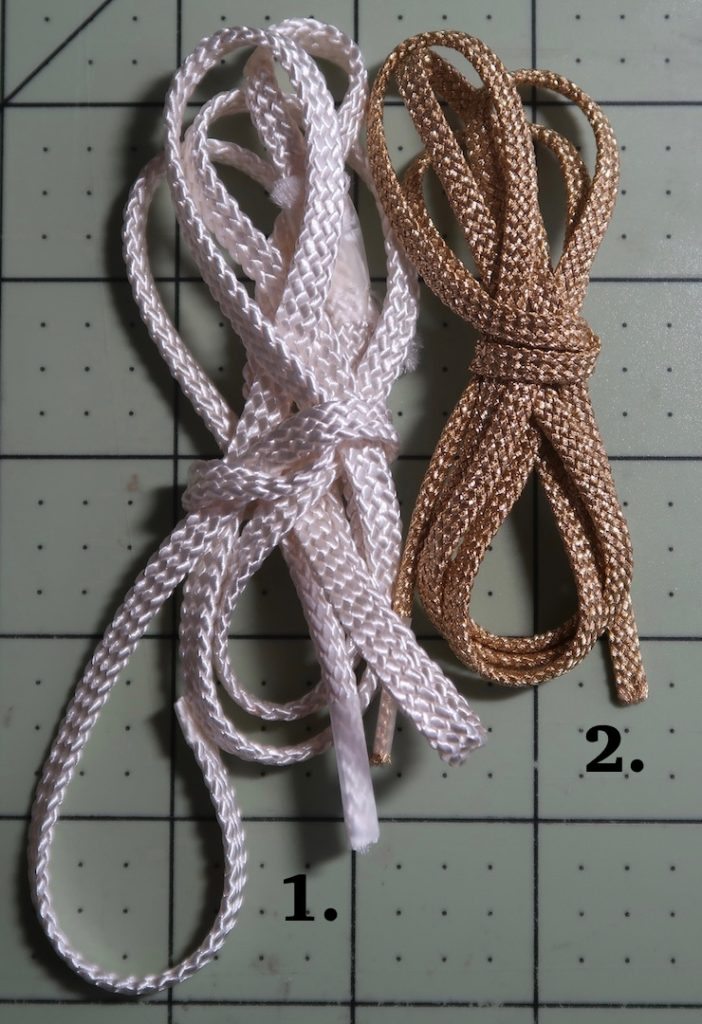
Flat braided cord in two widths is a good choice for frogs.
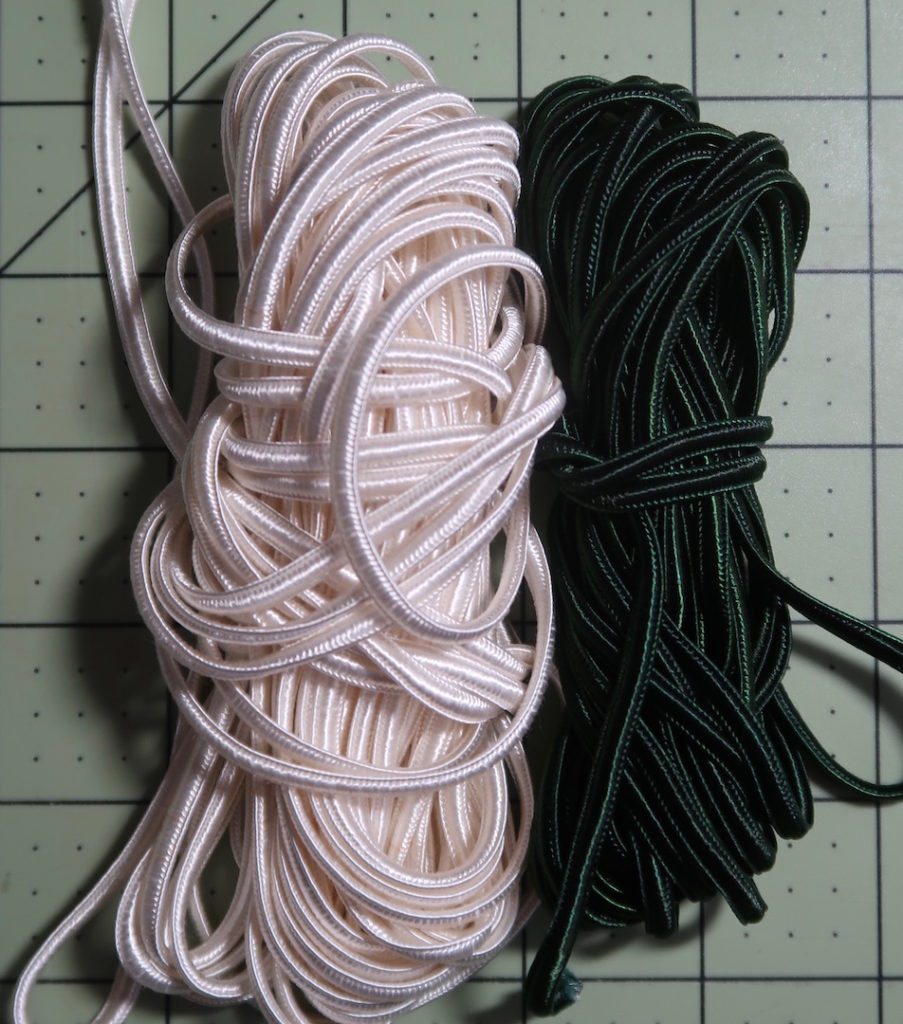
Standard modern frog cord. This cord has a center cord and two edges. It good for appliqués because it can make a fairly tight loop and continue to lay flat and not buckle.
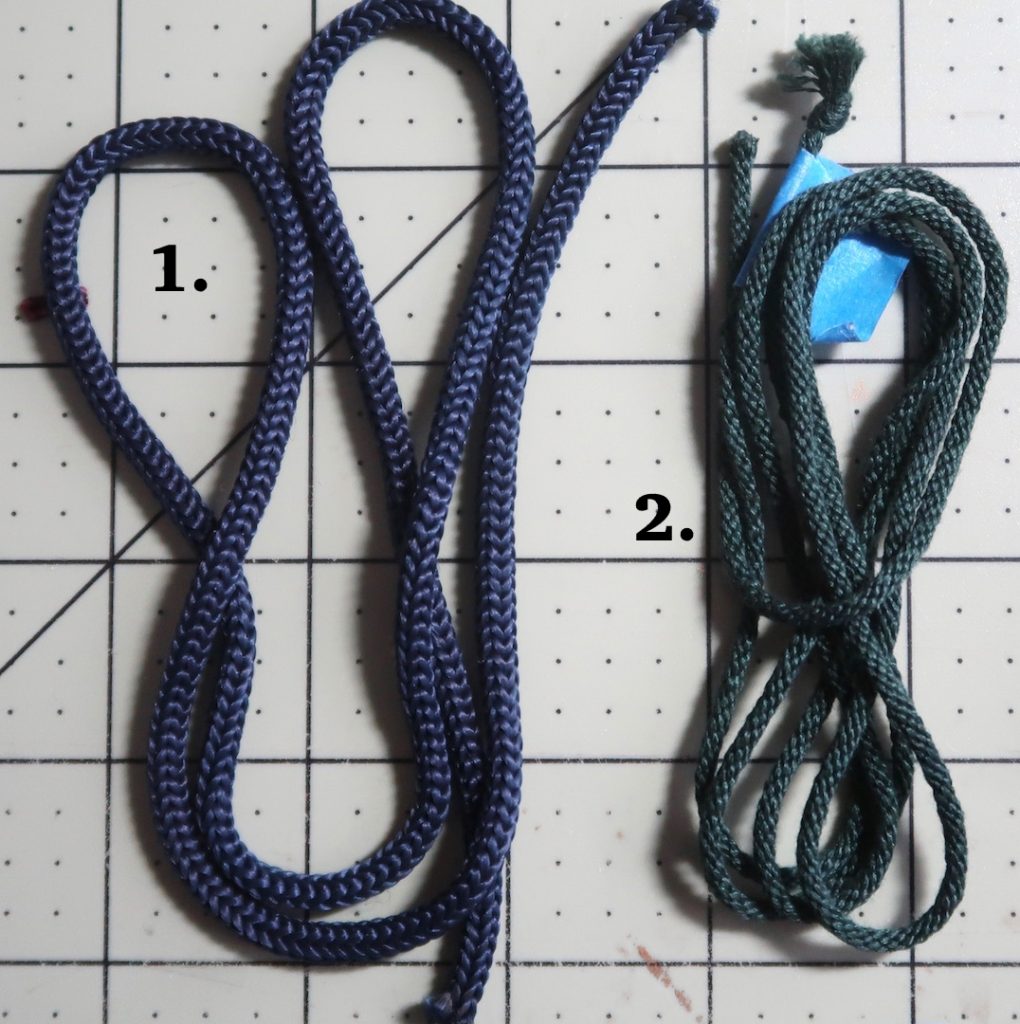
Braided round cord. 1. Is a commercial cord and would work but because it is rayon I might not pick it as other fibers like cotton and wool wear better. 2. Is a handmade braided cord made from DMC 6 strand embroidery floss.
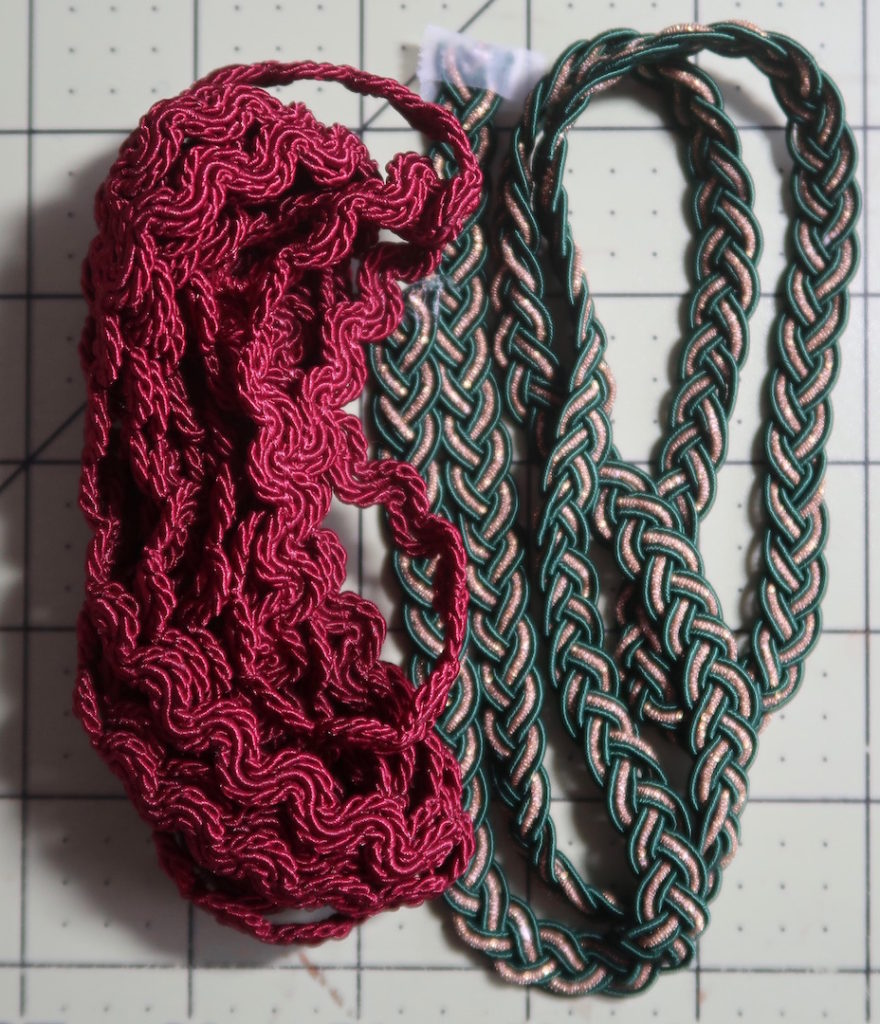
I added these to show you can use more elaborate braids if you are making something large and test that it can make a loop and continue to lay flat and not buckle.
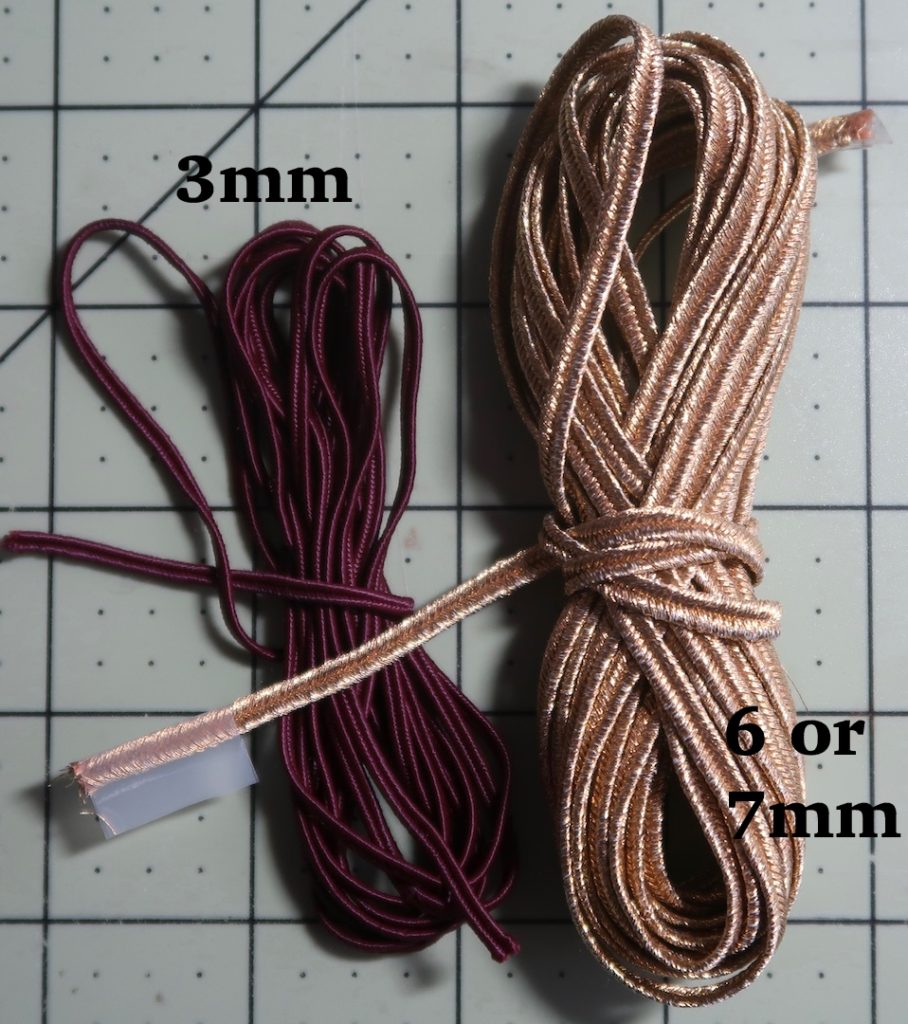
Two widths of soutache, the 3mm is good for buttons and the 6mm would be usable for a frog or other appliqué.
2) How can cord be turned into appliqués or frogs ?
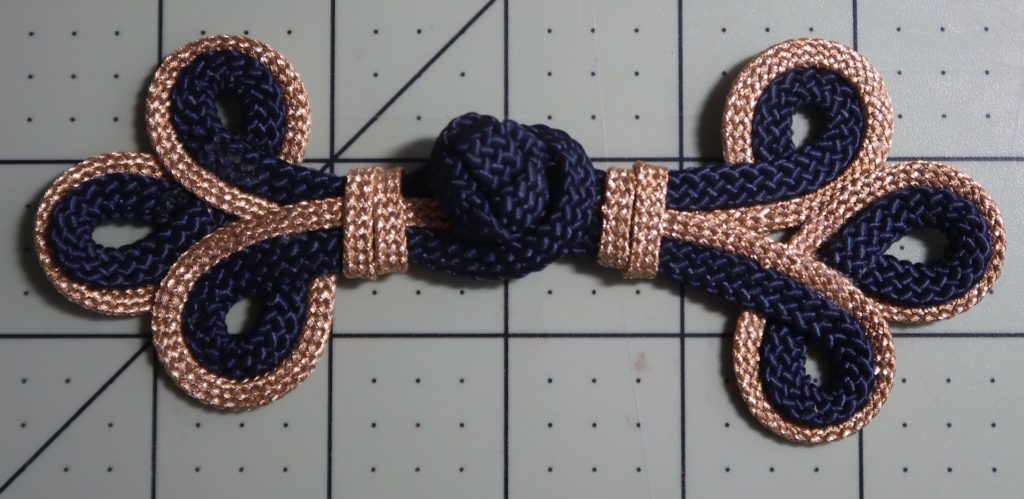
Say you have a frog or appliqué you want to copy. First you need to get some cord of the same type and size.
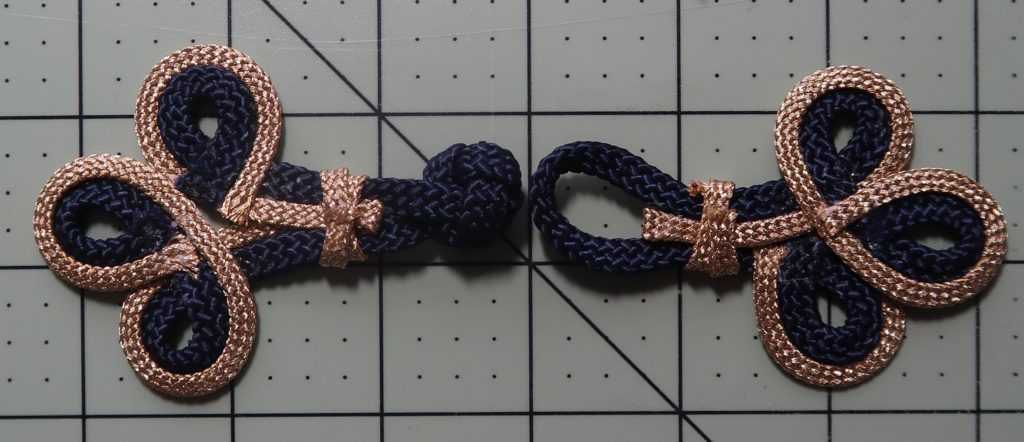
Because it is easier to tack stitch the finished frog from the backside, you will want to scan, copy or photo and make a print at life size of the backside of both halves of the frog. If your are using your camera it’s a good idea to put it on a grid so you can get your camera level and you will know the size of the frog without taking measurements.
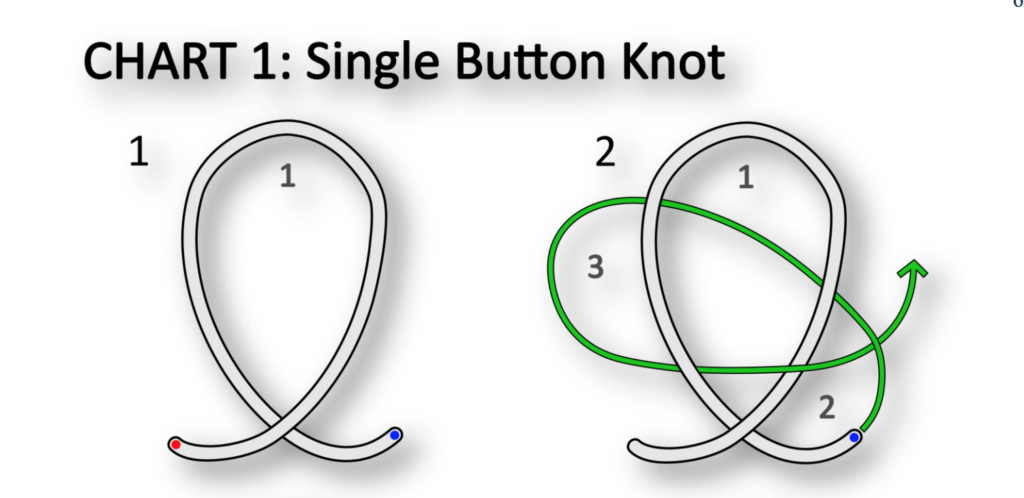
When you are making a frog, the knot is the place you should start. There are many web sites that show this. I like this one.
The end of her pdf has some really nice “step by step” drawings.
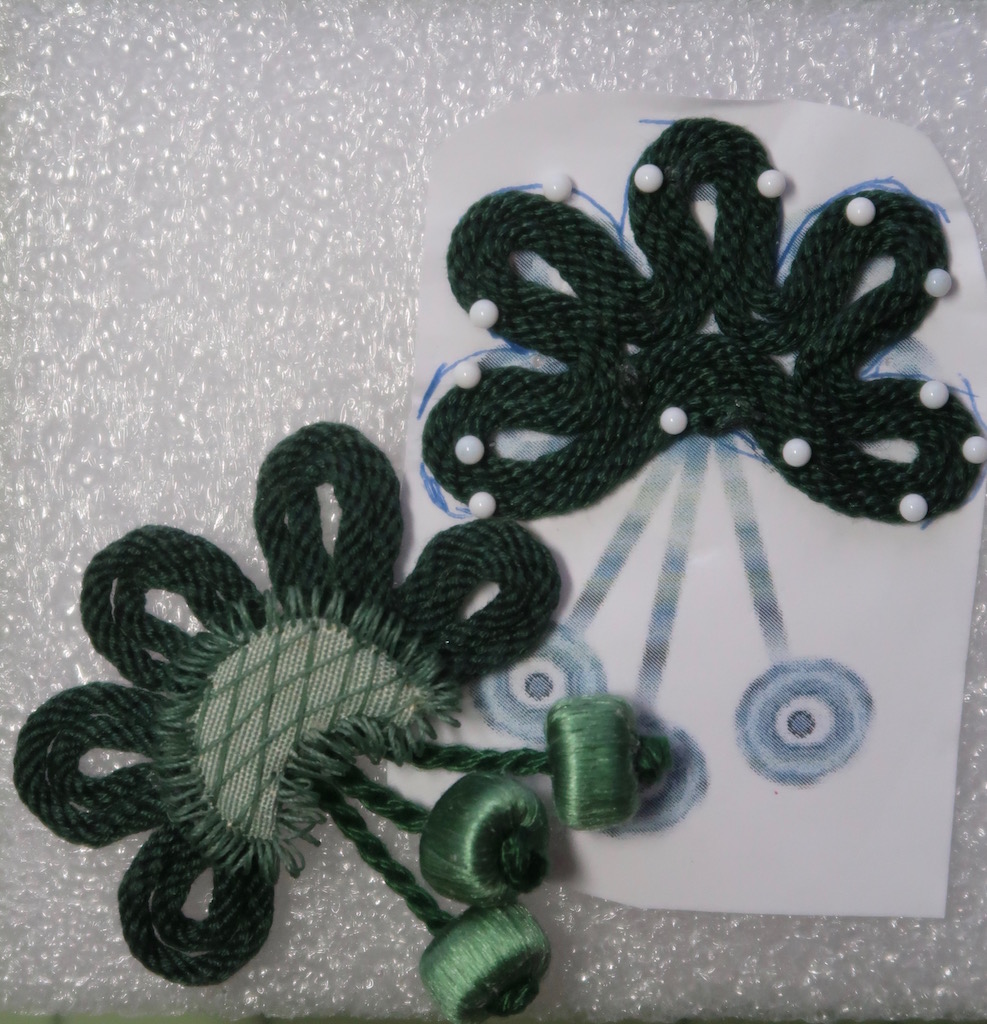
Once you have your printout (pattern) of the frog or appliqué place it over a 2″ thick block of styrofoam and starting with the knot (if you are using one) pin the cord over the printout following the curves on the print. Make sure when the cords cross that the cord in either under or over as with the original.
Note: you might not be copping another frog so you will need to make a drawing that notes the crossovers to use as a pattern.
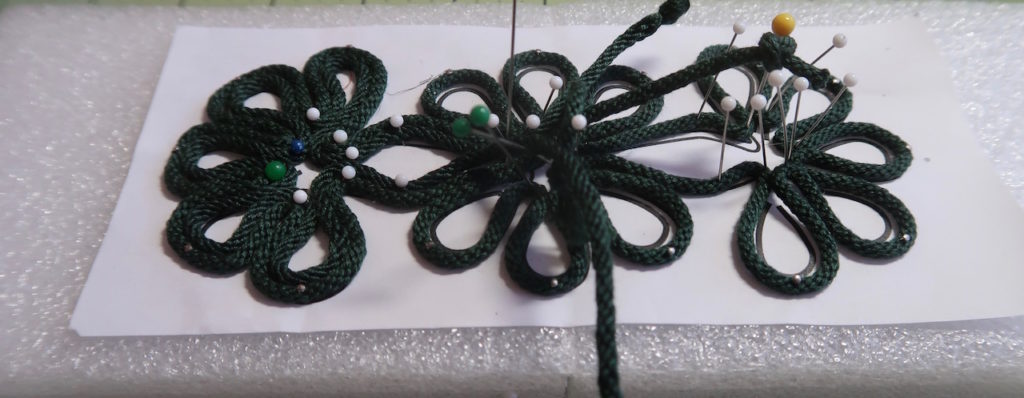
If you are working a double corded appliqué or frog you can work one or two of the cords at a time. I usually work one at a time, the outside one first then the inside one. When you are done push all your pins down to the cord level.

Add glue to the cut ends so they do not fray and glue of tack stitch down any crossovers. Just enough to hold things together. Note: this is shown after it has been removed from the layout block and has been tacked together.
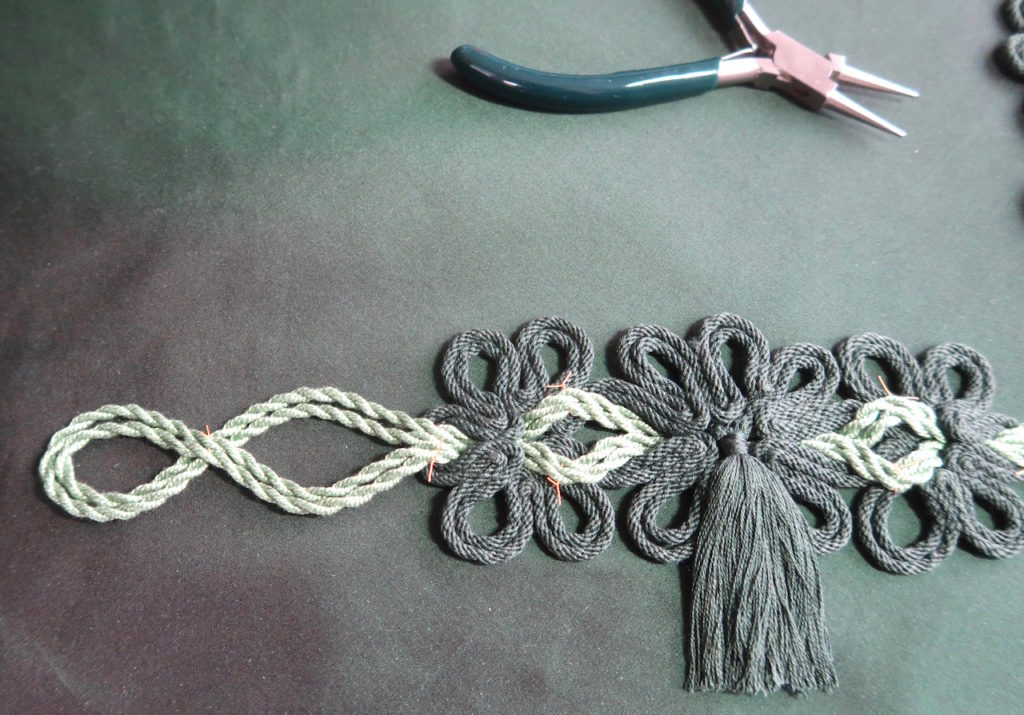
Sometimes you might have to layout your appliqué right side up as with this one with a tassel as part of the design. In that case I used temporary tailor tacks to hold the appliqué together until it can be laid out over the final fabric and appliquéd and or couch stitched on.
Note the round nose jewelry pliers, I use them to pull the needle thru to sew straight across the cord while it’s pinned to the layout board and if necessary while adding the finished appliqué to the fabric.
3) How should they be added to a garment ?
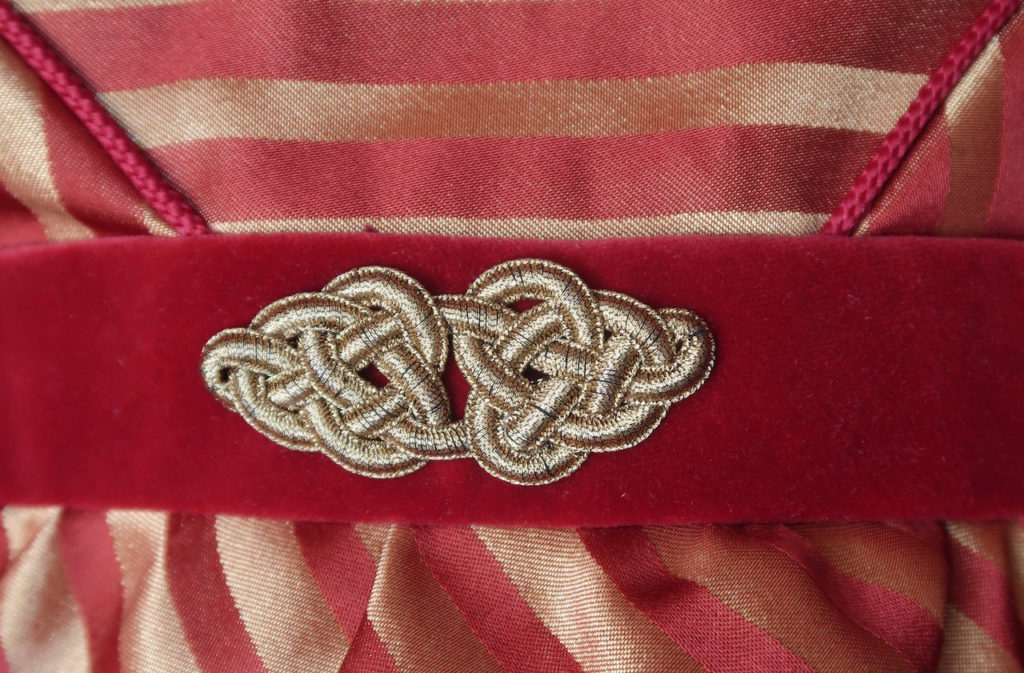
After the back has been tacked together it can be appliquéd to your fabric. If the appliqué has lots of crossovers you may only need to take a few stitches around the outside to hole it in place. But let the appliqué be your guide test it and if any part pops up then tack it down. I usually use a thread color to match the appliqué.
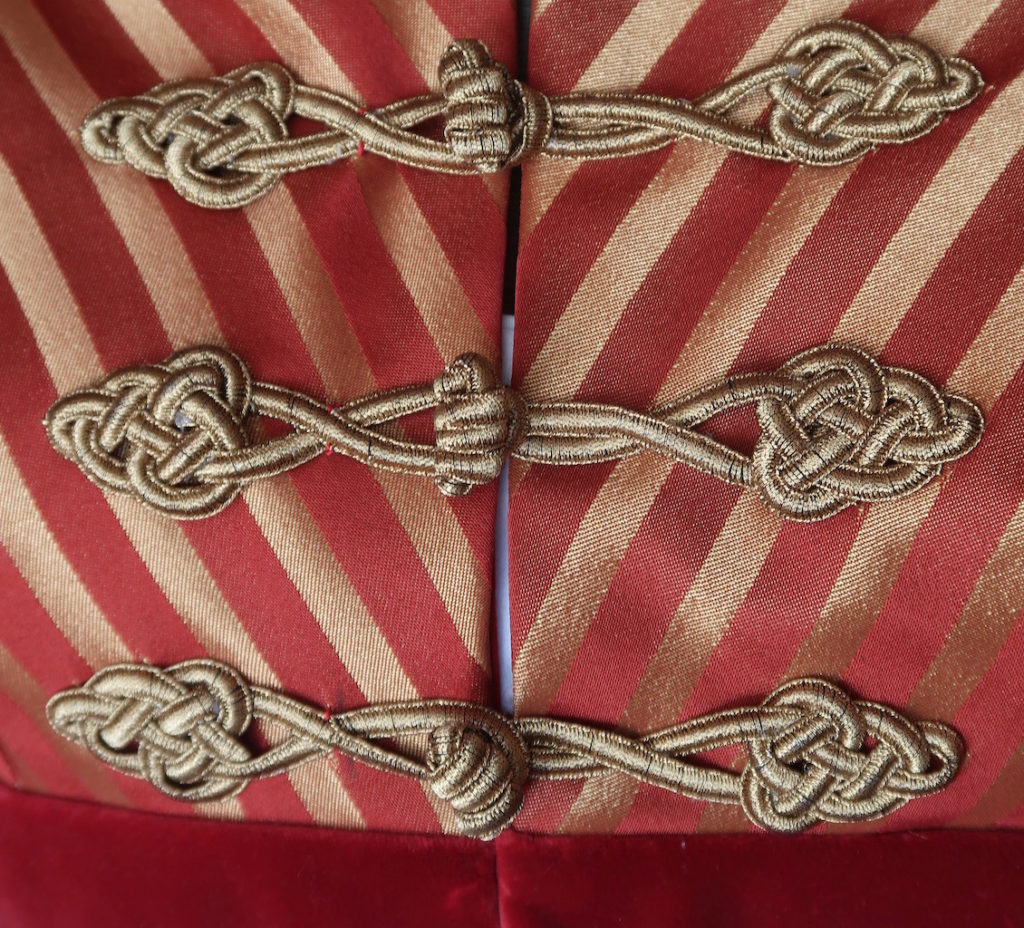
But when there is likely to be lots of pull on the stitching like the crossover point at the end of the loop and knot on these frogs I use a stronger thread (in this case red) to anchor that section of the frog.
Tips: 1) Making a frog or corded appliqué this was works well for compact ones, it is not recommended for large appliqués with very few crossovers and loops. If you don’t have crossovers and loops that you can tack together to hold the appliqué together you should just transfer your design to your garment and appliqué the cord directly on the fabric.
2) Making frogs and corded appliqués this is a very good idea if you need several that look very much the same. Trying to get 4 or 5 sets of appliqués the same adding them right to the fabric is not as easy.
3) Because you will after be wearing your cord under and over other cords it’s a good idea the figure out just how much cord each of you pieces will need so you do not have to pull a couple of yards cord under another piece of cord. I suggest that you measure the entire length of your cord, make one piece and then measure it again and subtract. For sure if your are making frogs with knots and loops the knot side will take more so you need a measurement for each side.