Three Hat Projects
Below are three different straw hats I have made by dying straw sunhats. One thing that can be a little annoying about using pre-made hats and not sewing your own straw plait (braid) together is that most modern sunhats are sewn together with a synthetic thread that does not take rit dye. It can be barely noticeable in the finished hat or distracting. I recommend that you start with a colored sunhat close to the color you want if possible.
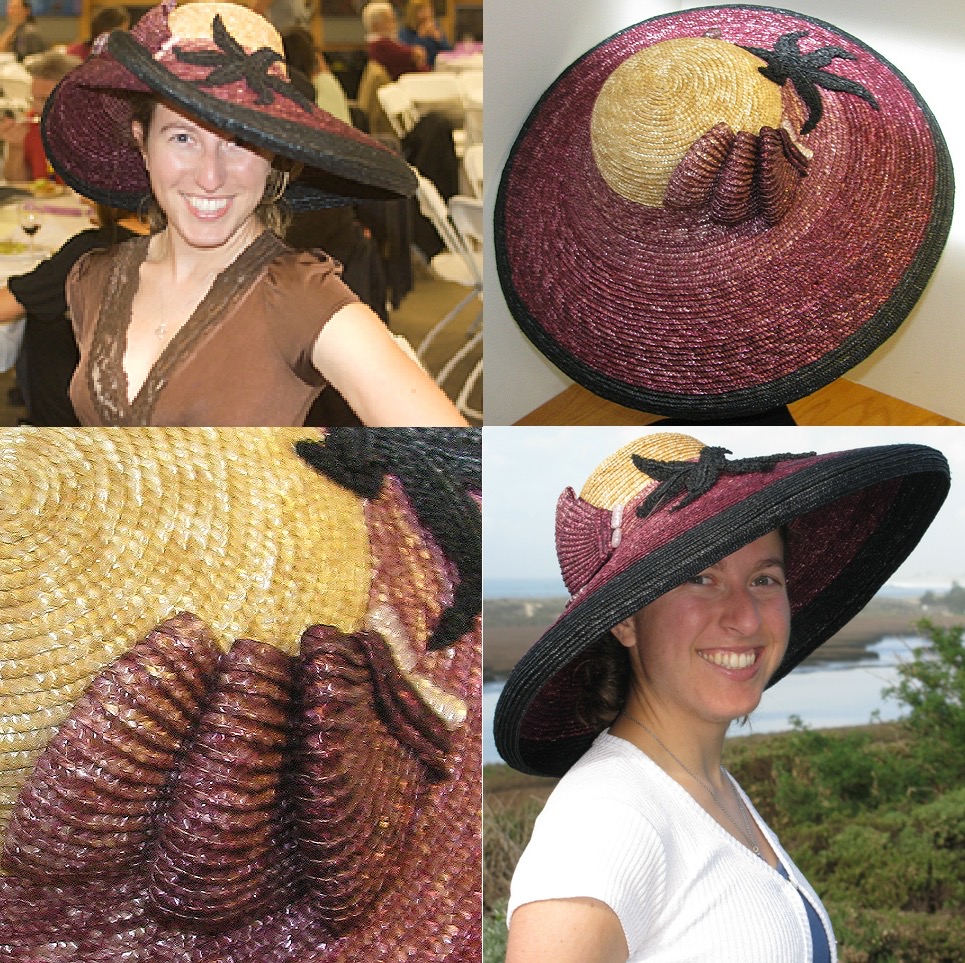
Hat 1; a multi-colored hat.
I wanted to make a straw sunhat with bands of color after seeing two examples of such hats in the book “Women’s Hats: IL Cappello da Donna” by Adele Campione. The hats had been made in Italy from the late 40’s early 50’s. It took me 10 years to get to it but this project is my attempt at making something similar.
Before I was brave enough to dye the straw for the hat I did a couple test. Above was the first test. I just used two short strips of straw plait in a small amount of liquid Rit dye (wine) one of the strips was left in the dye bath for a half hour and the other for an hour.
The second test was with the dye bath that I was going to use for the hat. It was made up of a full bottle of the liquid Rit dye and about four gallons of water at a slow simmer. I used a leftover band of straw about 15 rows from an 1830’s bonnet. First I left it in the dye bath for 15 min. and cut about 1/3 off and added the rest back for another 30 min. then cut that in half and left the last third in for another half hour. All the pieces where rinsed and left to dry. I was happy!!
I started by deconstructing a new modern sunhat. After a test I guessed that I could get at least three different shades of color from the same Rit dye, I also planned to leave the crown natural and I had some black straw plait for the outside edge this means that I could have 5 bands. I marked with a pin the places where I wanted the color to change. I didn’t make them even; they get narrower as they go to the outside. I started pulling the chain stitch that holds the straw together on the outside edge of the hat. When I got to the first pin I cut the straw but not the thread I keep pulling that until the next pin. Here I cut the plait and the thread. Then up by the next pin I cut the thread and pulled the chain stitch until it came full around and back to the pin. Now I cut the straw plait to separate the crown from the narrowed brim. This section of the brim stays as is without the chain stitch pulled. At this point I had four things; one crown, a small brim, two piles of straw plait one larger than the other.
I then put the brim and the strips of straw in the dye vat. I took the brim out at 15 min., the smaller bundle of strips out at 30 min. and the rest at an hour. There was still some dye left in the vat so I used it for another project.
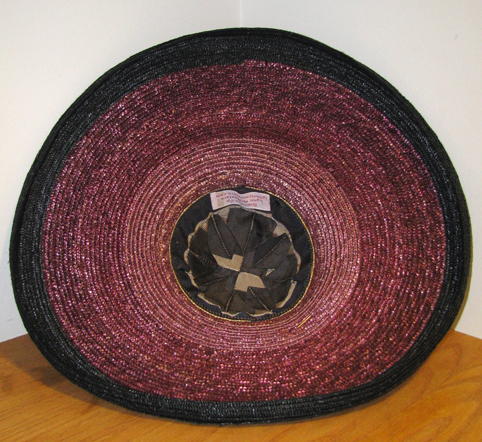
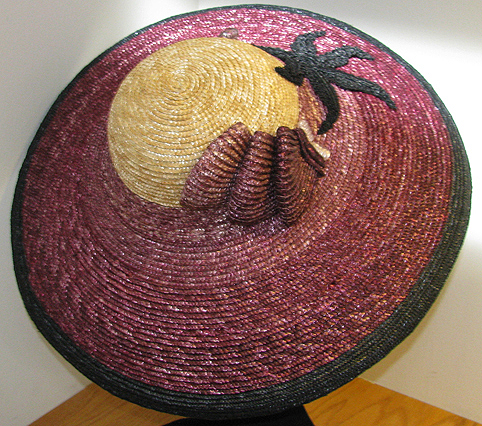
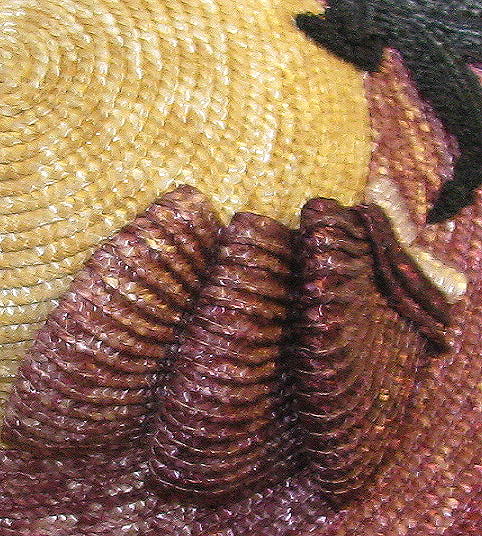
It is a little easier to see the bands of color from the underside. When all the straw was dry I sewed the 30 min. straw to the brim then the hour straw to that then a band of about 10 to 15 rows of black straw to the outside. The brim and crown where sewn back together at this point. The black straw curls in on itself a little. That almost happened without my help but I did have to steam block it over a thick cord to get it to be regular all around the edge. Black millinery wire was sewn after the blocking and helps maintain the shape as well as some gelatin sizing I brushed onto the under brim.

To make the lining for this hat I used a wide two color vintage petersham folded into points and tacked together on point. It made a very interesting design. The sweatband was made with all but 1/4 ” of the lighter color pressed over. The full width of the ribbon was just too wide to use.
The black starfish decoration is a vintage French piece I bought at Lacis in Berkeley. The straw shell decoration I made up from my test pieces. It seemed a shame to waste the straw so I just started fiddling with it until I came up with this. I wasn’t thinking shells but it worked out very well because this hat was made for a charity auction for Friends of Moss Landing Marine Labs. The decorations are sewn onto the hat with clear nylon thread so that the stitches would not show on the underside of the brim.
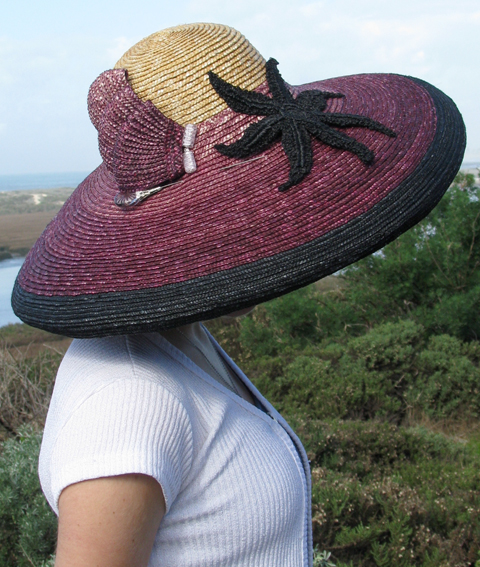
It’s a little difficult to tell in the photo but I continued the marine theme with the hatpin. I found a fantastic blown glass bead with a flower that looked like a purple anemone at my local Beverly’s and added it to a sharpened brass rod with a flattened aglet at the base of the glass bead.
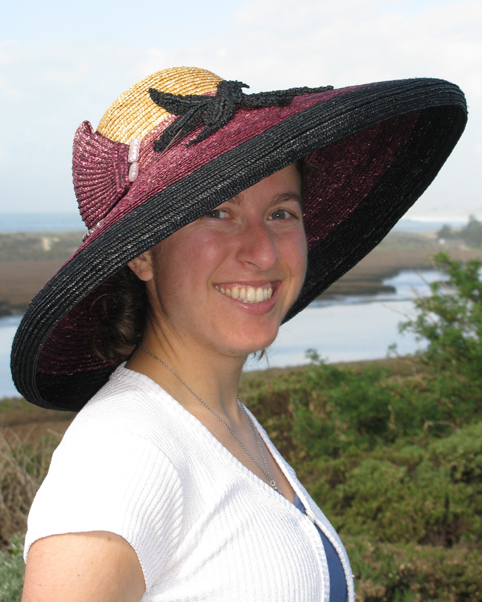
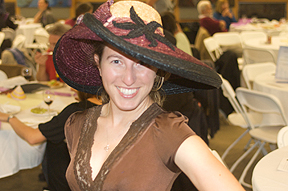
It takes a good hat model to get a good price at an auction and Amanda fit the bill. The hat was sold for a very good final price with brisk bidding. Thanks Amanda.
Just a note: the hat does look good worn this way but I should have rotated it just a little counterclockwise to bring the pink beads into the center front. I think I was thinking more about the lighting than the hat when taking these pictures. One trick that you might want to use when taking pictures of large brim hats in natural light, turn your camera upside down and use the flash. The flash can then fill in the face which would be in heavy shadow otherwise.
As I said it takes a good hat model, here is a picture of Amanda at the auction. The long hatpin worked very well to pin up the outside edge of the hat to turn it into something much more stylish. Photo by Thew Suskiewicz.
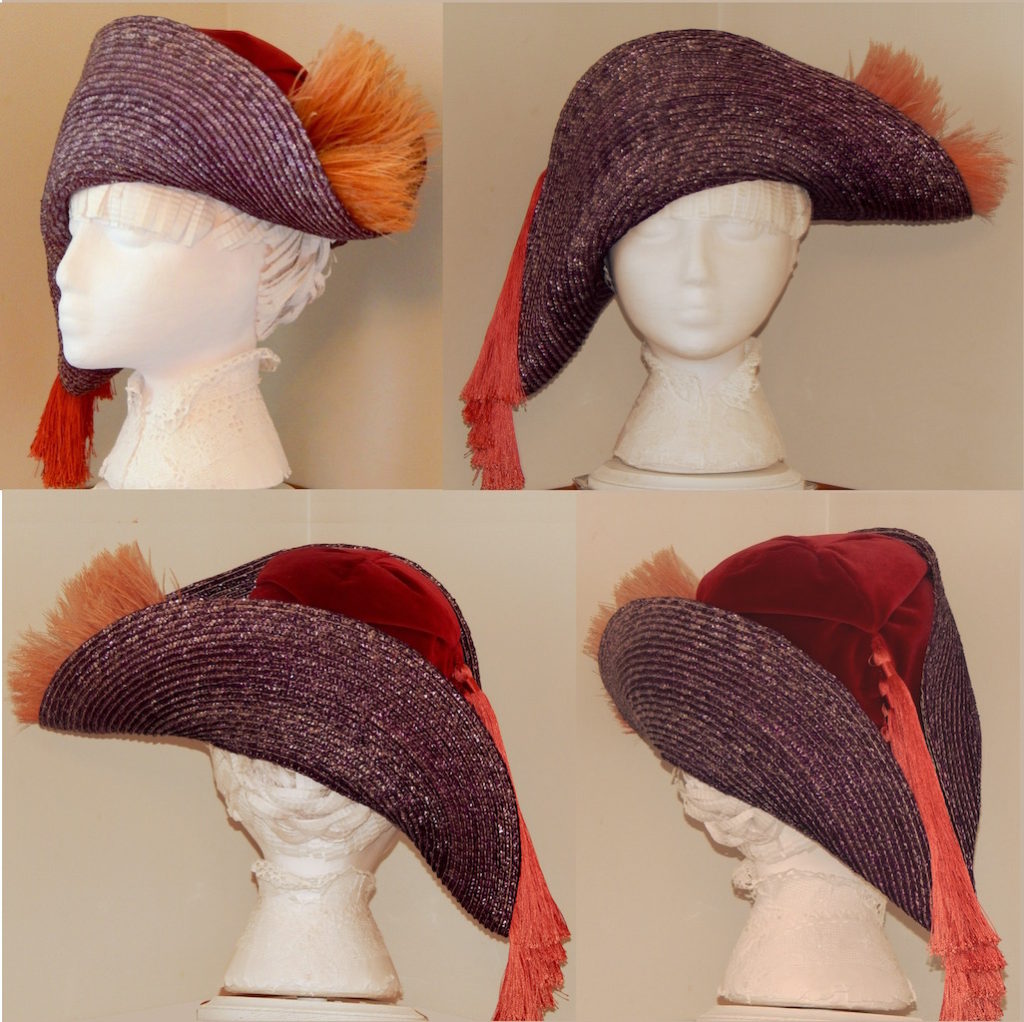
Hat 2; a single color for an intact hat.
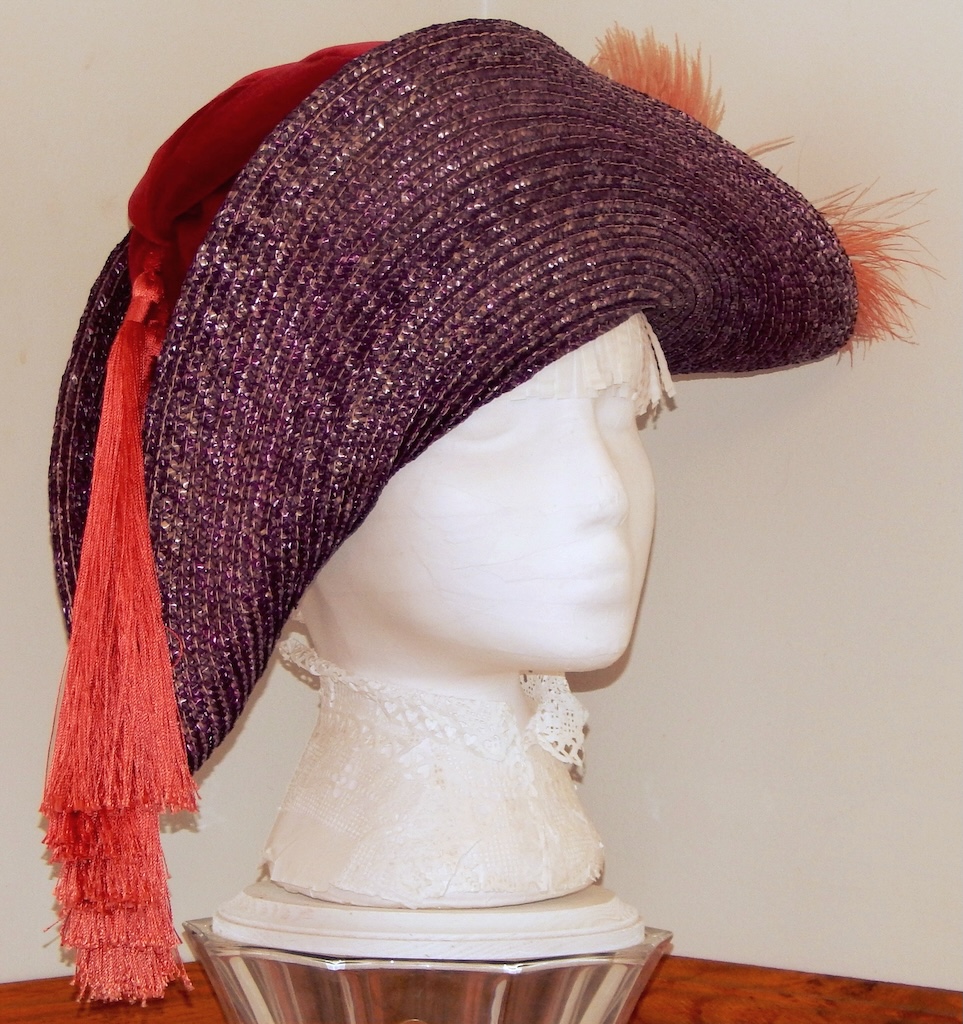
This Edwardian Bicorne hat was made from a modern straw sunhat. The entire sunhat was dyes at once in a strove top dye vat with liquid Rit purple dye.
I have a canning pot that I use only for dyeing. it is enamel coated so there are no metals that can interfere with the dye. I soak the straw I’m going the dye. This time as added some loose straw plait along with the hat.

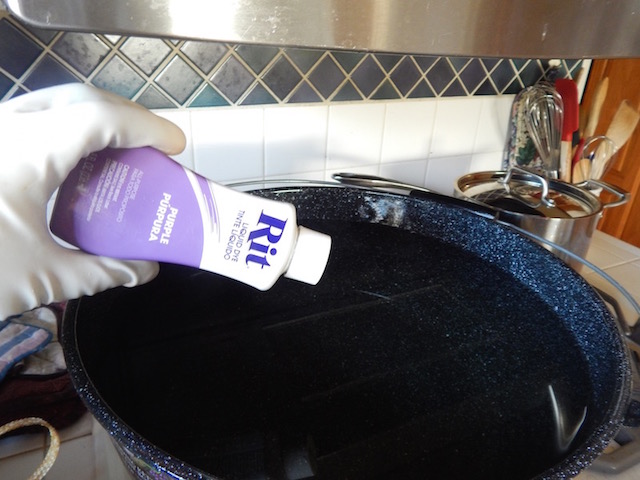
A add the liquid dye. It is difficult to say just how much to add for one hat. I often use 1/3 -1/2 a bottle for a single hat, it most likely is a little overkill.
When the water comes to a low simmer add the straw and stir for the first few minutes.
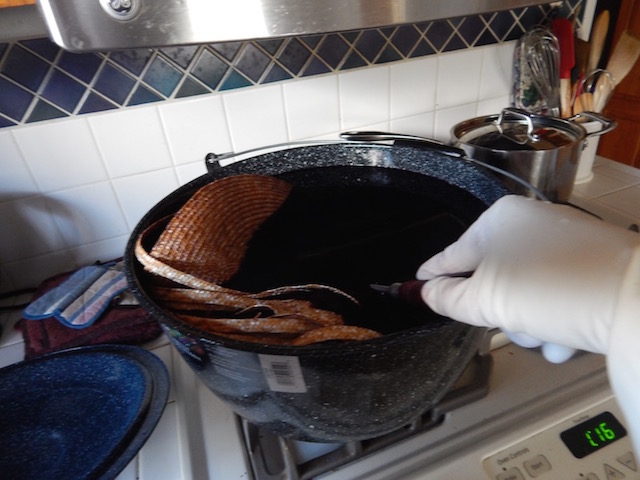
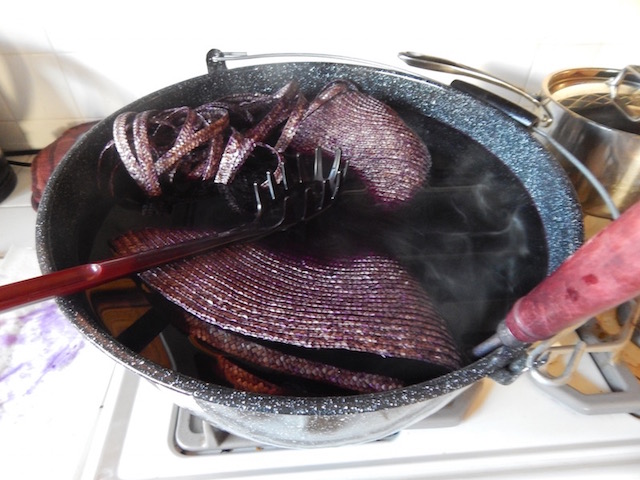
When it starts to take on the color made sure the entire hat is below the water line.
I often use my stirrer to weight down the straw.

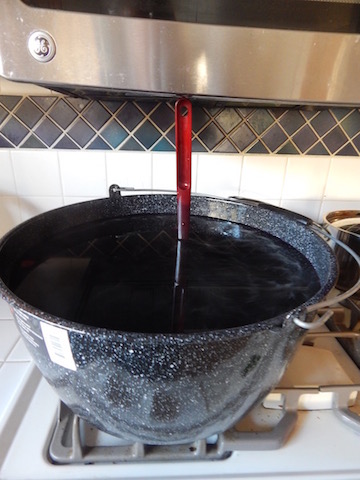
This involves wedging it under the microwave. But if you have an clean brick or a ceramic plate you are willing to keep with your dying equipment that works well.
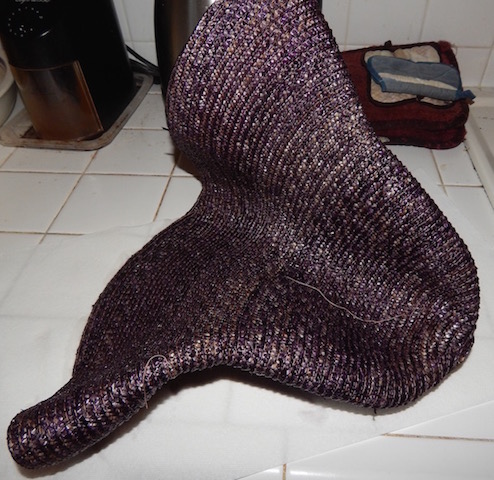
Getting a saturated color usually takes about 1 hour at that low simmer. When the hat is the color you want remove it carefully with something under to catch the drips. Rinse it in the sink until the water runs clear. Then it is ready to block. One thing to note, for this hat because the brim is turned up. I blocked the hat inside out and covered the entire crown with fabric to hide the inside of the straw which is not on the outside.
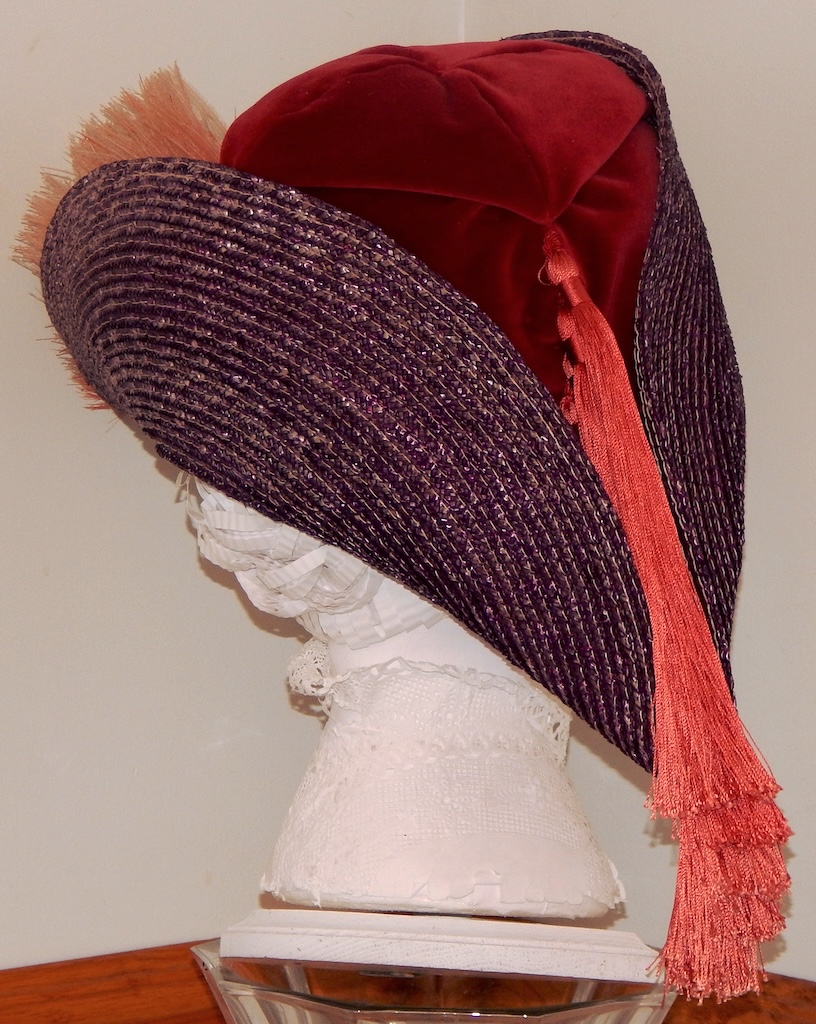
I added 4 vintage long tassels down the side of the crown fabric. The velvet crown covering fabric was sewn together in 4 sections so that it had points which made this possible. I sewed all the other points down onto a similar point as the one with the tassel. The other tassels are added along the side seam. On the other side of the hat I added a vintage ostrich feather double pompom ornament..
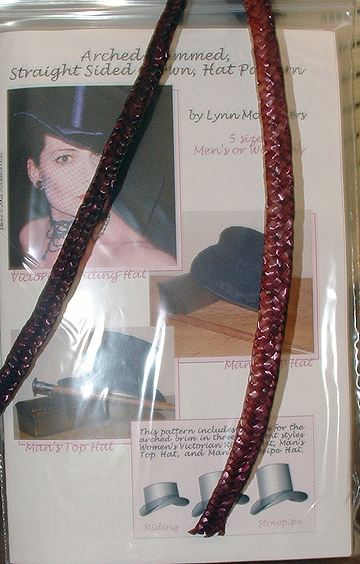
Hat 3; an Over Dyed Hat.
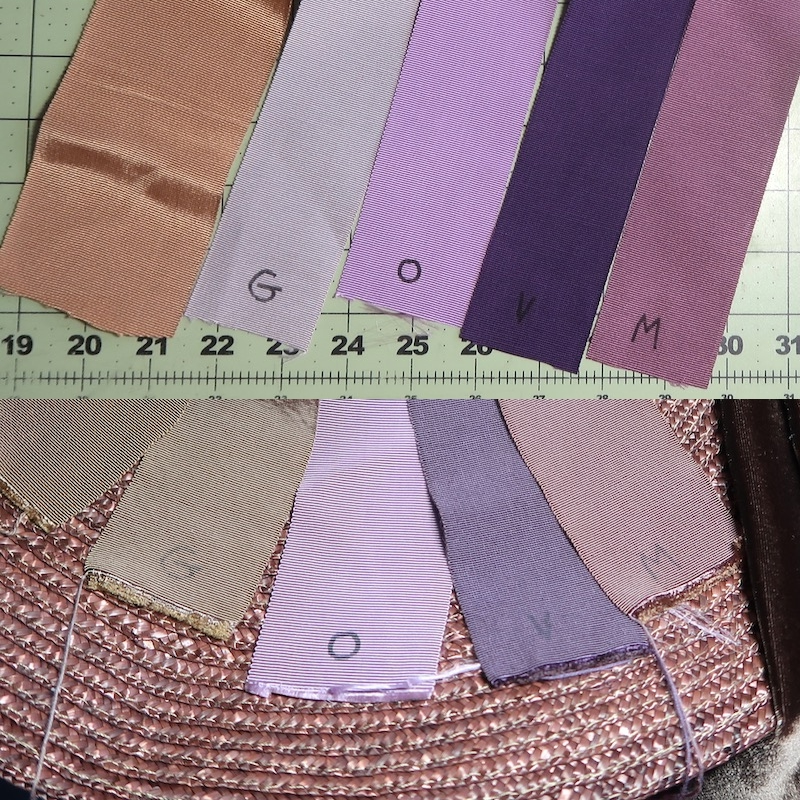
As I said in the introduction the thread ofter does not dye so for this hat I started with a brown straw sunhat (at the bottom of the photo.I was also using dye to dye petersham ribbon for this project.
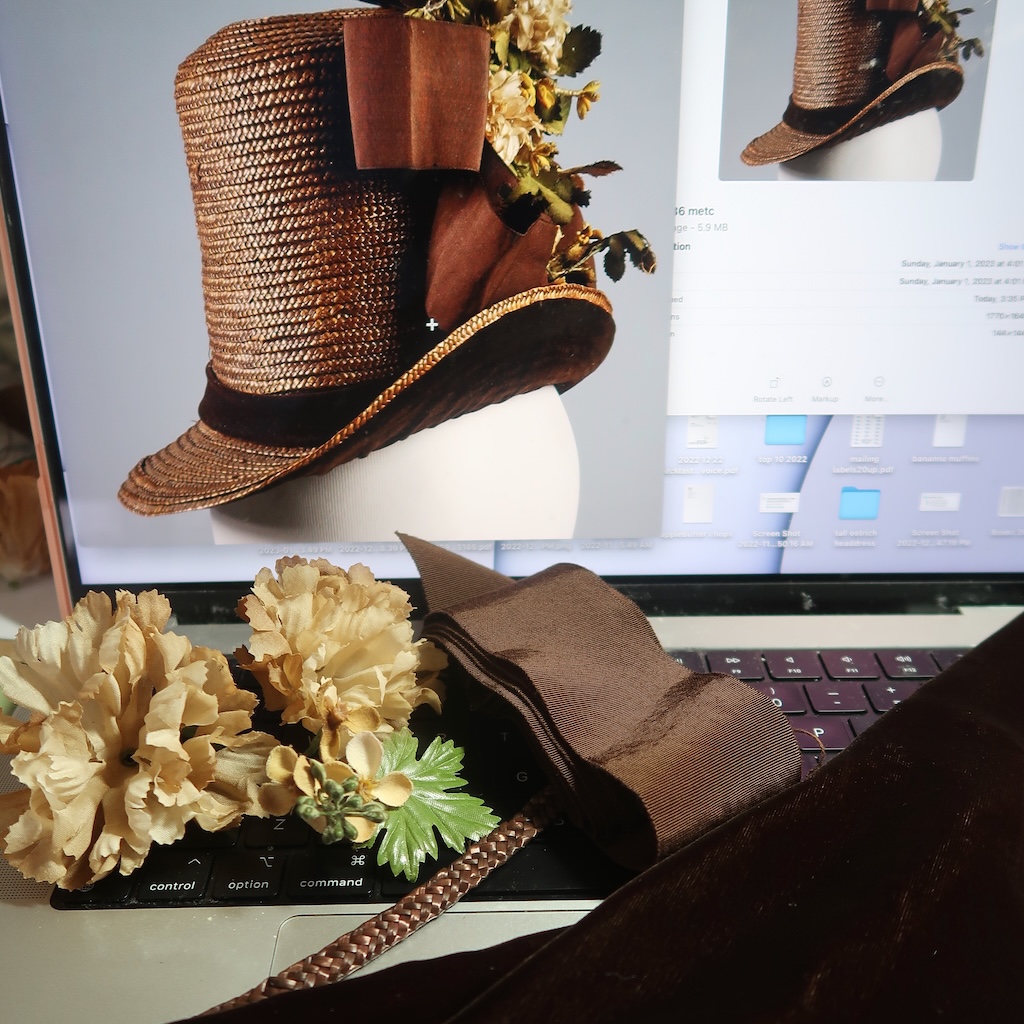
The computer screan shows the color of the museum hat I wanted to copy so, I had something to compare my items with. My brown hat was not dark brown enough therefore, I needed to over-dye it. I used instant coffee to dye the white silk flowers to the light brown you see in the picture I. And the same Rit brown dye for the ribbon and straw.
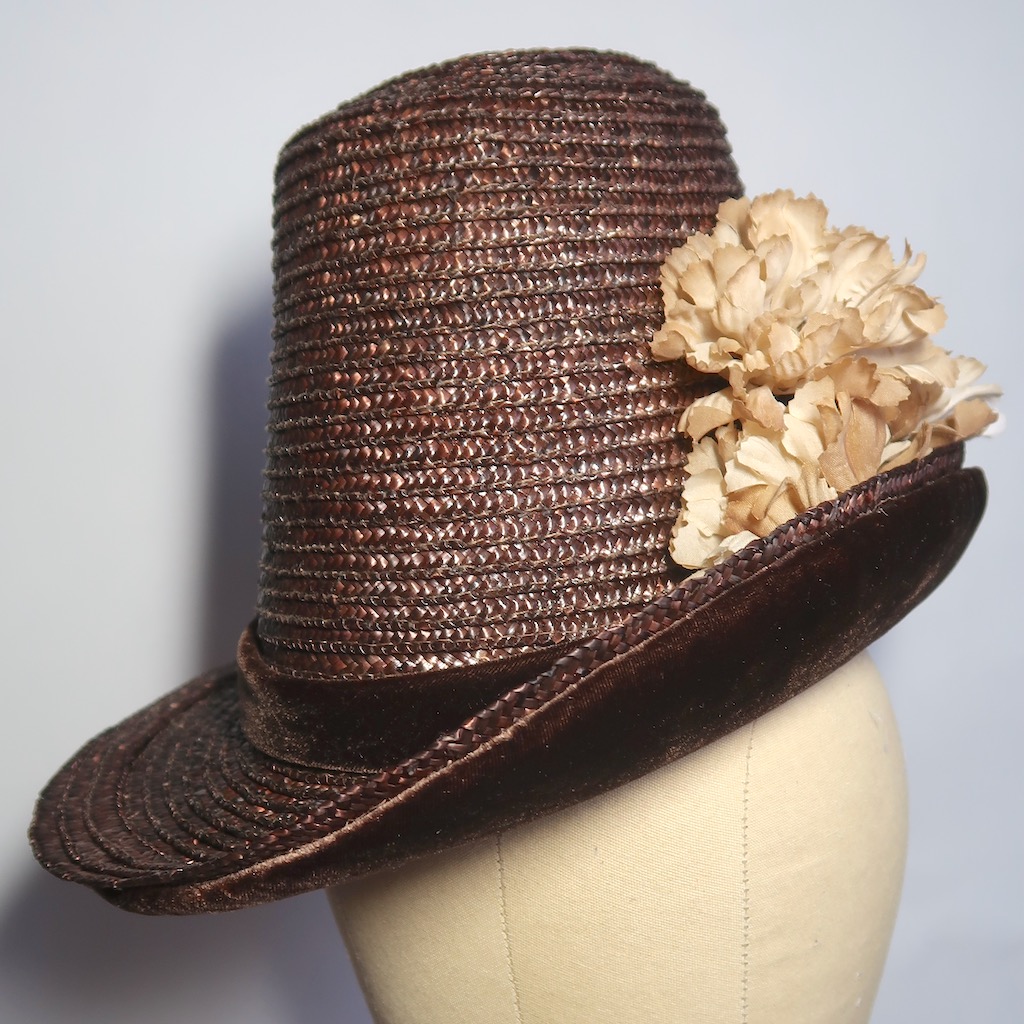
I used the same dye pot, time and simmer as with the other hats. Here is the hat after I blocked and dyed it. Also I sewed velvet onto the underside of the brim as with the original.
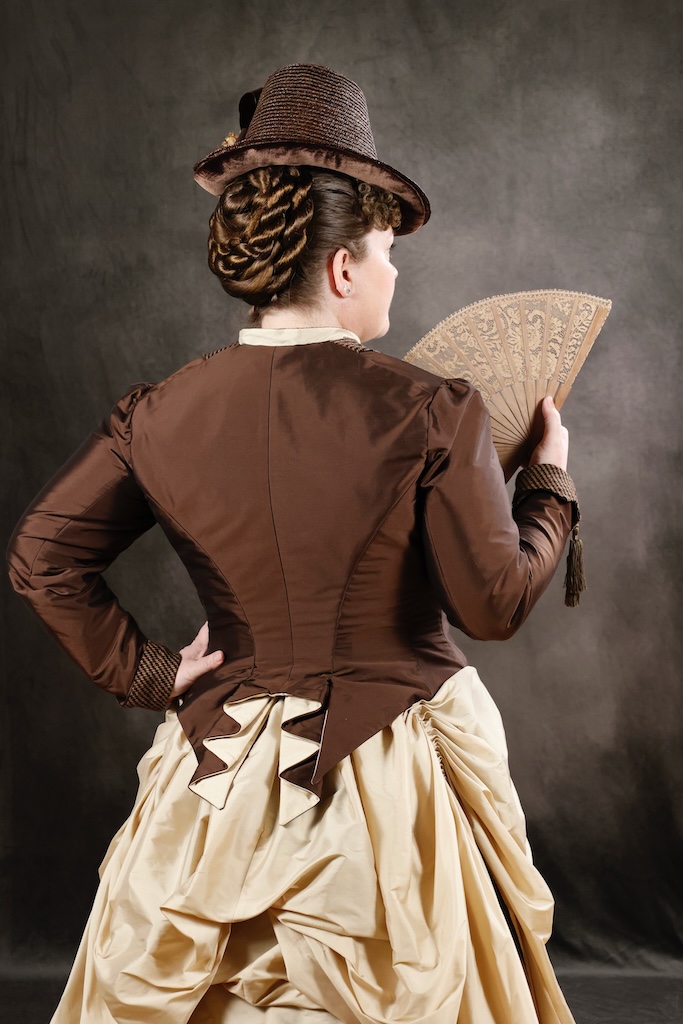
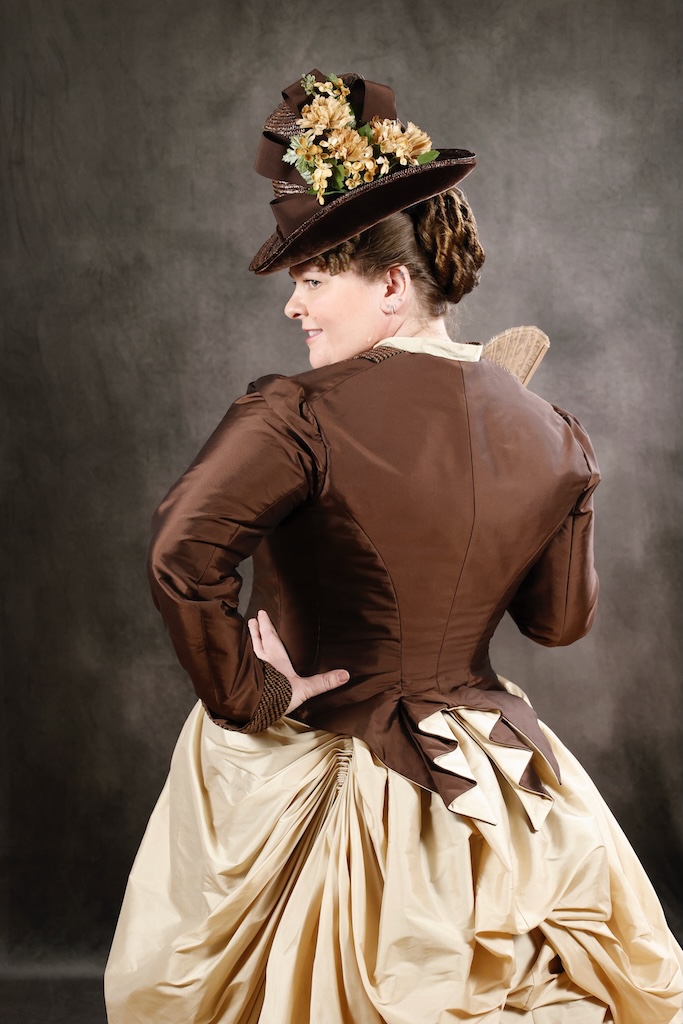
Noelle Paduan, modeling the hat in her brown bustle gown.
Hat 360°