This was the goal to create this hat. I decided after studying the original Fashion plate from Ackermann’a Repository, that it would be best to make this “one of a kind hat” with a wireframe structure covered with silk fabric. If I was a Milliner in the early 1800s I might have chosen to make it with a blocked straw structure covered with silk fabric. But to do that I would need to first make a wooden block which would have been too much work for a single hat so, wireframe it was.
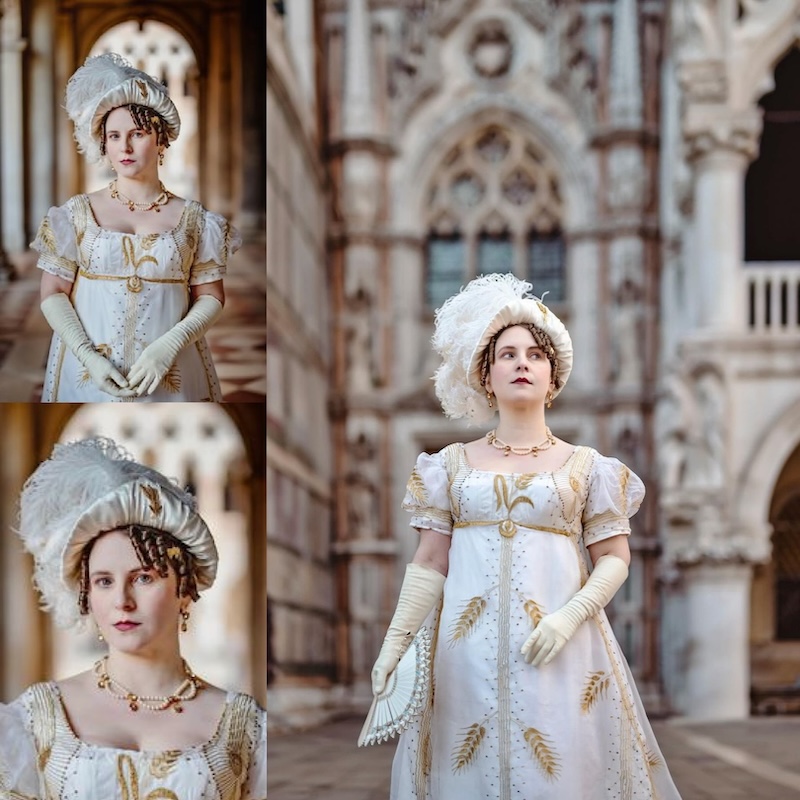
Laurie Tavan in San Marco square, Venice. Photos by Laure Jacquemin ©2024 used with permission.
Studying the original:
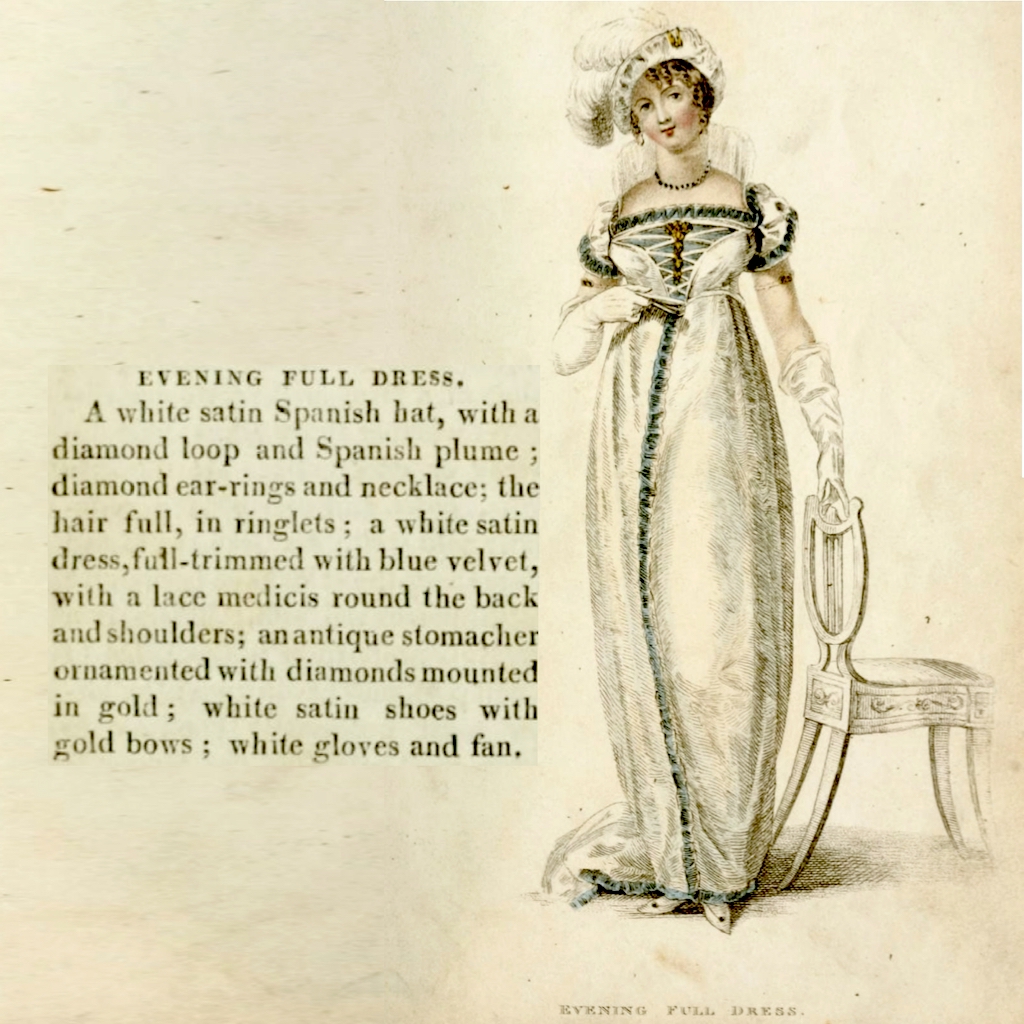
An Evening dress from Ackermann’s 1809 Jan-Jun edition. In the figure caption they called this a Spanish Hat which gave me the idea that it might have been inspired by a Spanish metal helmet which gave me the idea to have the crown have a ridge down it’s center.
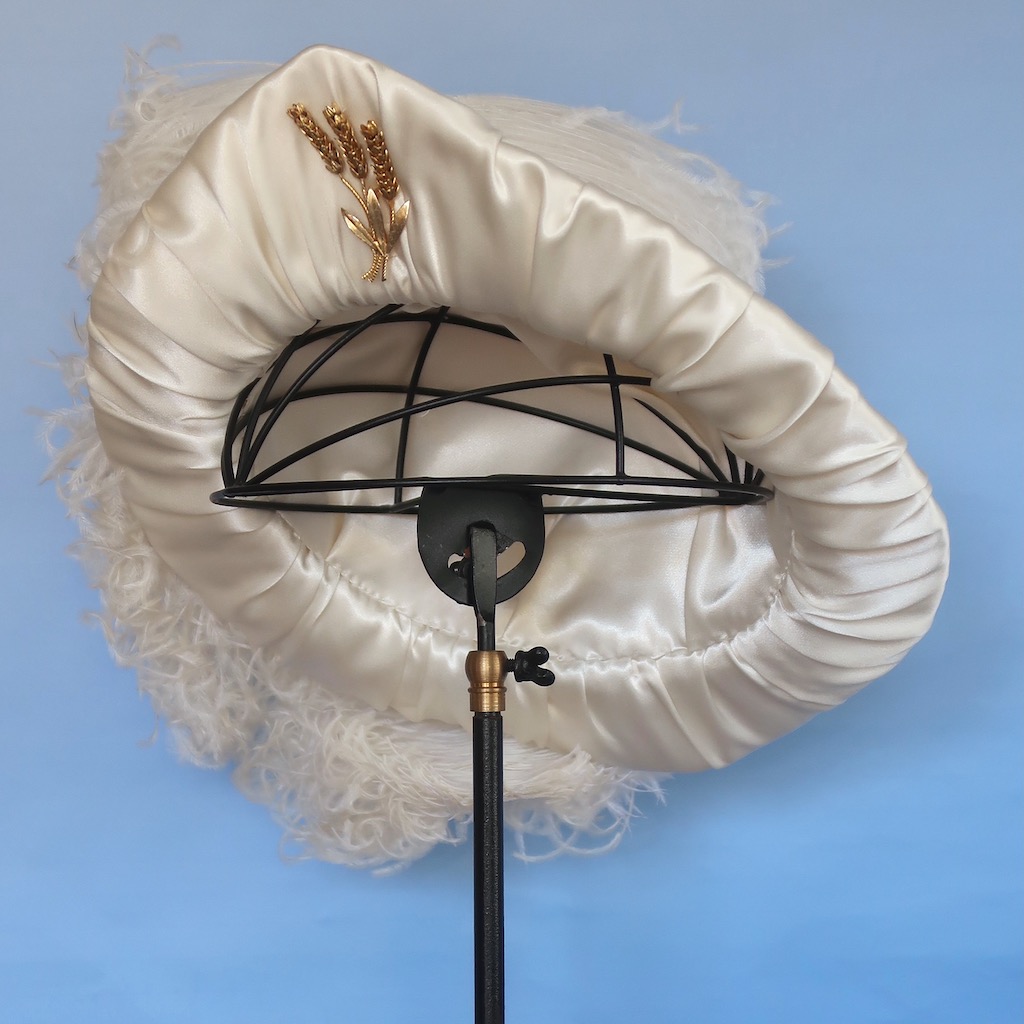
To get the approximate width of the brim I enlarged the fashion plate inside a drafting program to life size and measured the width of the crown various places. My first step was to create a 3/4″ band that will fit Laurie’s head size. By adding two medium thickness thread covered wires around a wig head (at the angle the hat sits in the fashion plate) and keeping them spaced with pins. I used ribbons to grid the crown into 16 sections by adding 8 black ribbons from side to side across the crown.
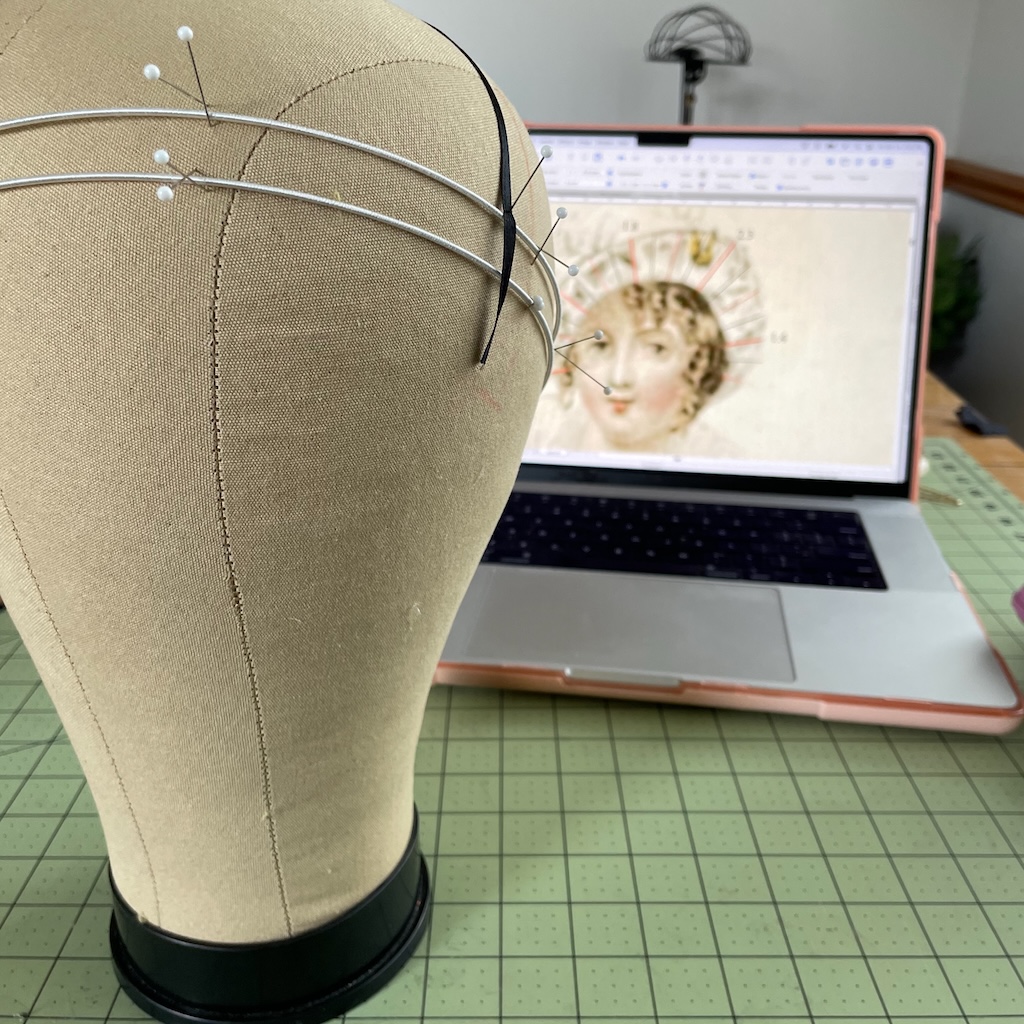
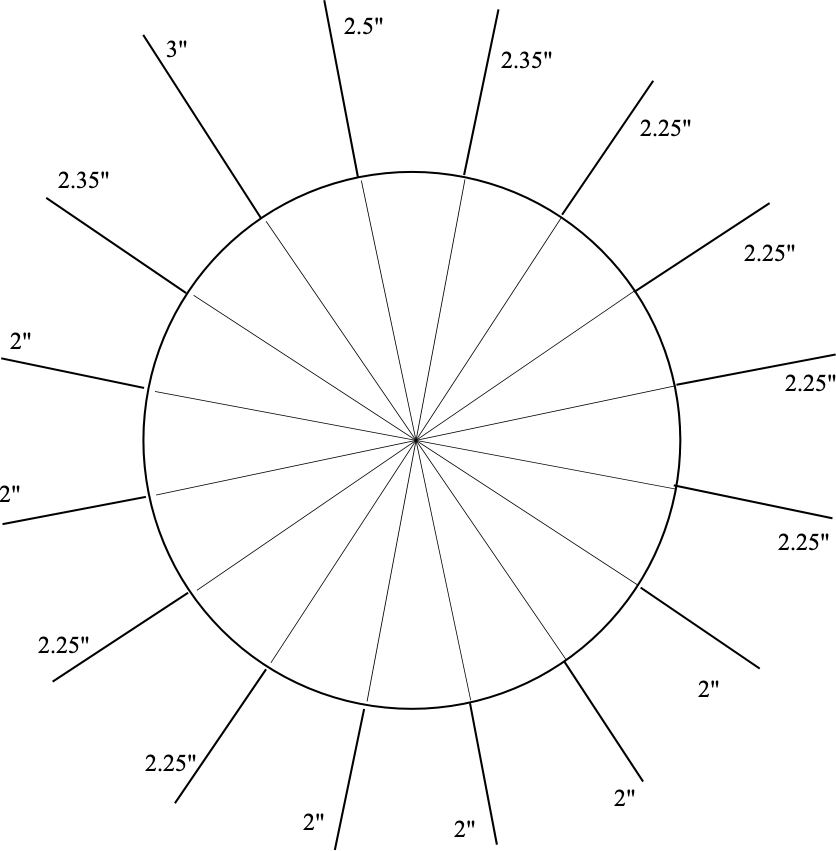
I marked the places along the white wires where wires have to be added by marking where each end of the ribbons met the white wires.
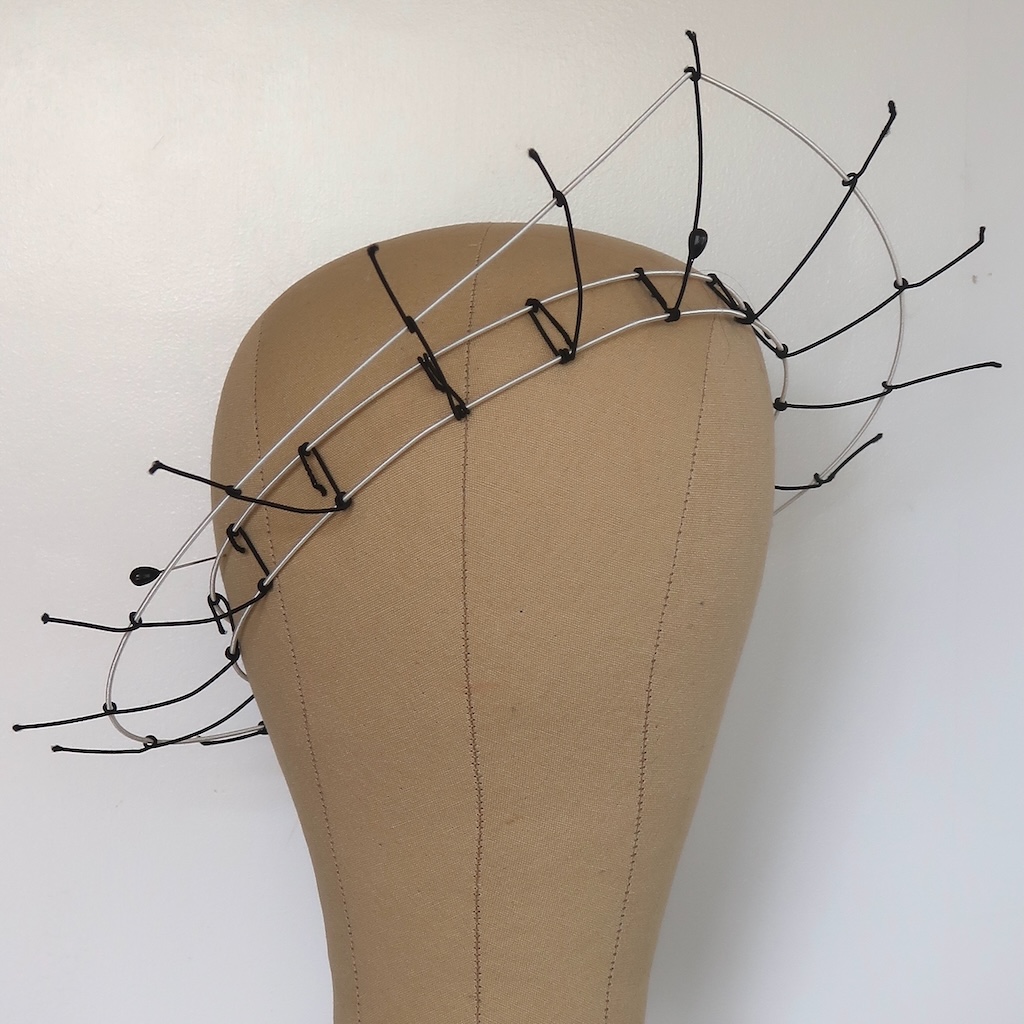
This is what I came up with for my first try. No more than 3″ wide at it’s widest and no more narrower than 2″ in the back.
Making the Wireframe:
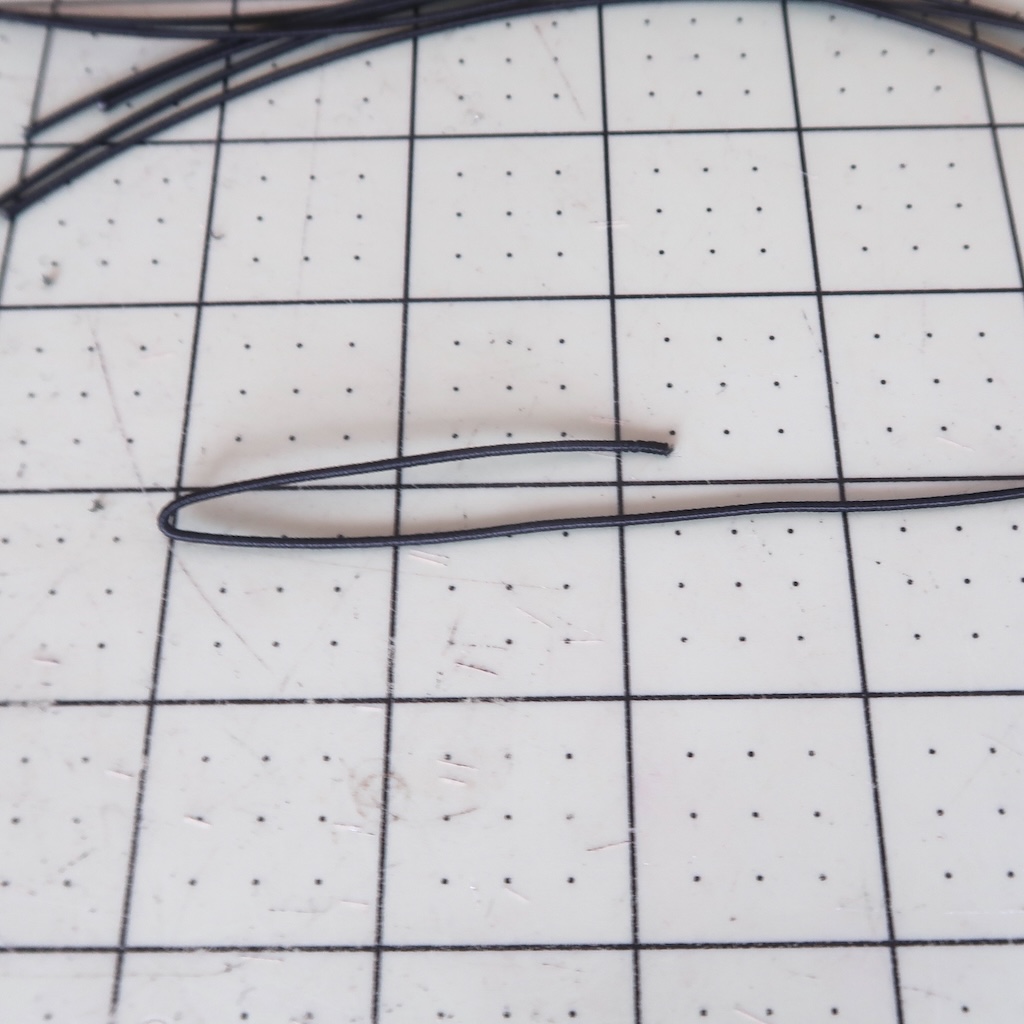
I cut 16 pieces of my slightly thinner thread covered wire. They were cut at `6.5″ and folded over at 4″. That way they can be cut to length after they were added to the two double wires for the band.
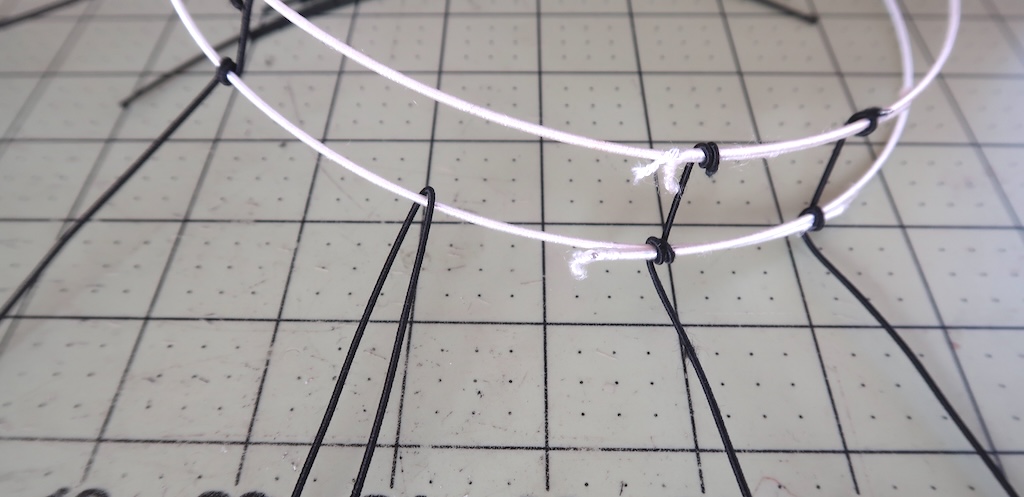
The first step in adding the wires that will hold the band together, create the brim and hold the brim edge wire is to slip one of the cut and folded wires onto the lower band wire with the longer half along the bottom.
Then the short upper half of the wire is rotated around the white wire twice, ending inside the band.
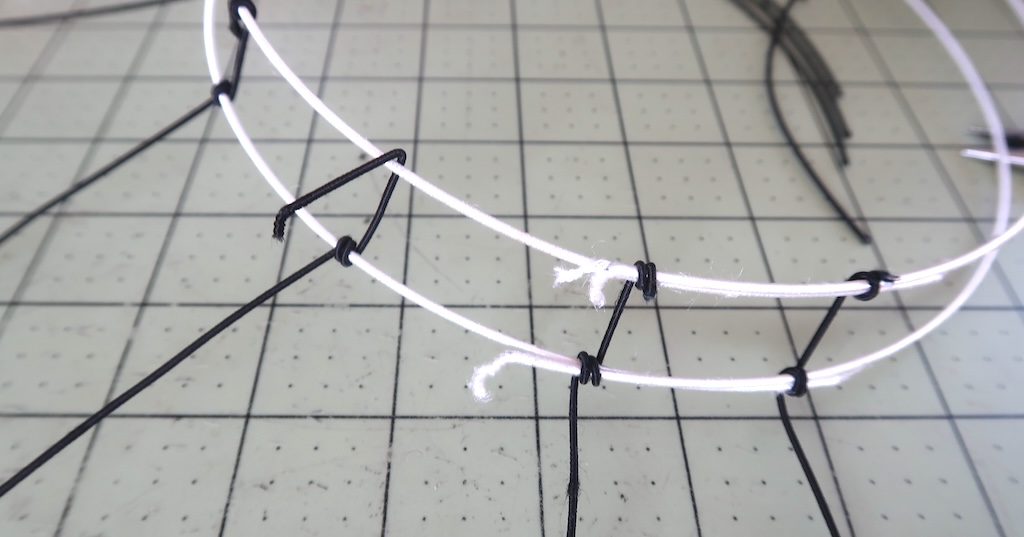
Then the short wire is bent into a 90° angle around the upper wire. You have to make sure the bent is at the right place so that the 3/4″ distance between the two white wires stays the same.
The end of this wire is wrapped around the upper band wire twice ending up pointing straight down. The extra end of the wire is trimmed off.

If any of the wraps of wire are not tight to each other pliers were used to pinch and aline them.
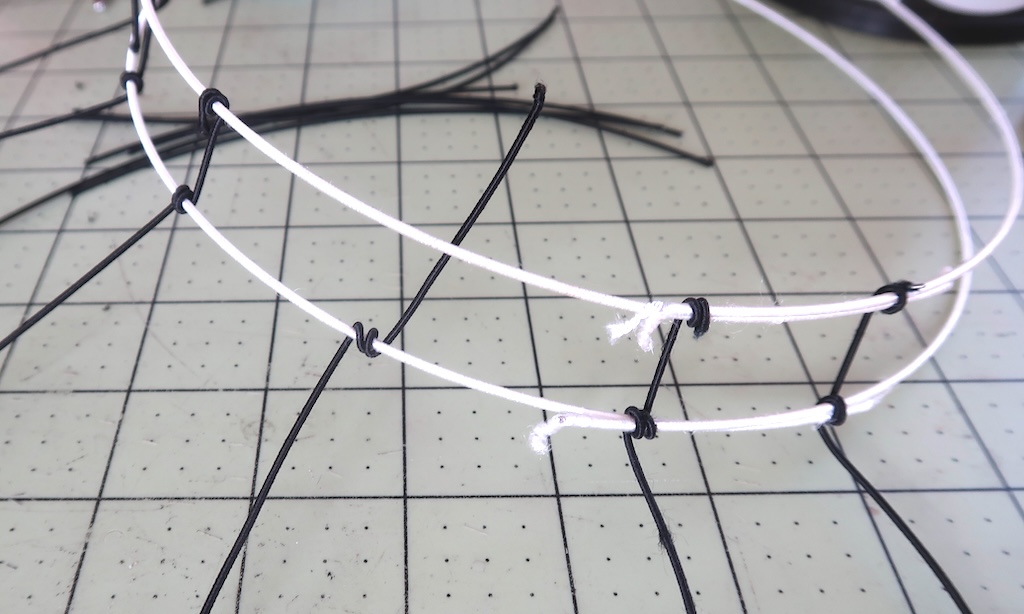
A gentle curve was added to each wire. Chalk marks were made on the wires to the guesstimated length between the band and the outer edge wire. Then a long white wire was shaped, slipped into place and temporally clipped to the black wires. When I liked the shape I wrapped the ends of the black wires around the heaver white wire twice.
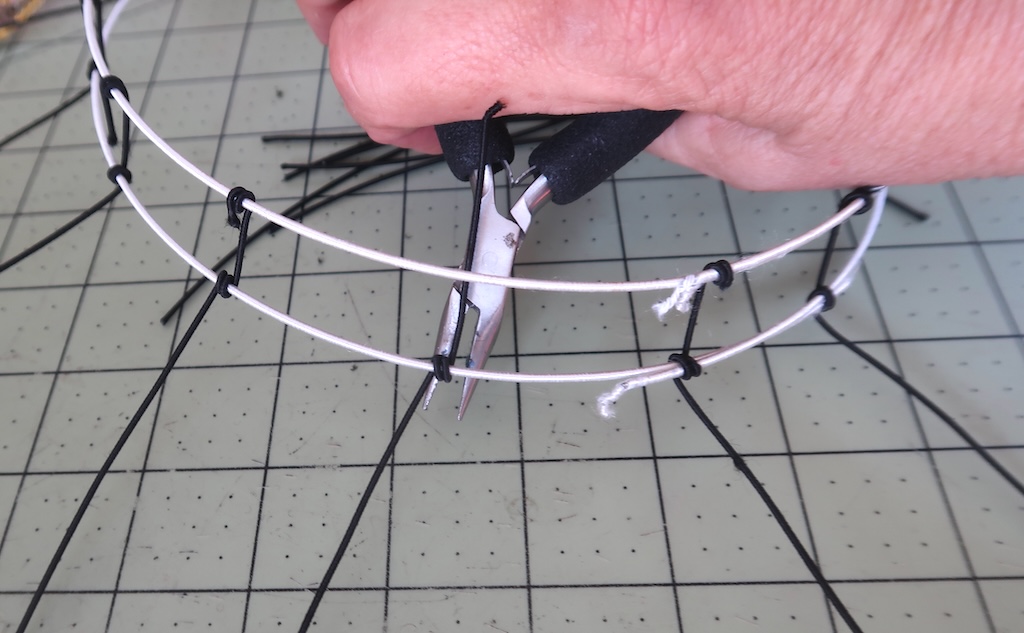
When sure about the final shape I folded the ends back towards the band and trimmed them. Up to the trimming point it was possible to un-wrap the wires and readjust. This was something I did a few times when the white wire was being pulled out of shape or, the black wire was not at the right angle.
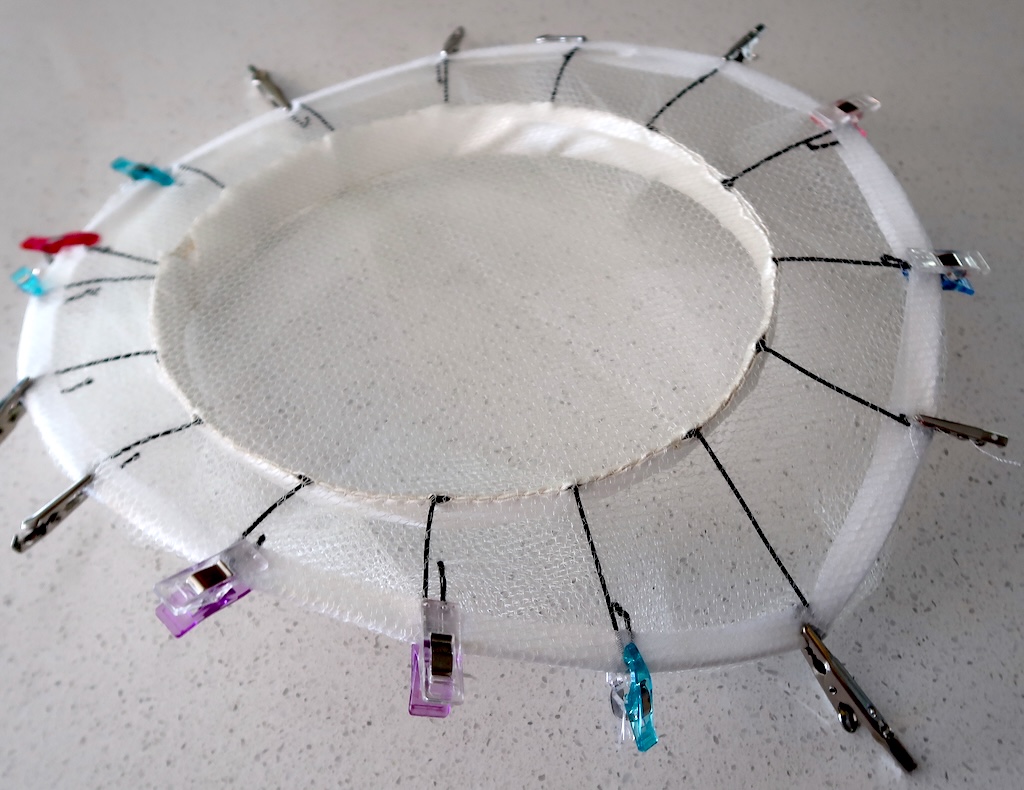
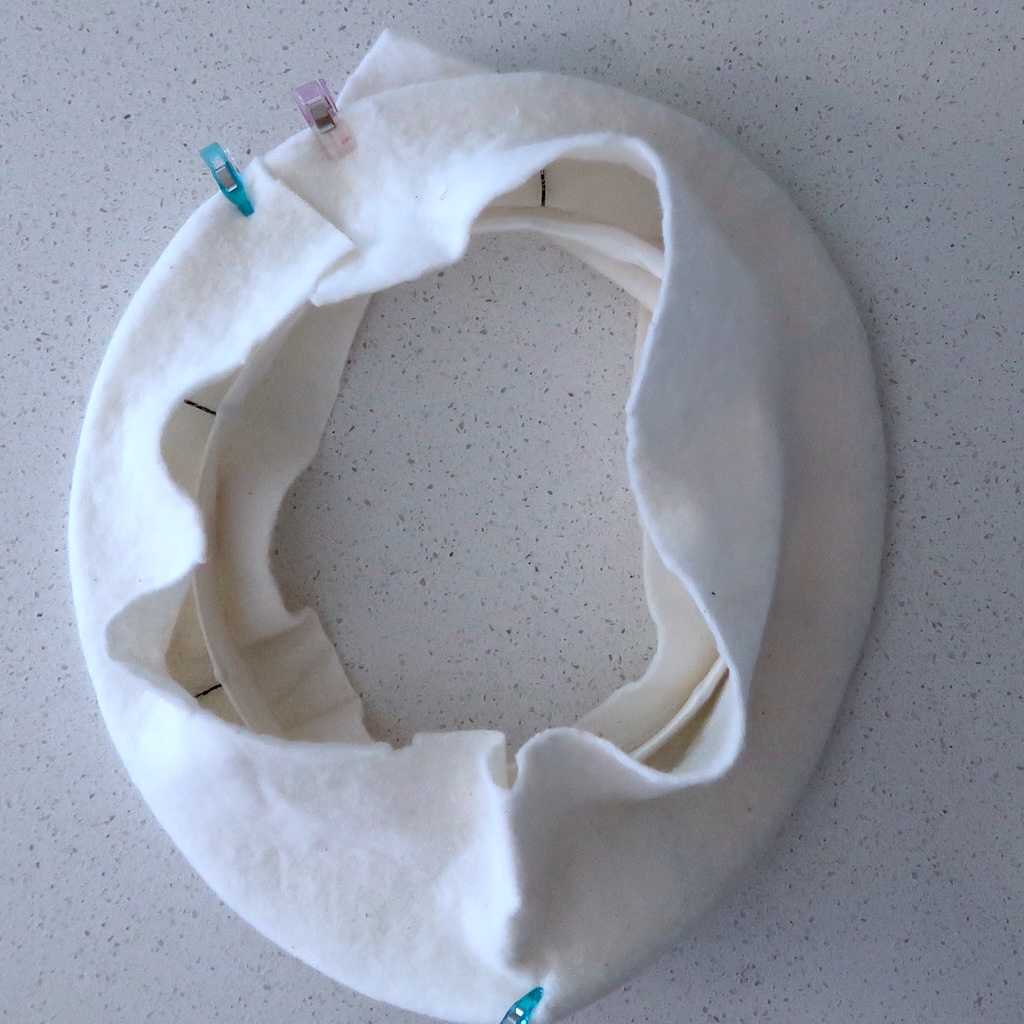
Covering the Wireframe with Bias, Netting and Batting:
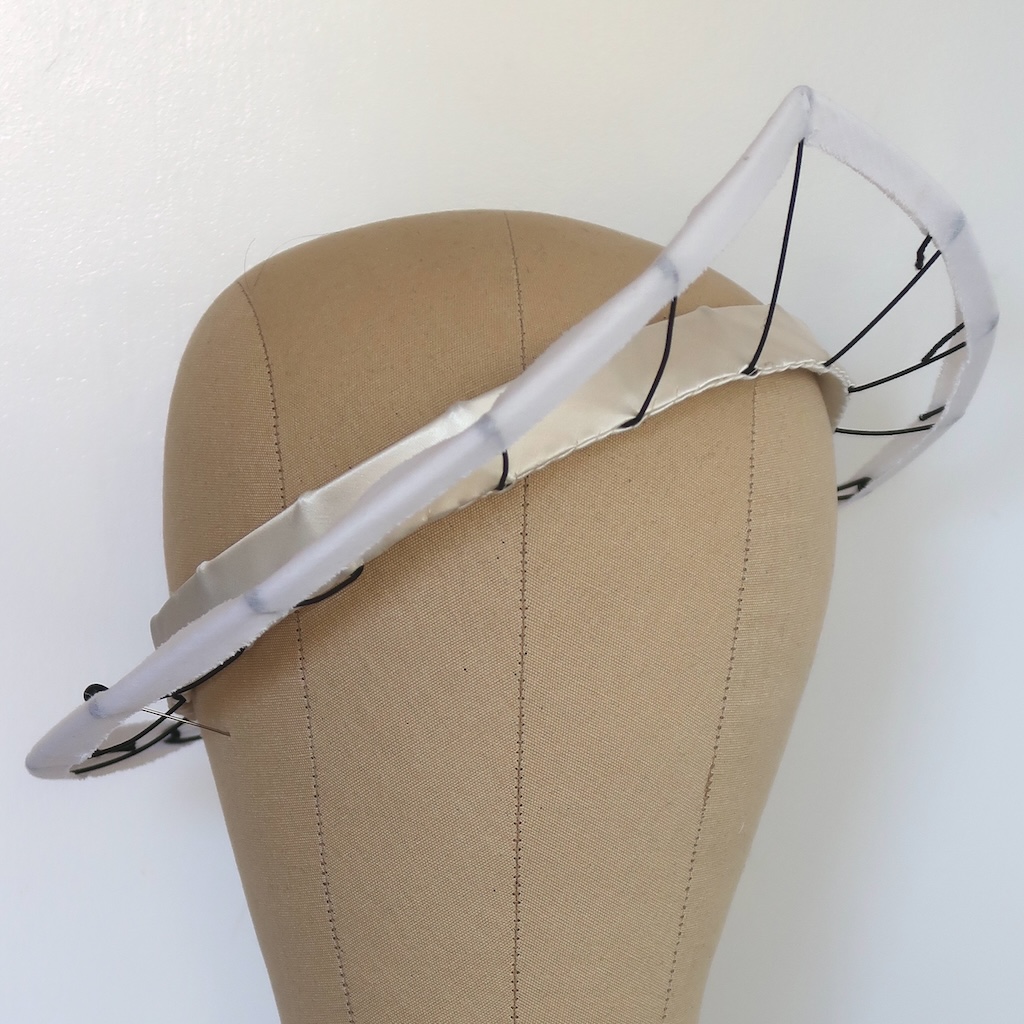
At this point some bias tape was added to the end of the hat and the band to cover the wire intersections.
Net needs to be added to help fill in the areas between wires. First the under brim. A piece of net was stretched, trimmed and pinned to the outside edge of the under brim.
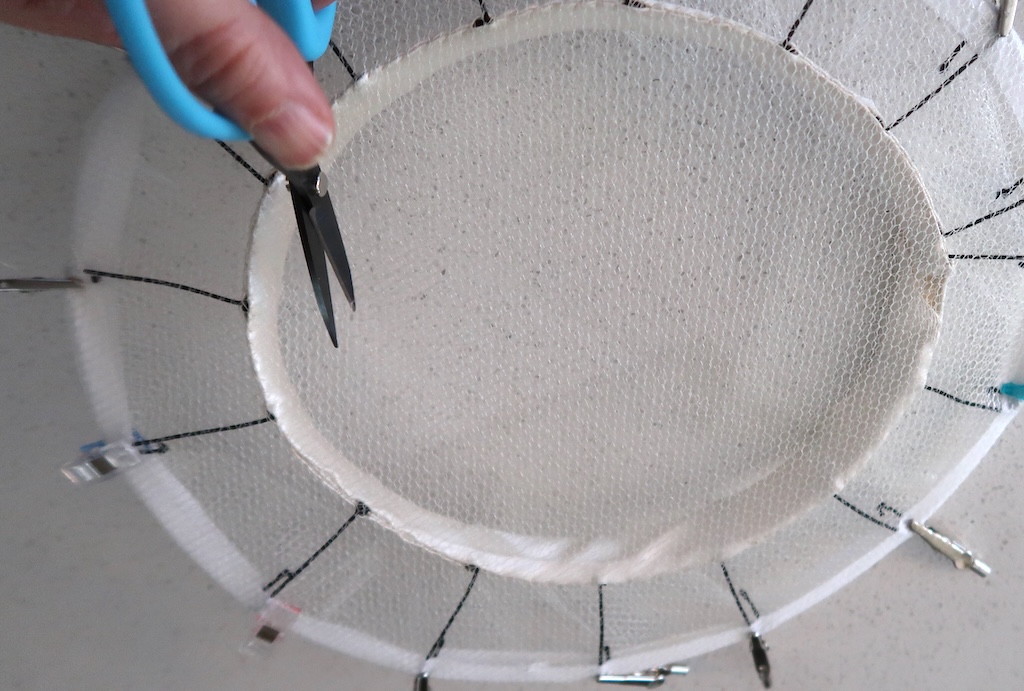
The head opening needed to be cut away leaving at least 1″ along the inside edge.
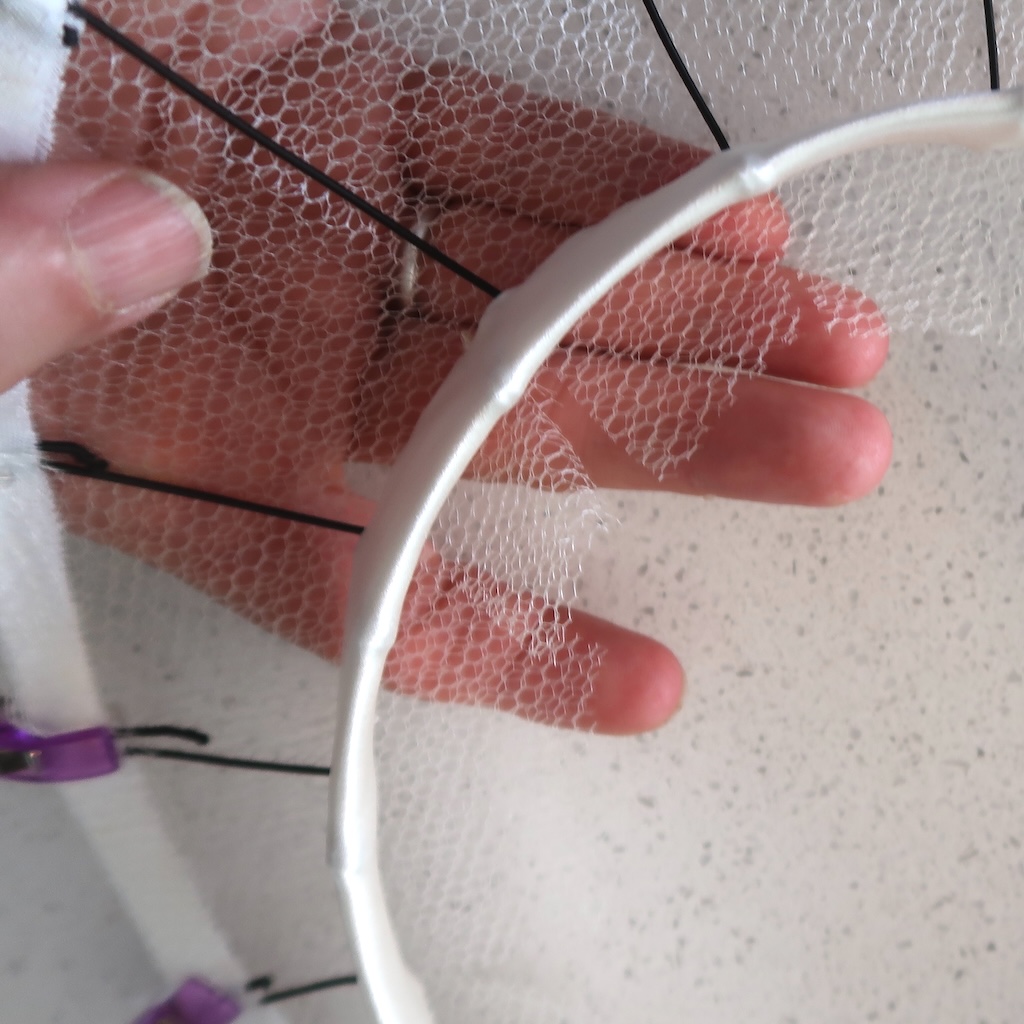
Then the extra net was clipped to make taps.
then a second piece of net was laid over the upper brim.
This was pinned to the band and the head opening was cut away.

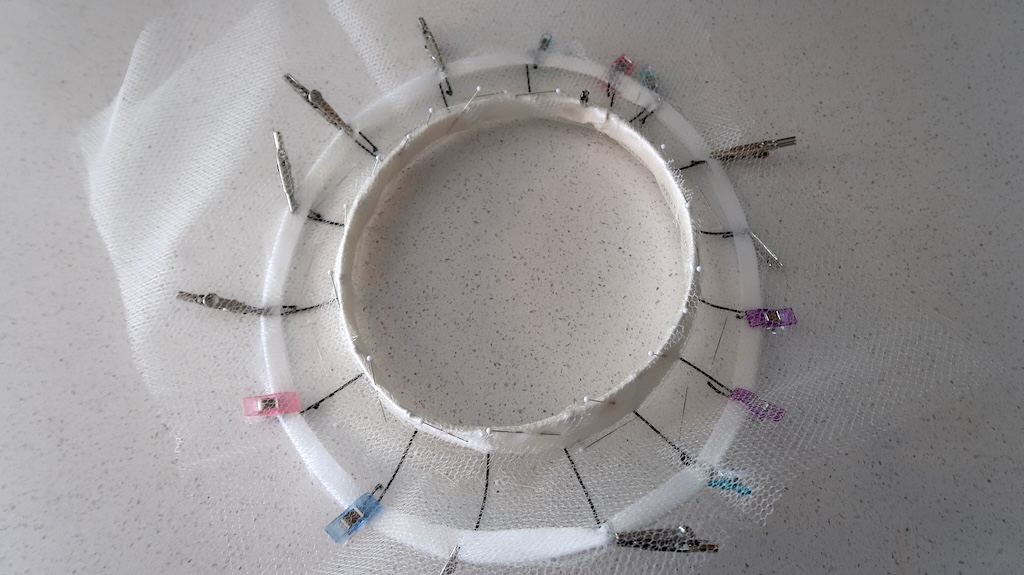
The tabs were pinned down.
Then pins were used to hold the net close to the bottom edge of the band.
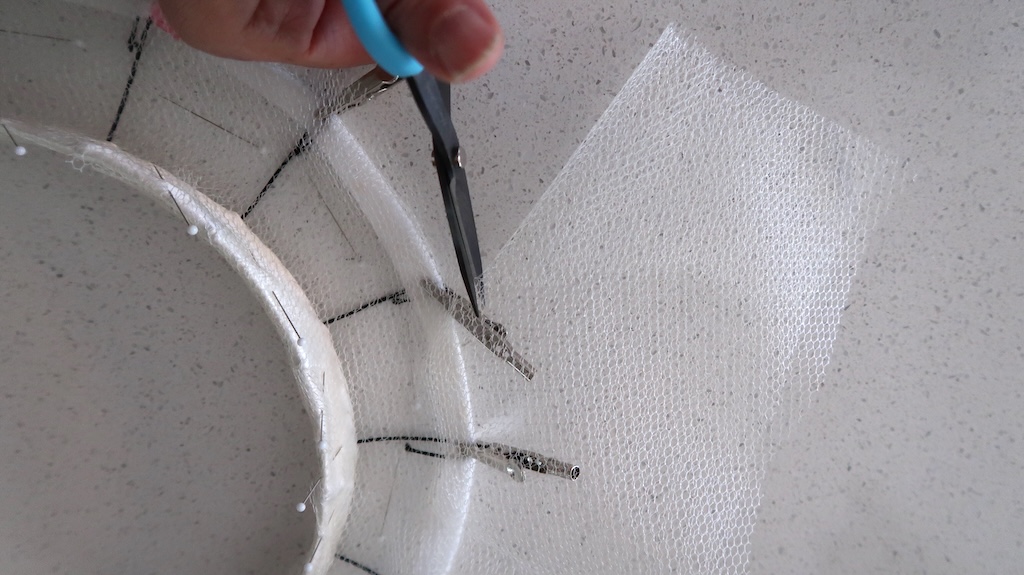
The outside end was cut at with about a 1/2″ overlap.
Another picture of the extra being cut away.

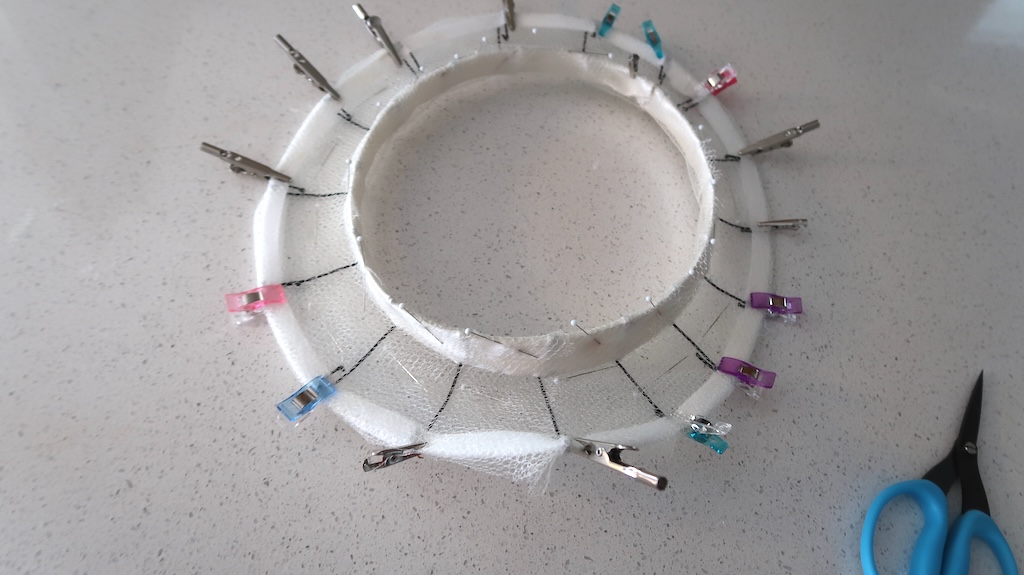
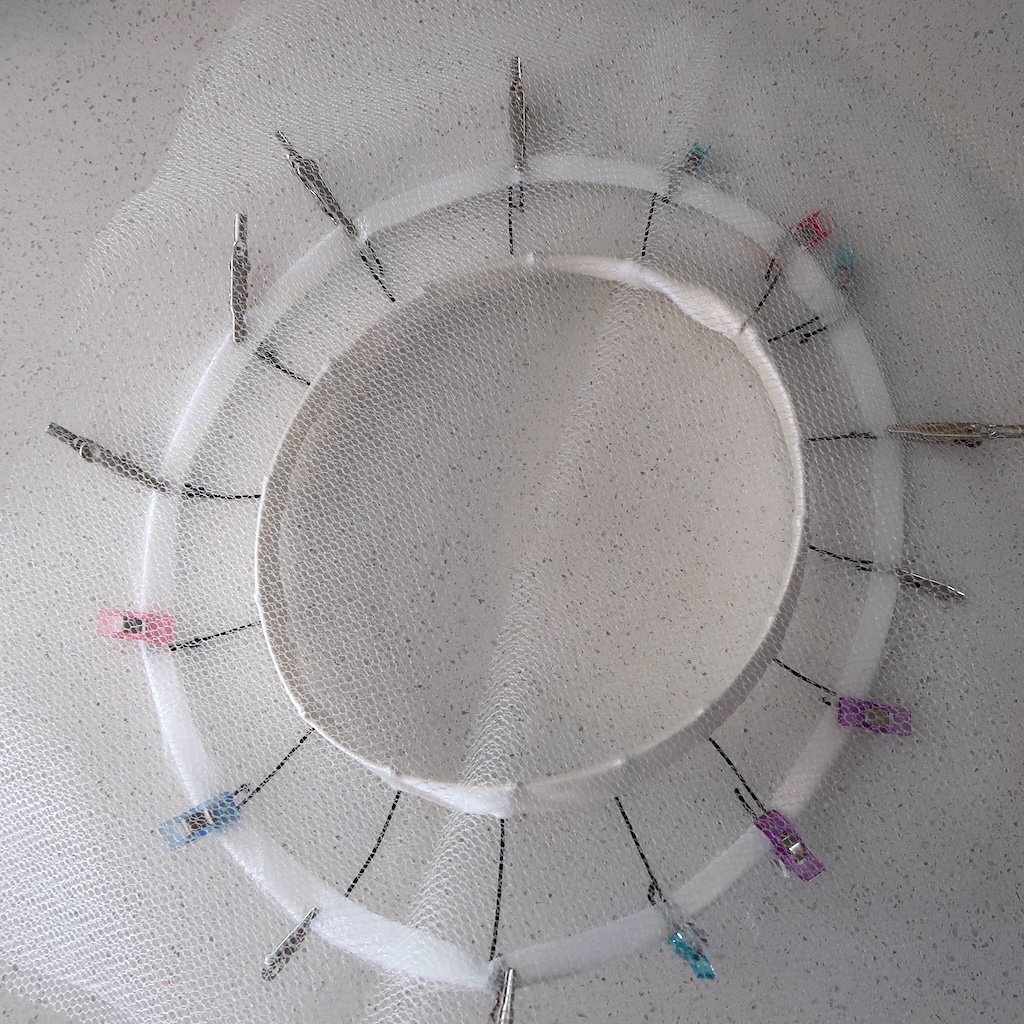
The clips were re-adjusted to hold both layers of the net to the edge so both could be tacked stitched down at the same time. Along the outside edge, at the base of the band and at the top of the band.
It now looked like this.
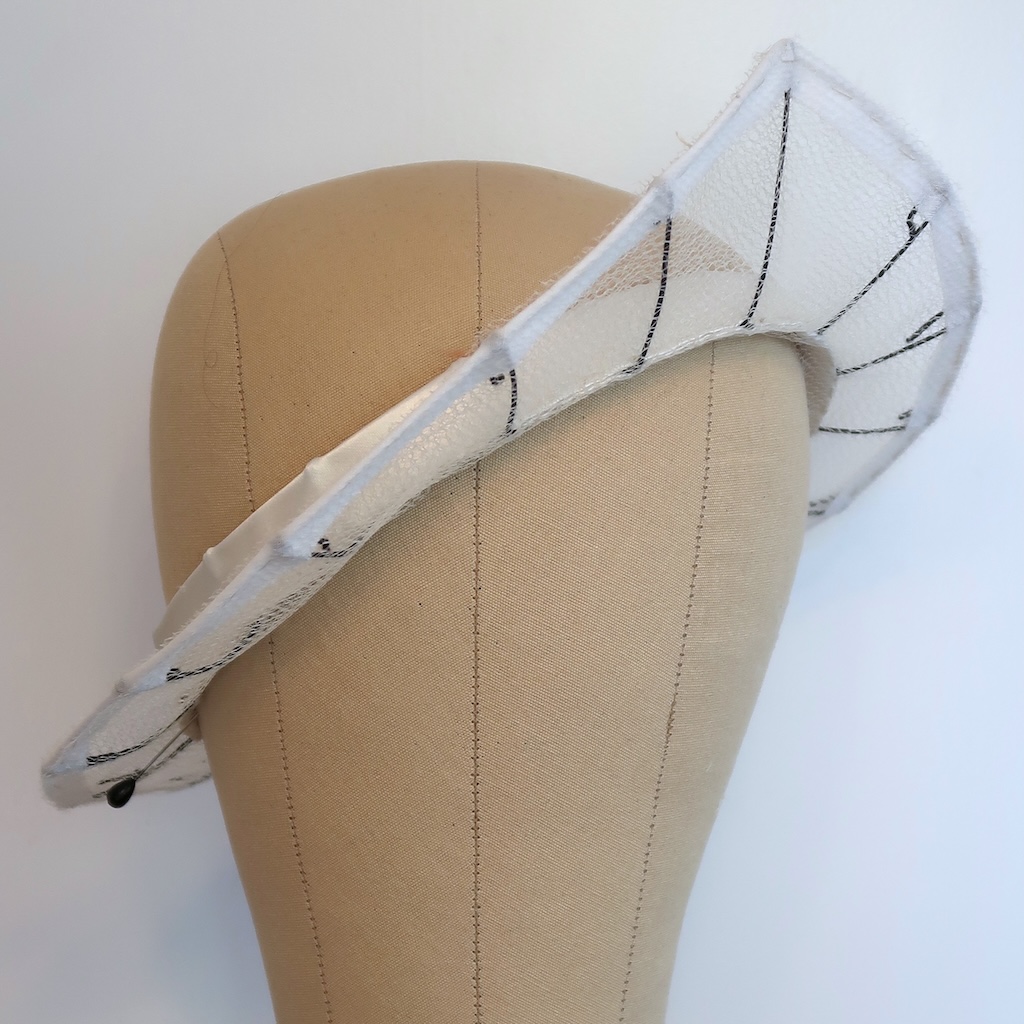

A long strip on thin cotton batting was added over the netting. It was wide enough to cover the upper and lower brim (7″) and long enough to go around the outside edge of the brim.
This was stretched and smooth and stitched along the base of the band and glued together without any overlap in a butt joint at the center back. A small amount of the batting needed to be cut out behind the high point (on the upper brim) to get everything to lay flat and even in another butt joint, almost like a dart.
It looked like this after the batting was sewn down along the edge between the band and the brim.
Covering the Brim with Silk Fabric:
I cut a rectangle of silk fabric that was longer than the distance around the brim outside edge by about about 8″ and as wide as twice the distance from the top edge of the band on the inside to the tallest point. The fabric was sewn together to with a 1/2″ seam (this will be the center back seam. Then two rows of gather stitches were sewn along one long edge.
Note: I did not write it down so, the amount of extra length at 8″ is a guess at this point. Maybe making a muslin and testing would be good.
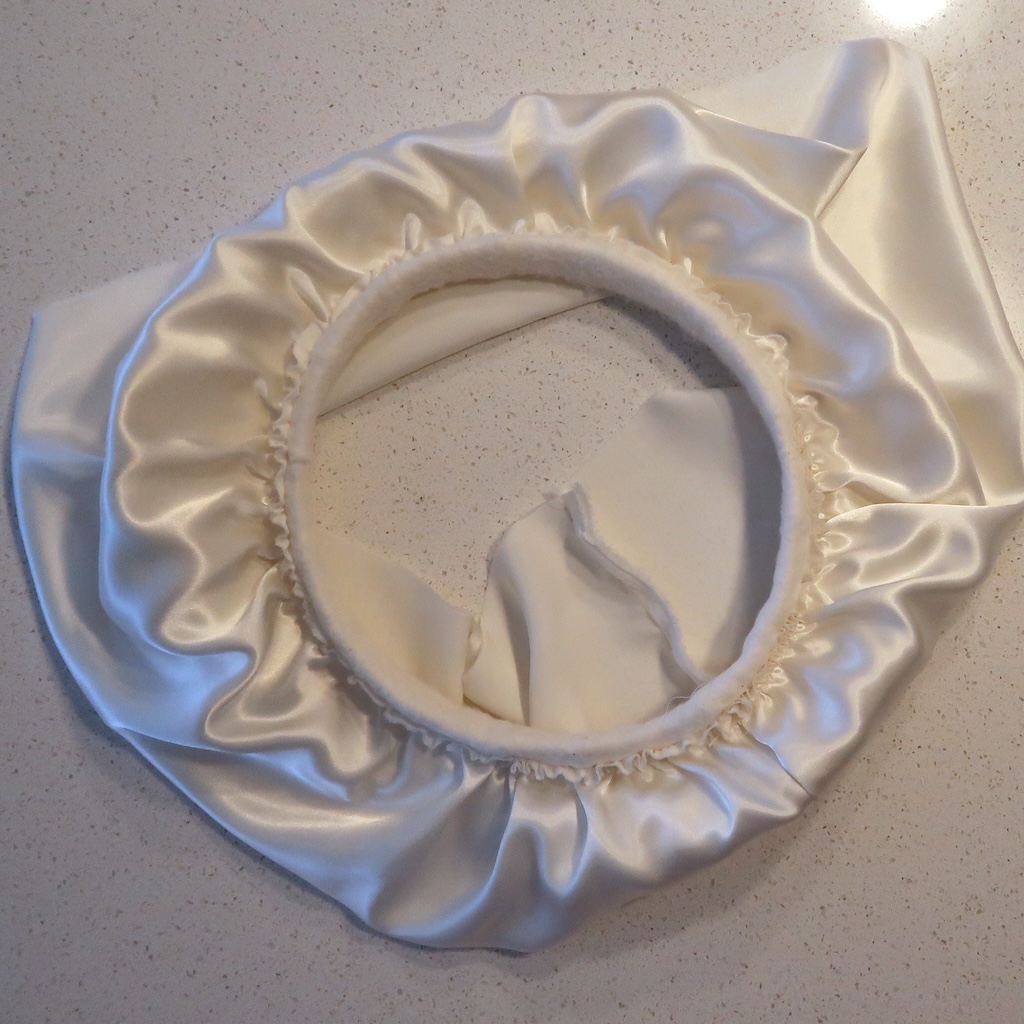
The gathering stitches were pulled until the fabric was a tight as the outside of the head opening band, then tied off.
The extra fabric was pulled into the head opening.
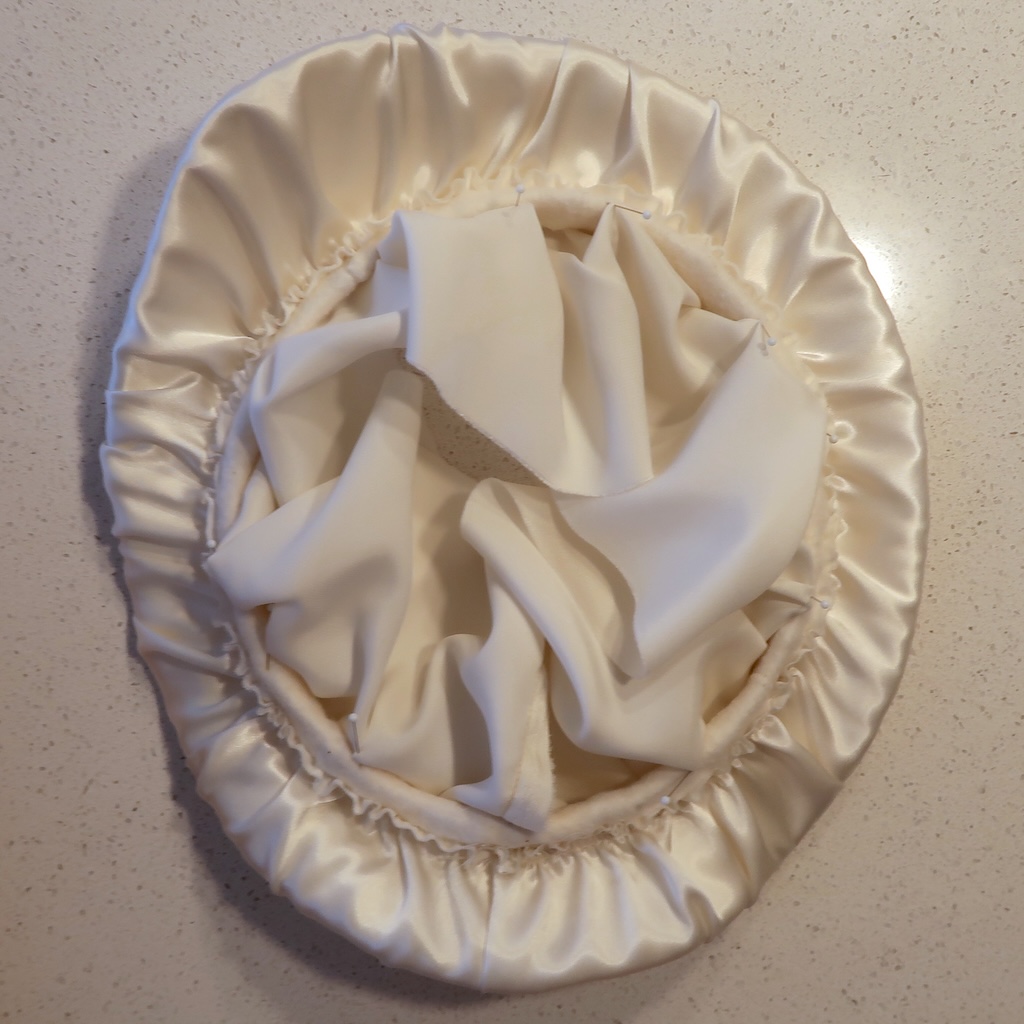
Top edge of the band was marked onto the fabric with a chalk marker.
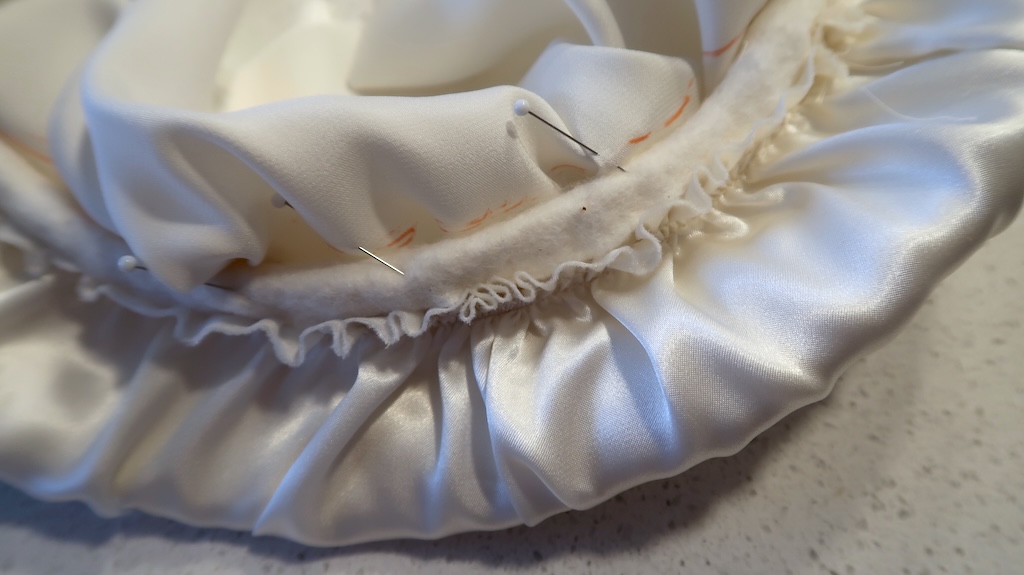
Then the fabric was removed from the frame and the marks were connected and a 1/2″ extra was marked for seam allowance. After being trimmed to this line two rows of gathering stitches were sewn in the seam allowance. The fabric was slipped back onto the frame and the gathering stitches were gathered to fit the inside head opening.
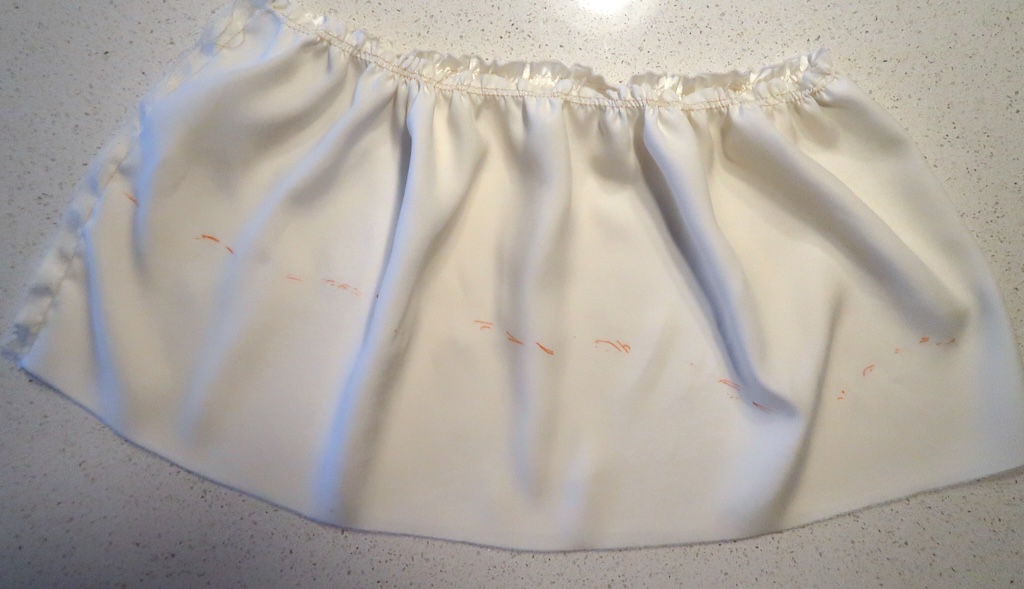
The fabric was then sewn to the frame through the gathering stitches and the band.
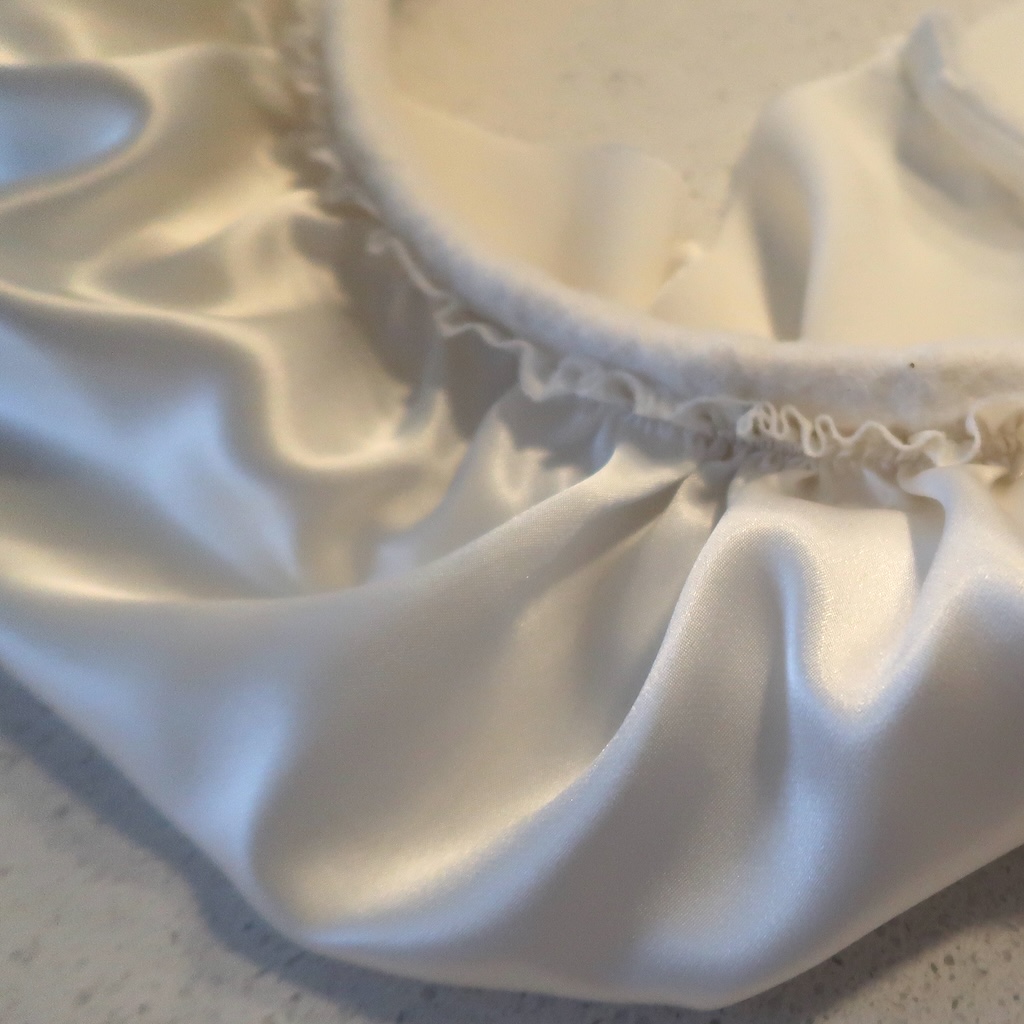
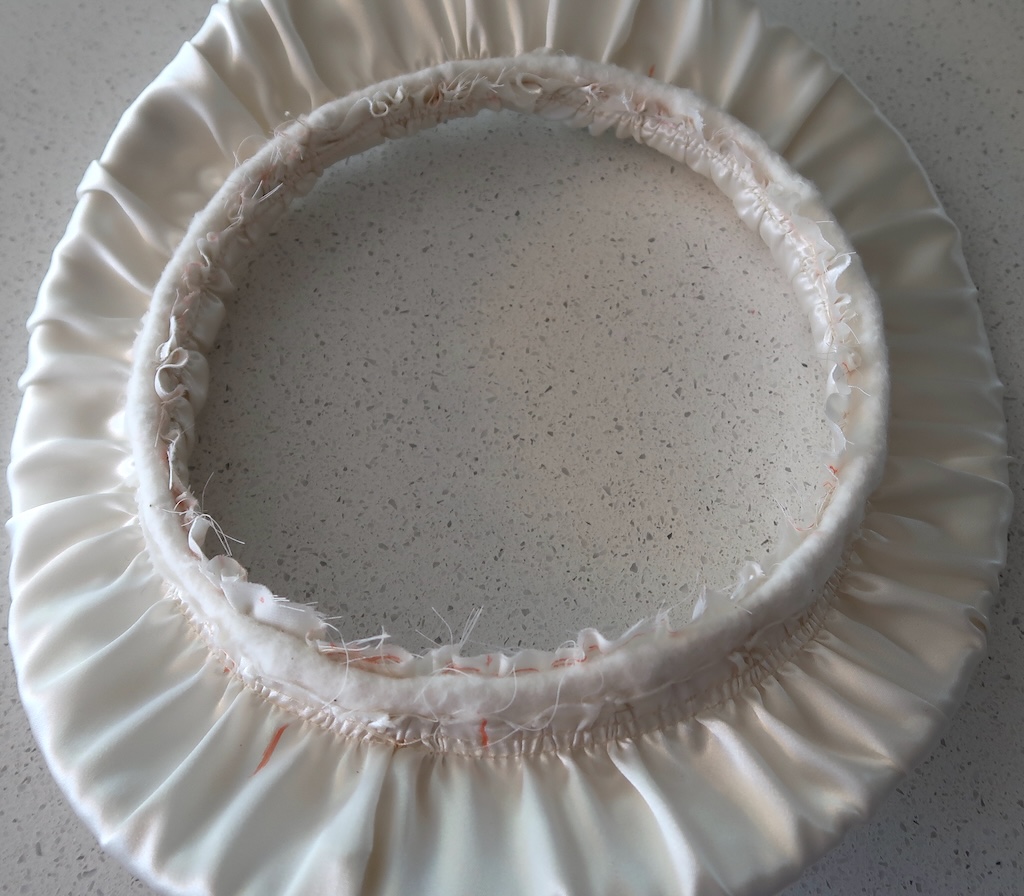
How it looked from the underside. All the extra fabric (shirring) needed to be adjusted somewhat evenly around the edge of the brim.
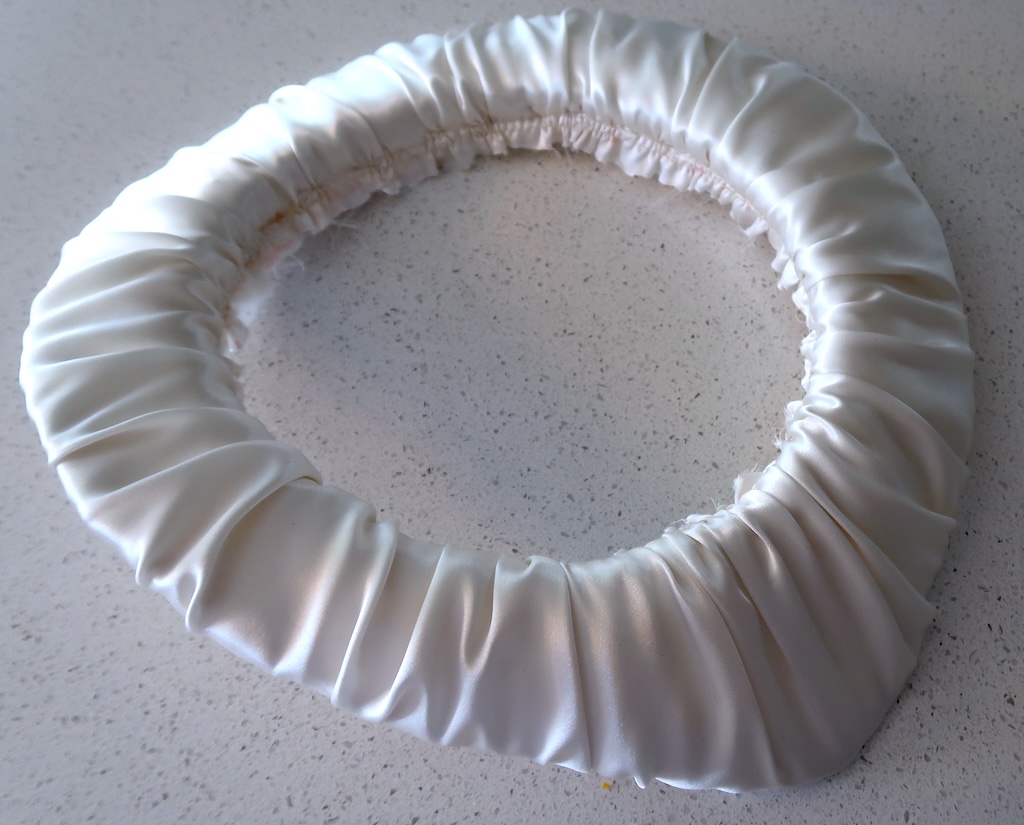
This was how it looked then.
Creating the Crown:
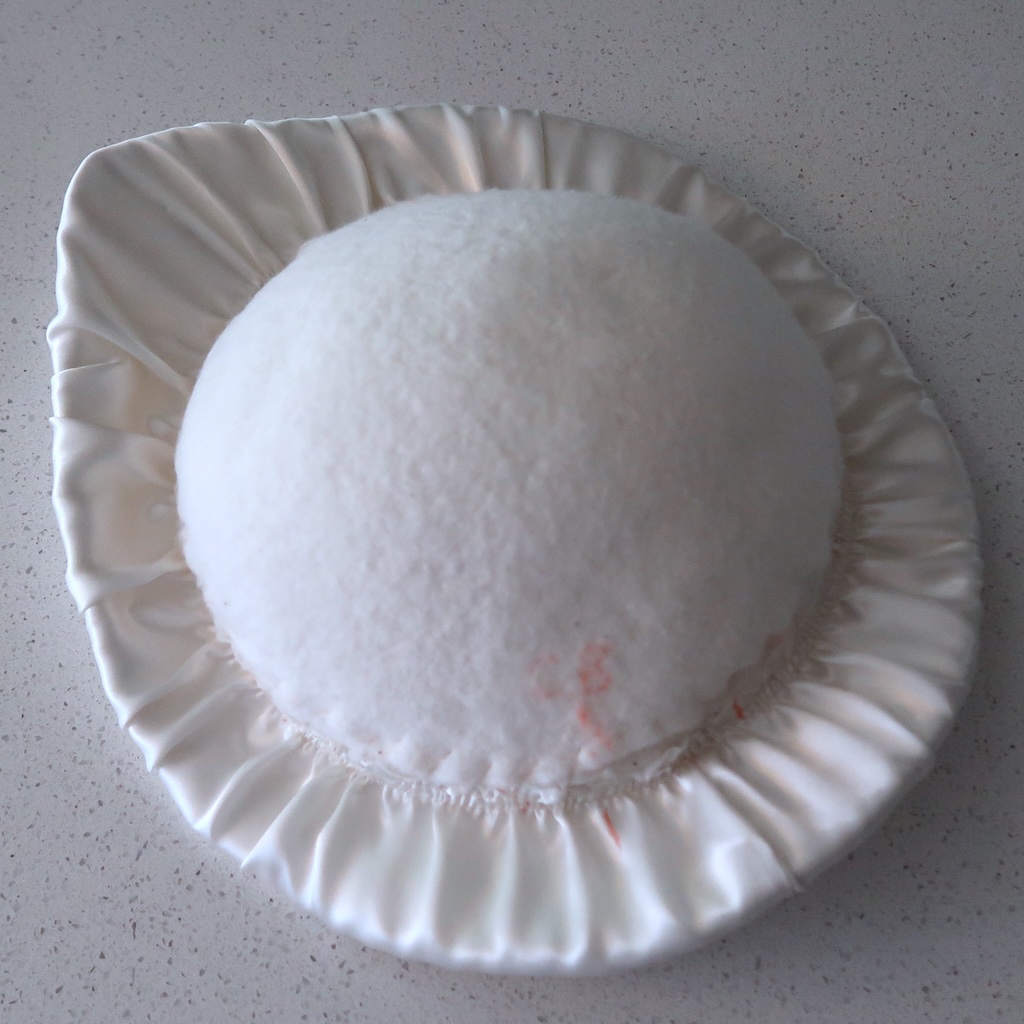
This hat has a soft crown. It is made from two layers of shaped batting, the outer fabric and the lining. My first step was to shape the two layers of batting by pulling them over the wig head then, trimming them with a level line. this was whip stitched to the top edge of the band.
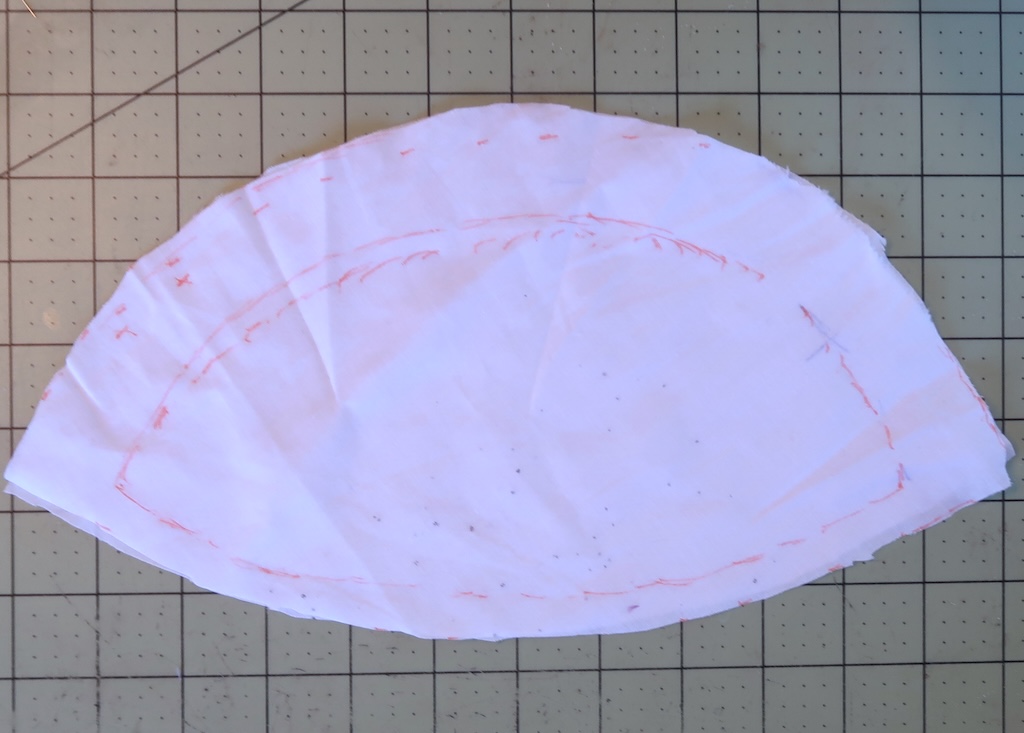
I draped a muslin over the crown to get the shape of a piece of fabric to cover the crown.
A pattern for the lining was achieved by draping a piece of fabric over the wig form then putting the hat over this fabric and marking the edge of the crown from underneath. To this a seam allowance of 1/2″ was added and gathering stitches were sewn in the seam allowance. The edge was pressed over to the wrong side, the lining was dropped into the crown and the gathering adjusted. Then the lining was pinned and whipped stitched into place.
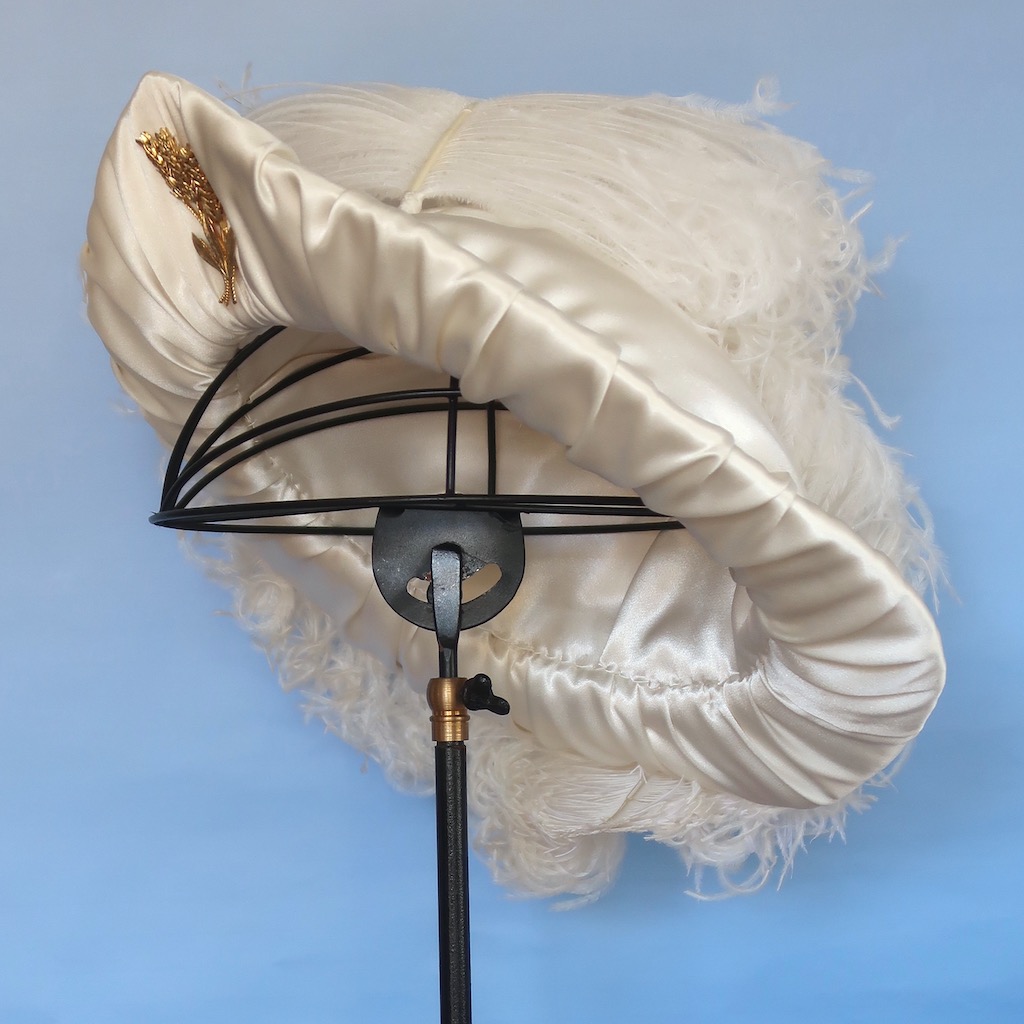
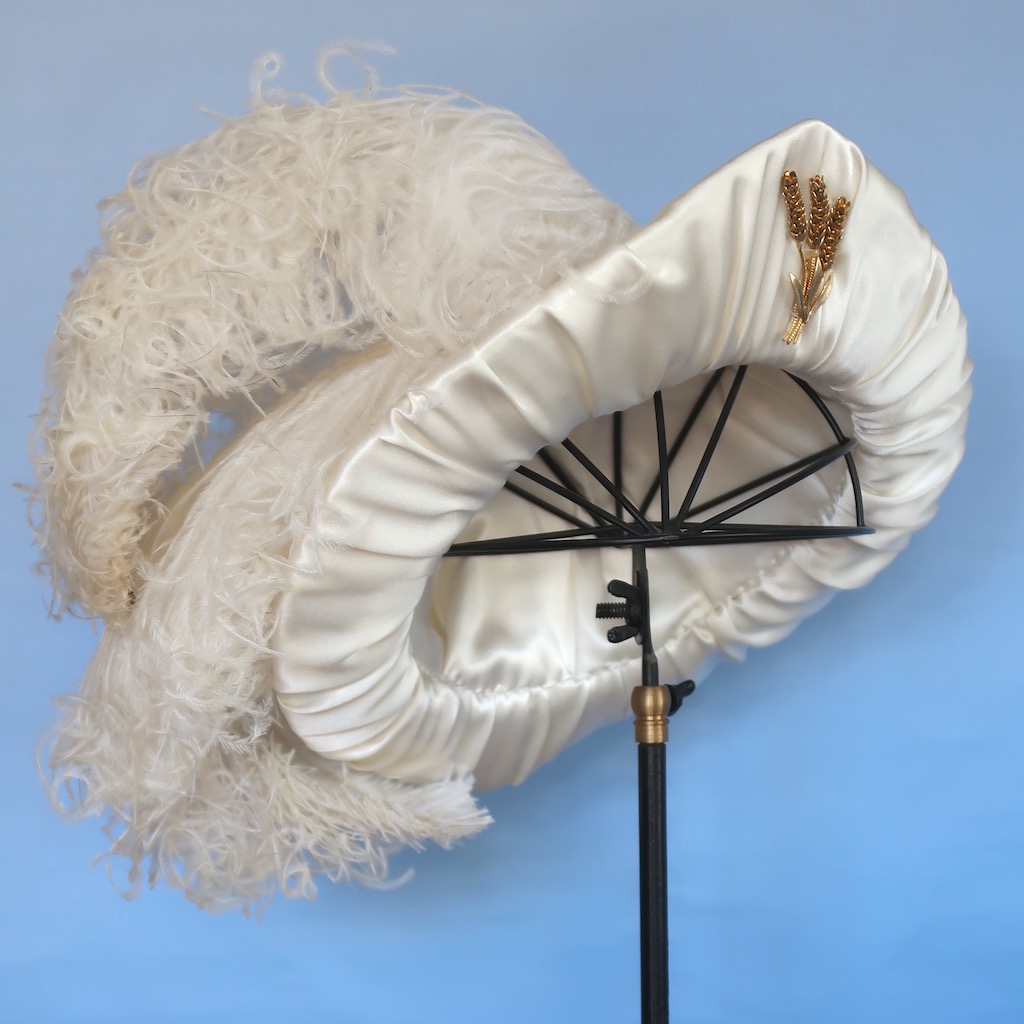
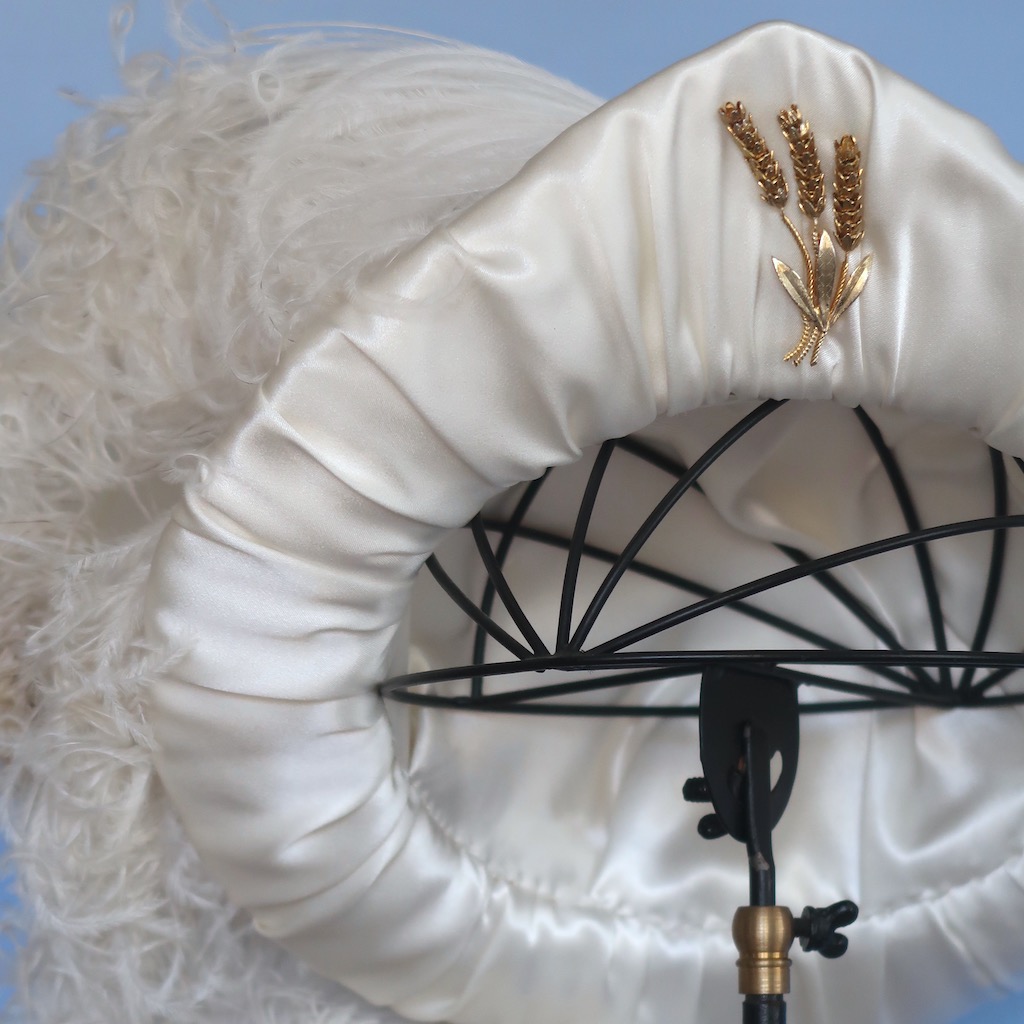
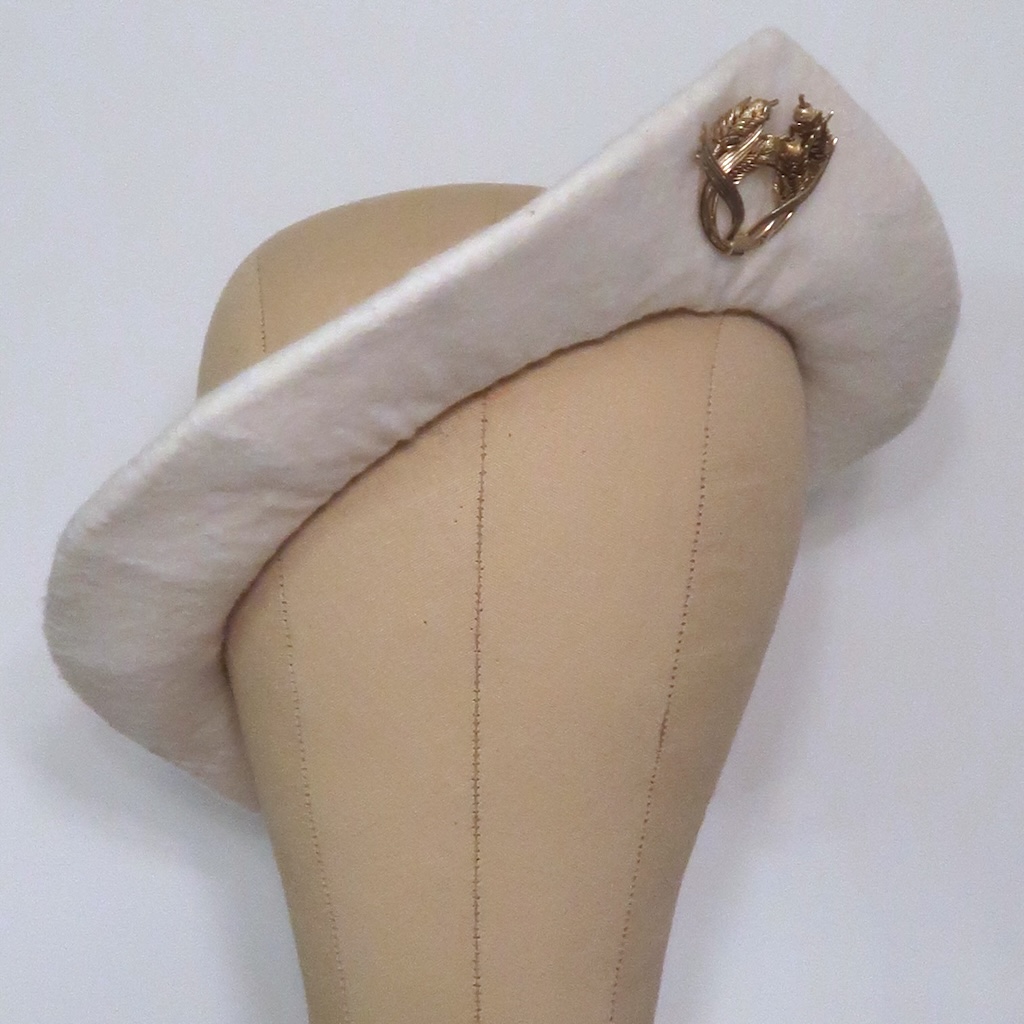
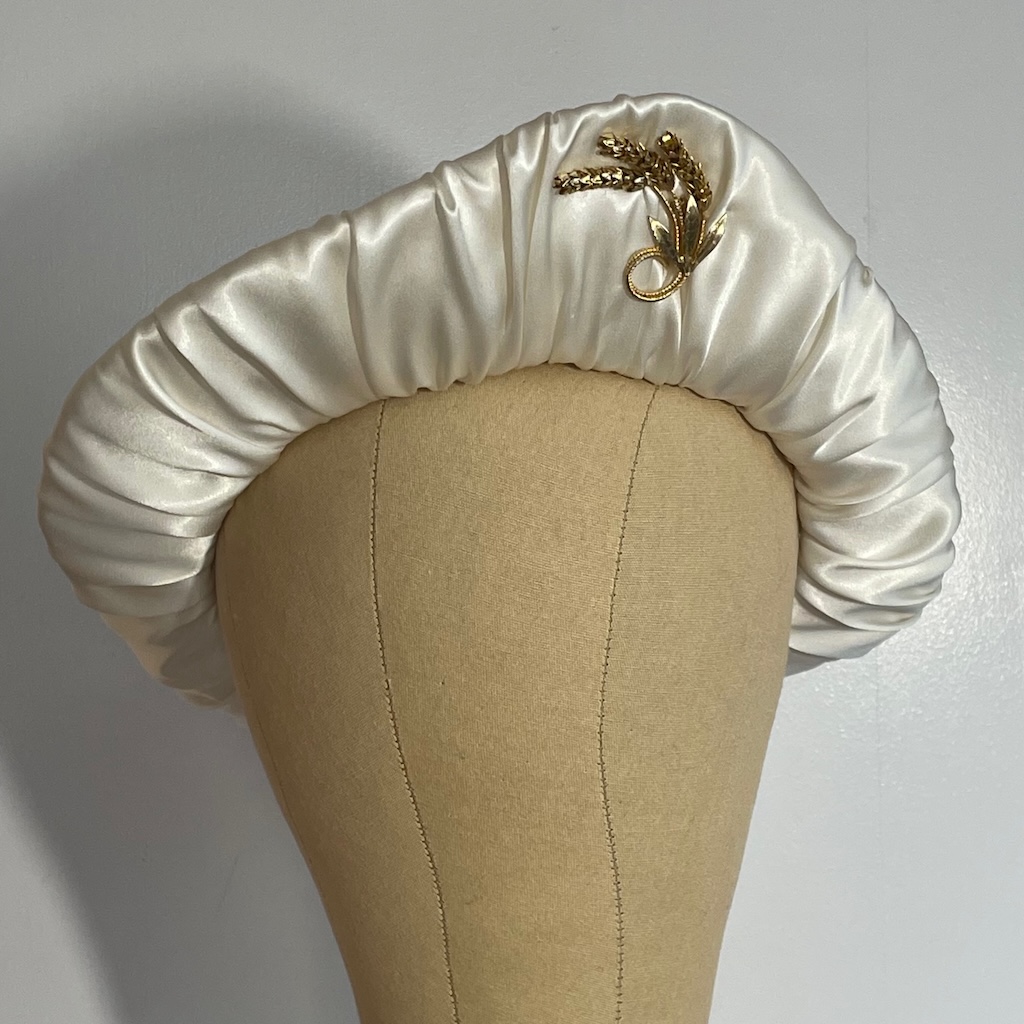
Rather than turning the edge with outer fabric’s seam allowance over, the gathering was covered with a 1/2″ bias band of fabric over the gathers to give a flat space to add a gold chain for decoration. In this photo you can see the narrow piping along the center line seam.
I did bend the wire at the center back of the hat so that it has a slight V.


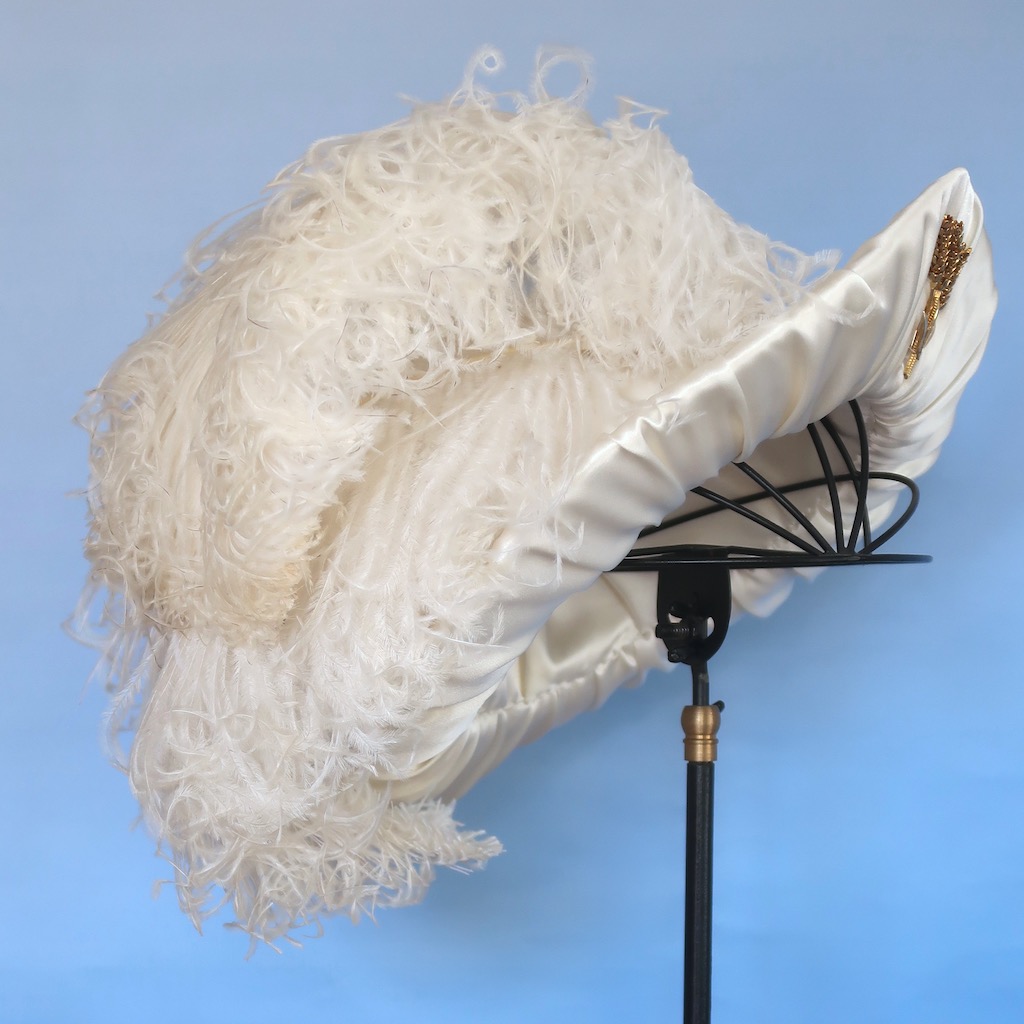
This picture of Laurie Tavan with the hat worn at a slightly different angle shows the metal chain I added after all the construction pictures were taken between the crown fabric and the bias that covers the gathering stitches over the band. It adds some visual interest to the side of the hat not covered with feathers.
Adding the Feathers:
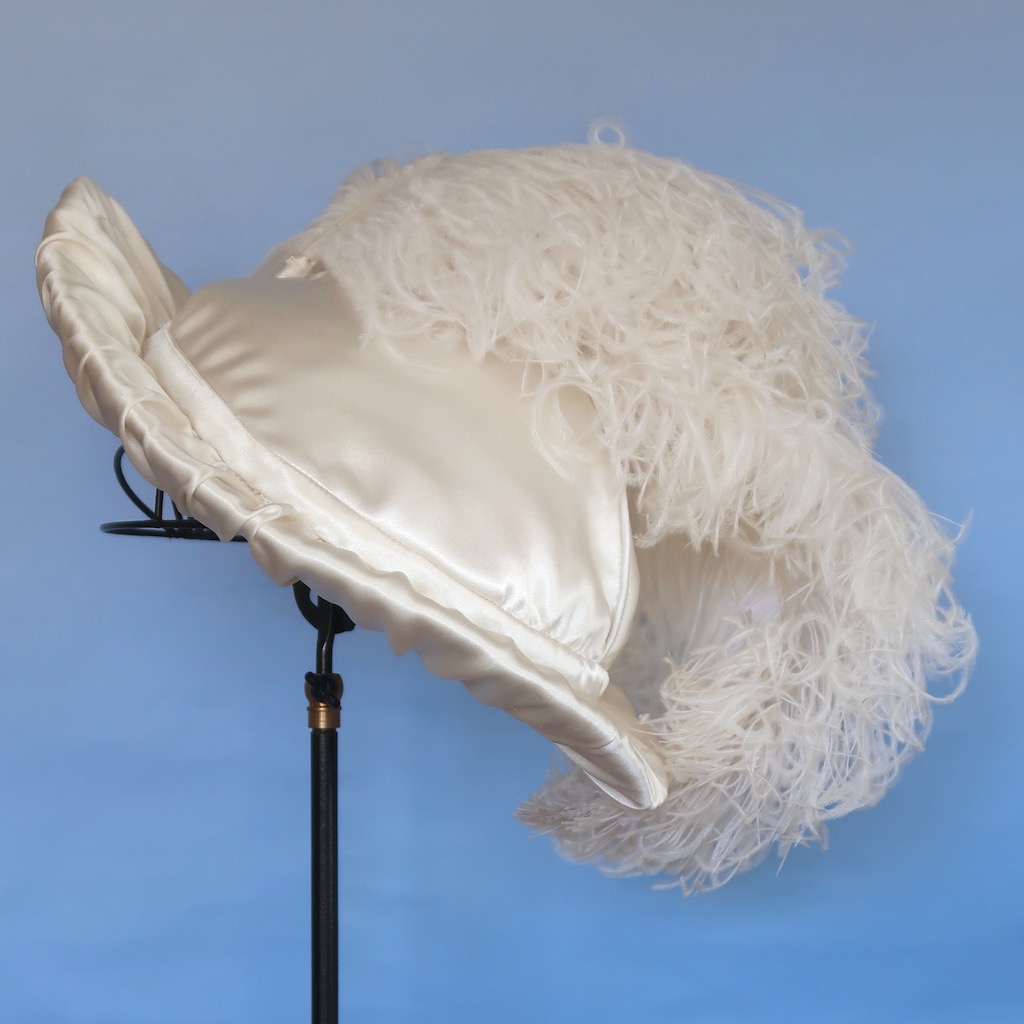
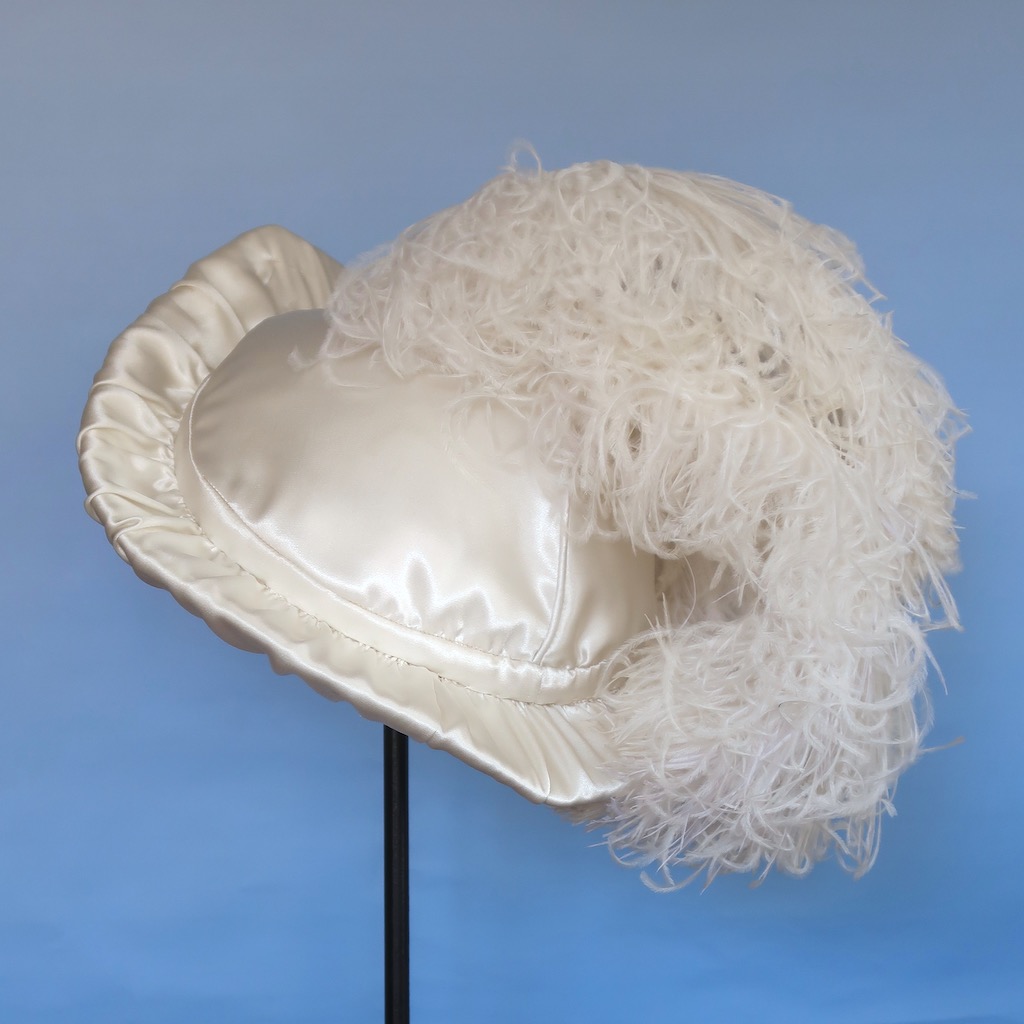
I have added several articles on how to make plumes, these two were created from two each Prime ostrich feathers. Check out these articles for how to sew feathers together. https://outofaportrait.com/how-to-choose-ostrich-feathers/ https://outofaportrait.com/advanced-plume-making/ https://outofaportrait.com/how-to-shape-a-plume/ https://outofaportrait.com/thinning-feather-stems/ On the last article, you will see a picture of this same technique I used on this hat used on a straw hat 2/3 down the page. They are not sewn to the crown fabric of the hat but are attached by a wire that goes thru the lining, batting and fabric of the hat with a 1″ two hole button on the inside of the hat and then to the inside of the feathers shaft.
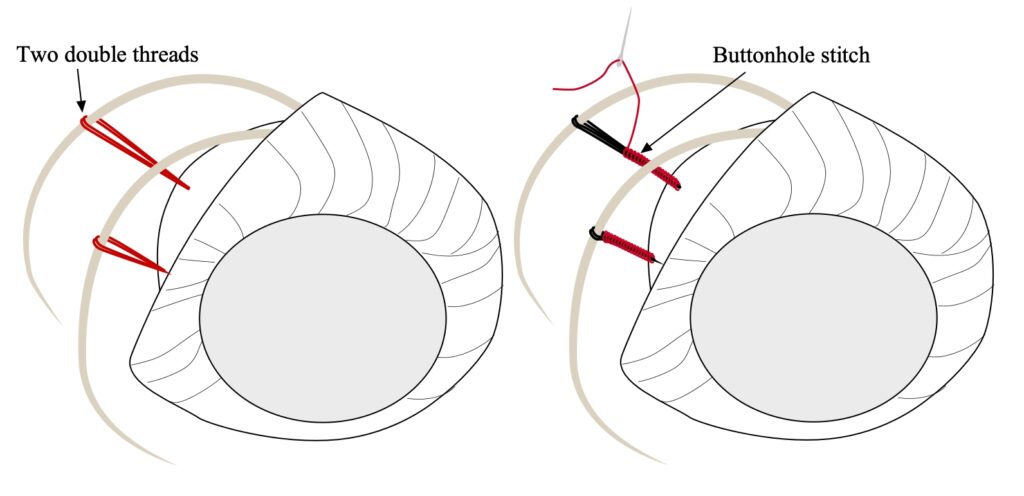
Swing tacks are very important to control the plumes and make sure they do not fly away or spin around in the wind. The swing tacks consist of threads that are sewn from the inside of the crown around the stem of the feather two times and back through (left). Then a buttonhole stitch is sewn down the length of the threads to bundle them (right).
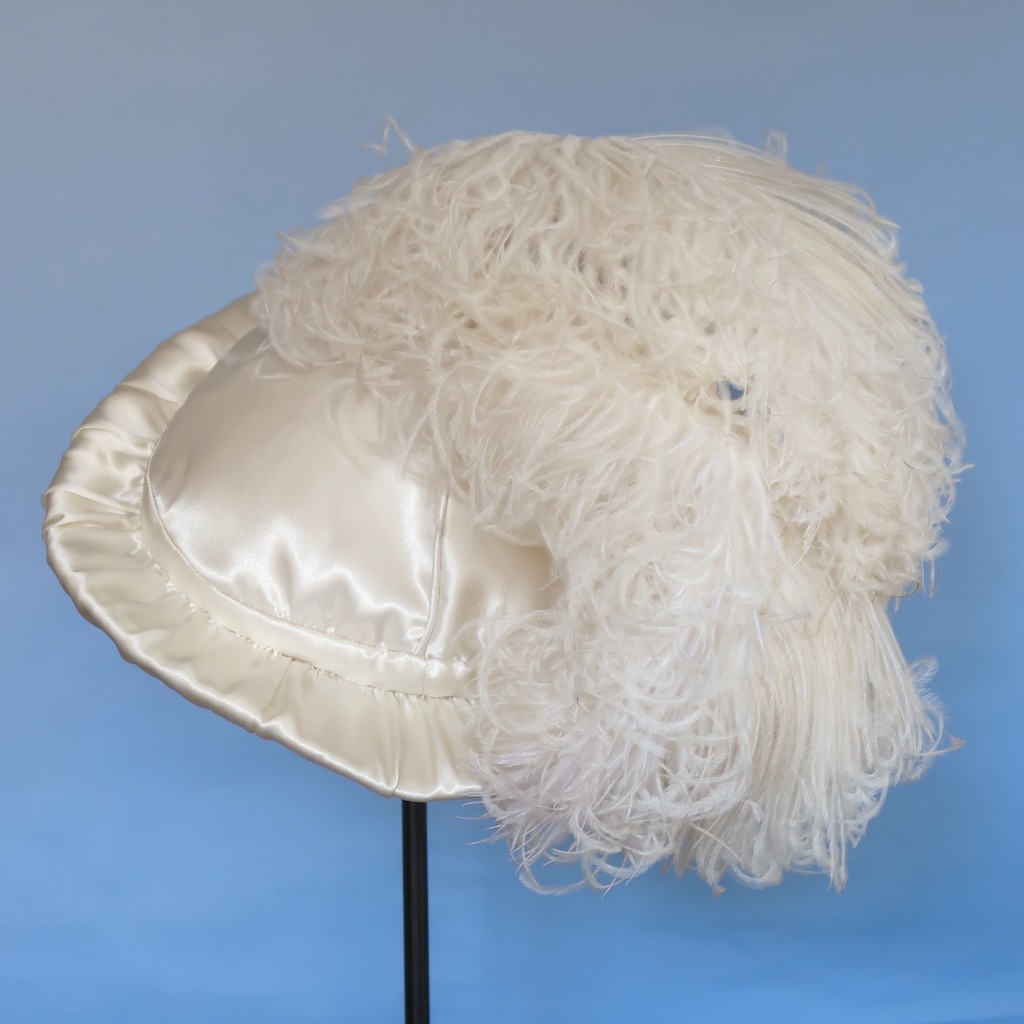
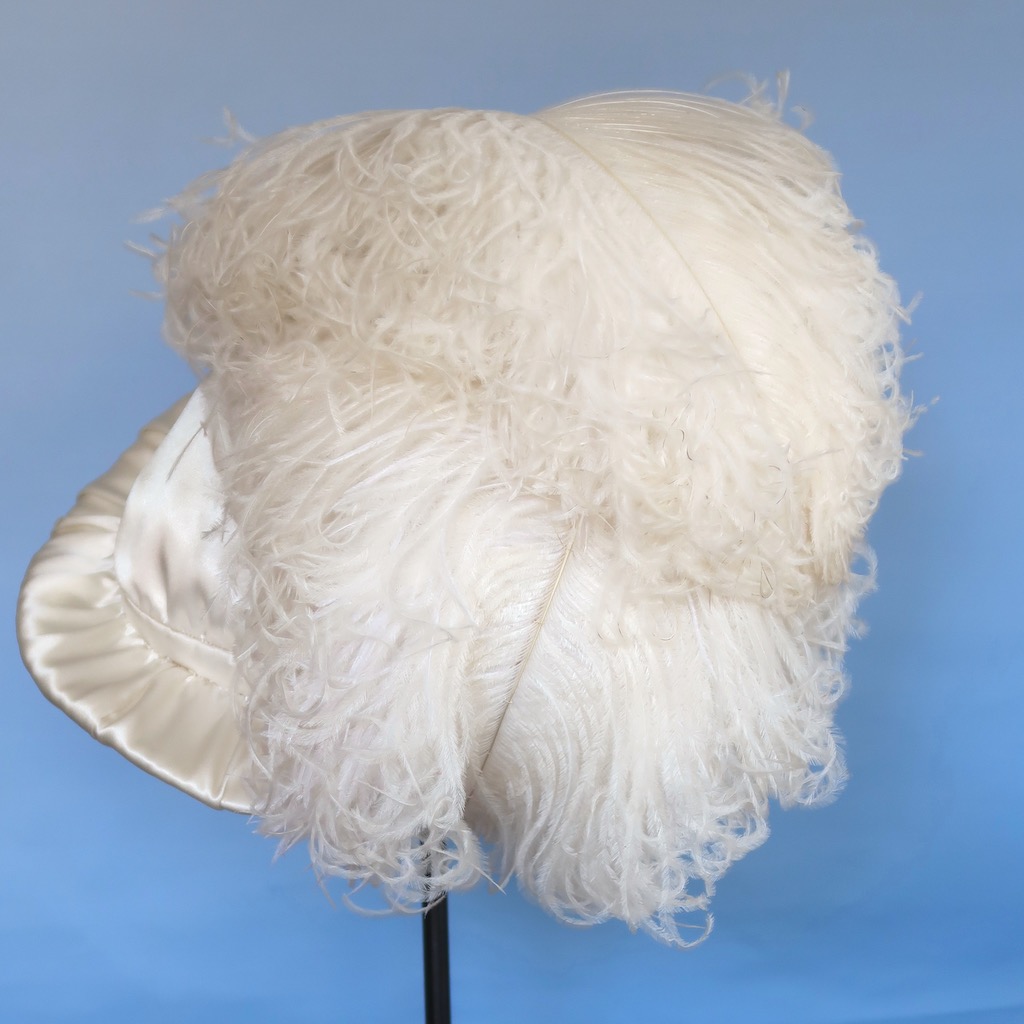
Finished Hat from all Angles