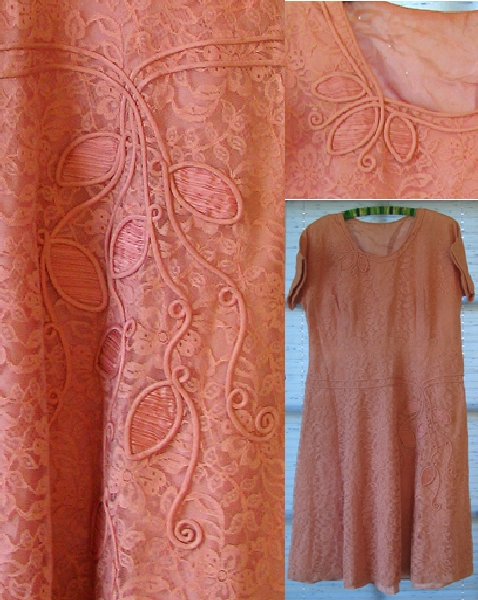
The inspiration for this hat was a dress that Steph brought into work saying, “Could you do anything costumey with it?” I fell in love with the couched silk bias tubing on lace, vine and leaf work. I thought about it for a day or so and then it came to me I knew it had to be a large wire frame hat with lots of fabulous plumes.
Steph remembered it as being a dress of her Grandmother’s but while asking around for family pictures of her in the dress it turned out that it was a dress of her Great Aunt’s. I hope to get some pictures of her in this late 50’s-60’s dress to add to this page.
I would like to say something about cutting up Vintage pieces for costumes. I would not have cut apart this dress if it had been museum quality. It had many moth holes and small rust stains all of which made it suitable to re-work. One of the major pluses was the fantastic silk lining. It was a peachy pink silk taffeta that was also used to make the bias tubing to create the pleated leaves and couched tendril design. All of the detail had been done with a machine stitch but it was such high quality work it was not easy to tell.
I have several books on making wire frame hats from this period.
1) “Skeleton Foundations, Part 1 Women’s Institute of Domestic Sciences” pub. 1920.
2) “The Art of Millinery” by Mme. Anna Ben Yüsuf pub. 1909.
3) “Millinery Theoretical and Practical” by C. Hill pub. 1900.
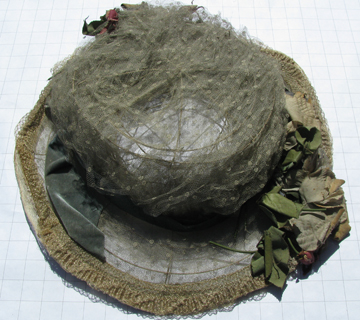
In fact, there is nothing like seeing the real thing and being able to get measurements and look at the construction methods. The hat pictured on the left is a wire frame hat made between 1906 and 1908. The hat was made by Evelyn Schade, as an apprentice milliner.
She was born in 1890 so she was between 16 and 18 when she made the hat. It suffered some smoke damage in a fire and that is why it is so dark. The original color of the netting was white or cream. The flowers where once very colorful and the velvet ribbon a nice teal. Evelyn Schade was Feather Tippetts-Rosica’s Grandmother, Feather is a costumer as well and I would like to thank her for sharing it with me.
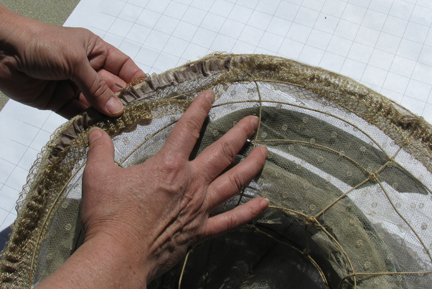
Upon viewing this hat I learned several things and it reinforced several other things.
1) The fashionable diameter and height of the crown.
2) The numbers, the spacing and gauge of the wires.
3) Both the crown and brim are covered with net and not backed with a solid fabric.
4) The brim has two layers of netting, the fancier pattern one on the upper brim and a plain one on the under brim.
5) The small head opening and the right angle bend of the wires before the two small head opening circle wires.
6) There is a good deal of edge trim.
7) The crown and the brim where worked separately.
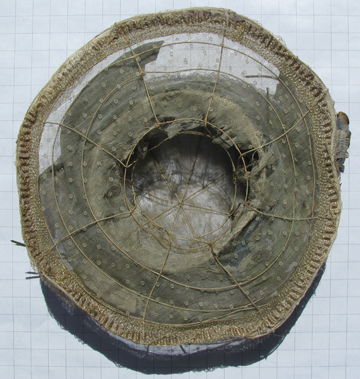
Feather told me that the hat was originally even and not out of round as it is now. You might notice that I took the pictures on paper with a 1″ grid. This can be very helpful if in the future I want to go back and get measurements on something else.
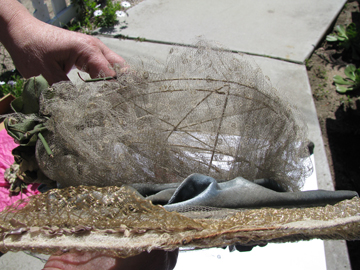
I never planned to make the pink hat the same proportions as this hat but I did use the crown measurements (height and diameter) and the head opening measurements on the pink hat
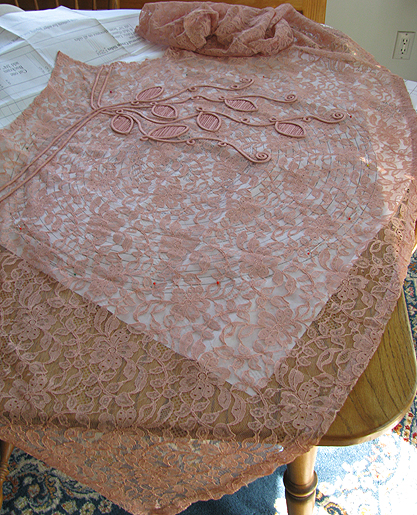
I separated the lining from the lace overdress and picked the seams of the lace until I could lay it flat over the hat pattern. This made it possible to figure out where the decorations would end up. It also help me decide just how big I needed to make the hat to include as much of the motif as was possible.
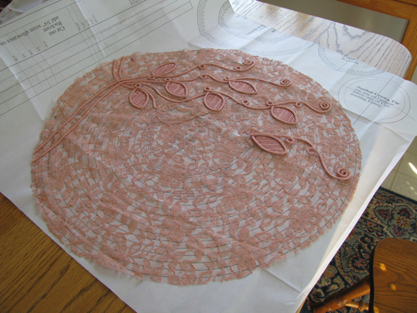
I trimmed the lace and moved one of the vines and a leaf because it would have been lost under the crown. I had to cut the leaf and the lace under it so the hole had to be patched with a scrap of matching lace.
I decided to make an oval hat and also to make the opening off center that way there would be even more area for the design.
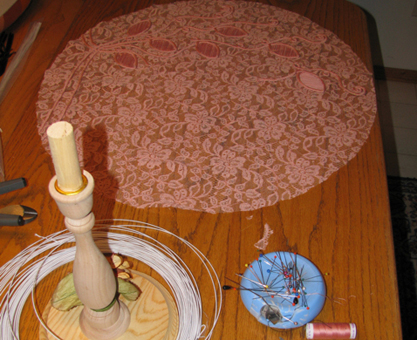
This is a picture of the cut lace that will cover the top of the wire frame when it is done.
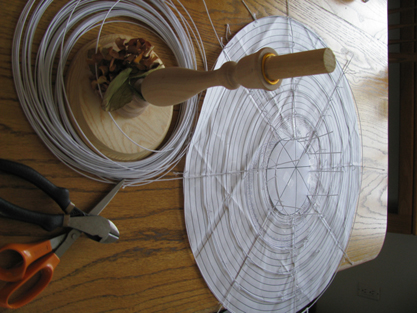
Before the picture was taken I overlaid a small circle of paper on the pattern this let me know the size and placement of the head opening. The opening is off center so the pattern didn’t have the correct size and location for the head opening.
I then laid four straight wires to form 8 spokes. I taped these down with office tape and cut them apart with wire clippers at the very centers. The spokes where bent to a right angle at the head opening. I added a wire for every 4 lines of the pattern or every 2″. I first taped the wires in place over the pattern with regular clear tape and then anchored the circles to the spokes with fine thread covered wire.
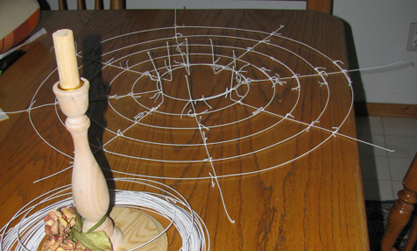
To the right is a photo of the nearly completed wire frame brim. All that needs to be done is to add the very last circular wire the second one inside the head opening and to bend the ends around and trim the extra off.
It might be a little more apparent that the brim is off center if the picture had been taken from another angle. All of the circular wires are even with each other except the two inside the head opening.
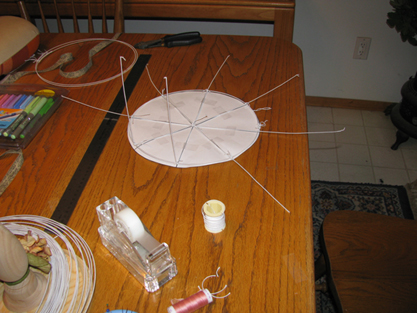
To the left is a picture of the beginnings of the crown. The first step is to arrange the first 4 wires to make the spokes and to bend them at a right angle. In this picture you can see the tape I used to keep the wires in place over the lines on the pattern.
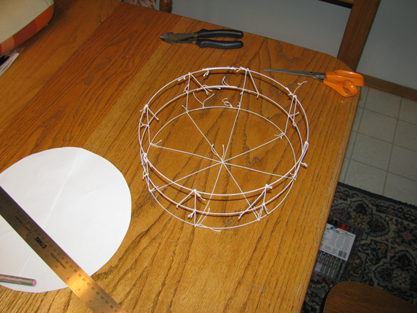
In this picture the crown is almost completed. All that needs to be done is to bend the ends around and trim them. Once the wire frame is finished it needs to be colored to match the lace. This can be done with floral spray paint or permanent markers.
You might be able to match you lace perfectly with the spray since it comes in many colors. I couldn’t, the pink floral spray was just too pink so I used a combination of the spray and the permanent markers. Sorry I didn’t get a picture of the colored wire frame.
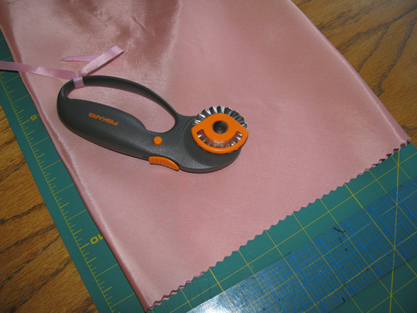
To make the bow and bias trim for the brim edge I needed to press and cut strips from the dress lining. I used a zigzag rotary cutter blade. The extra strips made fantastic flowers; the flower I used on the blouse was made from the silk fabric.
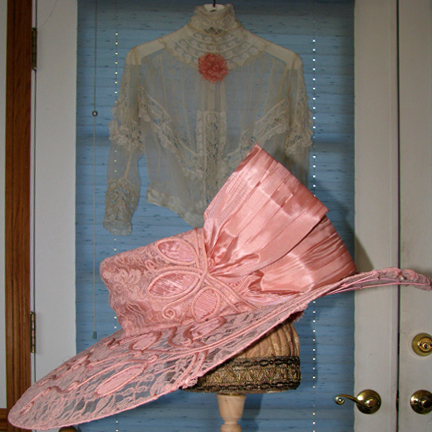
Here is a picture of the hat before the brim edge had been added and before the plain netting was added to the bottom of the brim. On the right side of the picture you can see the pink wires from the frame.
I decided to use two layers of plain netting to make the wires even less noticeable.
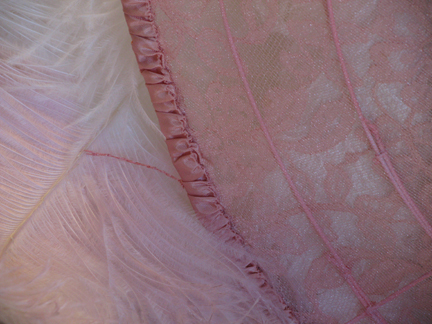
In this picture you can see the painted wire, the gathered bias edging on the hat and a swing tack. The feathers where shaped so that they could be sewn onto the crown sides and then bend down and hang over the brim edge.
In any kind of a wind the feathers would be ripped off of the hat so it is important to sew them to the hat lower down their shafts. A swing tack is how it is done so that the feather can be held in place but maintain some movement. One other thing I forgot to take pictures of was the bandeau. A bandeau is important to keep the hat at a tilt. It was also made of wire and I covered it with the silk fabric and then added silk flowers. You can see them in the picture below among the curls of the wig.
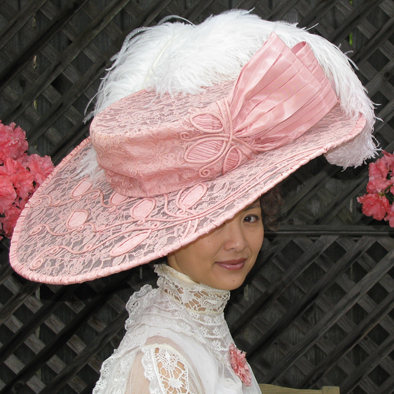
Between the early morning fog cover and the camera flash I think I got some good shots of Claudine and the hat. I used no reflectors but I would have if the Sun had been out a reflector would have been needed light up her face under the large brim of the hat.
I did hold the camera upside down and was shooting from about brim level so I think that might have help to keep the flash shadow from dropping down too far.

Close up of bow and the crown which was the old neck line of the dress.
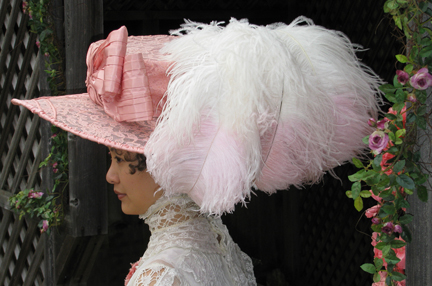
The feathers came dyed with the tips pink. They are prime ostrich wing feathers and each plume is made of two feathers sewn together.
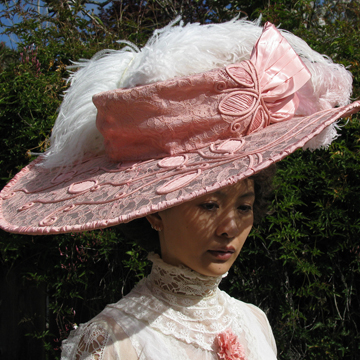
The sun came out at the end of the shoot and I got a picture of the sun coming thru the hat. That had been one of my goals.
Love what you did with my Grandmas dress, she would definitely approve. Steph
This hat is a dream come true! I have been envious of it for so long, Claudine looks so beautiful in it. On my list for Costume College wear!