
These pages where originally set up for an 18th C men’s waistcoat class at Costume College. The students in this class constructed an 18th Century Men’s Waistcoat from a pattern taken off an extant garment in the collection of the Lacis Museum of Lace and Textiles in Berkeley CA.
We discussed period construction but used sewing machines and more modern construction steps in class. The class inspired a pattern.

The pattern comes with sizes S, M, L & XL and two slightly different views. The embroidery plan included with the pattern is totally optional and should be done before you cut out your fabric. You can order the pattern on the 18th C pattern page.
Later in this article I will show you pictures of a finished waistcoat with all the period embroidery done by a very talented pattern costumer.
The Waistcoat we chose from the Lacis collection is a white silk with delightful silk embroidery. Only the front outside layer is left and there was at some point in time a shorting of the waistcoat and an addition of a collar. The pocket flaps are missing but the outline still shows as a color change in the silk fabric.
When I compared the shape and style of this waistcoat to the patterns in Norah Waugh’s “The Cut of Men’s Clothes 1600-1900″ I found that it was closest to the 1770 waistcoat. I also figured that it had been shortened about 3 to 4” most likely as the styles changed in the 1780s and early 90s. This would have given enough fabric to create the stand-up collar, which also came into style in the 80s and early 90s. I don’t think it was cut down in girth on the left side at all but was cut on the right side (as you are looking at it).

This is what the right side of the waistcoat might have looked like after it had been embroidered and before it was cut apart by the tailor to be sewn. I show it on blue background only because there is some white embroidery in places.
The V&A has some very good examples of period waistcoats much like the one. Taking a look on their site might give you ideas on fabrics and trims.

Edge
In most places the stitches in the green triangles are spaces far enough apart to see as much fabric as silk thread. The off-white is dense but the upper edge is long short. The gold edge is a modified stem stitch.

Side Flap
Stem stitch and satin stitch.

Under Flap Motif DR
The areas that have lost silk threads over the years do tell us just how the original pattern was transfered to the silk. It was traced on with ink and because you can see the needle holes you can tell that at least on the flower the stitches are past the line not on top of it.

Under Flap Motif ER
This motif is mainly satin stitch with stem stitch for the flower and leaf stems.

Field Motif MR,NR & OR
This motifs are satin stitch.

Edge Motif JR
This motif is mainly satin stitch with stem stitch for the leaf stems.

Under Flap Motif FR
This motif is mainly satin stitch with stem stitch for the flower and leaf stems. The leaves in this motif are created with a modified short long stitch as are a some sections of the flowers.
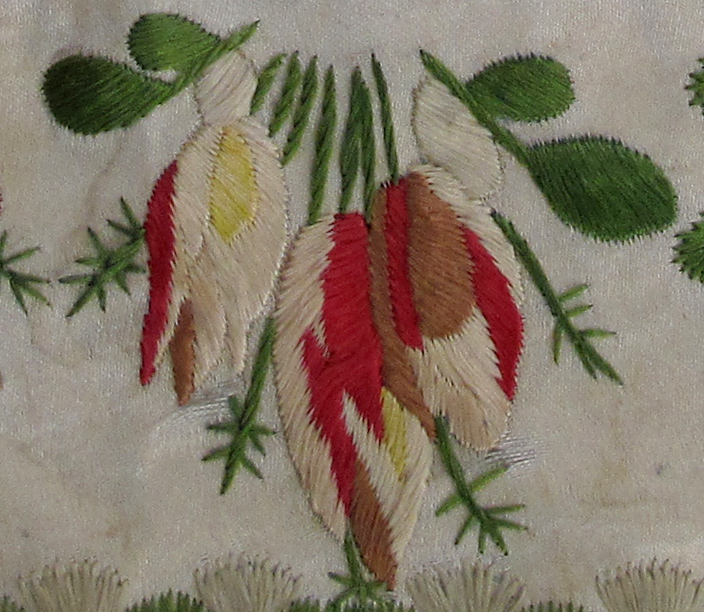
Under Flap Motif ER
This motif is mainly satin stitch with stem stitch for the flower and leaf stems.

Bottom edge.
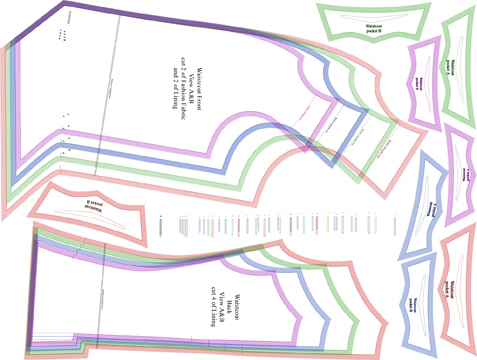
Picking a Pattern
The sizing on this pattern is based on chest size. Chose the pattern that includes your chest size rounded up to an even number. Check your waist size against the waist size on the pattern. If you waist size is larger by more that an inch or two I recommend using view B. View B has a large split up the back seam. This split will expand to fit a larger waist and you can tie the string in the back accordingly. This is historically accurate. View A is more fitted but you can also leave it a little larger (less fitted) and add ties to adjust the fit.
| Making a Muslin |
| The first thing to do is compare the pattern to the person for length and shorten or lengthen if necessary. The pattern was just the right length. |
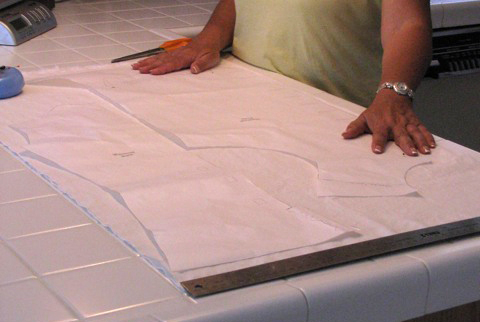
Lay out you paper pattern on some inexpensive fabric. These steps are being shown on View A.
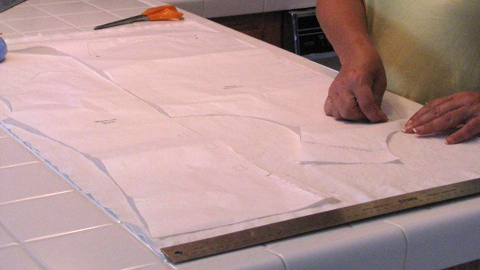
To make a muslin you only need two fronts and two backs. The fabric here is folded double.

Cut out fabric and sew the center back, shoulder and side seams. Use a long stitch that will be easy to remove. Clip the seam allowances around the armholes.

Try it on the person it is intended for or a dress form of the person. Make sure that you check for fit over what they will be wearing or something of similar thickness. Pin the waistcoat closed in front with about an inch overlap, as shown in picture.

Make sure that the shoulder area is adjusted properly.
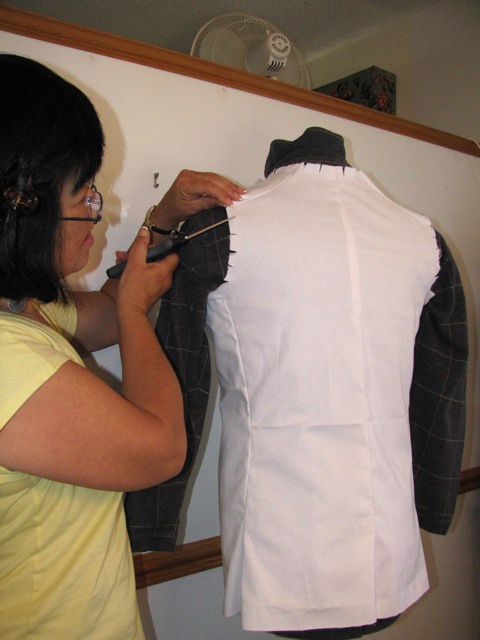
Clip the seam allowances at the neck and armhole if you haven’t yet.
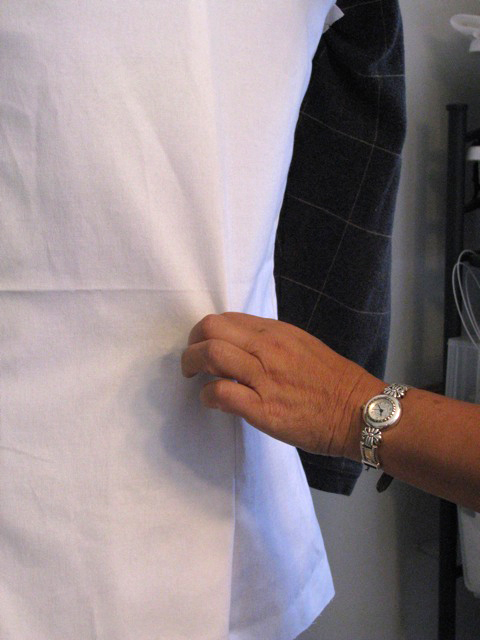
Check the back seam for fit.
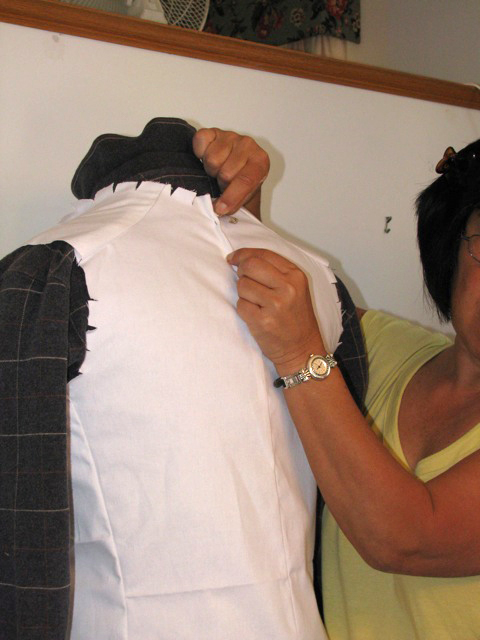
Use safety pins to adjust the seam. Gail is using the pins to take in about 1/4″ near the neck opening.
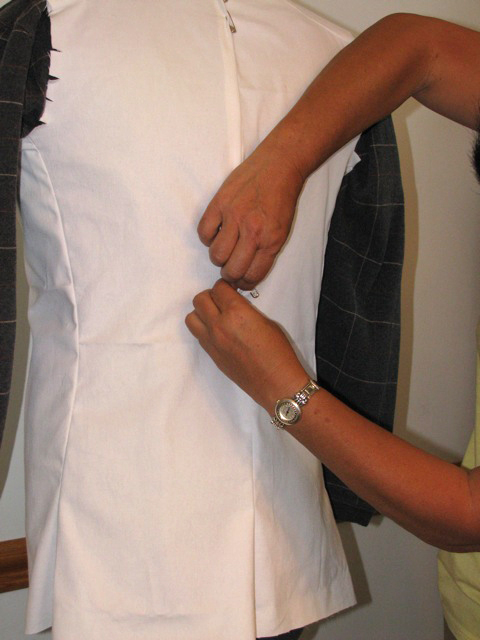
Here Gail is using the pins to take about 1/2 inch from the back seam near the waist.

This picture shows the final pinning, nothing needed to be taken out in the shoulder blade area.

Remove the muslin from the dress form or person. From the inside, mark the fabric near each pin.
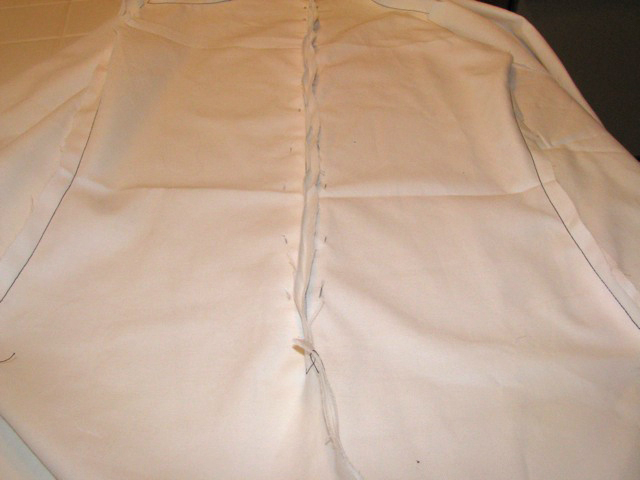
This photo shows the marks for the new seam line.
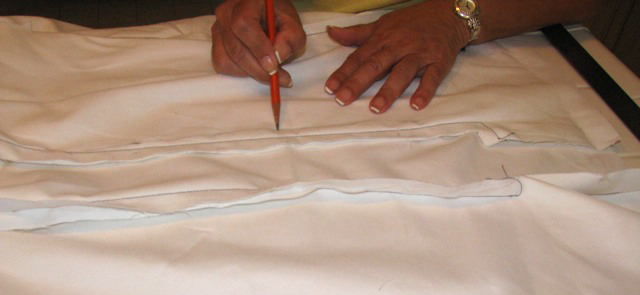
Draw a smooth line between the marks.

Pick out the old seam and sew the seam on the new lines. Try on for fit again.
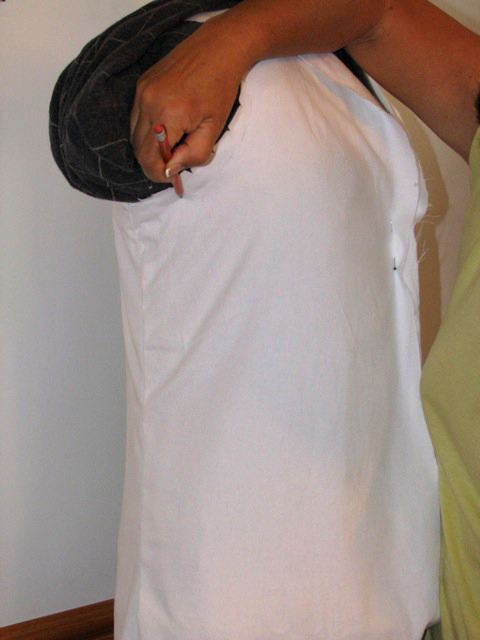
If the armhole seems a little too high re-mark it.
At this point you have two options some people use their muslin as final patterns to cut from but most people use the muslin to make the changes back to the paper pattern. We recommend this because the paper is easier to see pattern thru.
Transfer your changes back to the paper and you will be ready for class and ready to go to the fabric store and pick out some fantastic fabric.
Test Waistcoat View B

I made a sample waistcoat from View B. I used a cotton upholstery fabric with stripes and floral designs in the weave. It was not cut on the straight of grain of the pattern but just slightly off which is what gives the upside down “V” in the stripes.

The lining is a rose color linen fabric. It is not finished at the armhole and it does not have buttons or buttonholes yet.
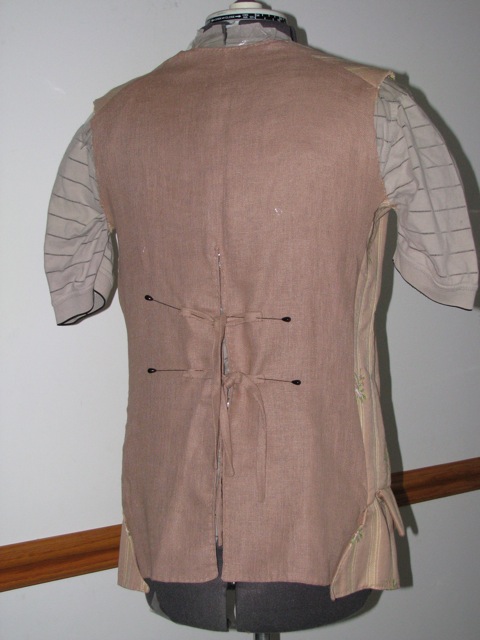
I have only pinned 4 and not 6 of the back ties into place.
In this day of home embroidery machines finding someone that loves to embroider and took my pattern for an 18thC Waistcoat and reproduced the extant waistcoat’s embroidery exactly down to the button covers makes me happy. These pictures are from Charlene Roberts of “A Stitch in Time by Charlene” on Facebook. She did a wonderful job.
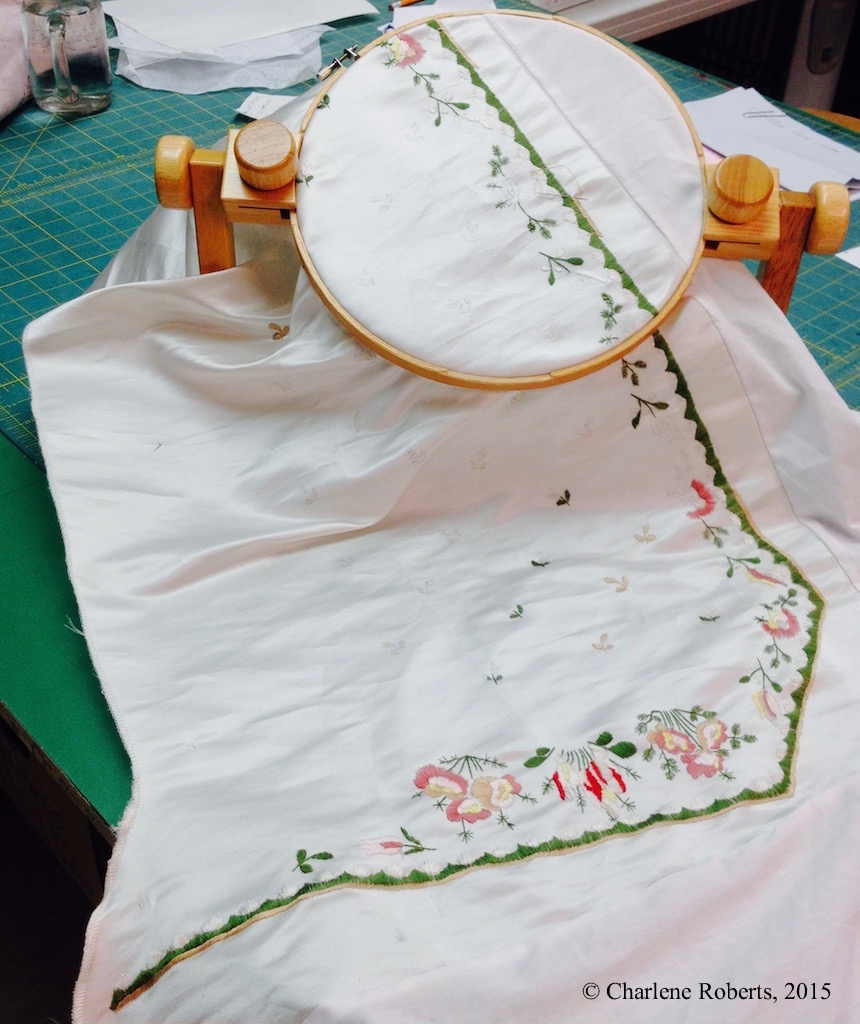
Picture of how Charlene worked on the embroidery a section at a time. In a hoop that has a stand. In the 18th C they would have stretched the full piece of fabric on a large frame.

Nearly finished waistcoat, just the buttons have to be added.
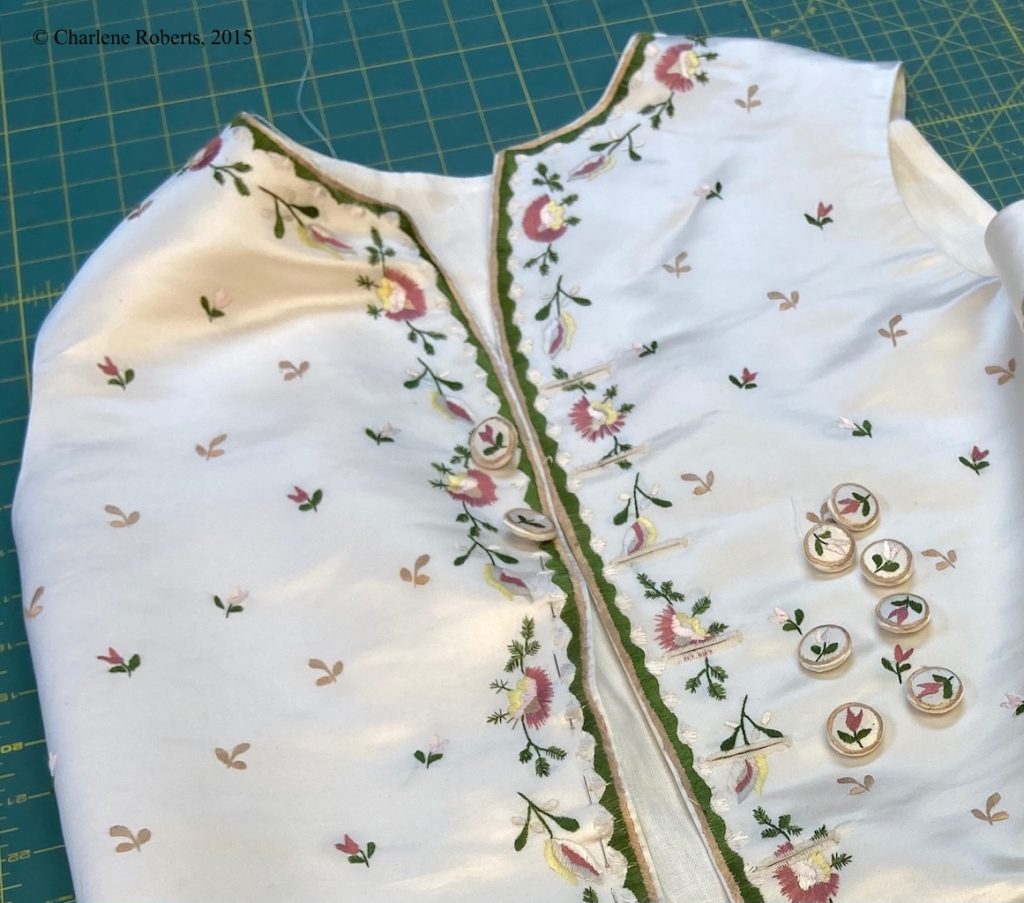
Close-up so you can see the buttons even have embroidery.

Finished Waistcoat on a dress form. I would like to thank Charlene for the pictures. I always hoped someone would convert my drawings to real silk embroidery on silk fabric.