My passion for Ostrich plumes started when I saw the opening credits of “Wings of the Dove”. Where do such plumes come from? How do milliners fabricate them and can I create such confections? These are all questions I asked myself and they lead me on a course of study and experimentation. In this article I will share some of what I have learned along the way. The hat from the opening credits of “Wings of the Dove is worth a look in motion is breathtaking.
In millinery terms a plume is a large feather usually ostrich and a single feather is called a stem, so one could use the terms interchangeably when speaking of ostrich feathers. I tend to use the term plume as something suitable for a hat and feather as a single stem.
If you take a close look at vintage hats you will soon notice something. Even the small plumes are made up of at least two feathers. Sometimes it is not easy to know for sure without taking the plume off the hat but you can tell without disturbing the feather if you look at the main stem and see little cross threads every ¾ to 1”. Joining feathers together this way is quite easy to do and makes a world of difference. To paraphrase Louise Dreher in From the Neck Up (the milliner’s bible) “A common practice is to use feathers in groups of 2 or 3 to give them more volume; stitch them together to look like one large plume. A single feather will appear lacking and lonely.”
In the first part of the 1900’s when hats and ostrich plumes where quite large milliners not only joined feathers together along the length of the center shaft they also sometimes added width to the feather by joining individual fronds from other feathers to create plumes with widths up to 24” that was on a feather that was 28” long. They had to use children to tie the small knots that would join the sections. Called Drooping Willow Plumes they where almost 4 times the cost of double millinery plume of extra quality. You can see a period newspaper advertisement in Ladies Vintage Accessories by LaRee Johnson Bruton but I’m not going to show you how to make that type of plume I know I could never have the dexterity to make the knots. With the help of Claudine de Montigny (my hat model and an excellent costumer in her own right) I will show how to join feathers along their center stems.
Joining feathers to make millinery plumes
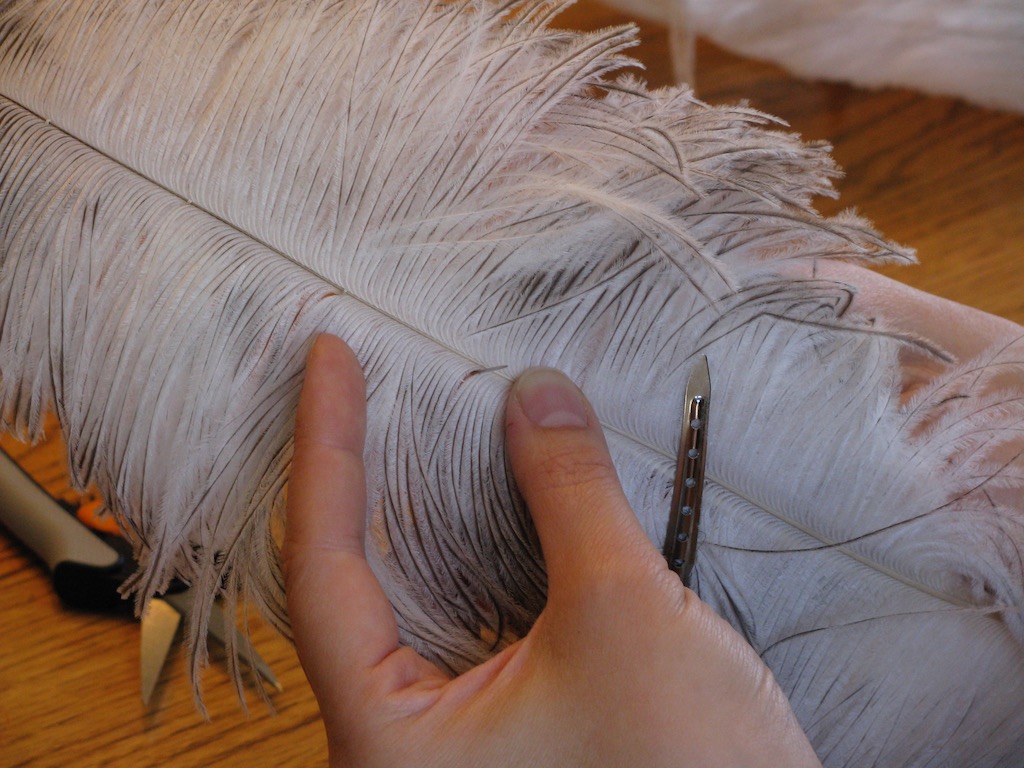
The first step is to pick matched pairs of feathers. You will want two or even three that are about the same length, width and color. Sometimes you can get away using a feather of a slightly lesser quality as your back feather if it will not show or if you are joining three you will be able to hide the lowest quality in the middle position. If the stems are very thick you will want to cut away some of the thickness in the last few inches of the stem. (demo by Claudine)
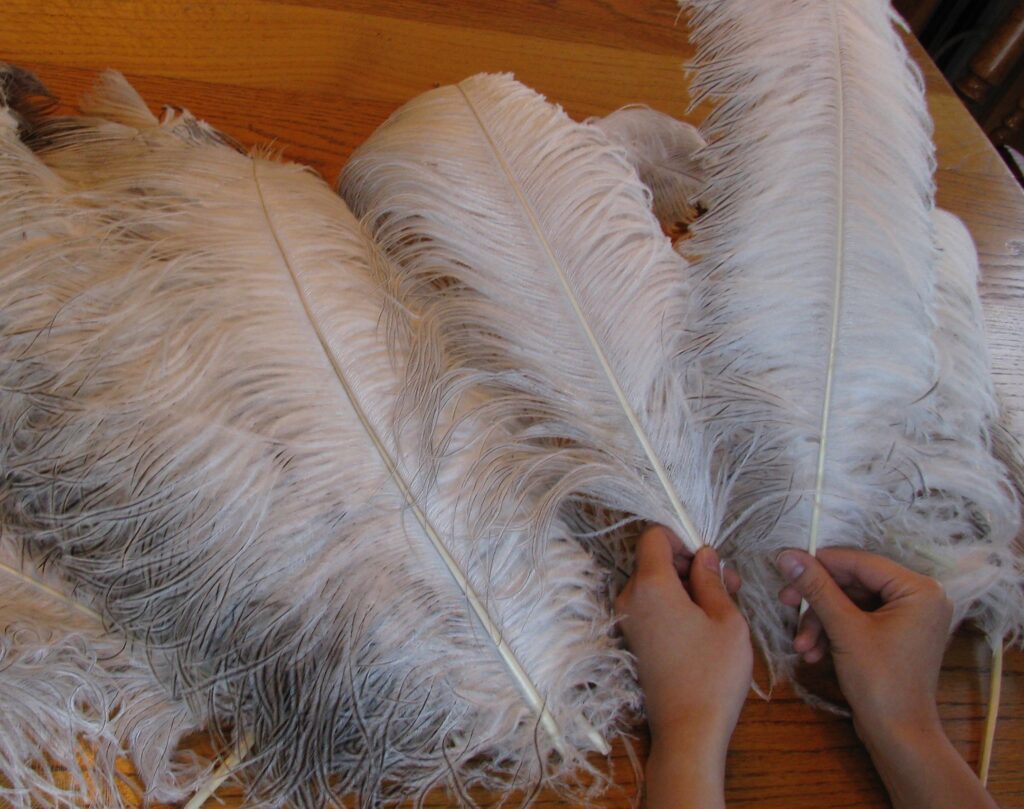
Claudine picked two pairs one long and narrow and mostly white and a mottled wider set.
Pick a thread color that match the center shaft not the fronds. Sometime the shaft changes color along its length, match the wider part as the stitches here are more noticeable. In this case the cream thread was the best. Thread up a length of thread three times the length of the shaft. Fold it in half and knot off both threads. Trim the thread past the knot quite close.
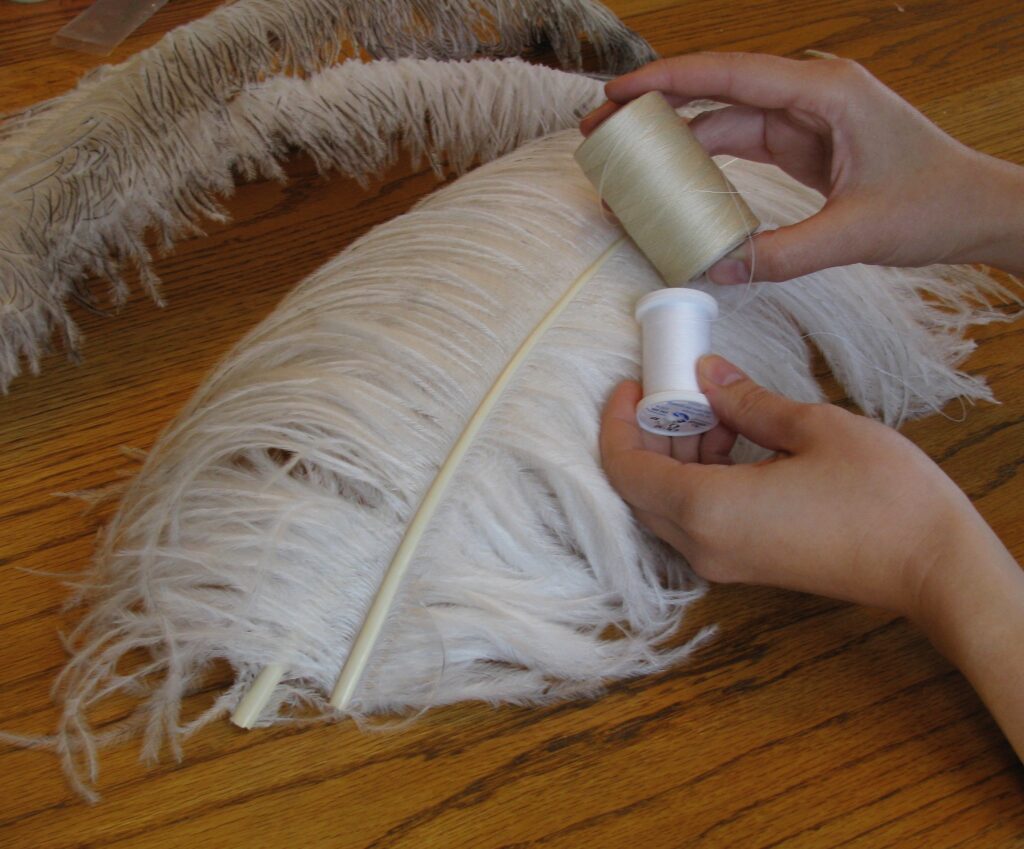
Match the tip ends of the two feathers and use two clips to keep the feathers together. I use long hair clips but you could use alligator clips.
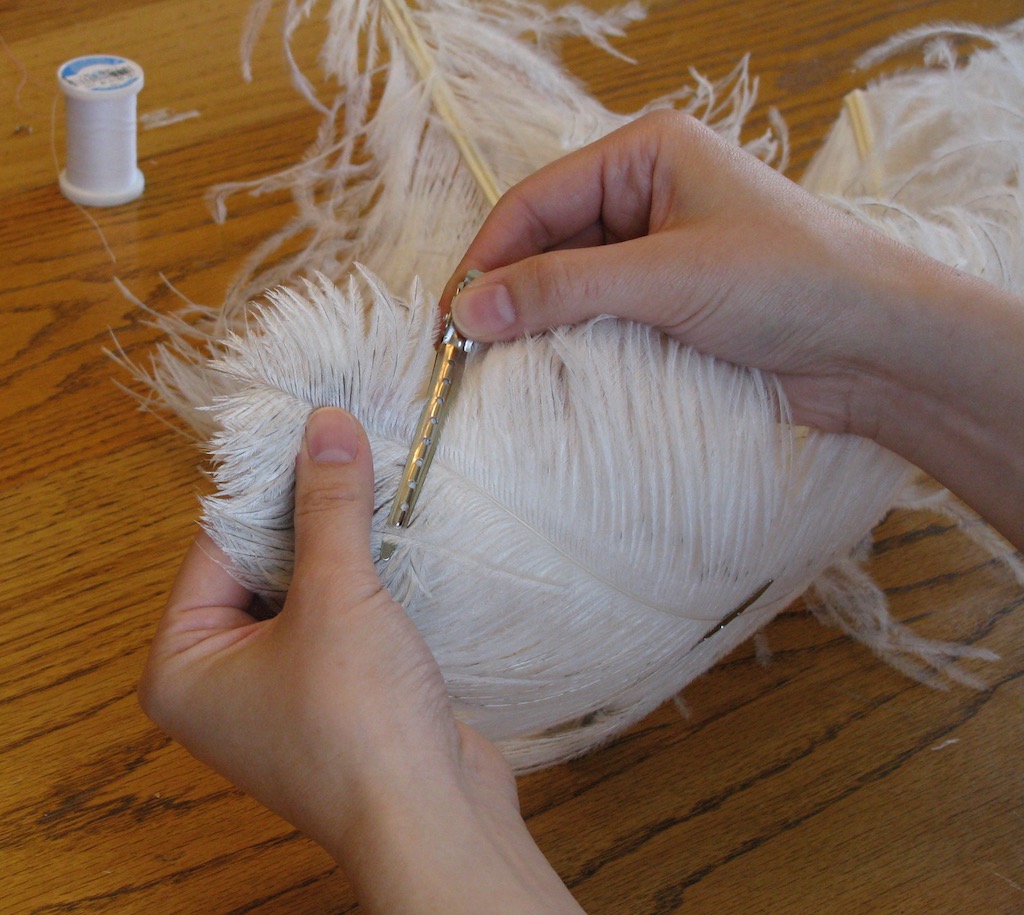
About 1.5” to 2” (4cm) from the tip end and from the underside of the feathers push the needle between two fronds on one side of the center shaft. Do not pull the thread thru. Push the needle back between the two fronds directly on the other side of the center shaft. Turn the feather over and pull your thread until the knot end is about 1” (2cm) from going thru the feather. Use your needle to split the two lengths of thread as shown in the picture below. Then pull the thread tight.
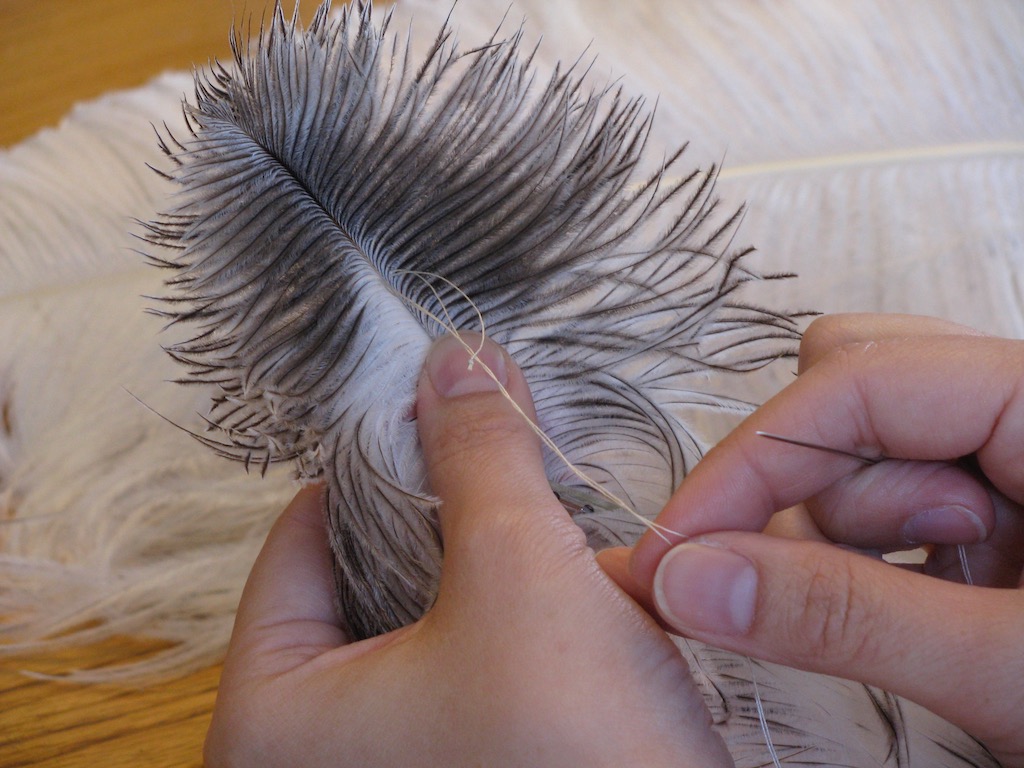
Working from the front side poke the needle up from the back about 1” (2cm) to 1.25” (3cm) down from your first stitch. Do not pull the thread thru. Push the needle back between the two fronds directly on the other side of the center shaft.
Just above her left thumb you can see the needle coming from the backside of the feather. This is really about her 5th stitch and not her first full stitch
Turn the feather over and pull the thread thru. Just before all the thread is pulled thru and a loop is formed stick you needle into the loop twice. With the thumb of one hand covering the previous knot pull your thread tight to form a knot. Repeat the steps from * until the entire length of the shafts are stitched together.
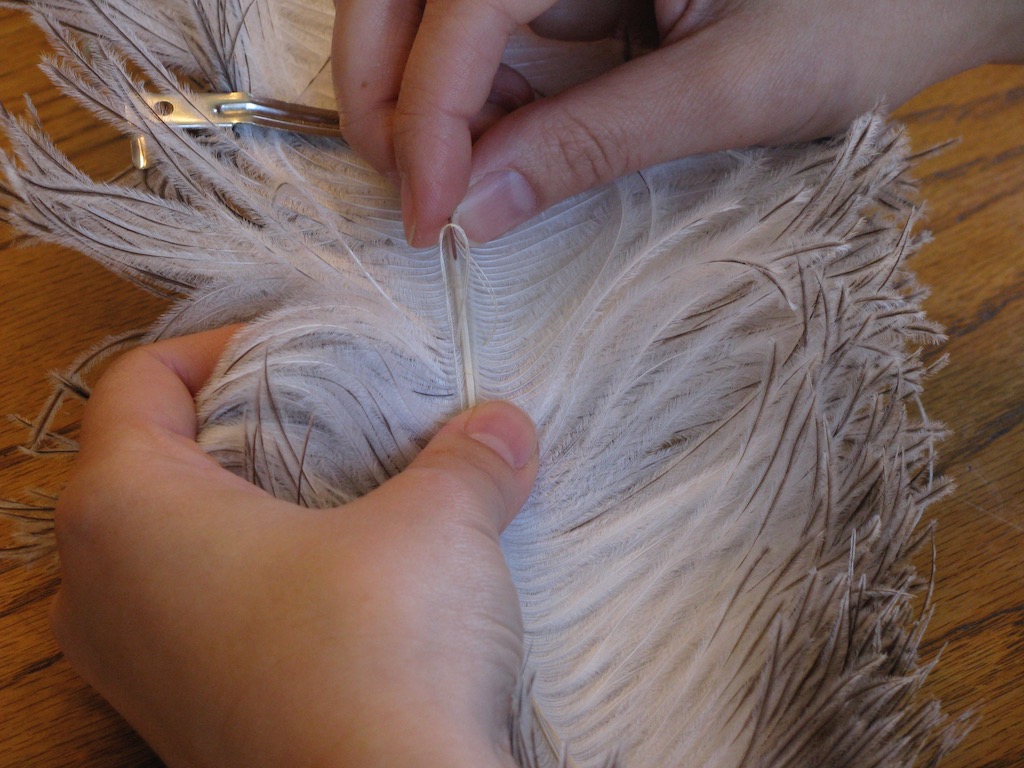
When you reach the end you can wrap the remaining thread around the shafts or make as many of these stitches as close together as you can before you run out of thread. Below is an example of stitched bound stems of some small ostrich drabs there are about 5 stitches after the last fronds.
Shaping plumes
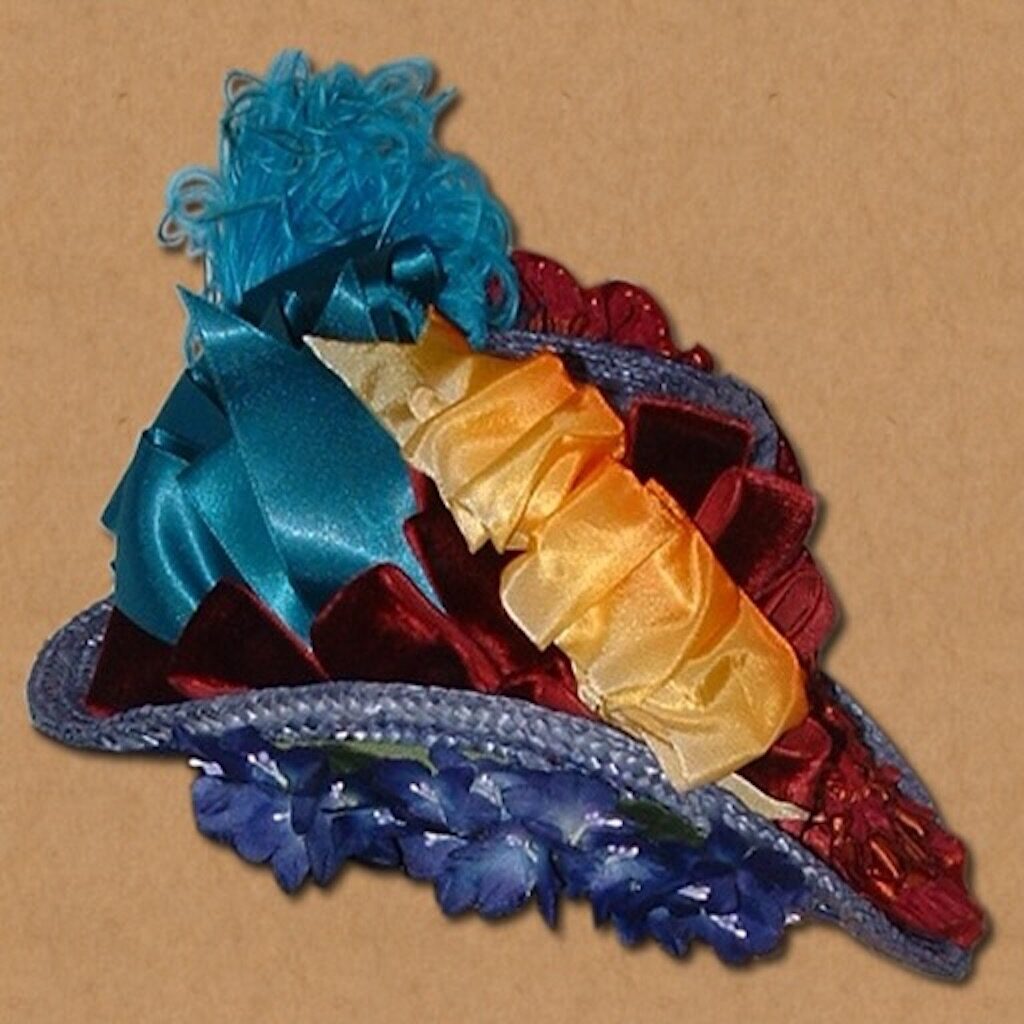
Many period hats have plumes that are shaped after they are joined. This vintage hat is later than Victorian or Edwardian but is a good example of shaped plumes on a hat it has two double plumes that are altered in two ways. The main shafts are shaped into a C shape and the fronds are forced back by steaming. This way the plums can be sewn onto the hat so that they follow the line of the crown but the fronds bend backwards to cover the brim and do not either lie on themselves or stick straight up in the air or cover the fantastic smocking on the crown. They are also overlapped so that the fronds of the blue partially cover and blend with the fronds of the pink.
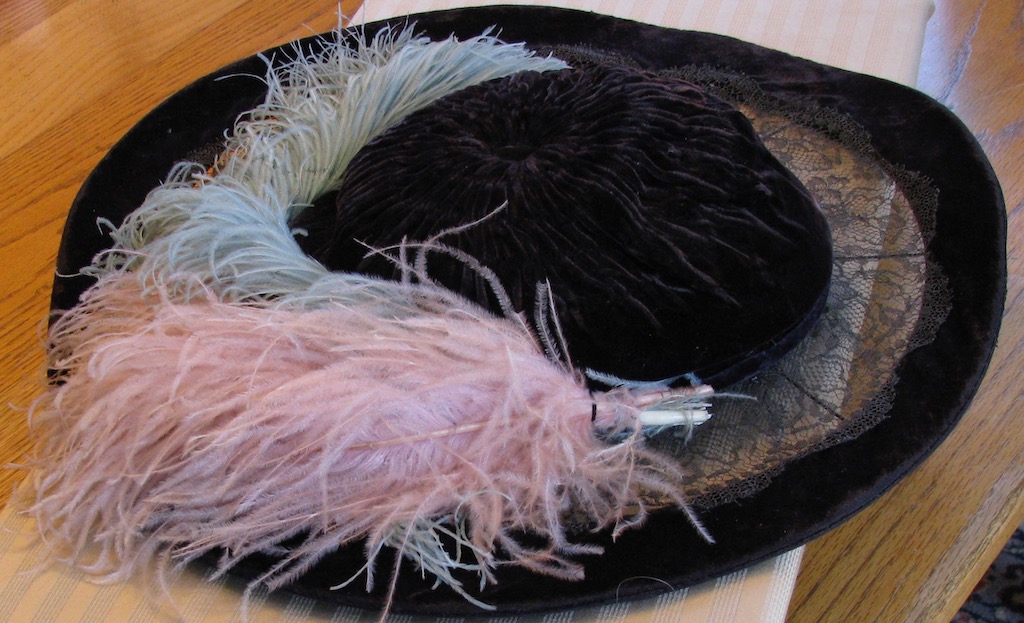
A vintage hat, covered buckram brim with a lace covered wire frame insert the crown is soft with smocking and a covered button at the tip. Something is likely missing something that was used to cover the plume stems.
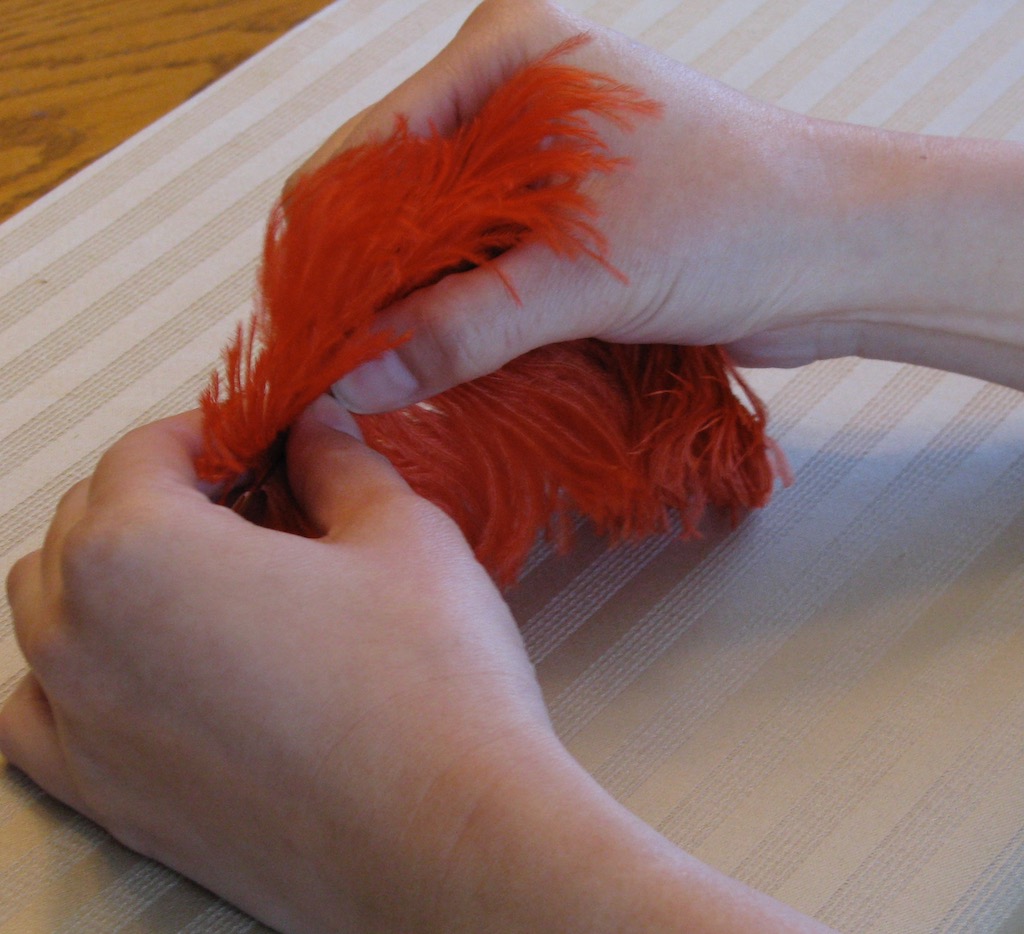
First sew two feathers together as above. To shape the center shaft of a feather or plume hold it in both hands and with a fingernail dent the back of the center shaft while angling your thumbs together. This takes very little force at the tip of the plume but a great deal near the ends.
Claudine is crimping the center shaft with her right thumb.

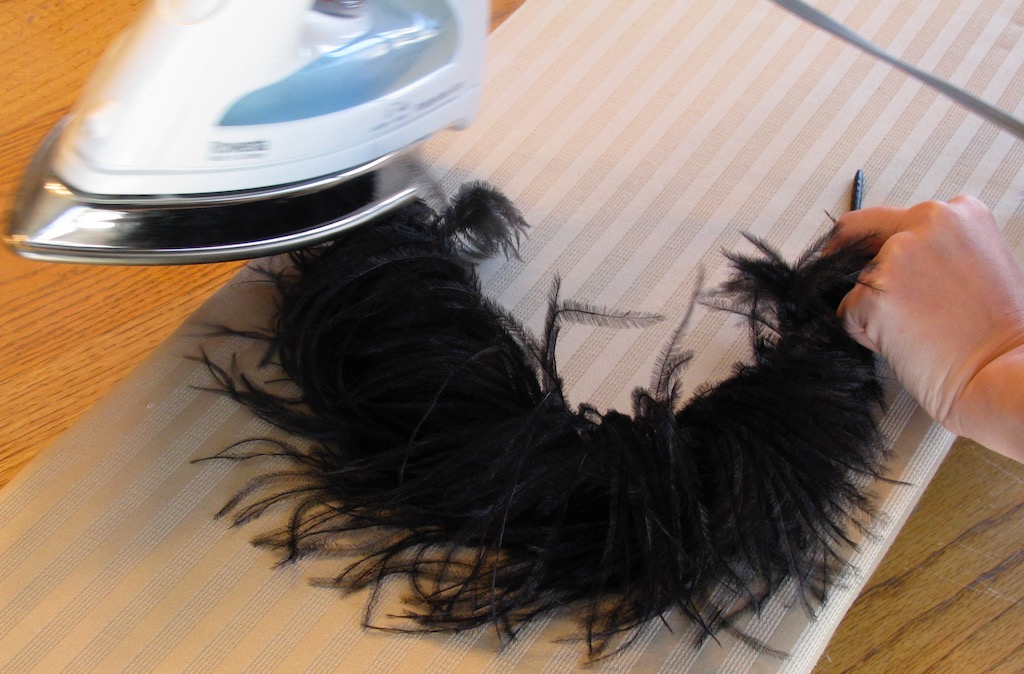
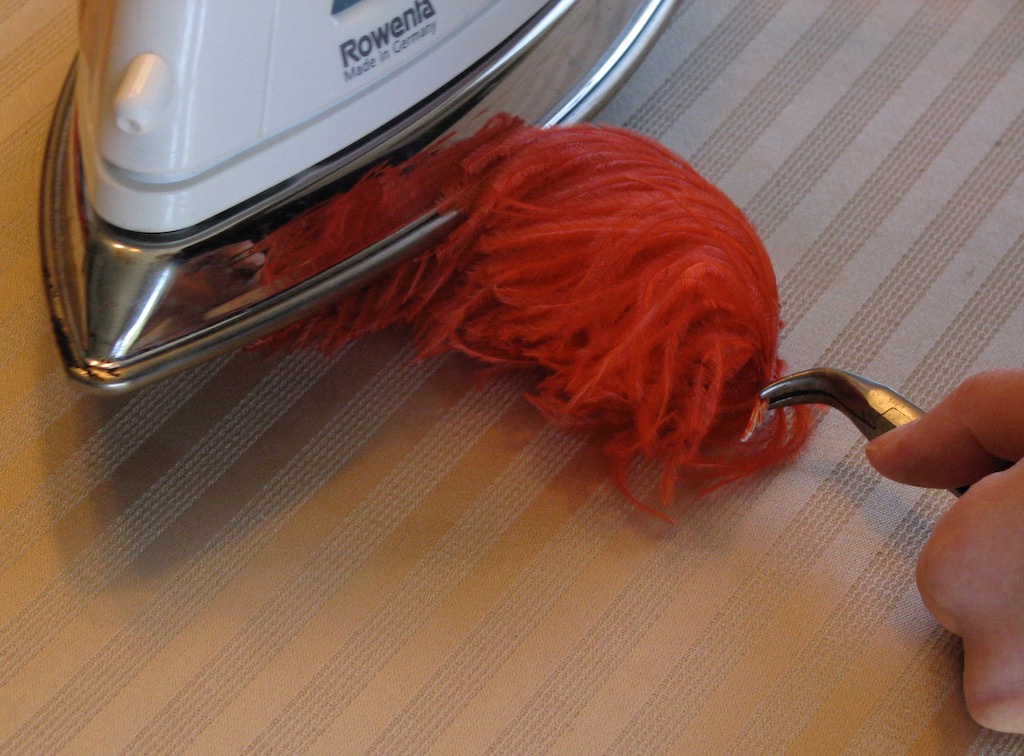
Drag the plume across the ironing board so that the fronds on the bottom side are all going away from the center shaft. Use an iron to steam the fronds on the other side of the stem until they lay that way by themselves. Keep your hand away from the steam or wear an oven mitt. You can apply some pressure with the iron but in this case you do not want to press the fronds all the way over just have them gently curl over.
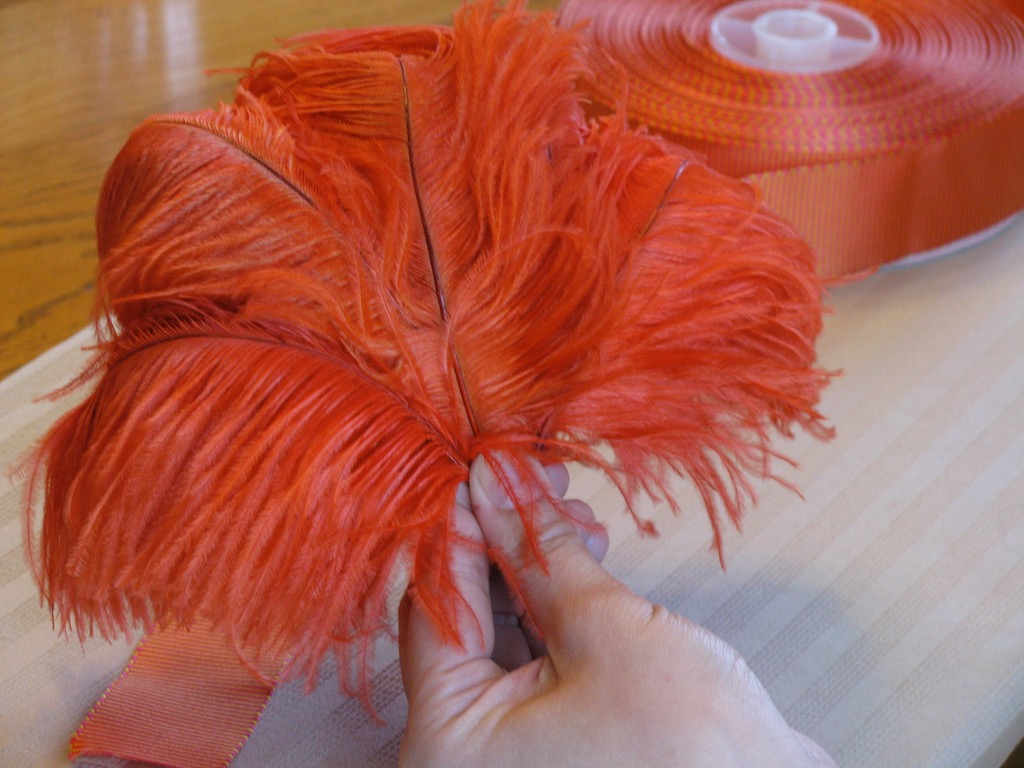
Another example of steam shaping plumes is shown below with some small double vintage plume. I purchased 10 of these small ostrich drabs most of them where already shaped but a few where not. In the picture below Claudine is holding the shaped plume.
The first step is to curl the shaft with your thumbnail as with the black feathers above.
The next step is to steam the feather but, with the curl of the feather this time and press the same way, towards the curl. These are small so it’s a good idea to hold onto the stem with a tool or you can pin the feather to the ironing board into the shape you want and then steam.
I plan to use these all on a small late Bustle Era natural straw bonnet with the ribbon shown, grouped together something like this. I will most likely tack them to a small semi-circle of crinoline colored to match the feathers. This I will tack or pin onto the hat.
Back of plume cluster

Front of plume cluster.
Curling Plumes
In many cases millinery plumes are curled. Sometimes the majority of the frond is curled and sometimes just the last inch or so. Fronds are curled the same way that ribbed curling ribbon is curled. You hold the ribbon between you thumb and a pair of scissors. With feathers you need to be a little more careful. I suggest that you take a damaged feather and practice with a variety of scissors and other edged tools. I have moved away from scissors altogether and have moved to plastic tools.
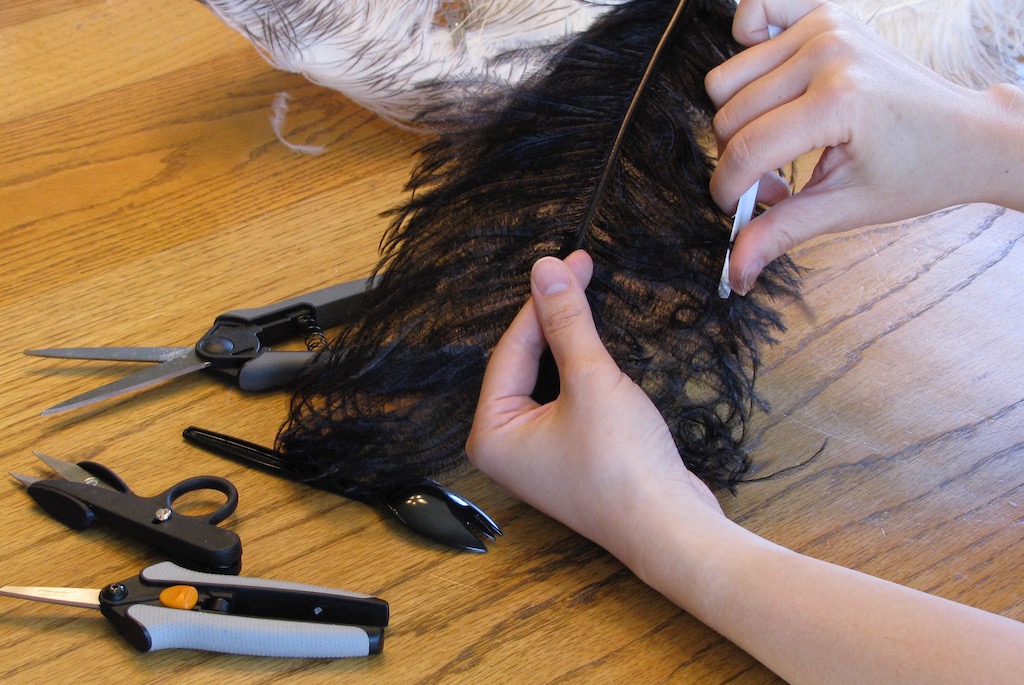
Claudine is trying out tools and a plastic spoon handle with the edge cut away gives the best results with the most comport. The bowl of the spoon also worked well but was a little awkward to hold onto.
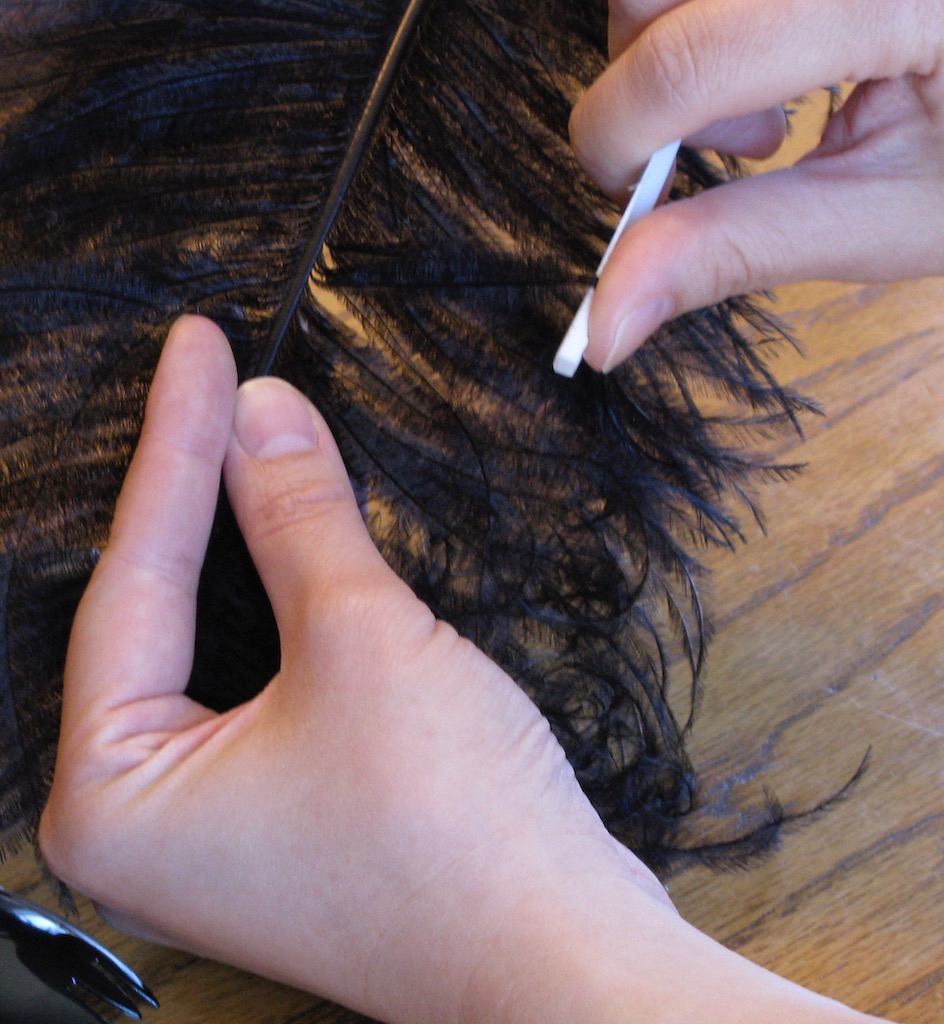
For best results I usually take only three fronds at a time. In the close up you can see that Claudine hat three fronds and is starting about ½ way down the frond before applying pressure with her thumb.
With some smaller plums you might want to curl almost the full frond. Just realize that the more of the frond you curl the narrower your plume will look. Below is a teal plume that was made from some short wide feathers in order for them be in proportion with the hat I curled them almost to the shaft.
On the smaller hats of the late Victorian Era you would never use the giant ostrich plumes that can be used on Edwardian hats as on the pink one above. You can use the upper parts of the plumes. Below is an example where 6 tips of larger plumes where used. I salvaged these from a feather fan that was not in any condition to use as a fan. As you can see from the front, the tips had been trimmed to create a spade shape. I joined the tips together in pairs by wrapping the base of the stems together with silk thread and because they where still quite wide I also bound then with thread two inched above this (you should be able to see that in the back shot of the hat). Then I curled the heck out of all but the very shortest fronds near the tip. When the shafts of the three double plumes are curled slightly and bound together they create the type of feather decoration that is often seen on period hats.
A late Victorian small bonnet from all sides
I left curling feathers almost to the last because you do not want to get steam anywhere near your curled feathers they will un-curl. Which can be quite demoralizing because it can take a few hours to curl a large plume.
Getting your plumes onto your hat and keeping them there
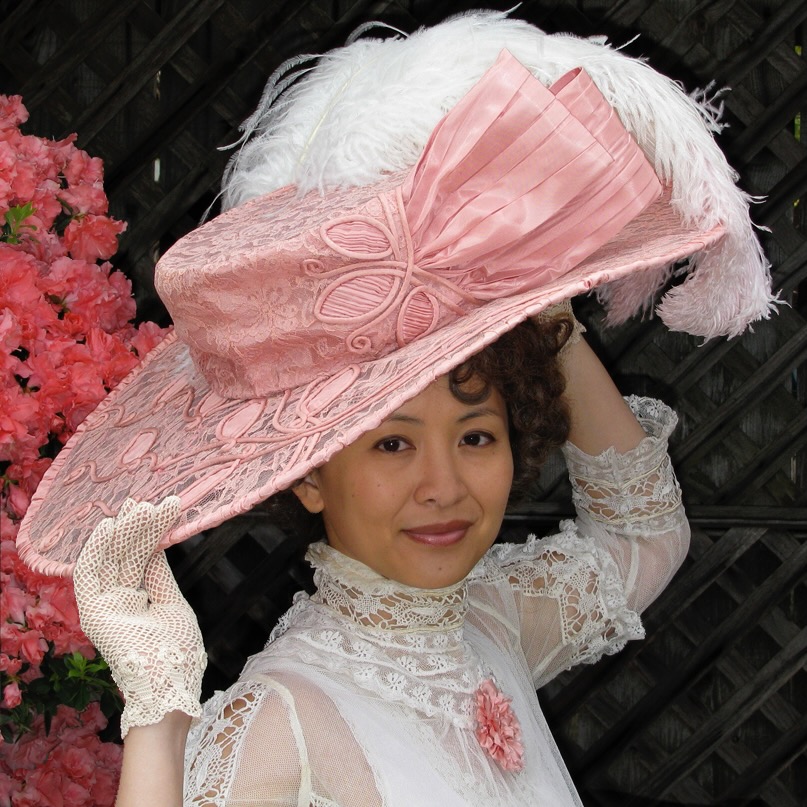
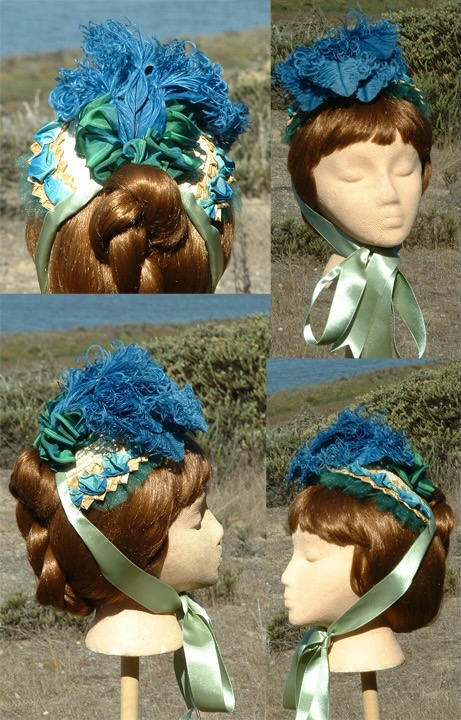
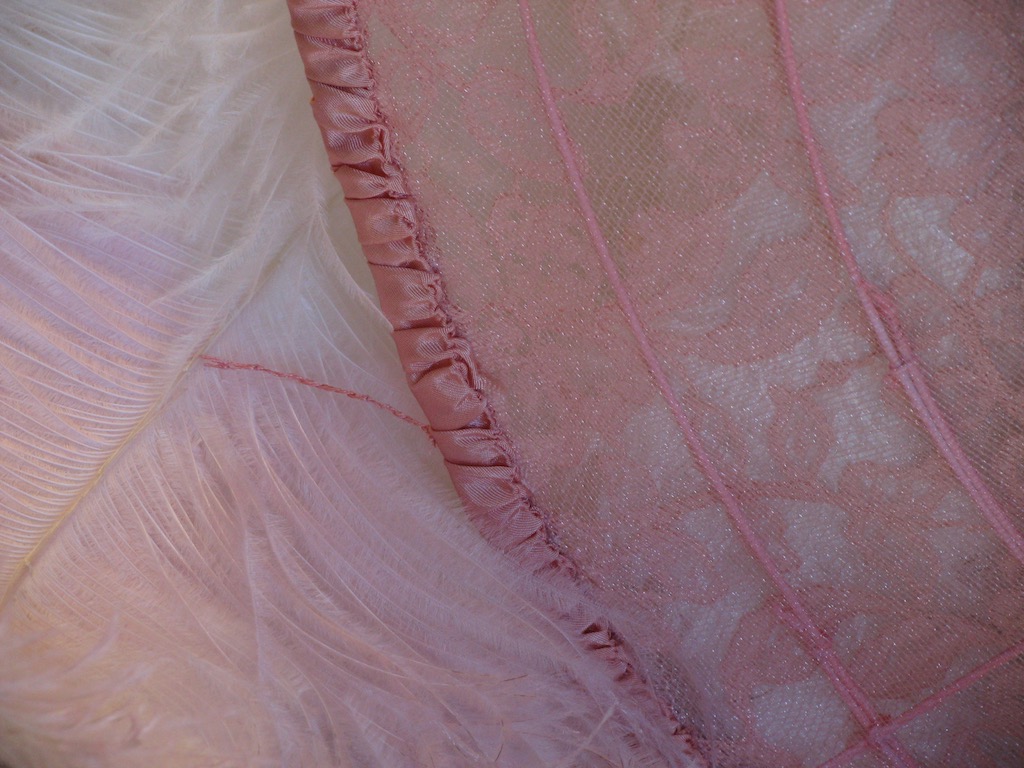
At the beginning of this article there is a picture of a new wire frame hat I just completed. The hat is being modeled by Claudine de Montigny and very well indeed. The inspiration for this hat was a dress that a friend brought in to work saying “can you do anything costumy with it?” I fell in love with the “couched tubing on lace” work and knew it had to be a large wire frame hat with lots of fabulous plumes.
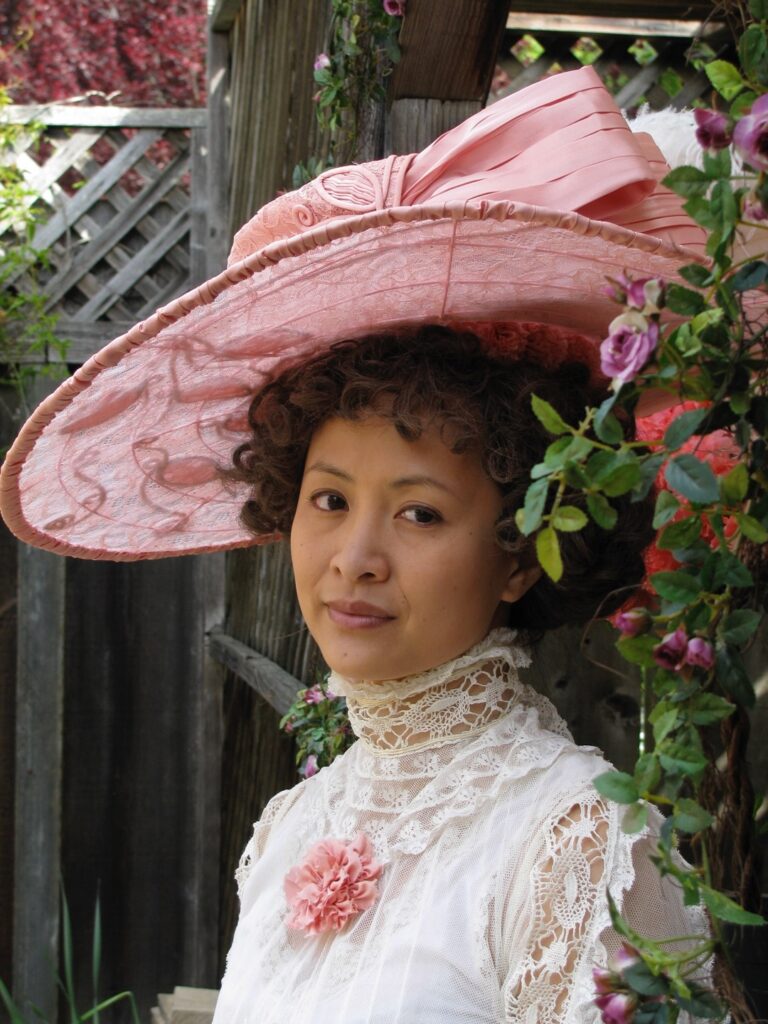
Plumes as large as these can be difficult to get onto a hat but they are done in the same manner as smaller ones. If you go back and look at the black vintage hat earlier in the article you can see the black stitches used to sew the pink plume in place. Usually the base ends are stitched to the base of the crown with a heavy matching color thread. Three or four stitches are all that is needed per plume. In this hat the shafts of the plumes where curled into a “U” shape and then the base of the shafts where stitched to the crown sides. Because this is a wire frame hat it was important to make sure that some of the stitches go thru the crown fabric and around at least one wire.
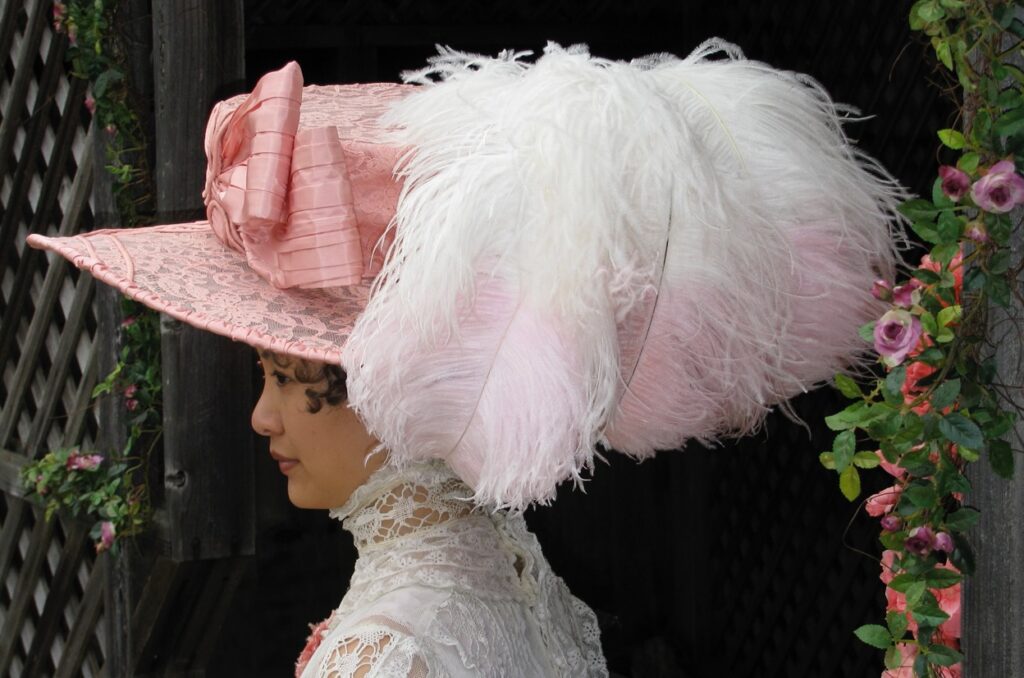
If the plumes are of any length it will also be necessary to anchor the plume farther down its length. This was done where the plumes cross the brim near the color change of the feather. Because I wanted to preserve the ethereal quality of the feathers I did not want to sew it down tight to the brim edge, it would loose all its bounce. I used a swing tack as shown below. The swing tack is the same stitch tailors use to keep linings in place but also maintain some slack, basically a chain stitch. I did not invent this it is a standard millinery technique.