Intro
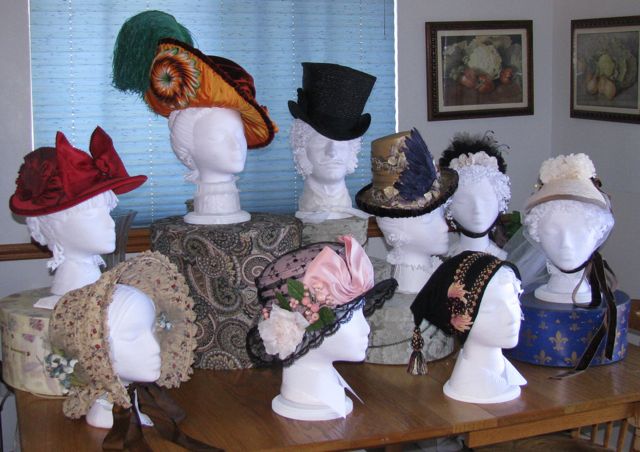
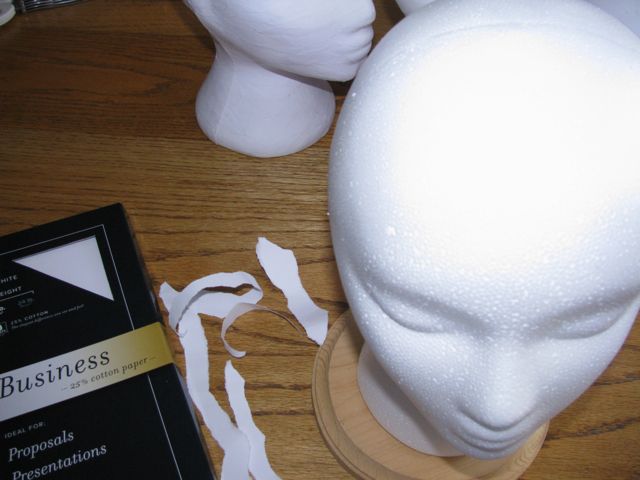
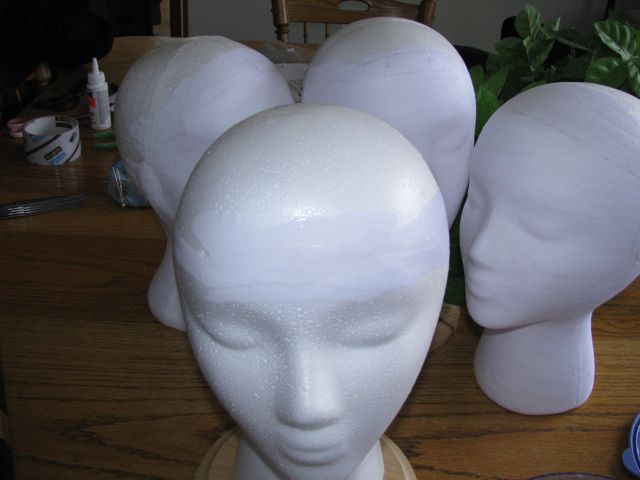
It has always bothered me that when I needed to display a period hat I could not really display it as it would have been worn on a head form without hair. So, when I was asked to bring a collection of 19th and early 20th century hats to Costume College I wanted to come up with a way to display them that illustrated not only the changes in hat styles but also the changes in hairstyles. I really admired the paper hairdos in the Kyoto Costume Institute’s book “Fashion: a history from the 18th to the 20th century” so I set out to make a set of heads. The hats I chose to be in the display where made between 2005 and 2011 either as prototypes for patterns or as teaching aids for workshops and run from early Victorian to mid-1920s in style. As a reference for the hairstyles that would have been worn with the hats I went again to my favorite hat and hairstyle reference book Ruth Turner Wilcox’s “The mode in hats and headdresses”. I have some experience in making yarn wigs for dolls and in my first attempts I treated the paper just as if it was yarn. I was never able to make hairstyles with the 1” wide strips the Institute seem to be able to work with so, I moved down to 1/2, 1/4 and 1/8” strips. Braids for chignons so much a part of any hairstyle in the 19th Century where difficult with flat strips of paper so I keep trying different things. Curls however are fairly easy and fun. Each head took any where from half a day to a full day to finish. I did make two heads before I realized it is also important to cover the face with paper mostly because the color and surface texture of Styrofoam just did not match the paper hair and the deference was heightened in photos.
Below are some examples of the heads I made my first go round with and without hats. The chignon # will be important in the chignon section later in the article.
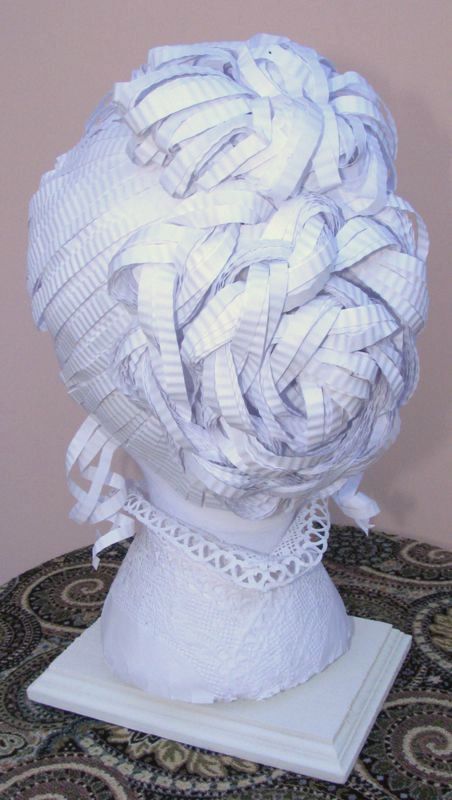
1900 back view chignon 1, the lower bun was done by braiding long crimped strips together..
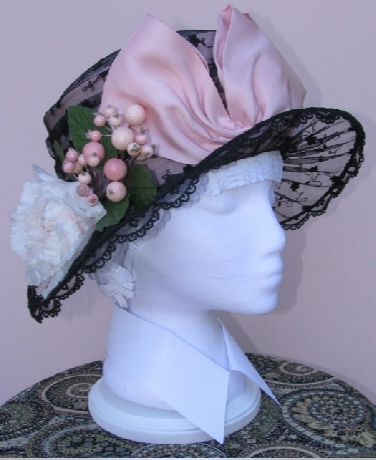
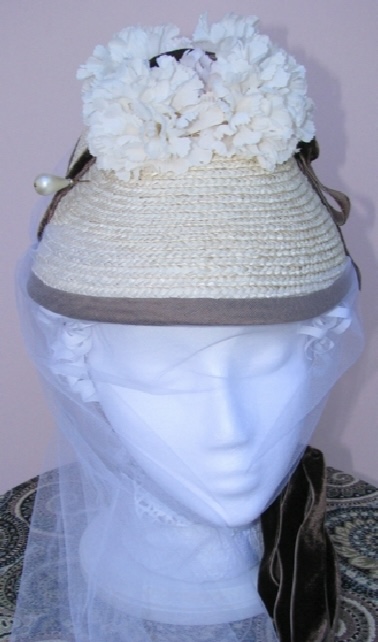
1900 for clam shell front silk and lace covered hat

la Belle hat.
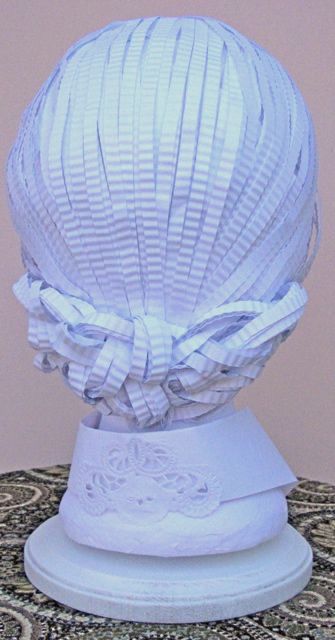
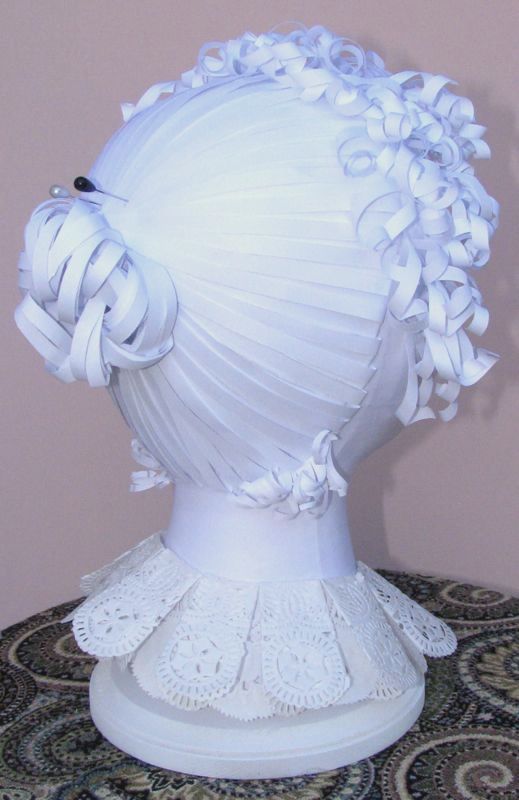
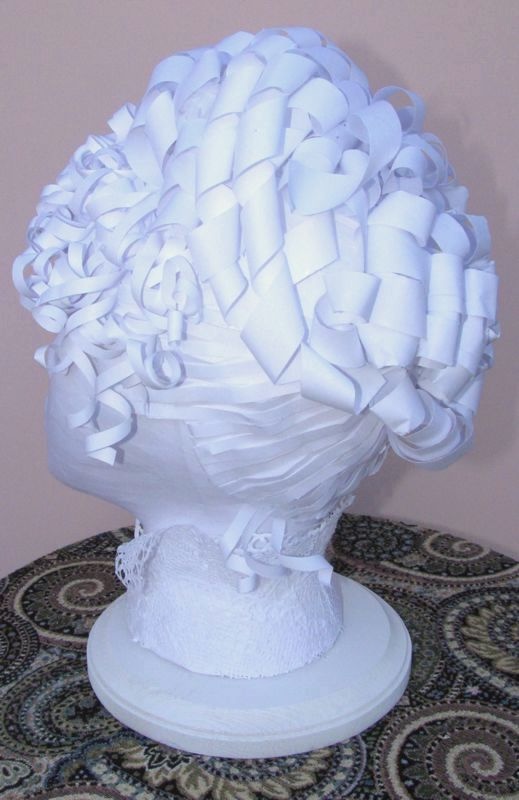
1919-20 back view chignon 1-2 this narrow bun at the base of the neck was also done this way.

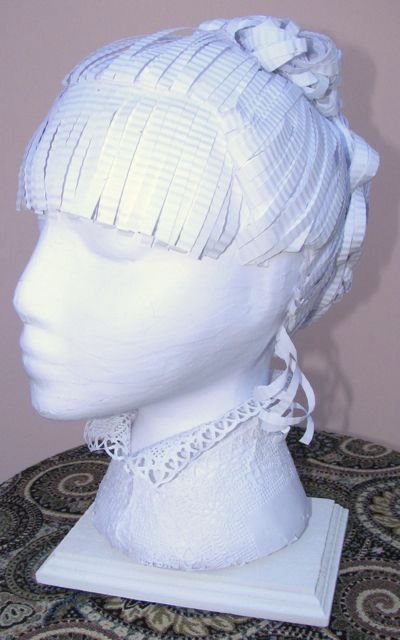
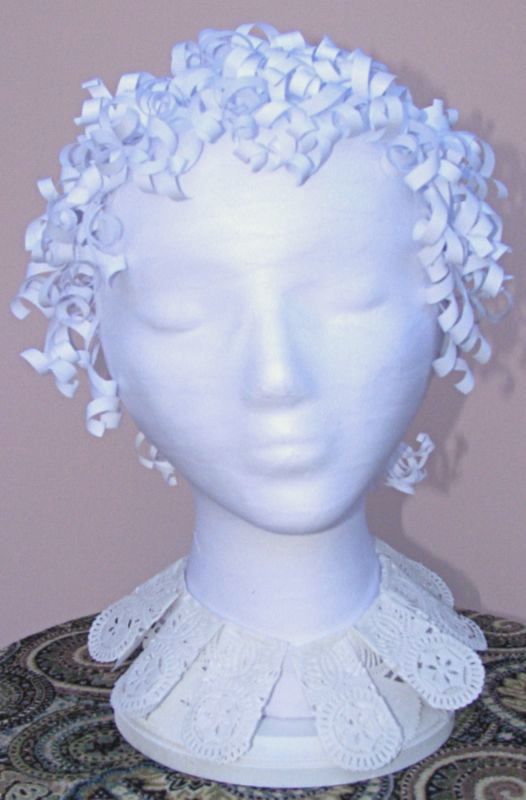
Front with crimped bangs.
1919-20 for a sheer brimmed post WWI hat.
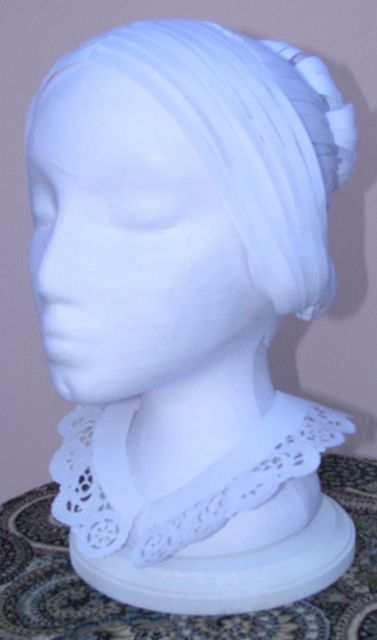
1890-95 for sheer wire frame late Victorian small bonnet.
1890-95 back side view. chignon 2 , small chignon created by looping and weaving a bundle of strips in and around itself.
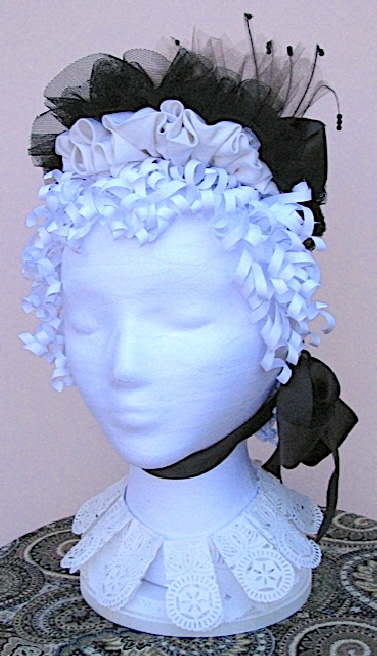
Evening small bonnet.
1875-80 side back view chignon 3, the chignon is made with looped 3/4 inch strips of paper.
1875-80 for a Natural Form Era bonnet
1875-80 side back view chignon 4, the chignon is made with looped 3/4 inch strips of paper.
1875-80 for a Natural Form Era bonnet

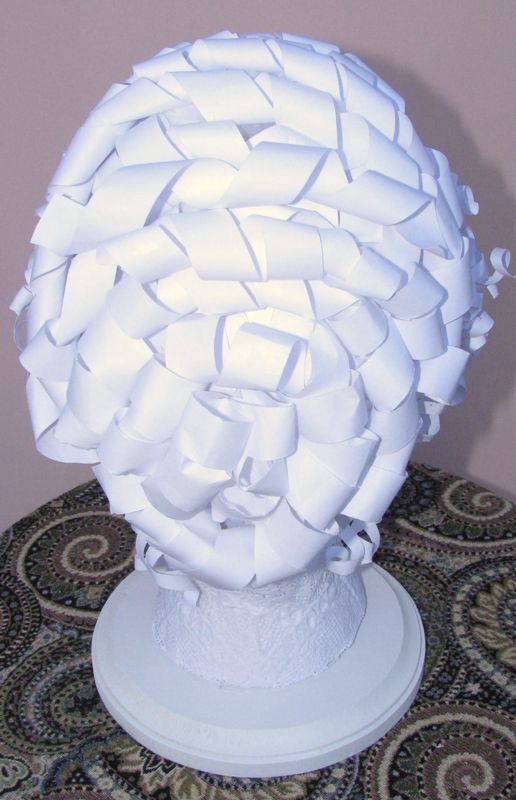
1912 back view chignon 5
1912 for wire frame pre-WWI hat

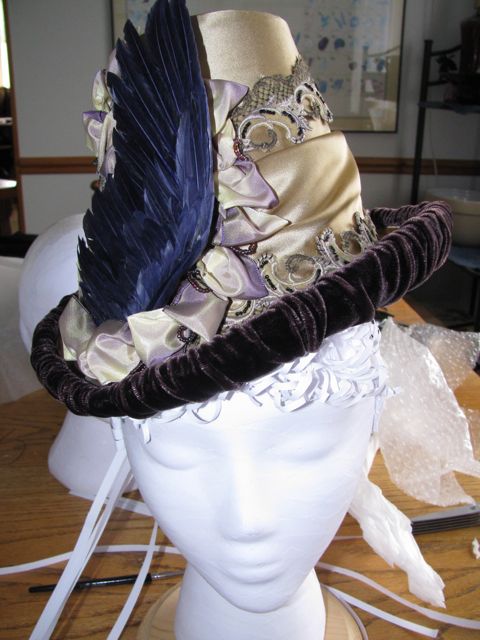
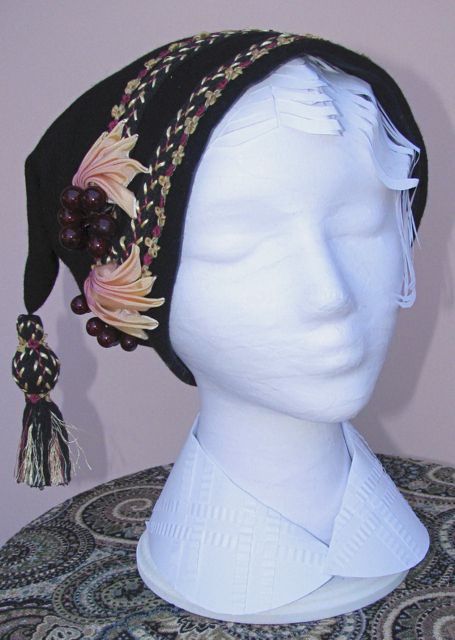
1912 Wireframe hat with willow plumes.

Covering the heads with paper strips
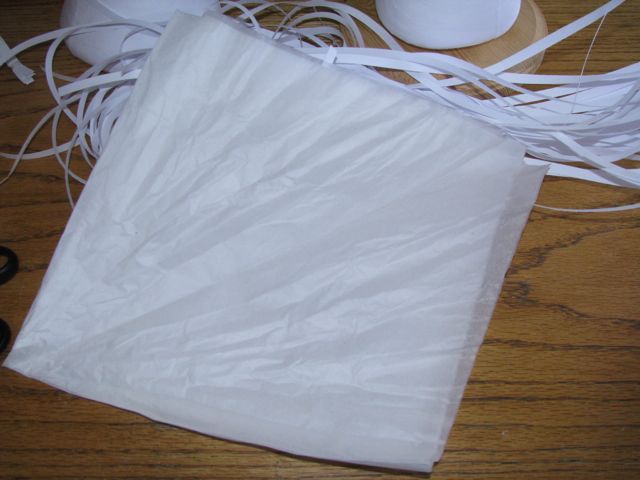
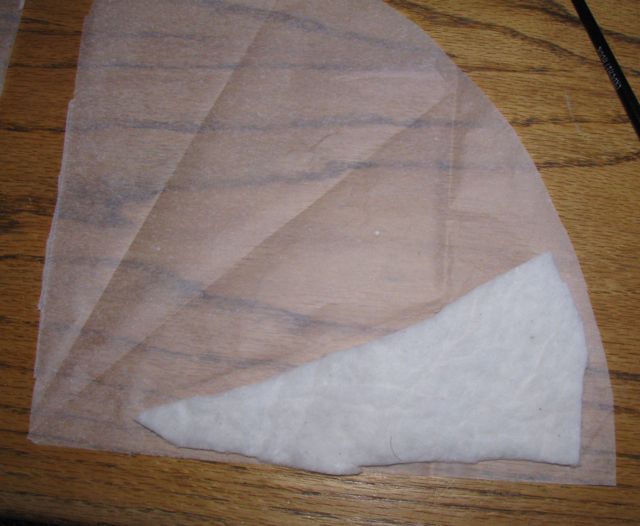
I started by ripping three letter size pieces of 25% rag paper up into strips. I tossed any of the strips that had a cut straight edge away. It usually took three pieces of paper to cover the areas of the face that would not later be covered with hair these can be ripped at the same time three pages thick. On the man’s head I covered the entire head figuring that his scalp would be more likely to show thru this took five and a half sheets. You can usually buy this kind of paper at a copy center by the sheet. I chose rag paper because I figured it would hold together better when wet I never experimented with regular paper. I have done Papier-mâché projects in the past where I used a white glue like Elmer’s glue to wet the paper and create the hard surface but this left the heads shiny which I did not want so I went back to the origins of Papier-mâché and decided to use a starch to hold the paper on. My formula was 1 cup of water to one Tablespoon of cornstarch and 1 Tablespoon of powdered sugar. I added the cornstarch and sugar to the water in a small sauce pan then stirred until it was dissolved, once dissolved I turned on the heat and brought it to a boil and boiled it for about a minute. After I made my heads I learned that if you add oil of Cloves to the mixture there will be less of a change that the paper will develop mold something I would have done as a “just in case” even though I live in a fairly dry environment.
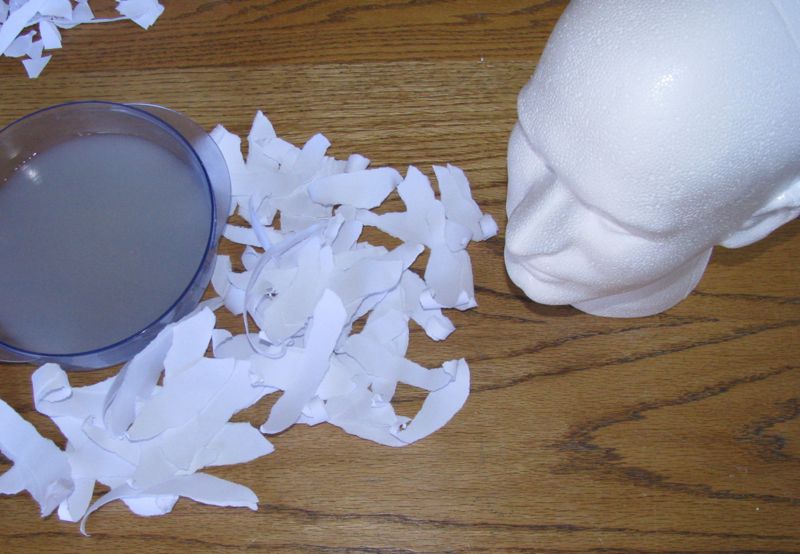

 Paper strips shown soaking in the starch glue mixture used.
I always started on the forehead and tried to keep the strips as horizontal as possible throughout the process. Make sure that the paper is tight to the foam by smoothing and pushing it down several times as it is important to get out all the air bubbles.
If it begins to drag under your fingers while smoothing add some more starch mixture on the surface. It does help some what to use the thinner strips in the area of the eyes, mouth and nose but there will be some wrinkles but most can be smoothed out.
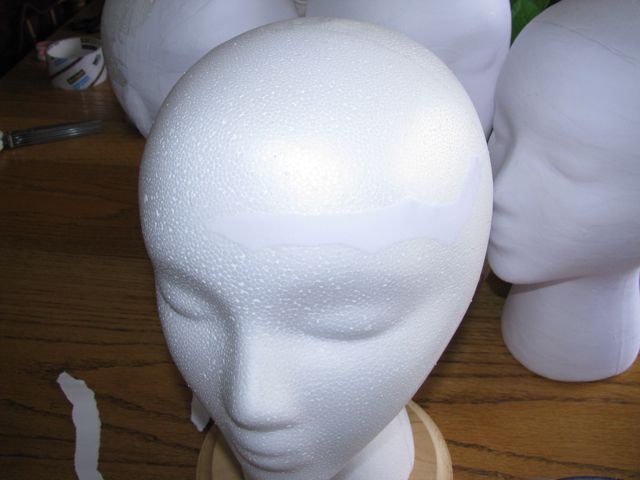
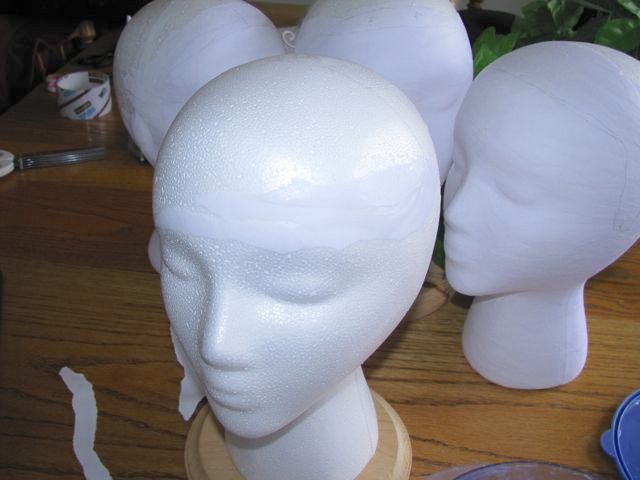
 Continued addition of more strips.
Adding the Hair
This project can be completed without a lot of special equipment but I found that some tools made it much easier.
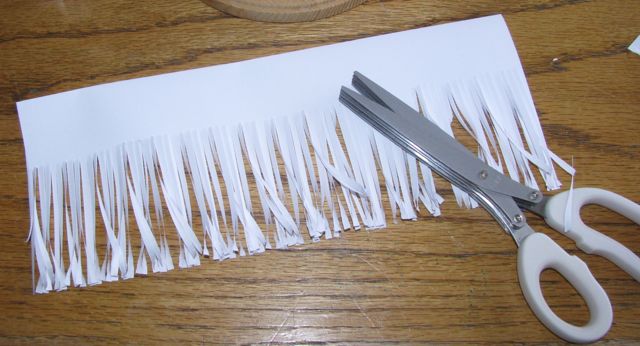
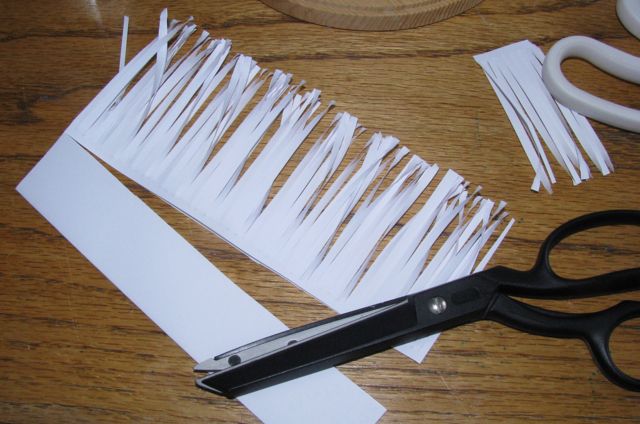
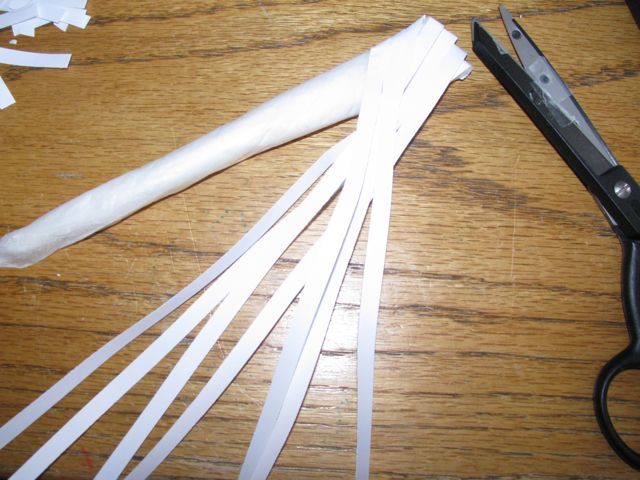
1) An old style paper shredder that only cuts the paper into ¼” wide strips and does not also crosscut the paper. This way I could cut long 9” by 36” pieces of paper into long 36” strips. But for my first heads I used a paper cutter and cut only 11” strips. These worked for all things except the chignon braid when I needed to glue the 11” strips together to get 44” strips it was time consuming.
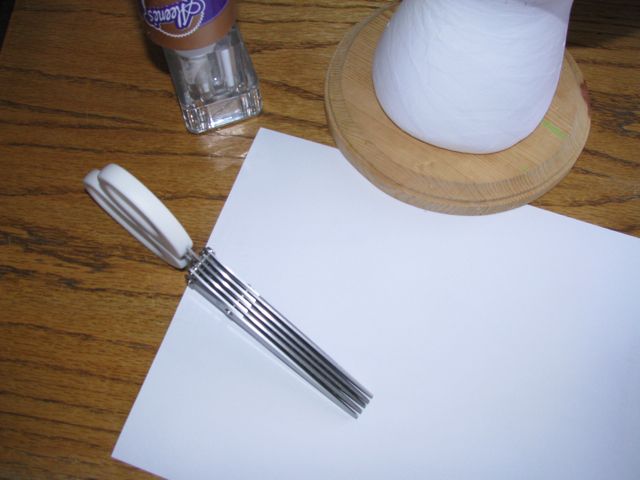
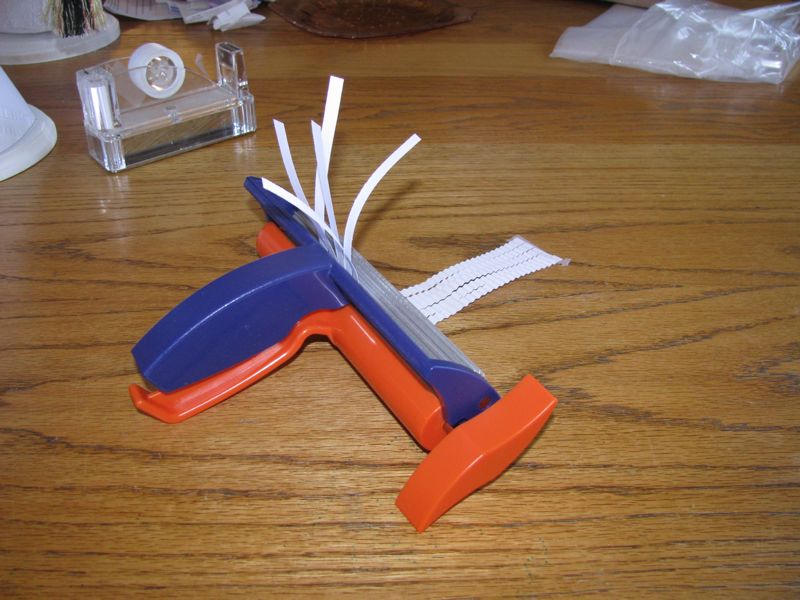
2) Special scissors that cut 4, 1/8” strips of paper.

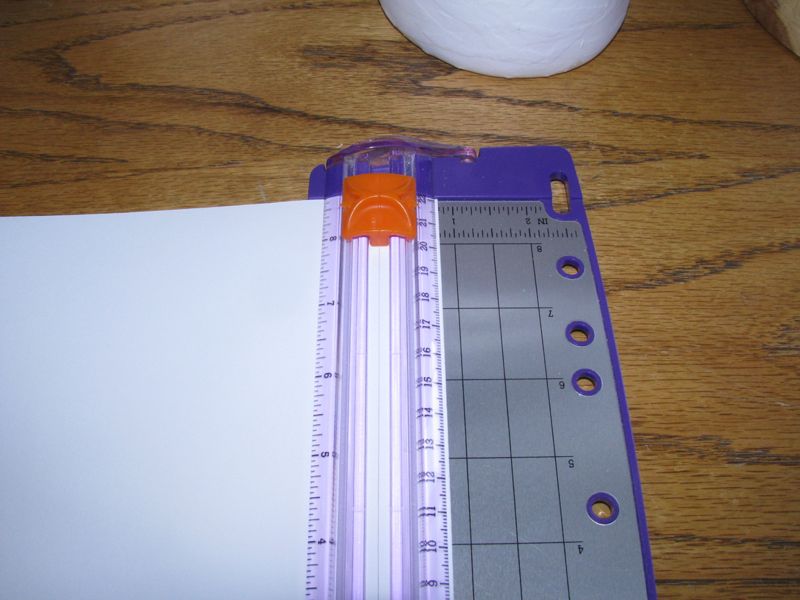
3) A desktop paper cutter that will let you cut strips of paper but not all the way.
4) A paper crimping tool it is totally optional but because so many of the styles in this time period used crimped hair I just had to get one. It does make handling the paper hair much easier except for curls.
5) A tape dispenser that can be modified to hold your paper glue with the tip down so you do not need to wait for glue. There will be times when you need just one drop and then you need to put it down to attach a piece of paper then another drop of glue and so on. If you have to wait for a drop of glue it really slows down the glue. I glued two tips from old empty bottles of glue into the pen holes in my tape dispenser until the bottle could snap into place and stand by itself.
6) Some kind of base to keep the head from falling over. I used 6” round wooden plaques from the craft store. I added a 4” length of ¾” wooden dowels held in place with a 1-3/4” wallboard shrew that I counter sunk. These I painted white with matt spray paint. If you do not have access to wood tools you could of course just glue your Styrofoam head to the plaque after it is painted.
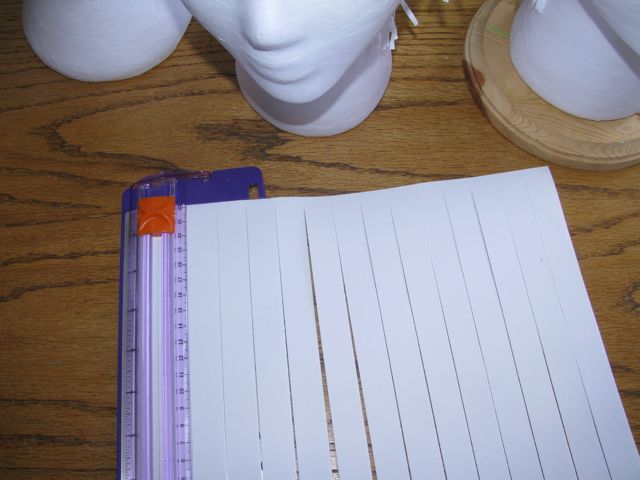
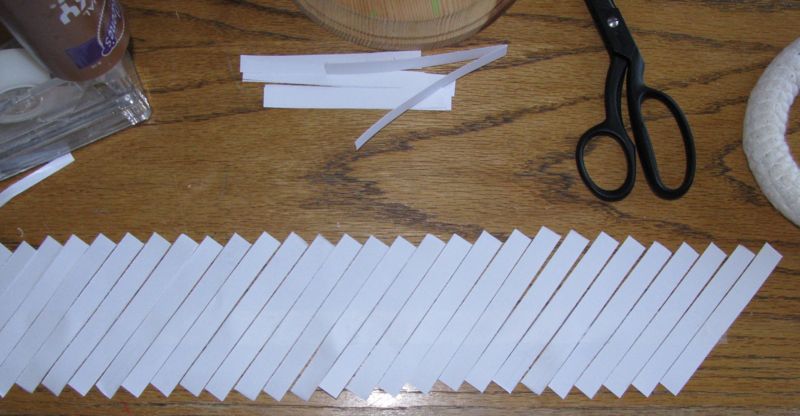
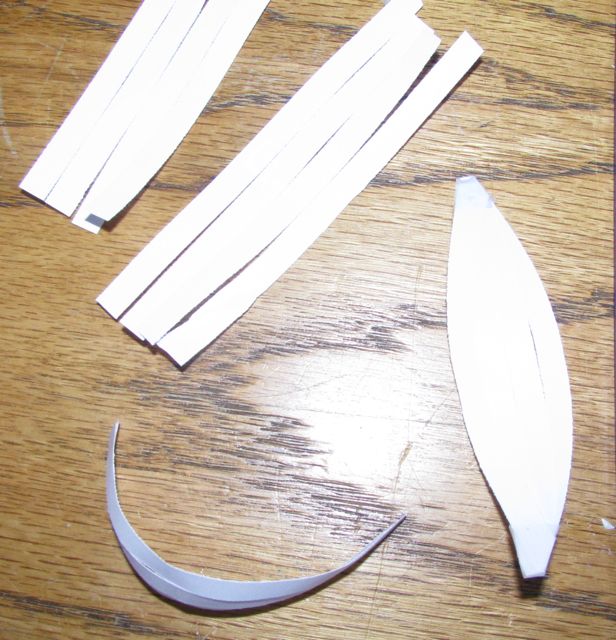
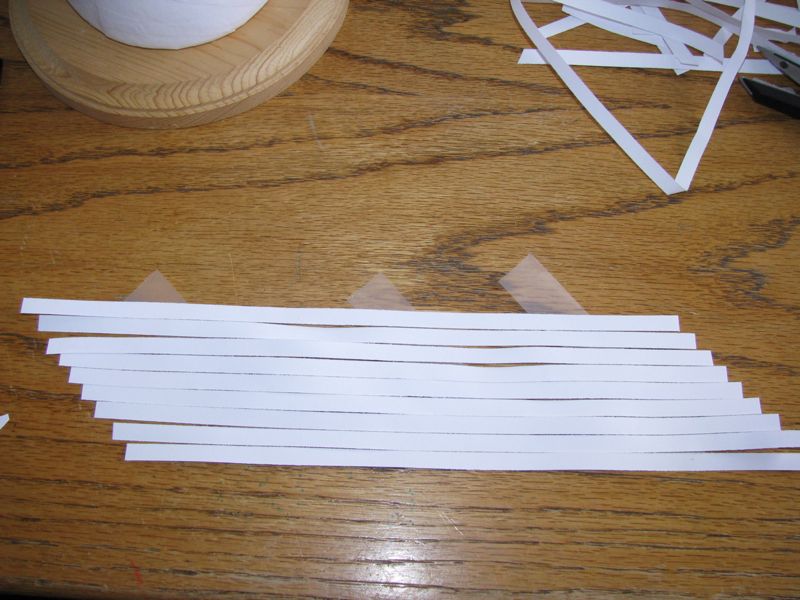
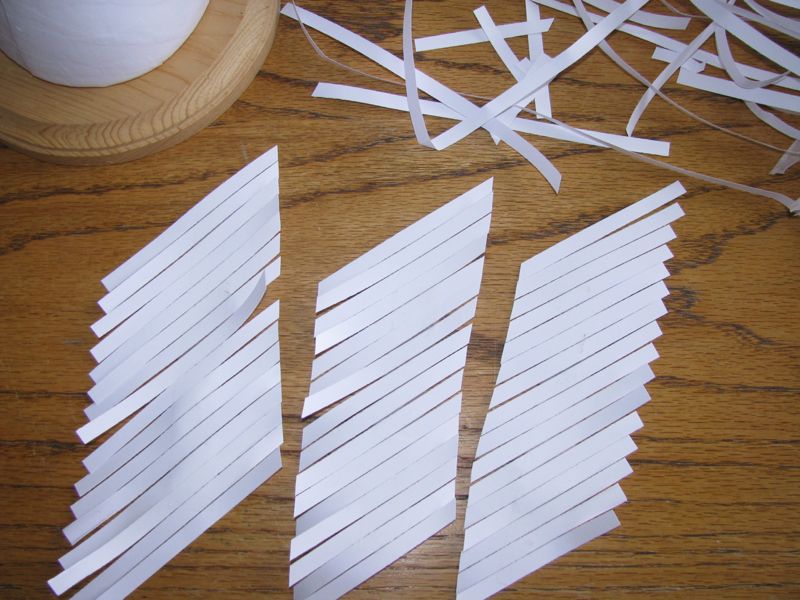
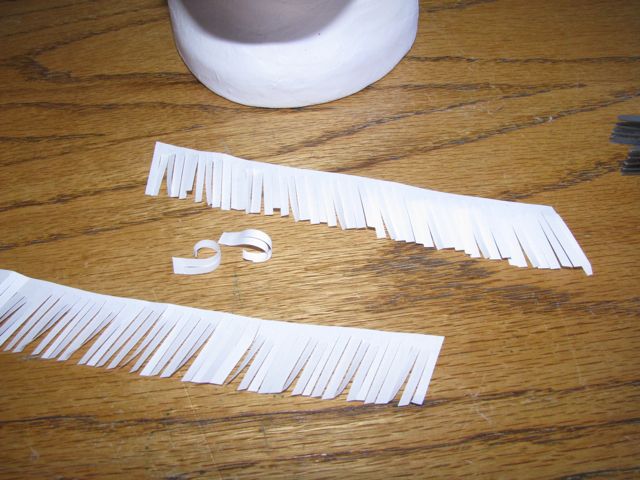
Wide strips, hand cut strips with un-cut 1/4″ at top.

Crimper
Crimper
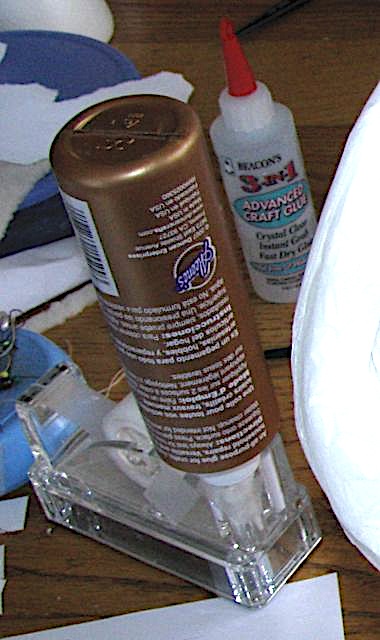
Glue Bottle holder
Marking the hairlines
After the face is dry I used a pencil to mark the hairline following the facial features of the head. Most Styrofoam heads do not have ears but it is still important to mark for the side burns. In most females the bottom of the side burns are even with the bottom of the eyes so use that as a guide. As you are marking the hairline view the head from the front and the side over and over that should help you get it symmetrical. There is a change in slope between the forehead and the start of the hair so if you mark along this change you should have a good hairline. You should mark for a part with two parallel lines so that there will not be pencil in the blank space left when you part your paper hair. You should also mark the areas on the head where you will have paper that makes the bangs and longer paper that makes the regular hair. Also if you are doing a male head mark the long sideburns if they are period. There is no need to mark for a mustache you can just use the upper lip as a reference but do mark for the area of any beard.
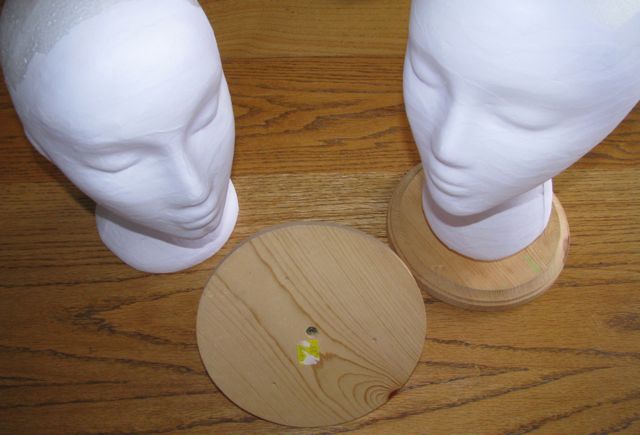
6″ Wooden base (center) from the bottom showing the screw used to hold the 3/4 ” dowl in place.
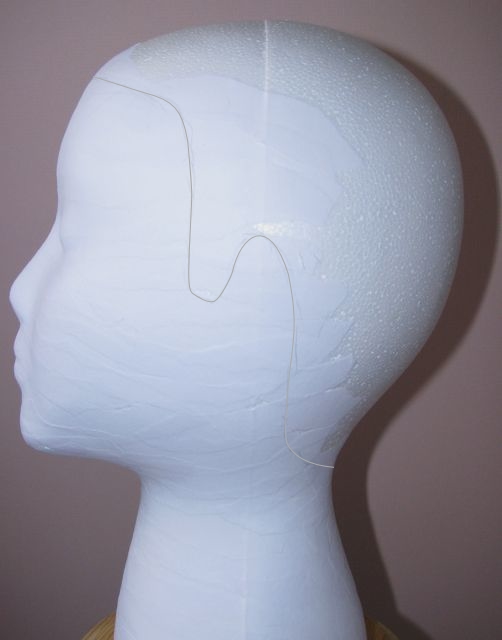
Pencil mark, hairline drawn in with pencil
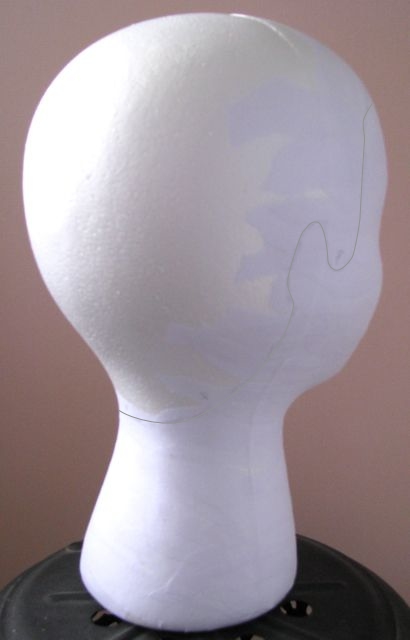
Pencil mark, hairline drawn on with pencil shown from the back note that the back of the skull is not covered with paper
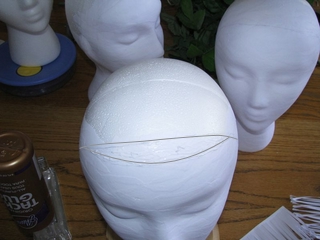
Pencil mark, area of bangs marked and covered with glue.
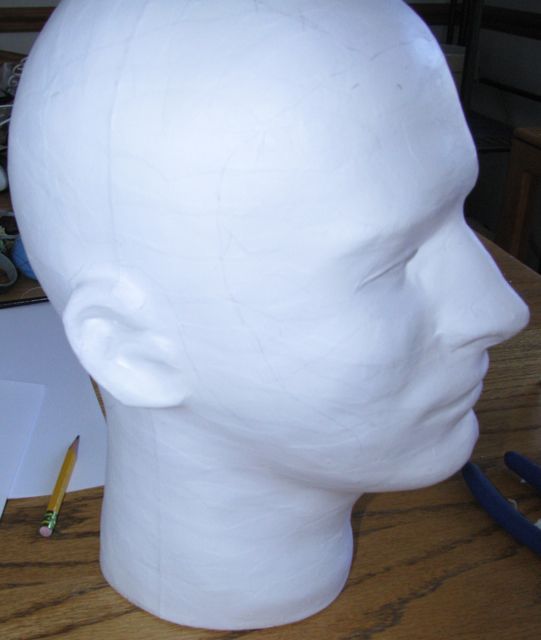
Male heads need to be covered completely so, draw the hairline and the sideburns lines.
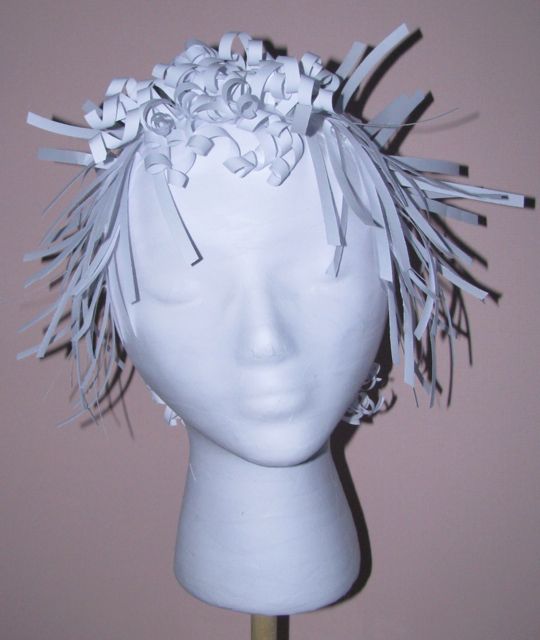
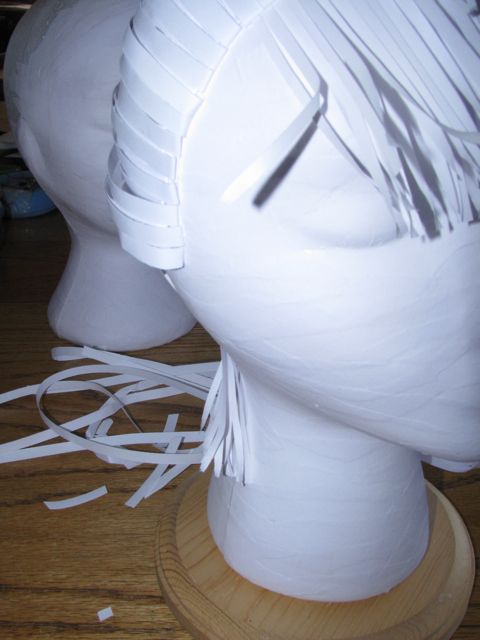
Adding bang or fringe
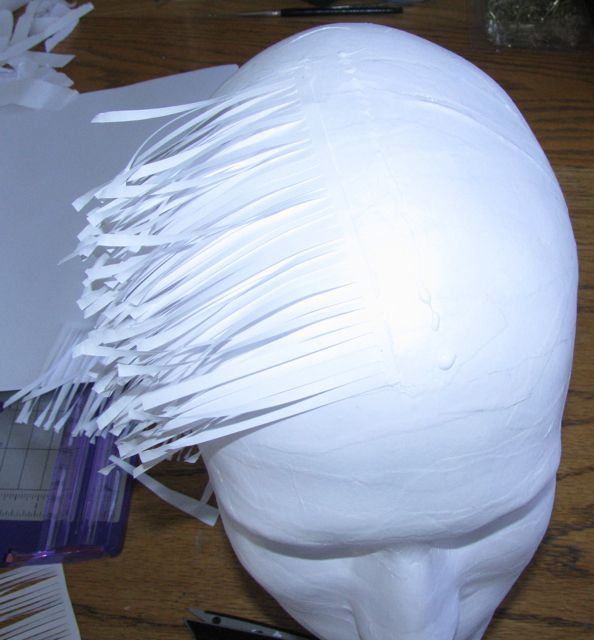
It might seem backwards but the first thing you need add is the paper for the bangs, side curls and back fringe. There are usually added with a line or dots of glue and with the paper glued down in the direction they will lay.
For bangs, add a strip along the hairline.
Add a second strip.
Usually a third strip needs to be added.
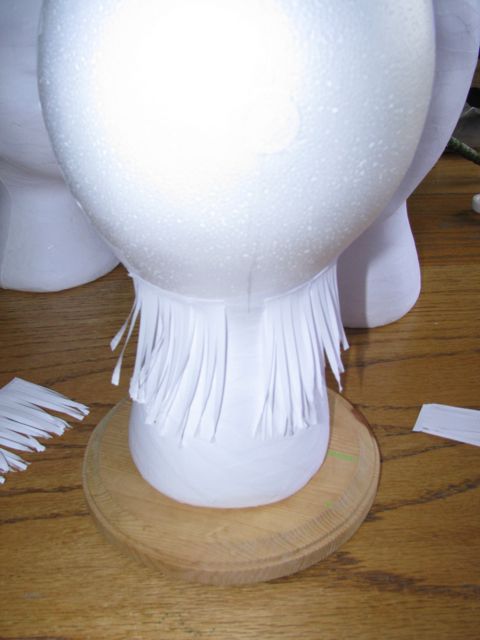
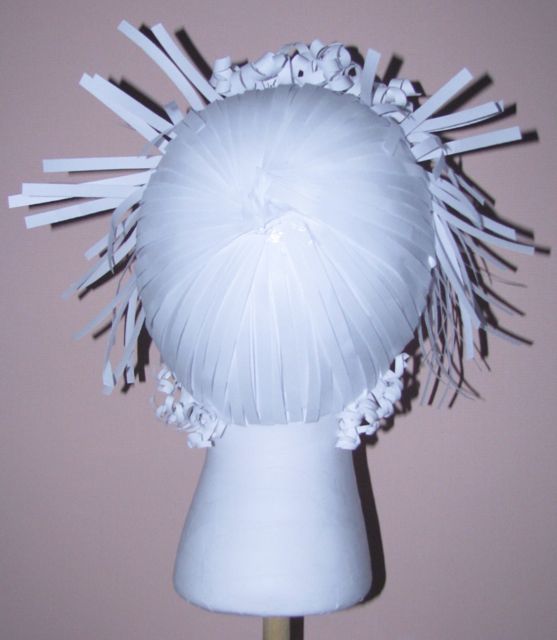
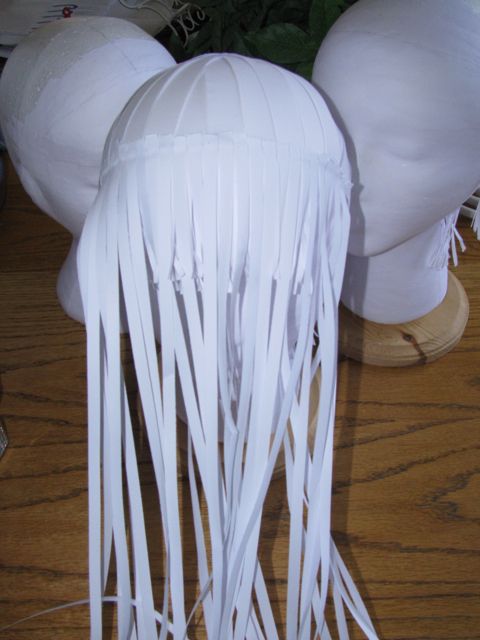
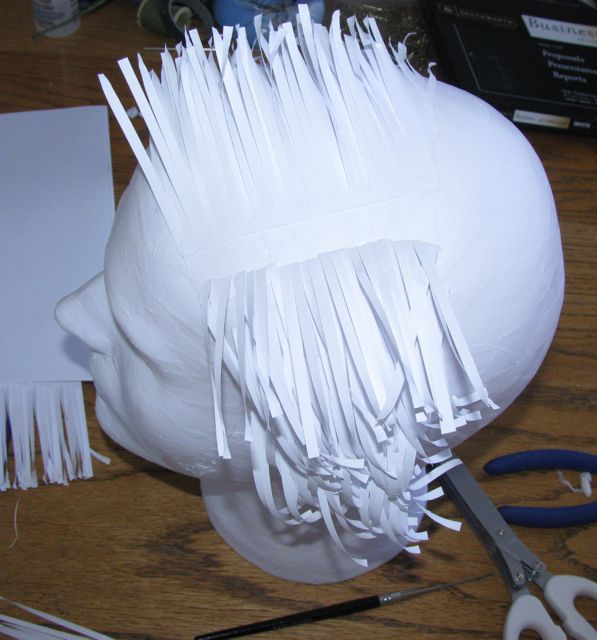
Back fringe, some strips glued along the base of the hairline.
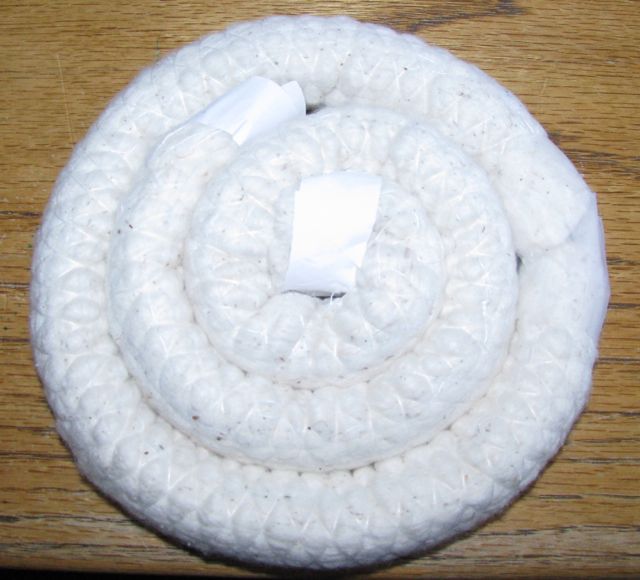
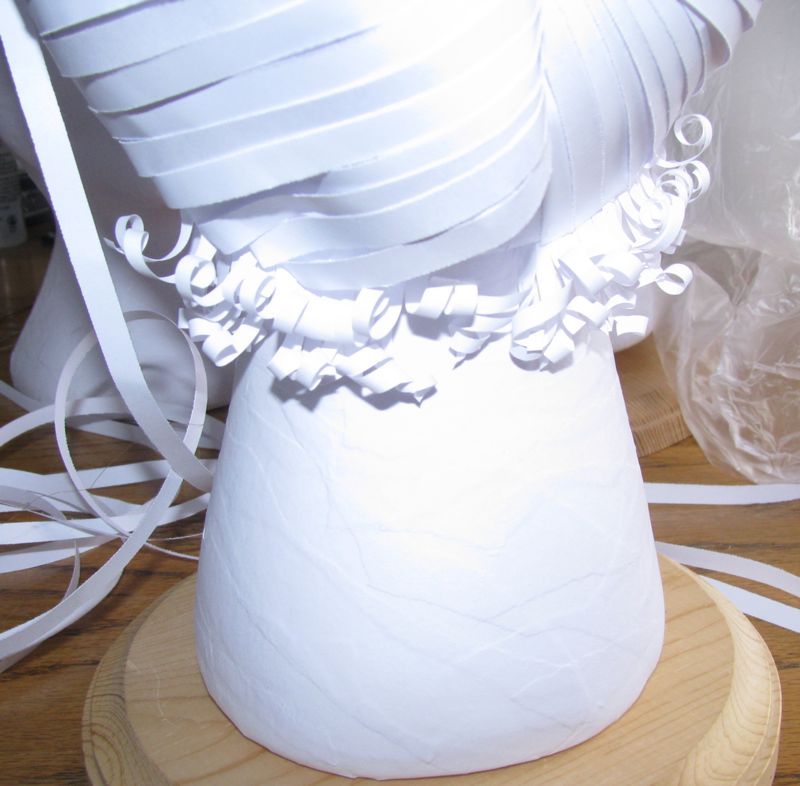
Strips for side curls are glued in place. Also, for padding on head 11, a coil of tissue paper was glued about 1″ back from the hairline to take the place of period rats the coil overlaps in back.
Adding fullness to a hairdo
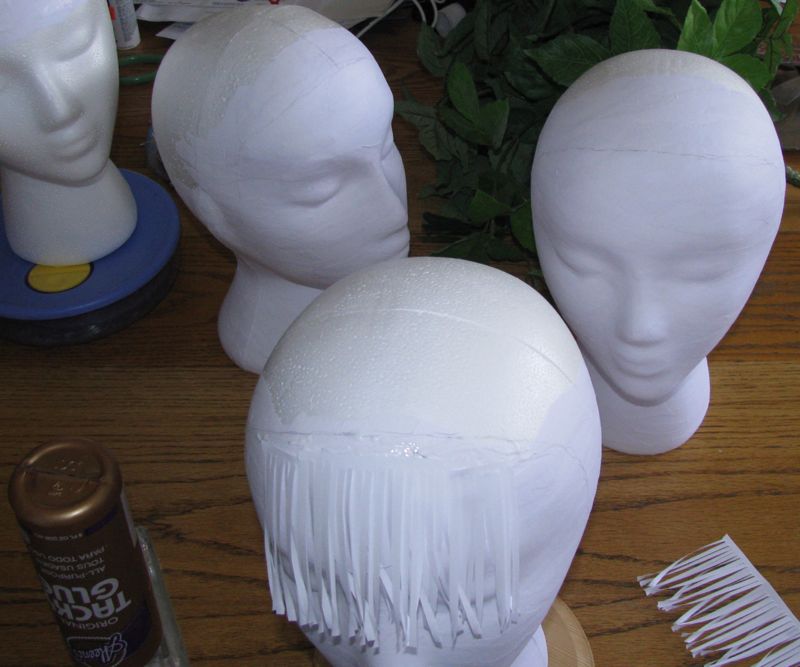
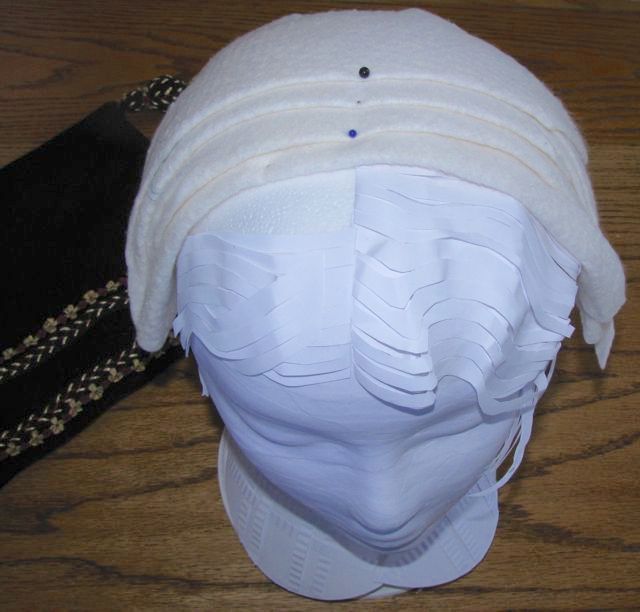
In some cases either the hairstyle or the hat will call for some fullness. Most Styrofoam heads are 21 or 22” head size so if you have a larger hat you need to add padding to the head so the hat will not look too big. I used a couple different techniques to do this.
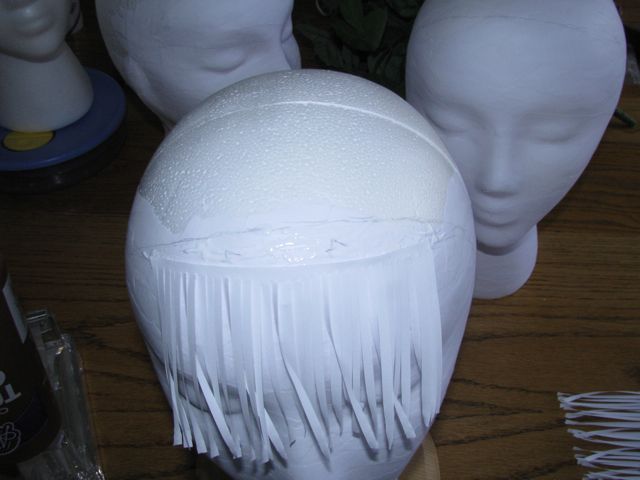
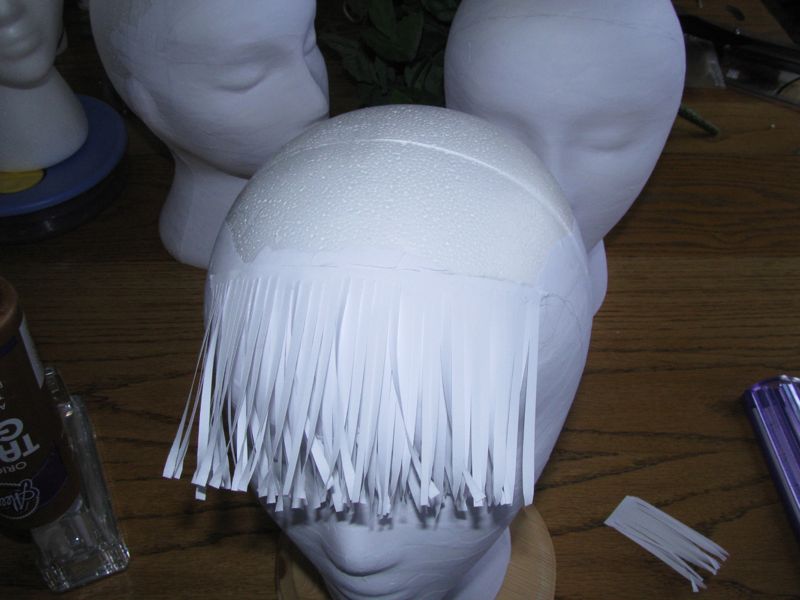
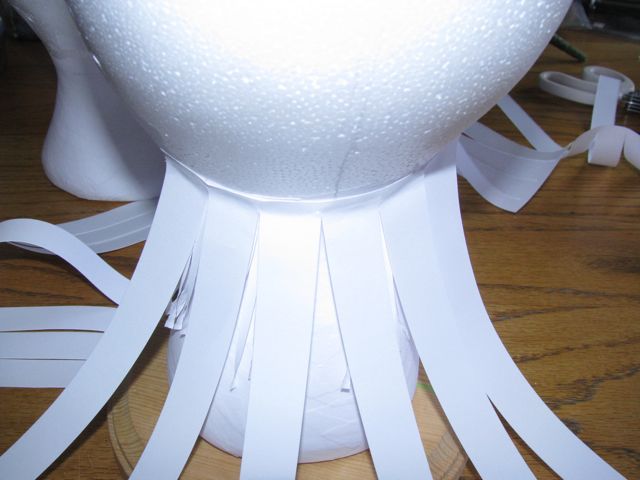
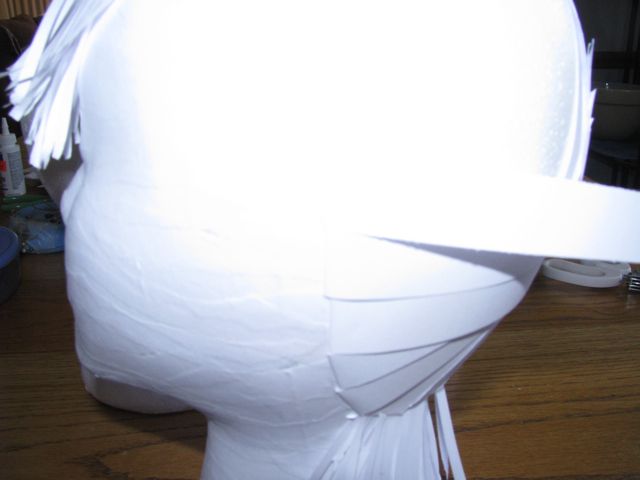
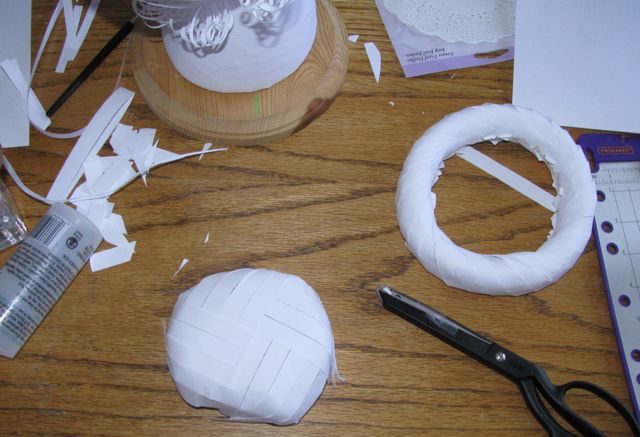
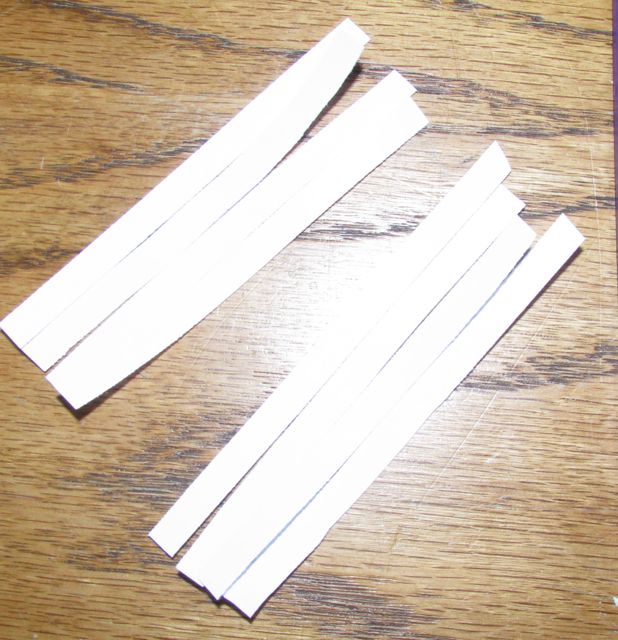
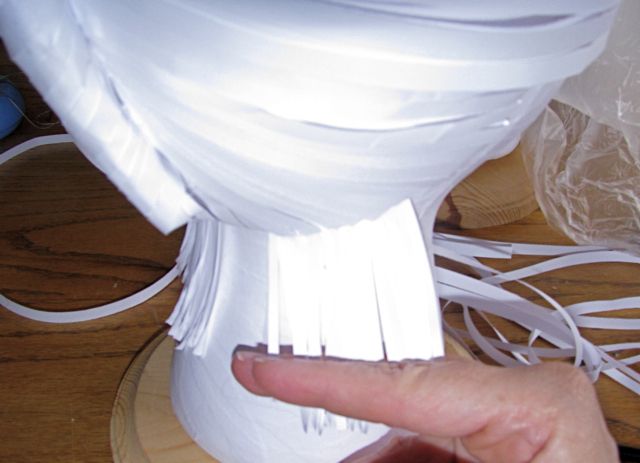
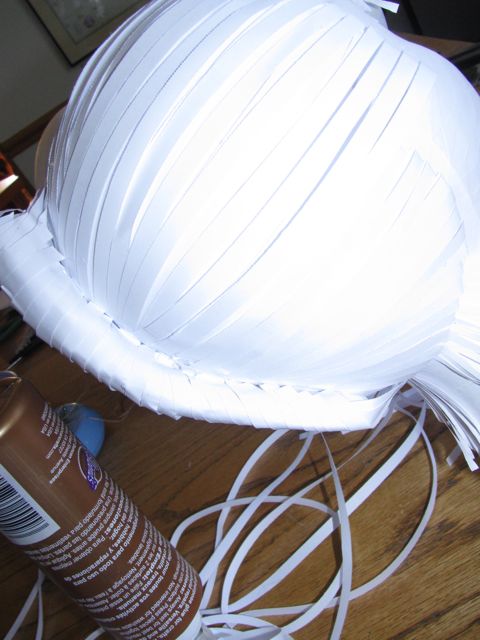
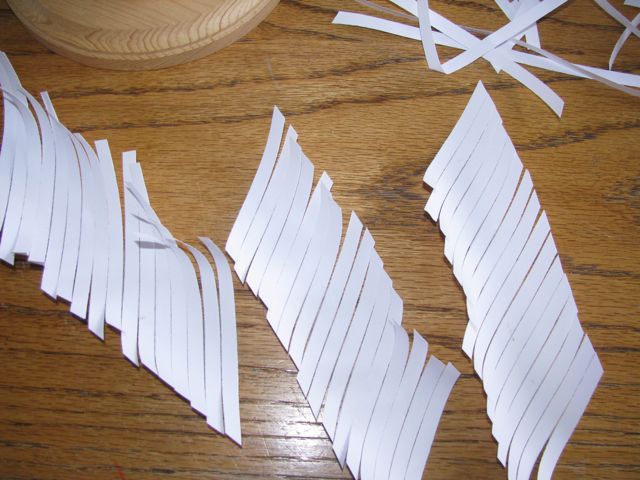
1) Follow the same steps that I would do with the finer ¼” strips with wide ¾” strips. The strips I used here where cut with the table top paper cutter without the last ¼” of paper cut that way they can be glued to the head in strips that follow the hairline. The last ¼” inch is glued down and when dry the paper is folded back on itself.
2) Another method I used to pad out the heads was to add tissue paper that was lightly pleated up and twisted to form long coils that where then glued to the head where needed.
3) The last method was to use scrap quilt batting circles that I glued the head. I started with smaller circles and stacked the up in ever-larger circles until I was within about an inch of the hairline. Sorry I do not have pictures of this. The batting needs to be covered with the 3/4 “ strips as above.
4) The last method was to use large circles of batting folded in half and pinned to the head. This can be used if the hat will be covering all the batting and there is no need for any ¼” hair to be added above the padding
Glued strip at the base of the skull
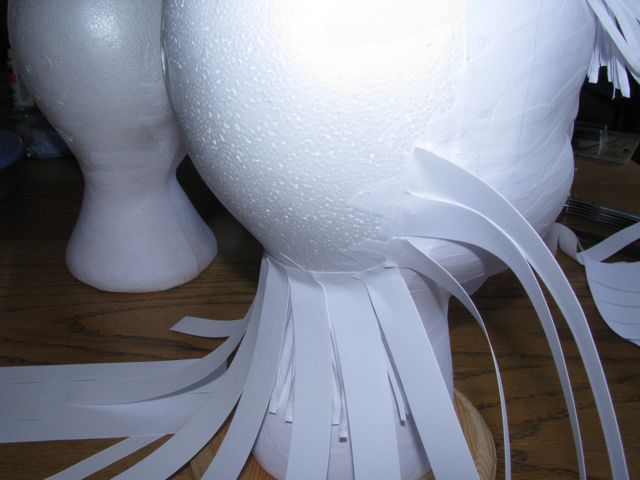
Glued strip along the side hairline.
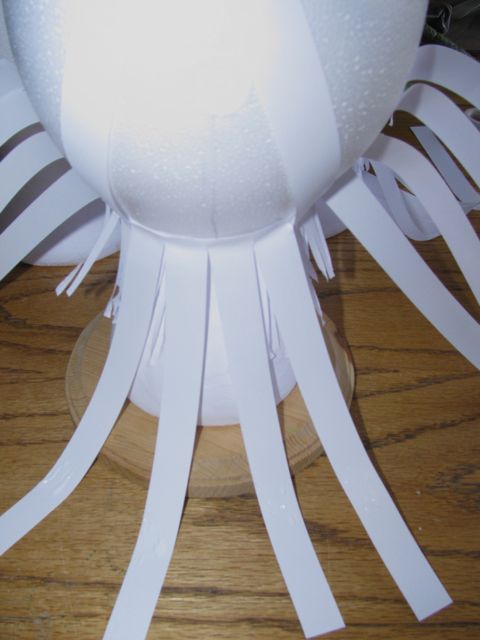
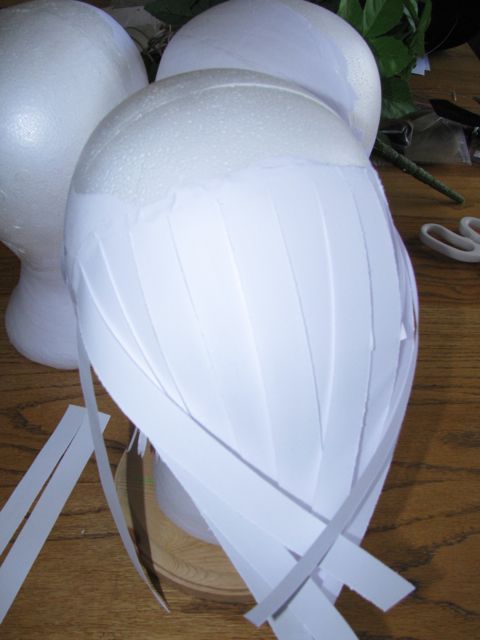
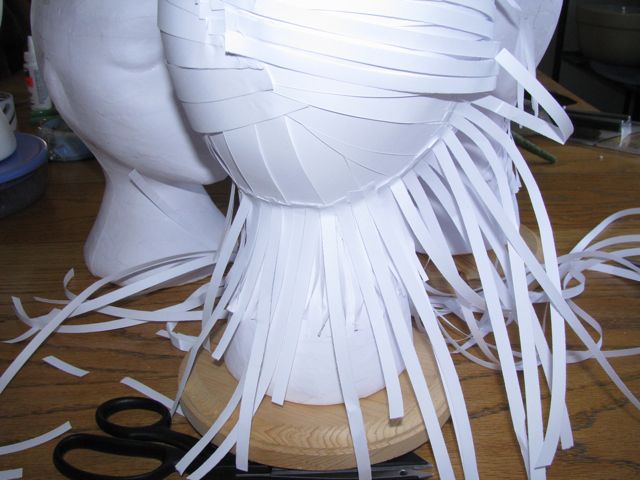
First set of strips being glued up to bun area
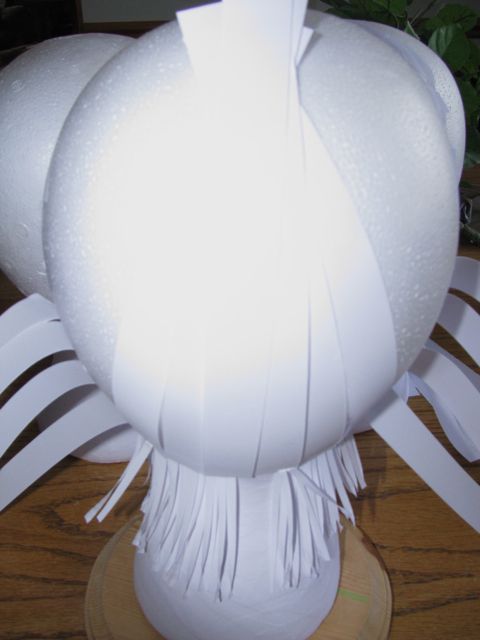
Second set of strips being glued up
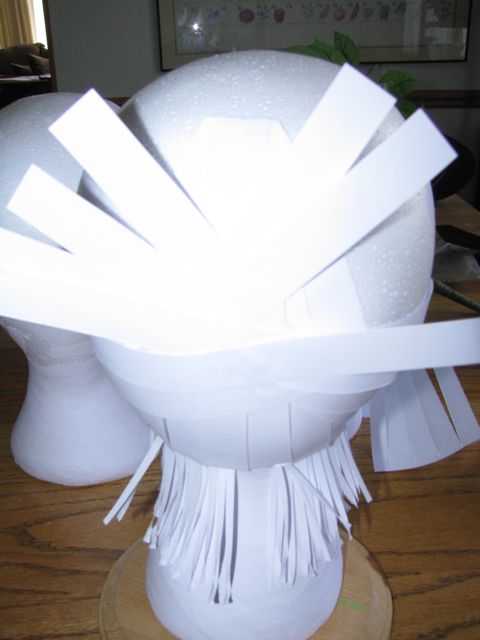
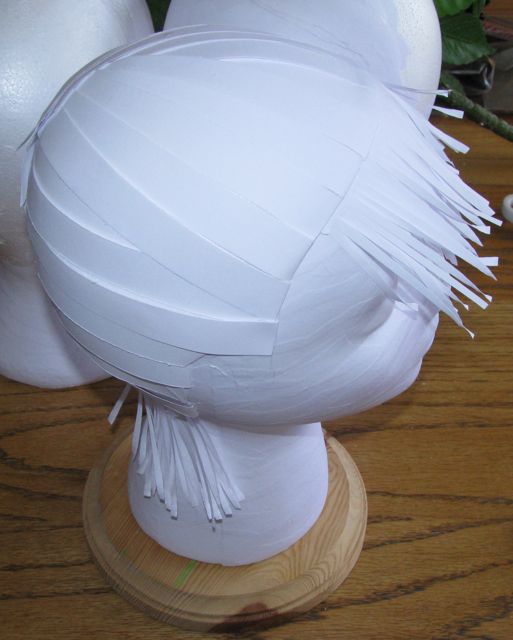
Side strips glued to center but the extra on the ends not trimmed
Last side strip being glued in place at the bun area.
Front strips being glued along hairline.
Front strips after being glued to and trim at the bun area.
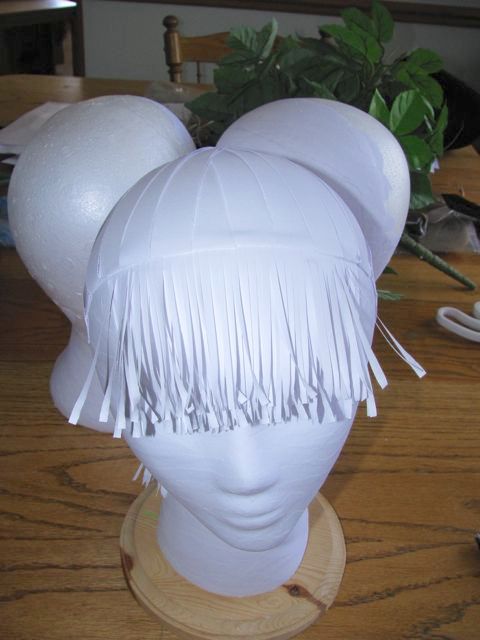
front strips after being glued and trim at the bun area view from the front.
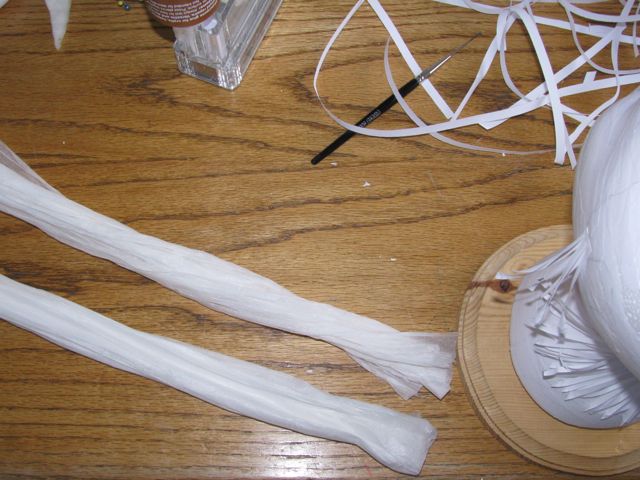
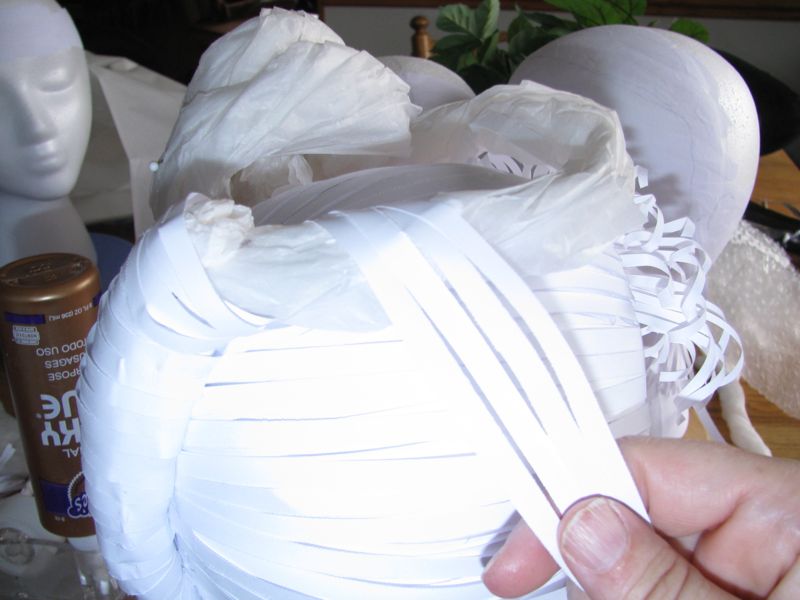
Two pieces of tissue paper folded and twisted to form two long 1′ pads.

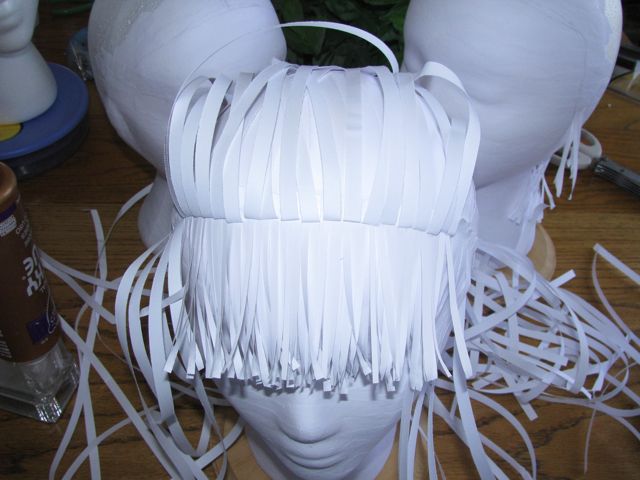
After the tissue paper is added more strips are added all around the hairline.
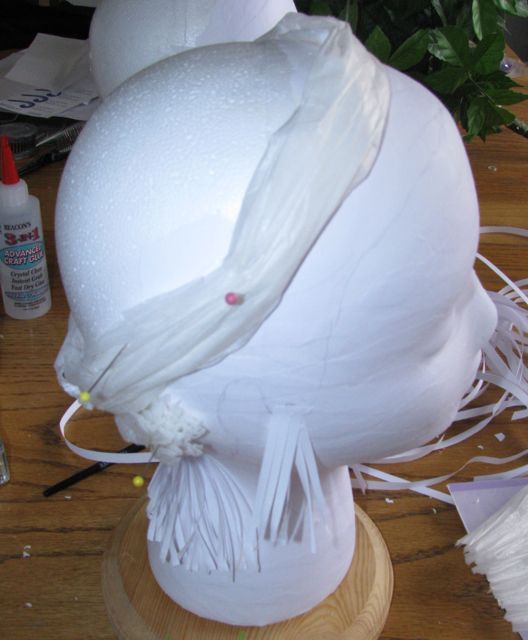
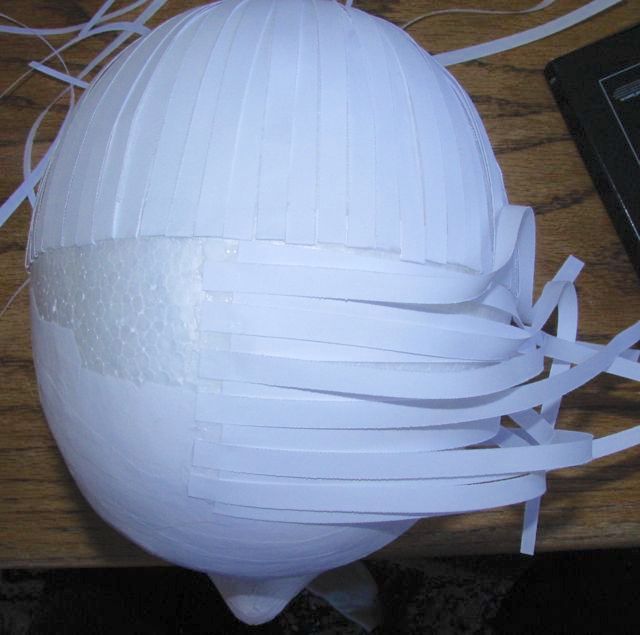
This 1912 head has one layer of 3/4 inch strips glued at the back in the chignon area. Also, has adding 1/8″ strips side and back for fringe.
Adding the ¼” paper hair
I didn’t take photos of the process on all the 9 different hairstyles. I figured that would be overkill, there are just a few important concepts.
1) The tips (about ¼”) of the paper strips usually need to be glued 180 ° from their final direction and then folded back when dry.
2) When folded back they need angle towards the bun or twist.
3) They need to cover the head so sometimes two or more layers should be added. When you do so it is best to offset the layers.
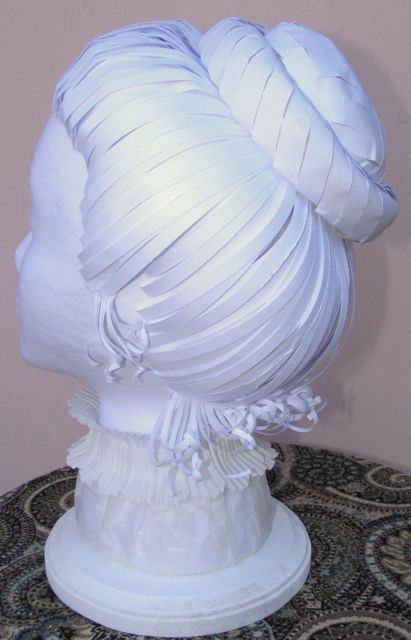
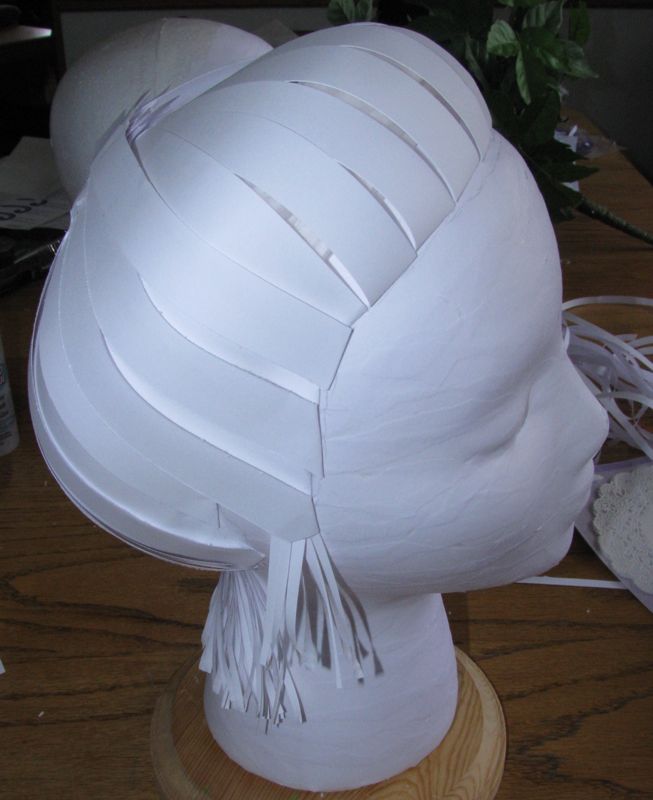
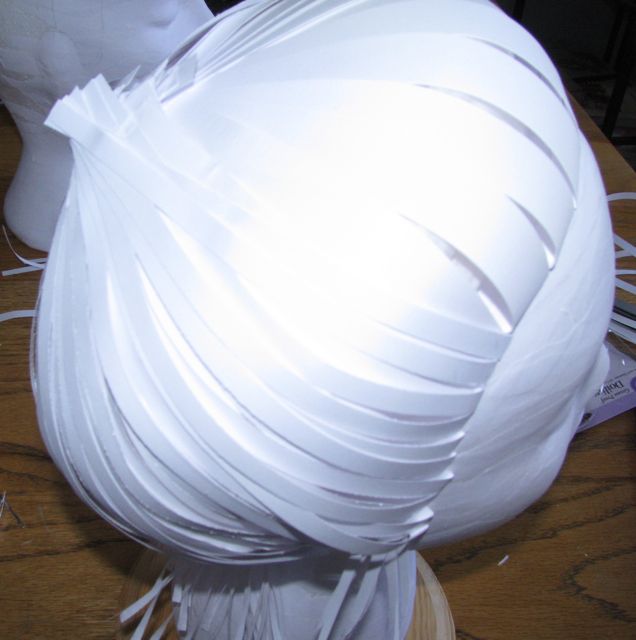
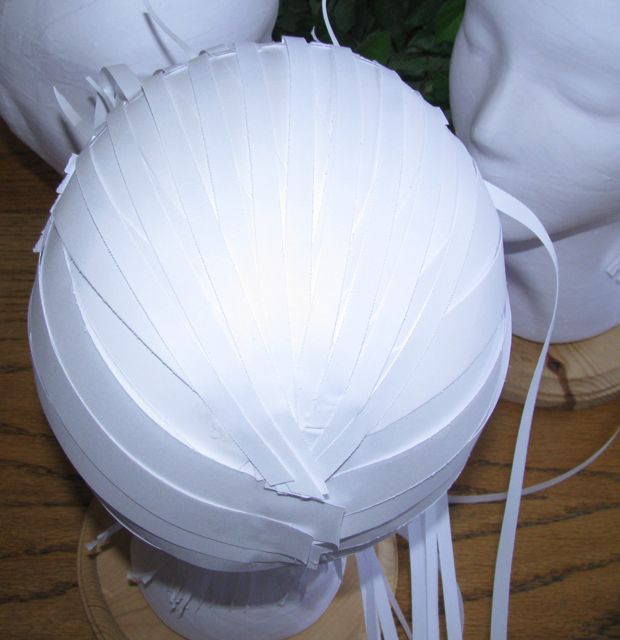
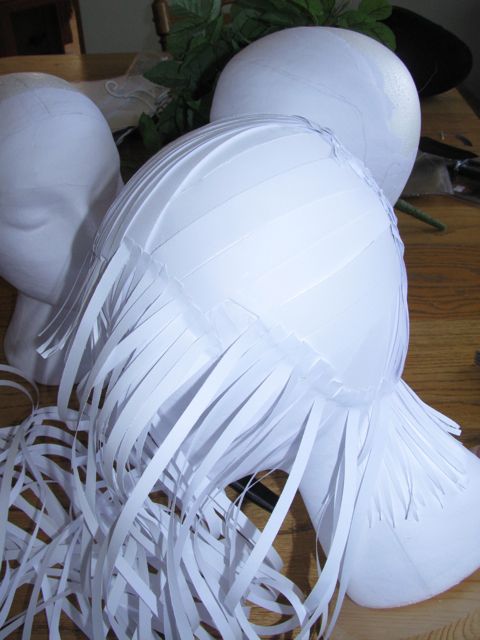
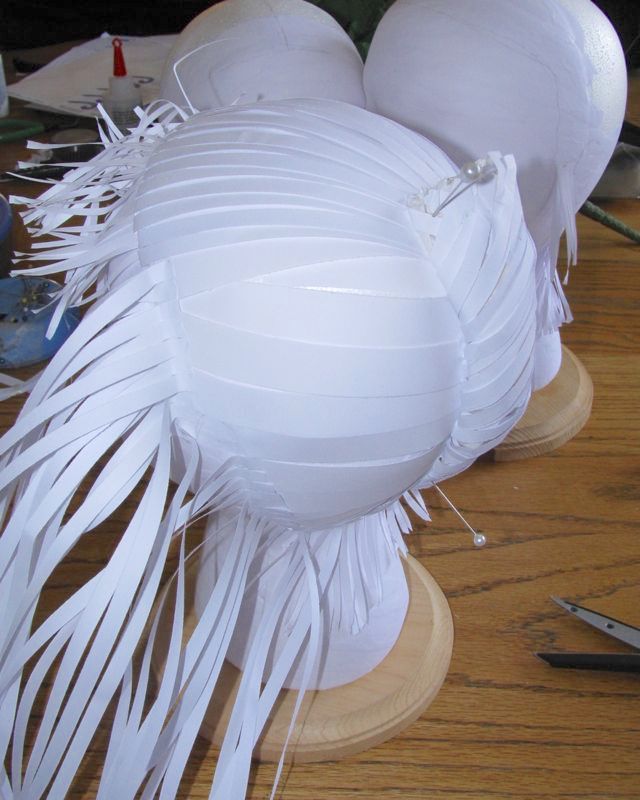
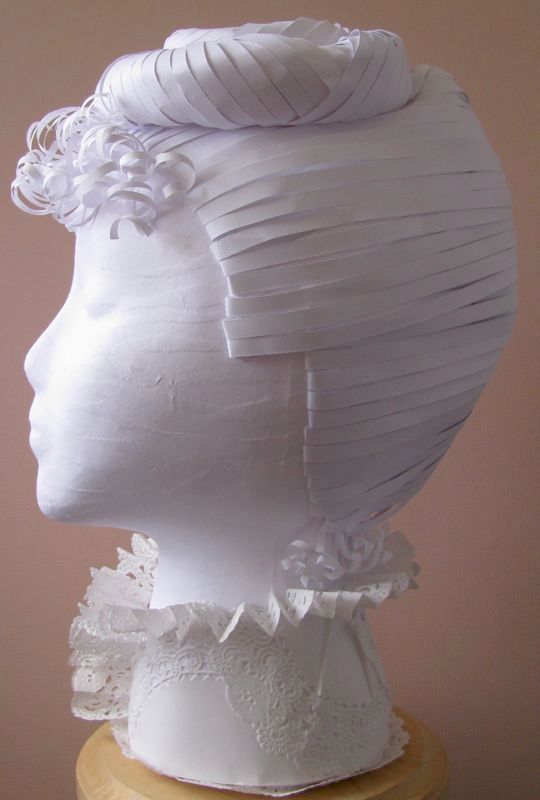
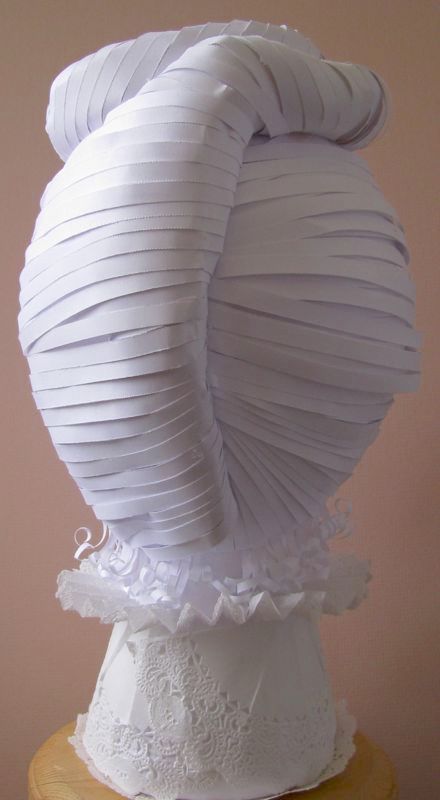
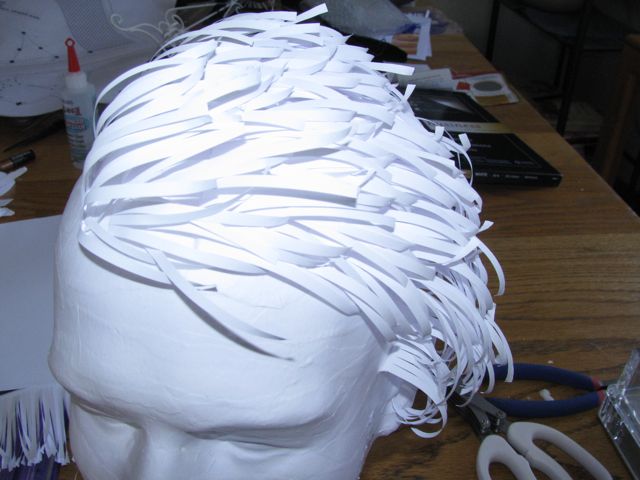
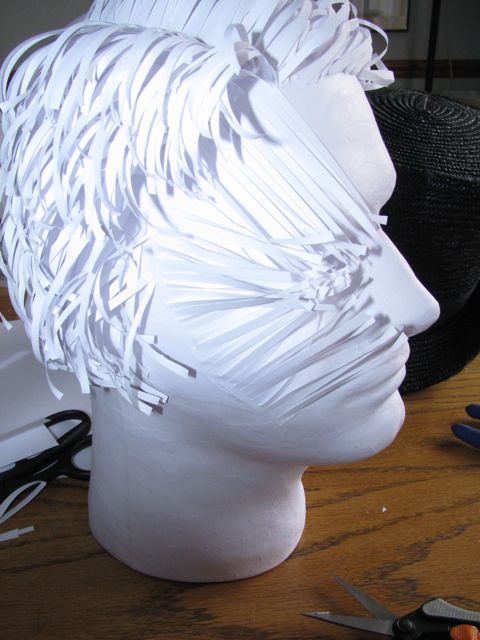
Adding the ¼” strips to the 1912 hairstyle for wireframe silk velvet covered hat, third from the right in the intro picture.
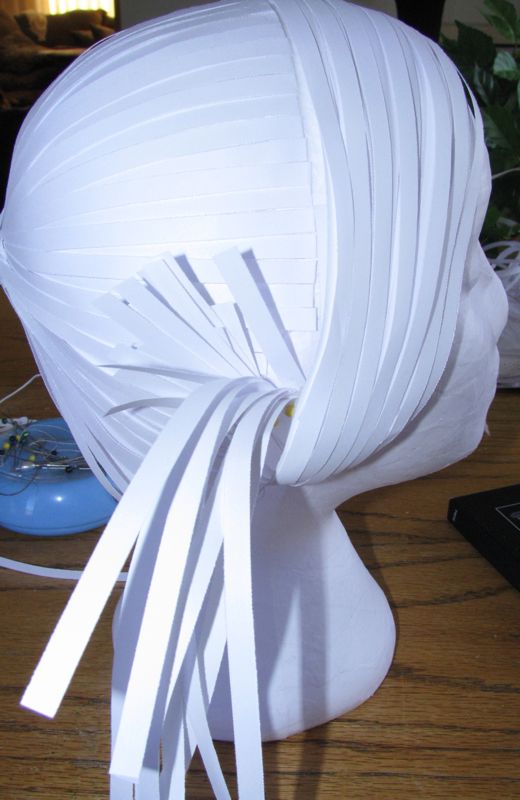
I chose to show the process of adding the narrow strips to the 1912 head from the time it was covered with the ¾” strips. The strips are added, turned back on themselves and glued near the bun area in four sections; first the section from the back of one ear the back of the other, then each side from the base of the sideburns straight up the side of the face until the hairline changes angles to go across the forehead, finally the front across the top of the forehead is done. After each section is glued in the area of the bun any extra length in the strips is trimmed away very close to the glue. To get the strips to lie down more evenly I would take every other strip and glue them one by one in the bun area and then the glue the remaining strips one by one. This picture from the 1860 hairstyle shows how the strips come together in the area of the bun. Most of the hairstyles follow this pattern the 1875-80s, the 1890-95s, the 1900s, the 1912 and the 1919-20s hairstyle. The major difference is just where on the head the strips need to be glued and the size and shape of the bun that covers the strip ends. Another difference is the presents or absence of bangs. Even the 1850s style starts out in the same manner only leaving a large area in the center front for the long twisted bangs on either side.
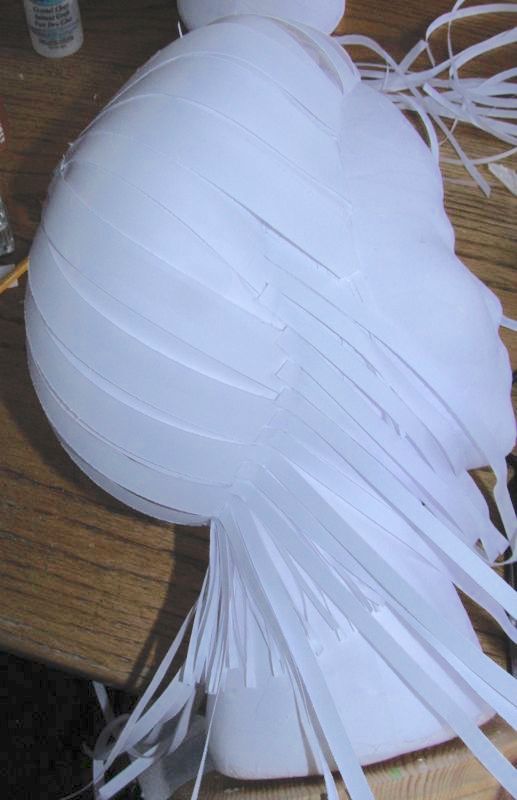
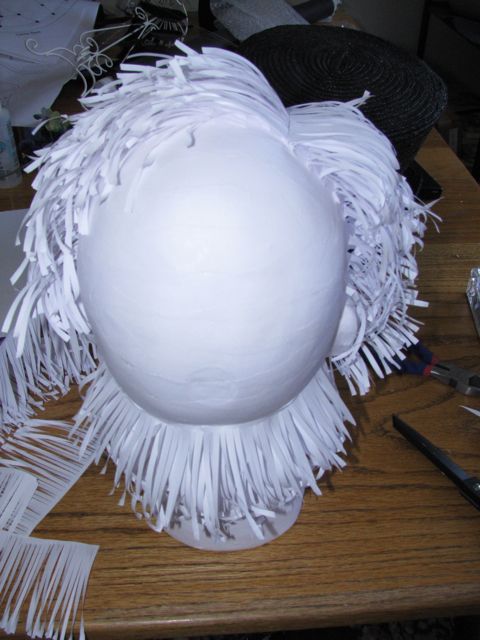
Individual 1/4 inch strips are glued a cross the back of the head
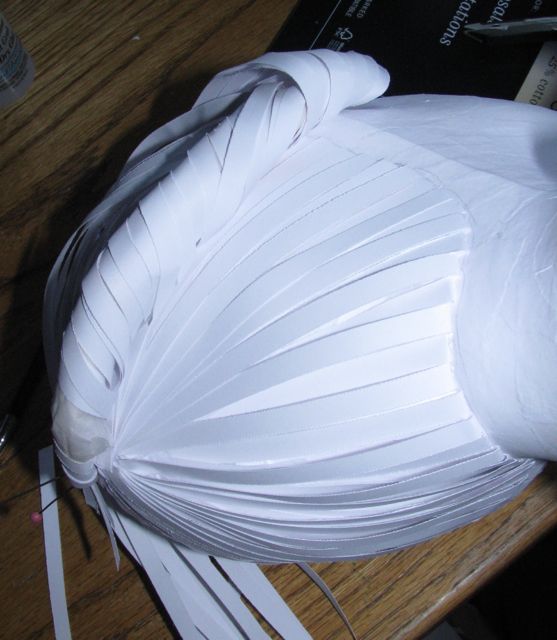
These 1/4″ strips are glued to the bun area.
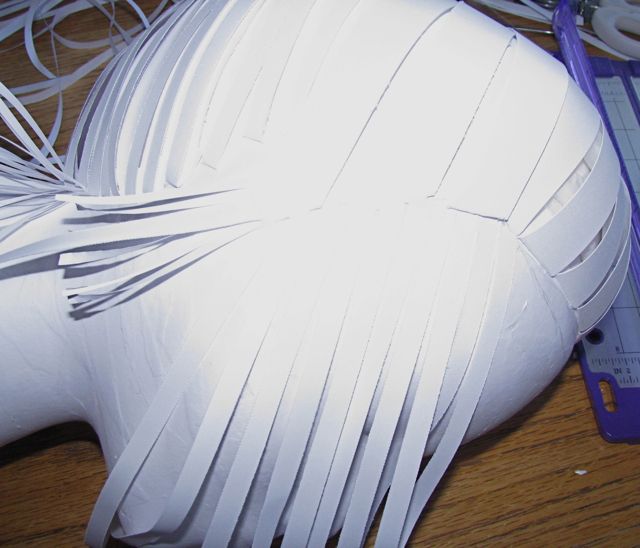
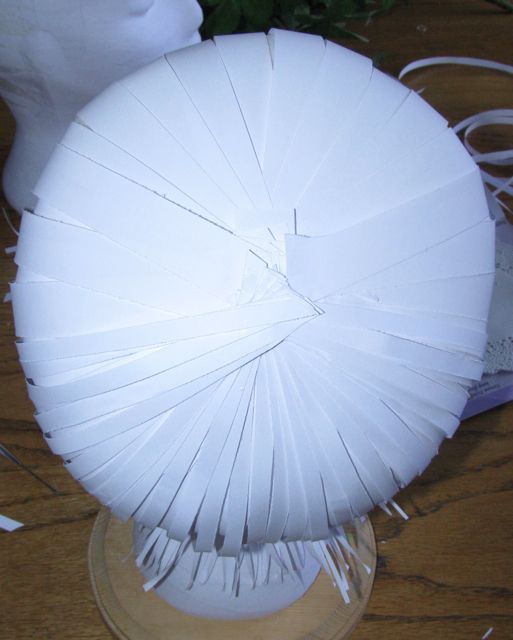
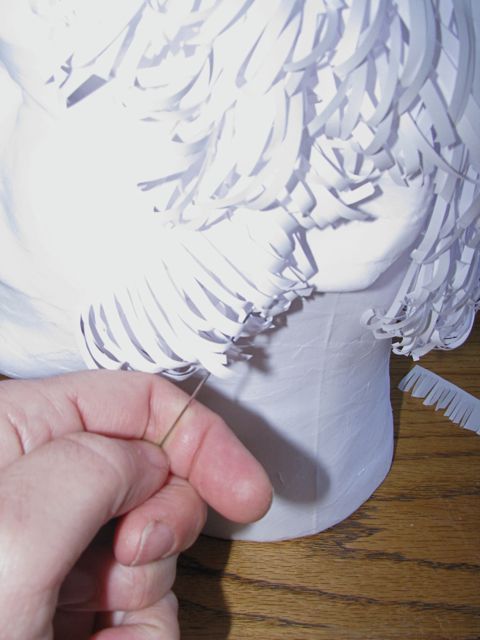
Two rows of 1/4″ strips are glued to the side of the head from the base of the side burns to the top of the straight line of the forehead.
These strips are pulled back and glued in the area of the bun.
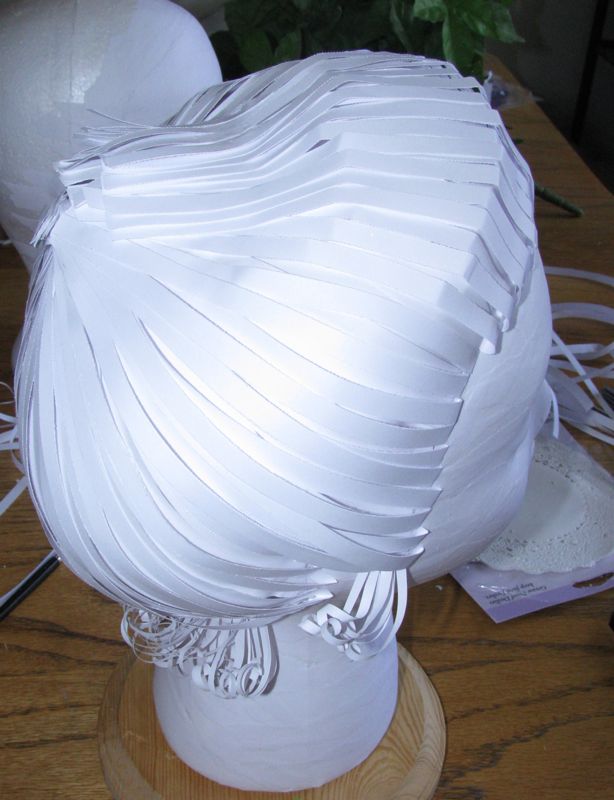
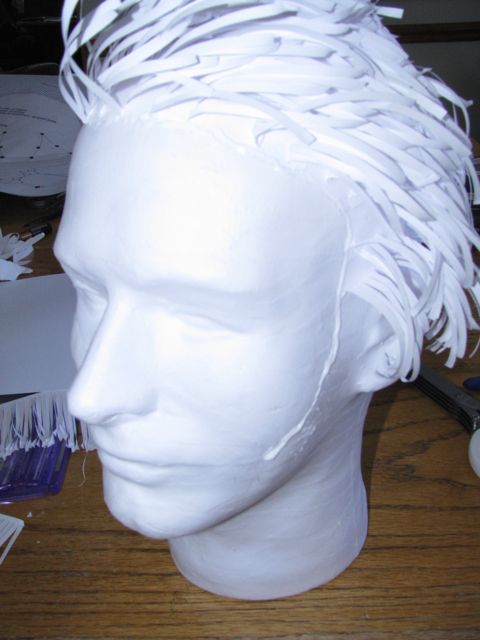
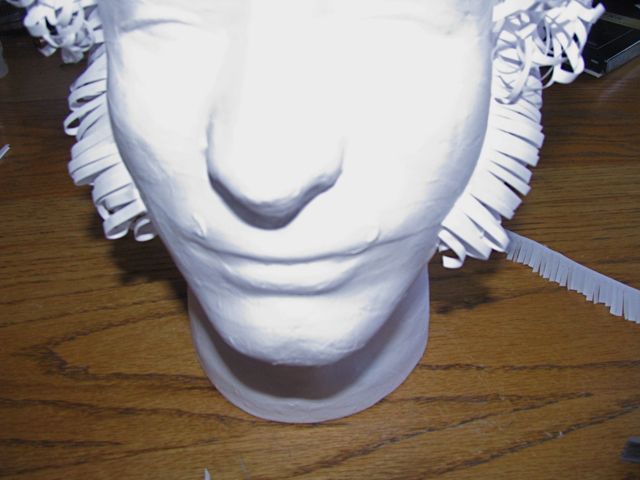
The same is done across the center of the forehead.

Alternating strips
Chignons
Most of the heads have a chignon. I tried several different methods of making them.
1) The crimped hair made the best chignons (#1). All that was necessary was to crimp 36” long lengths of strips usually 24 to 36 of them. I would bundle them in a clear rubber band divide them into three bundles, loosely braid them and rubber band them off at the other end. Then I would glue one end to the head and twist the braid into the shape I wanted, buried the end and glue it down to the head. It was usually necessary to glue it in 4 or 5 more out of sight spots.
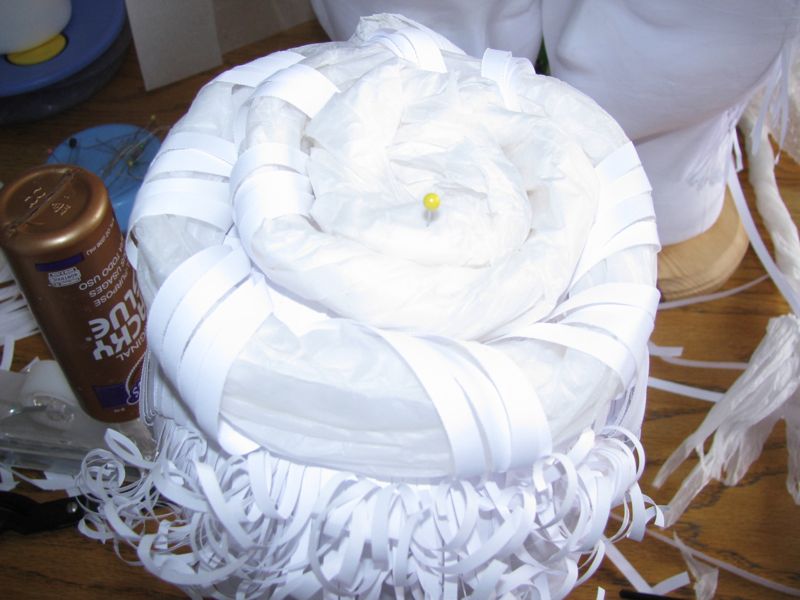
2) Another type of chignon (#3) is made with wide strips of paper that is twisted into a spiral and glued down to the head where it touches it. I started at the center and spiraled out from that until the chignon was the correct size.
3) I made the small chignon (#2) for the 1890s’ hairstyle by taking a bundle of long strips that were held together with a rubber band and gluing it to the head. When this was dry I looped it several times and then wrapped the strip bundle thru itself to hold it in place and glued it down where necessary.
4) The large chignon (#5) on the 1912 head was made over welting. The figure captions tell how it was done.
5) The last chignon (#4) is made from bundles of 1/4” wide and 4” long strips taped together and then glued so that they are in one layer in the center and in four layers at both ends. The figure captions show how it is done.
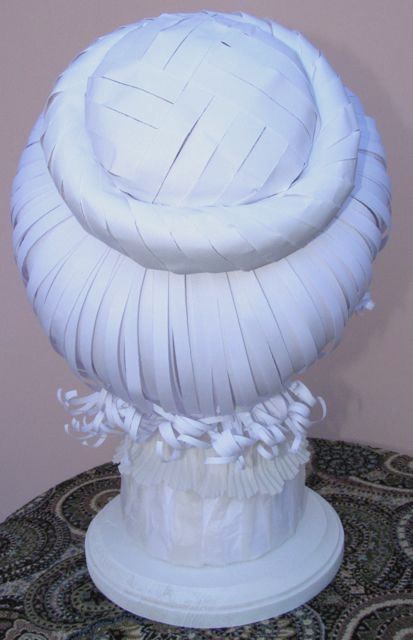
Chignon (#5)
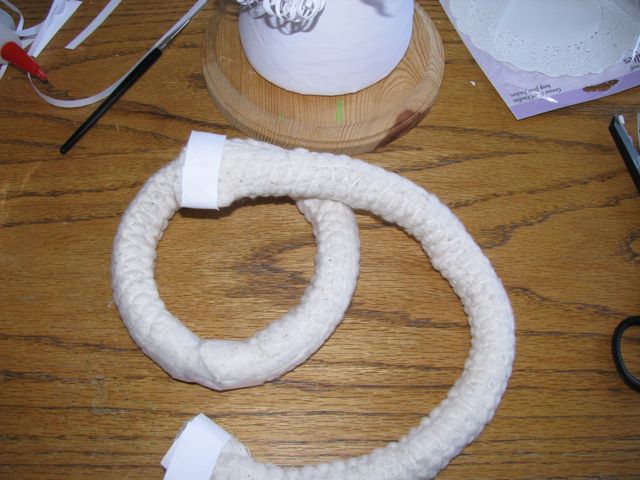
Chignon (#5), Two lengths of 1″ welting one glued into a circle and one that will make the center.
Chignon (#5), The circle and spiral of welting need to fit into each other.
Chignon (#5), short lengths of 3/8″ paper stuck to a piece of tape at an angle. These are glued to the circle of welting with ends on the inside.
Chignon (#5), On the right is the circle covered with the strips of paper. On the left is the spiral of welting covered with a weaving of paper strips thru
Chignon (#4), Four strips of 1/4″ paper about 4.5″ long were taped together in the middle.
Chignon (#4), These taped strips were gathered together at the ends and taped so that they all overlap and the bundles form a fusiform shape.
Chignon (#4), each of the bundles was glued down at one end and then twisted until the other end touches the head. This is glued down.
Curling bangs or sideburns or side fringes
Curling can be done two ways. Either by wrapping the strip around the handle of a paintbrush or crochet hook from the end to the base while holding the end with your finger. When there are many curls it is sometimes difficult to not crush one you have already done so It can be important to curl them from the center to the outside edges. If the hair is too long you can cut them to length.

Take hold of the end of a strip between a paint brush end and your first finger and twist the brush until you reach the base of the skull.
With a full set of bangs from side to side it is best to curl from the center front toward the sides.
Small curled neck fringe should be curled with a smaller tool like the handle end of a fine crochet hook.
You might want to trim the base curls, grab them between your first two fingers and use the scissors to cut them off just above.
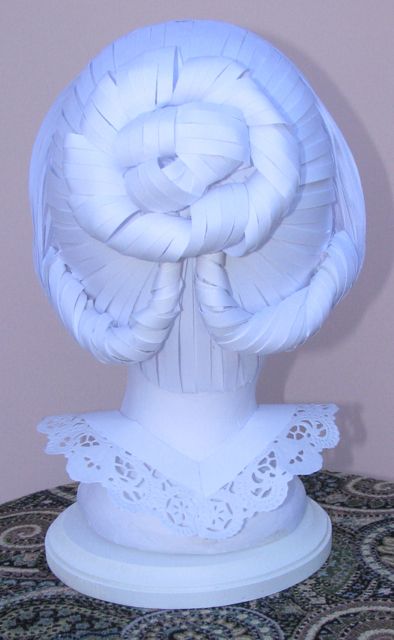
The French Twist for Victorian tall hat
The French twist with the spiral chignon was the most difficult hairstyle to achieve. It started out much the same as the other hairstyles but I had to figure out how to create a cone shape pad that could be covered with hair coming from the left side of the head and also create a spiral pad that I could cover with strips to form the cinnamon roll bun. With a little trial and error it came out well. The figure captions and pictures show how it was done they go onto page three.
The 1/4″ strips were glued across the front of the head.
The front strips are folded back along the hairline
The front strips are glued down in the bun area
On the right side of the head glued strips from the sideburn area to center back with a little ease over the invisible ear.
The strips from behind the right ear to about 2 ” below the left ear are glued. check the next photo.

The strips in this picture that were along the left side and almost to the center are glued down along the hairline.
Along the left side and almost to the center are glued down along the hairline.
One piece of tissue paper folded in fourths.
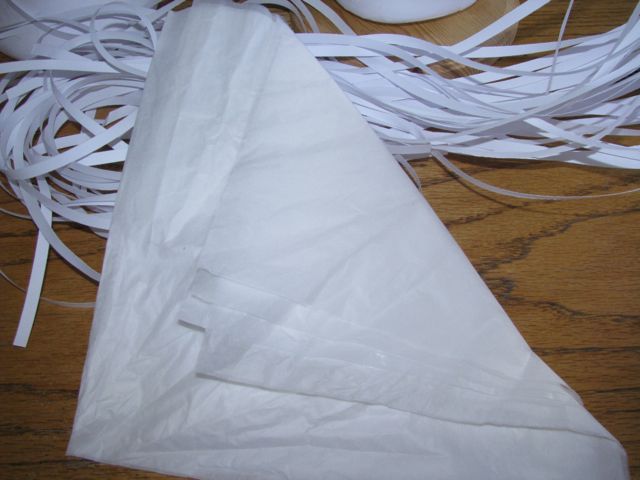
The tissue paper folded one more time on the diagonal.
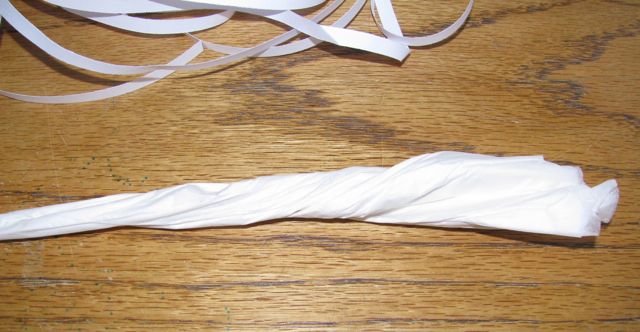
The tissue paper twisted to form a long cone shape.
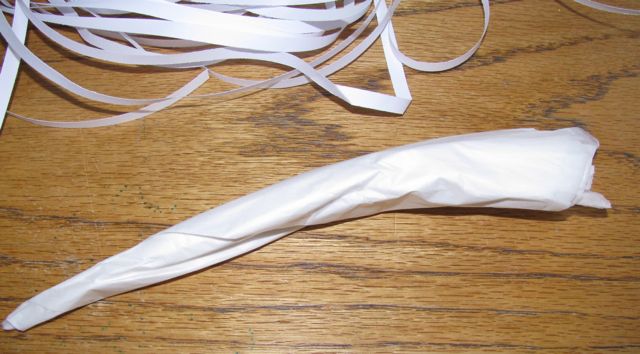
That cone shape angled to fit the curve of the back of the head to become padding for the French twist.
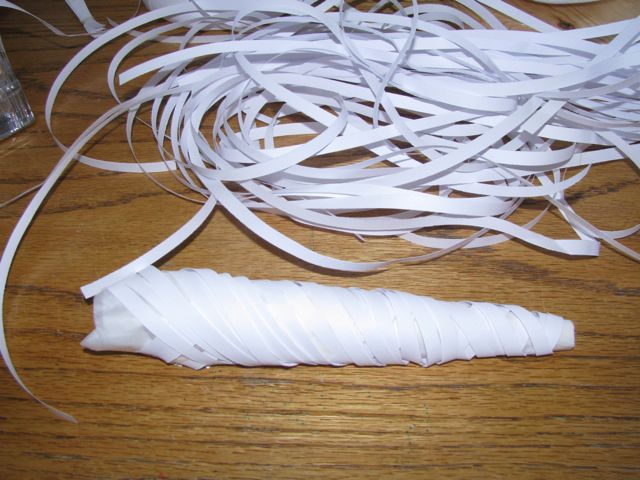
After the cone is cut to length strips of paper are clued to wrap around and cover the cone
The long glued strips on the left side are brought around to cover the cone
The cone is glued in place down its left side with the right side left free.
All but about the upper most two inches of strips are folded back and wrapped around the cone. they are then marked for length and trimmed.
Two sheets of tissue paper are glued together with about a 1″ overlap.

The tissue paper is rolled and twisted into a spiral as shown. one end is glued to the top of the cone and the other twisted and tucked under.
Test it to make sure tha hat would still fit over the bun.
The un-cut long strips are twisted around the top edge of the cone and the bun until the end.
The long strips after having been wrapped around the tissue spiral and the spiral having been pinned back in place.
To cover the areas of the tissue that has no strips covering. I taped strips of paper off set by about 1/4″ with three rows of tape.
These are cut apart in three pieces.
Then these strips are curled to the shape of the tissue spiral so that the taped side will be on the inside.
The strips are glued over the tissue spiral as needed to cover.
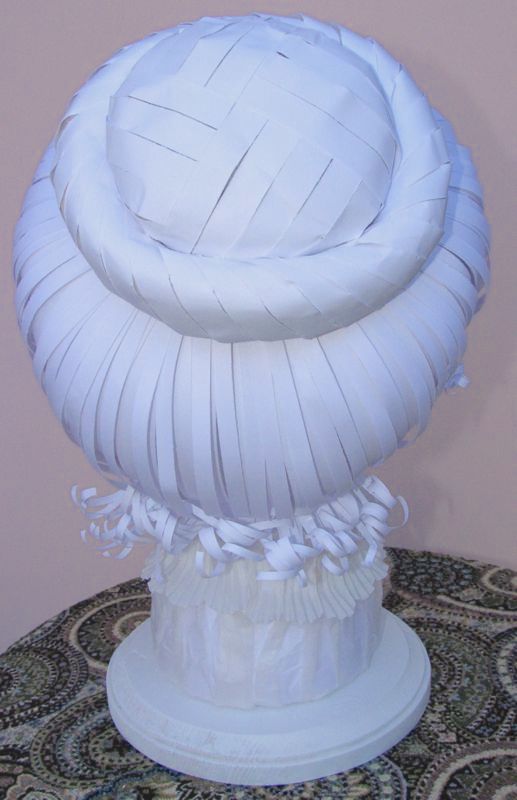
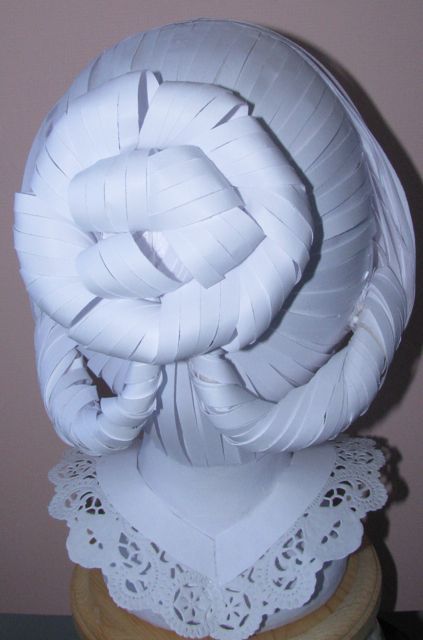
The French twist and bun shown from the back.
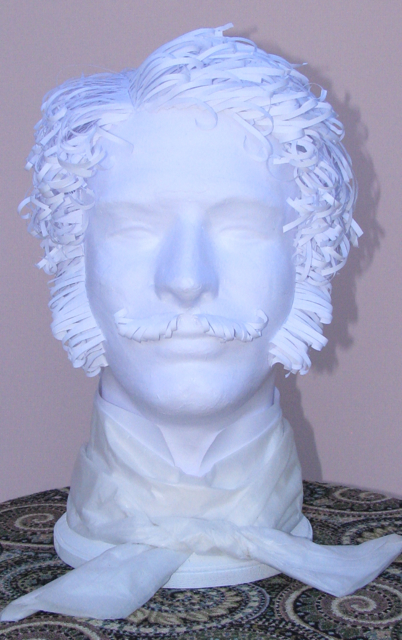
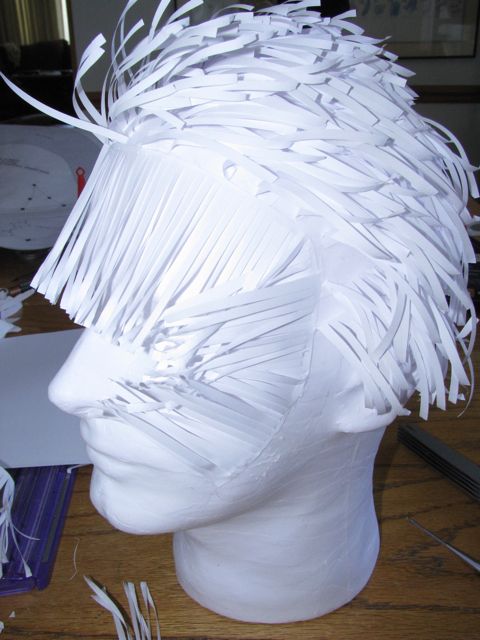
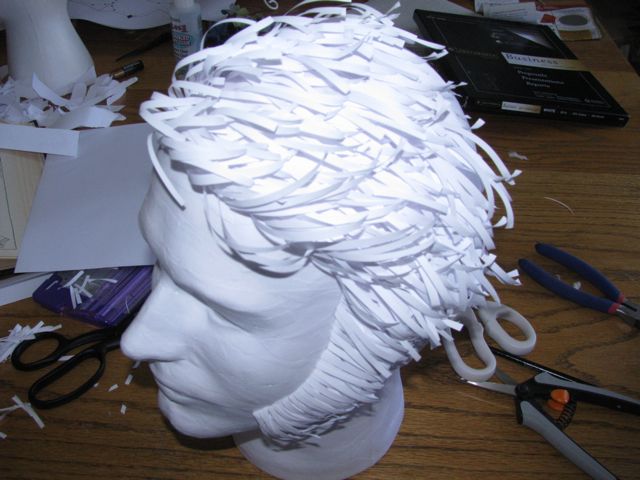
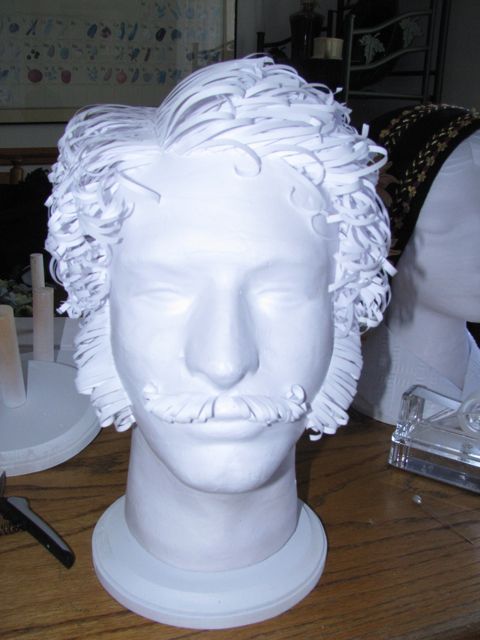
Male hairstyle for straw Wellington top hat
I did take step-by-step pictures of the hairstyle on the male head. The figure captions tell what was done in each step. My pattern of adding strips for this hairstyle follows how weft is added to a wig and could be done with the wider ¼” strips and for different hairstyles made with longer strips. Knowing how to cut hair would come in handy. For this male hairstyle one a few of the strips over the ears have to be trimmed along with the hairs for the sideburns.
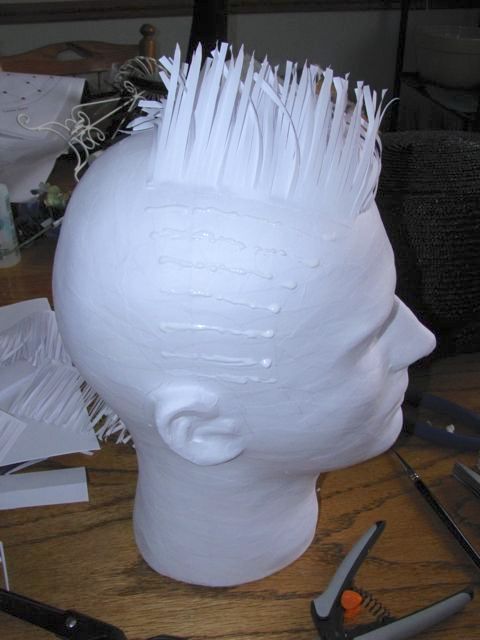
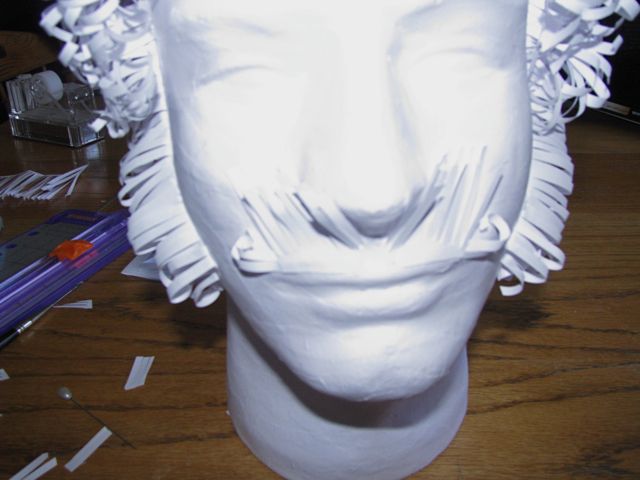
Add parallel lines of glue about every 1/2″ over from the part on the right to just above the ears and add a row of 1/8″ strips over each line of glue.
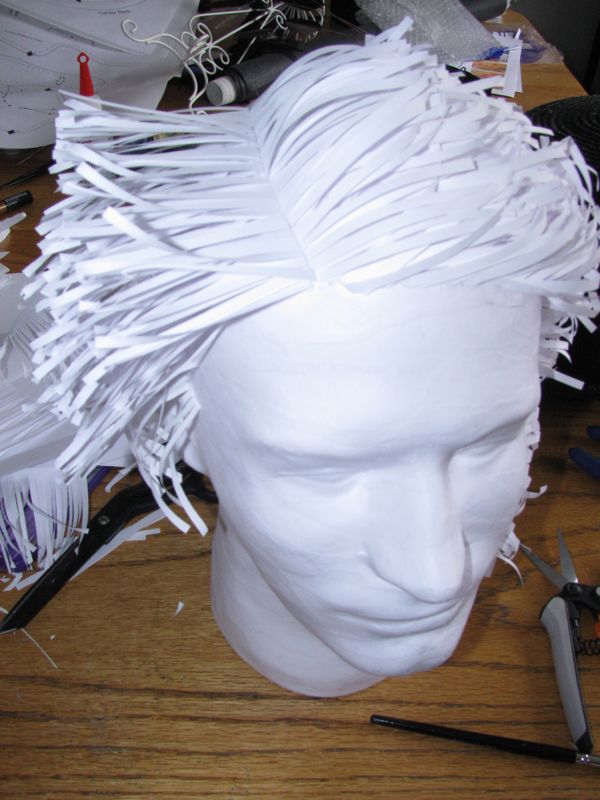
When the glue is dry flip the rows of strips over one at a time starting from the lowest to the closest to the part.
Use the handle end of a paint brush to smooth out and give a slight curve to the strips.
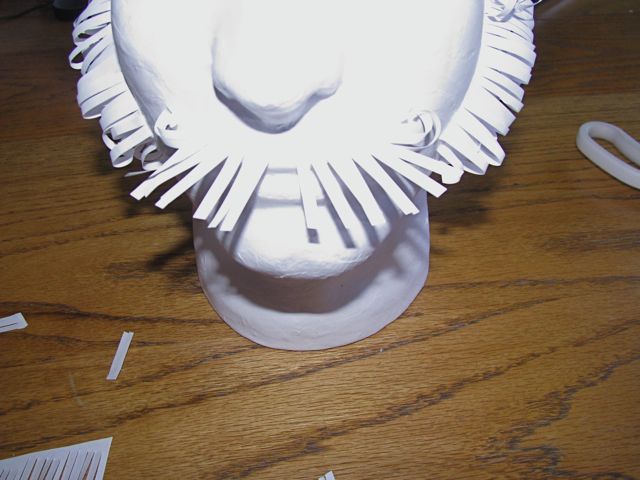
Add a line of glue over the hairline and down the outside edge of the sideburns.
Add a row of paper strips over this glue line.
Flip them up, smooth and curl them with the handle end of a paint brush.
Add the glue to the other side of the head. Add more weft strips with the cut side up.
Flip back the strips.
Add the strips along the hairline and sideburns.
Fill in the back area of the skull by adding rows from the base to the tip.
Add two more rows of strips parallel to the first along the sideburns then use a large corsage pin to give the ends of the hairs a tight curl.
For the mustache add a dot of glue at the outside edges of the upper lip.

Glue three 1/8″ pre curled strips to each dot.
For the remainder of mustache cut some strips that angle at about 45 degrees to the left for the left side and to the right for the right side.
Glue two rows on either side leaving the center section without strips.
Fold them down and trim if necessary.
Curl the mustache with a corsage pin.
1850s’ center part twist style for drawn bonnet
This hairstyle was just a little tricky until I hit on using pins to hold the hair down just behind the ears. The pins where left in but are covered up with the padded roll that forms a faux twist for the remaining hair from the center front. The figure captions and pictures show how it was.
A 1/4 circle of tissue paper was folded around a wedge of batting to cover it and form a long narrow cone.
Long 1/4″ paper strips are glued to the cone.
Three rows of offset strips where glued to the right of the center part. More strips are glued lower down.
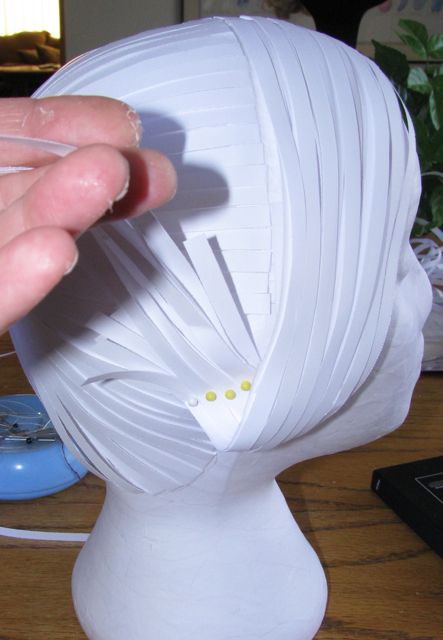
The strips are folded over and then flipped up then pinned in place
The shorter strips shown in this picture were cut away very close to the pins.

The cone with its strips are glued into the space inside the twist.
The strips are spiraled around the cone to cover itand the end is glued in place. The head as seen from the underside.
The left side is just a repeat of the right but is is spiralled counterclockwise.
The bun (#3) is added over a three inch circle drawn on the back of the head just above the twists.
1926 hairstyle for wool traveling hat
In some ways this was one of the most challenging styles to do because I had to figure out how to make a bobbed style with a Marcel wave. I knew I could make strips of hair both wave and curl around form a large curl at the cheek. What I finally came up with was to draw a wavy line on my paper that swirled back in forth and ended in the large curl I wanted. I then drew rows of lines that got gradually narrower until it reached the curl. I cut along the lines so I could trace between the lines to copy it to make three or four that matched. I glued these along the part in slightly offset layers. For the other side I made some that where shorter and with a much smaller curl. When the glue was dry I used my first and second fingers to create ridges and valleys for the Marcel. It was a good thing that the hat covers up most of the head because I really did not have an idea just how the back might have been worked out.
1926 marcel wave hairdo
1926 hat side
Final touches
After I did a couple of these heads the necks seemed bare, I had to come up with something. Most of the everyday fashion from this time period calls for a high stand up collar something I could make with paper doilies. Heart shaped doilies worked very well but I wanted some variety so I moved on to round doilies of different sized. Between my local craft, party and cake decorating stores I found 7 to 8 different types and just fiddled until I came up with something I could do for every head, except for the 1926, the 1850 and the man’s head. When working with paper doilies fabric tac glue worked much better than tacky paper glue because it did not melt them. I used paper to make a very large fold back collar for the 1926 head. I used two half circles of paper with the outside edge of a doily glued to the outside edge for an 1850 collar. The inside edge of the paper needed to be clipped so it could be glued to a piece of paper that went around the neck like a collar band. For the man’s neck a piece of paper for the high collar and tissue for a cravat did the trick. It started with the center of the folded tissue in the center front and the ends wrapped around the back and tied in the front with a knot. Even with the 1919 collar I used part of a doily as a decoration in the center back of the collar.
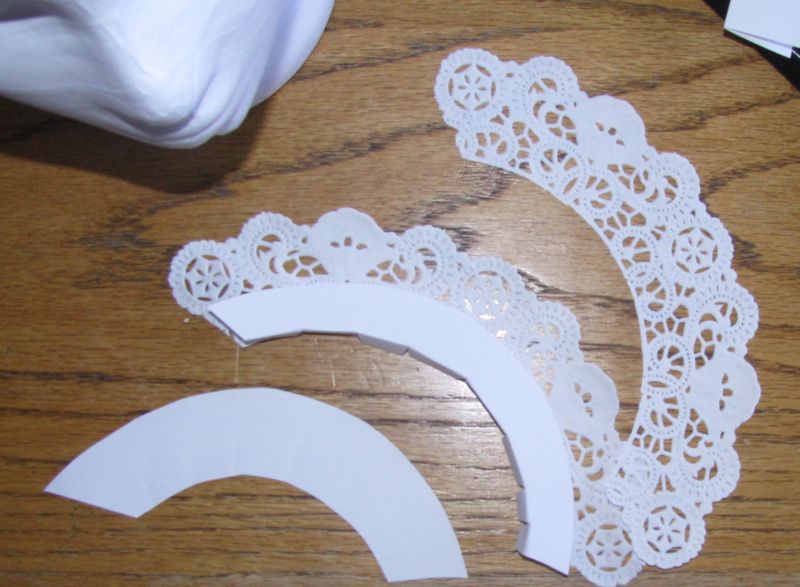
Collar was made from paper and the edge of a paper doily.
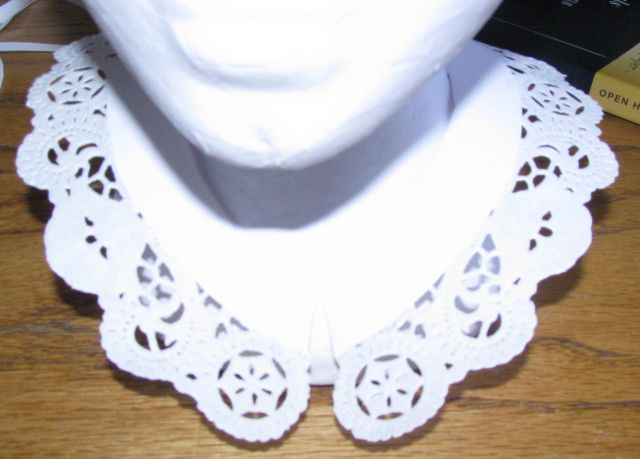
Finished collar.
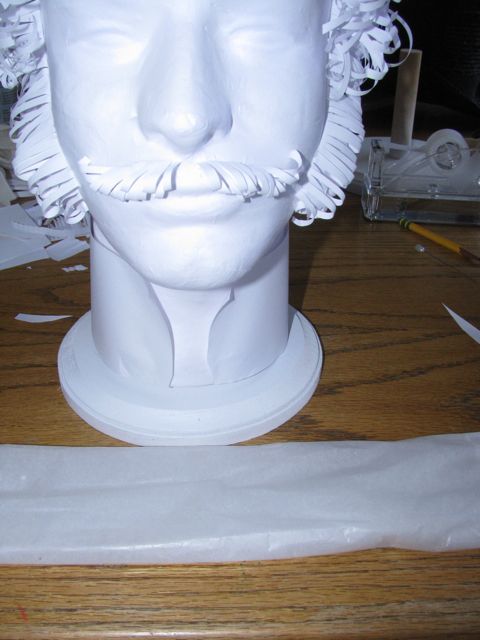
The Victorian man has a high paper collar and a cravat made from tissue paper.
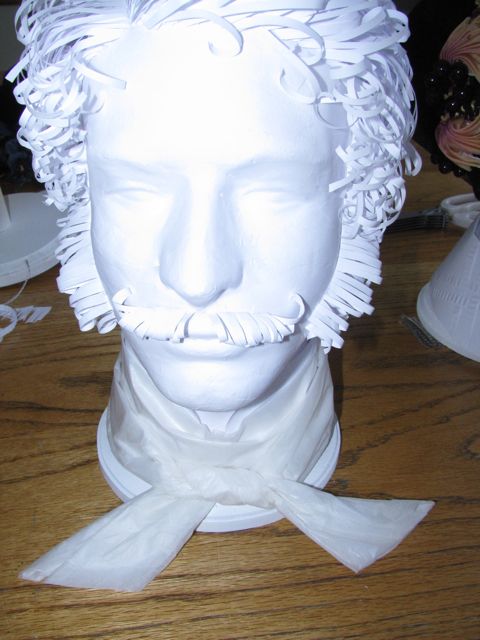
The tissue paper was wrapped around and then back to the front and tied.

Finished head with hat
Space saving idea
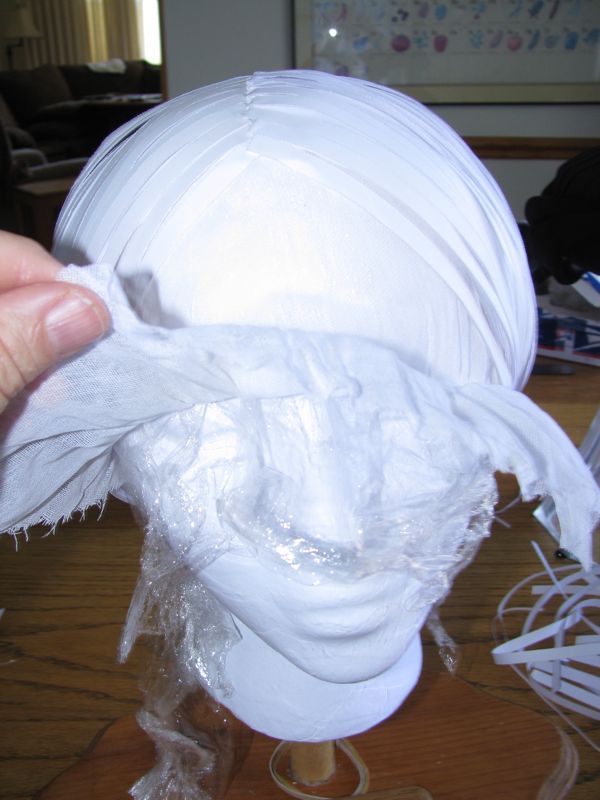
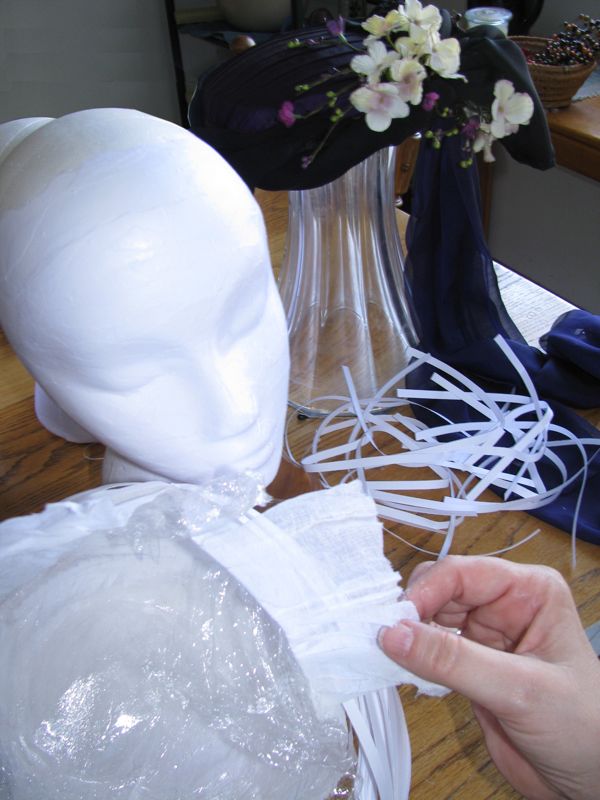
I ended up with quite a few heads and storage and display room got tight so, I realized that going forward I could do these hairstyles as wigs and I would only have to store wigs and have only a couple heads. So, I started by covering the face and neck area with paper maché as before and drew on a hairline. Then I covered the head with plastic wrap and draped the head with wet, medium weight buckram that I held in place with a rubber band to dry. When this was dry I created the hairstyle just as I did before. When the glue was dry I loosened the buckram from the head cutting some of the buckram where it was necessary. When I could pry the paper wig off the head I trimmed the buckram base so that it did not show when I slipped the wig back on the head this time without plastic wrap. I needed to pin the wig in place to hold it from slipping but as you can see from the last photos it is impossible to tell that the paper strips where not glued to the head.
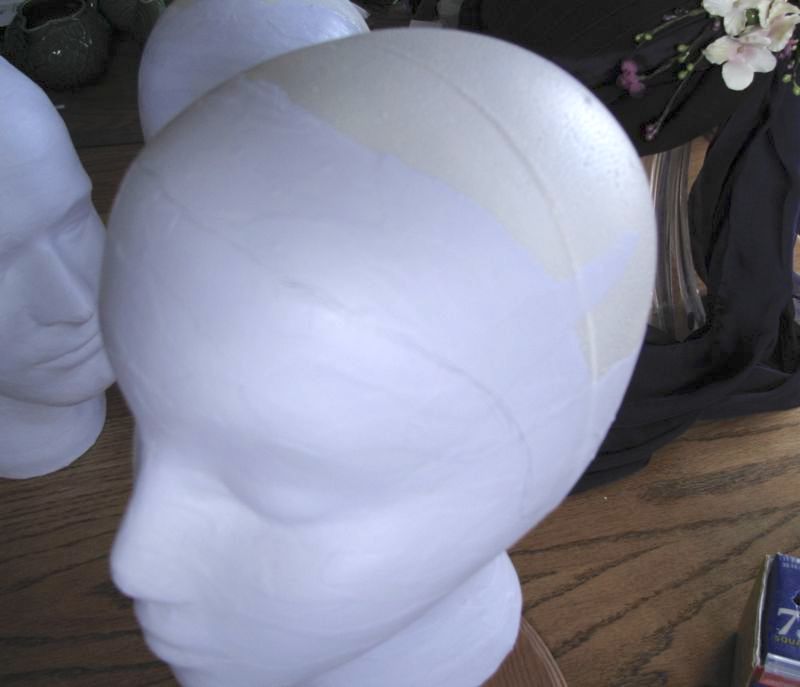
Head with hairline marked with pencil.
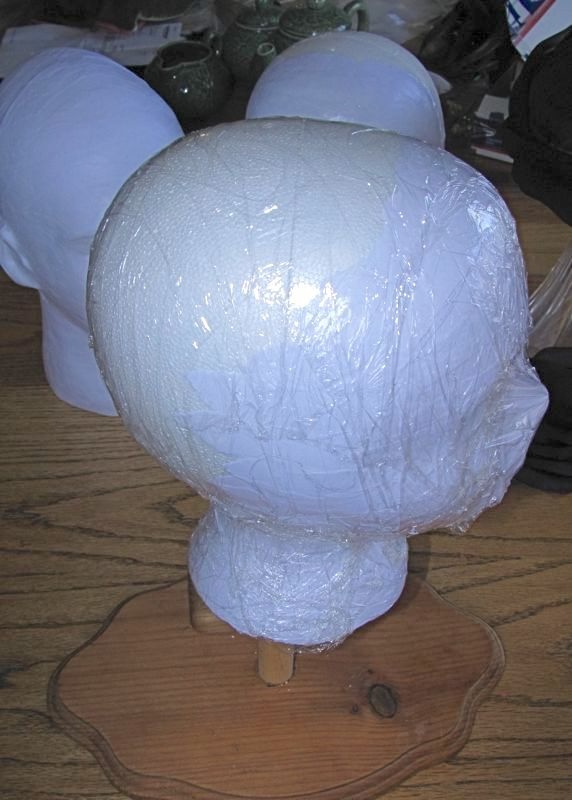
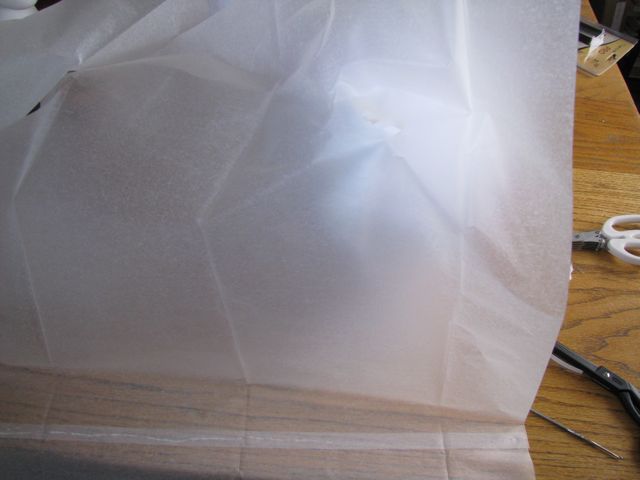
Head covered with plastic wrap.
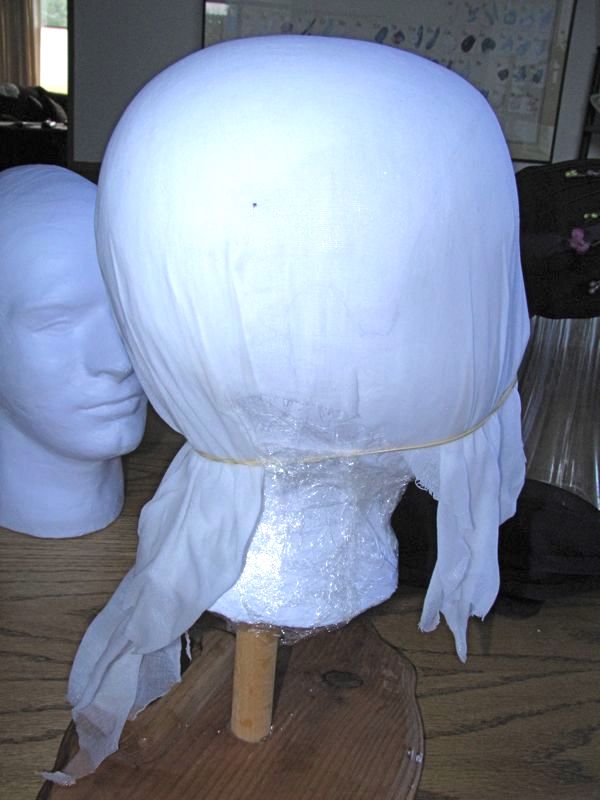
Head covered with wet buckram.
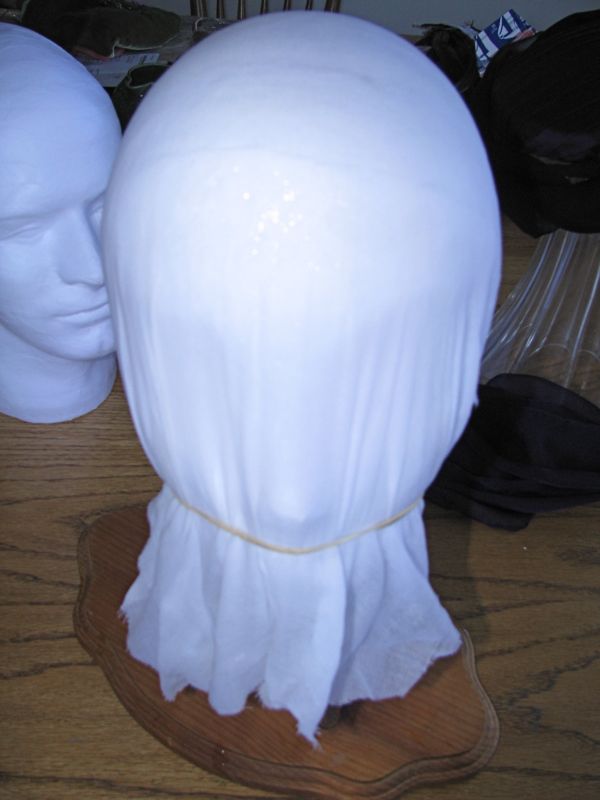
Head from front with wet buckram.
Dry paper wig and buckram base being detached from plastic wrap.
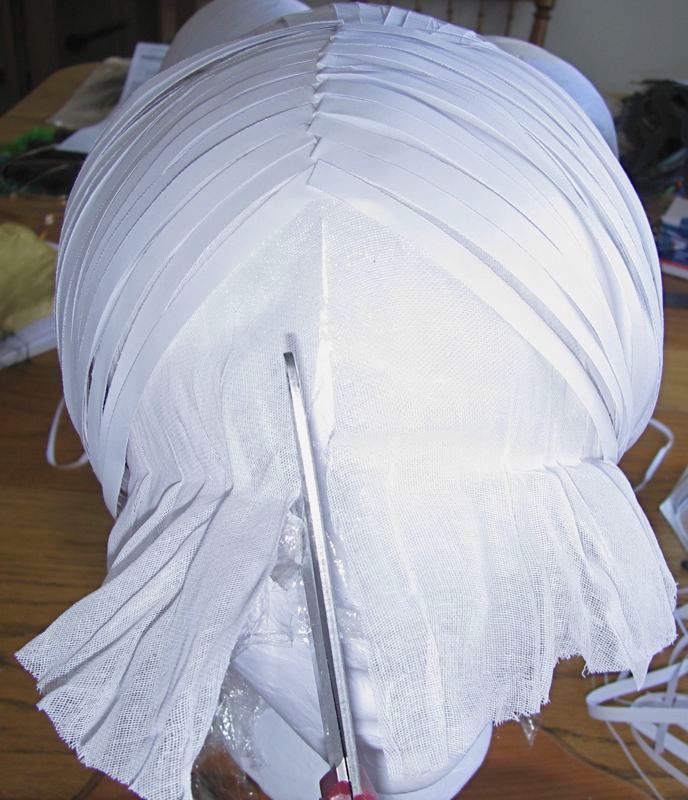
A cut in the buckram to help free it from the head.
Clipped piece of buckram being folded back so that the entire wig can be pulled off the head
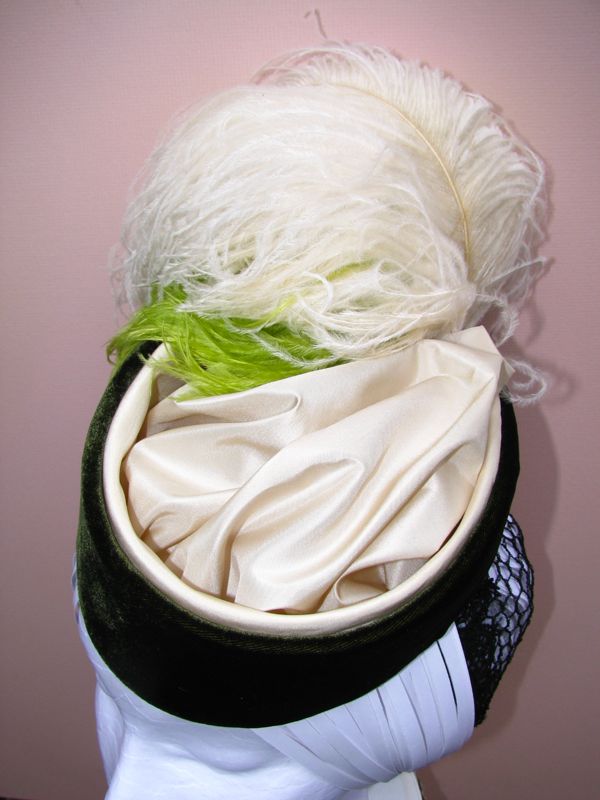
Brimless 1860s hat on paper wig.
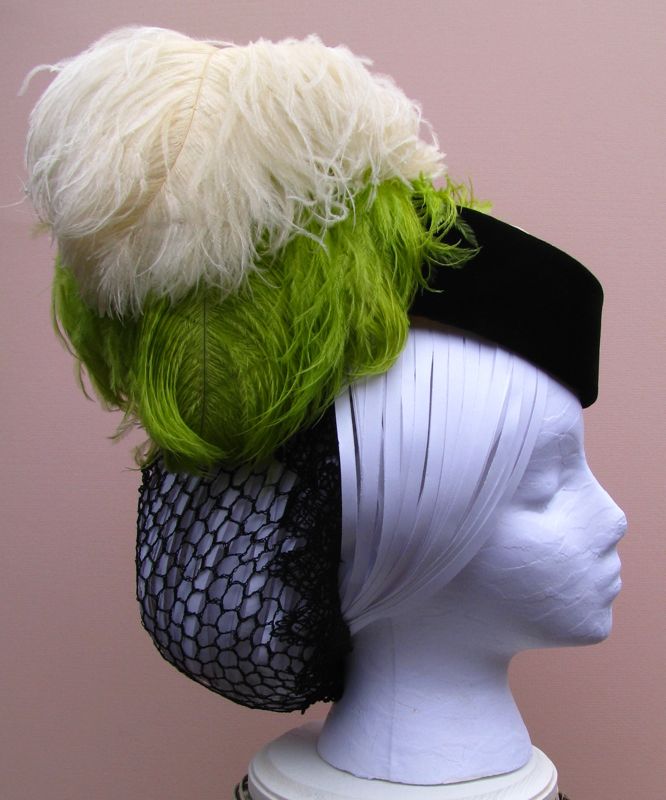
1860s hat from side showing the snood filled with paper strips.
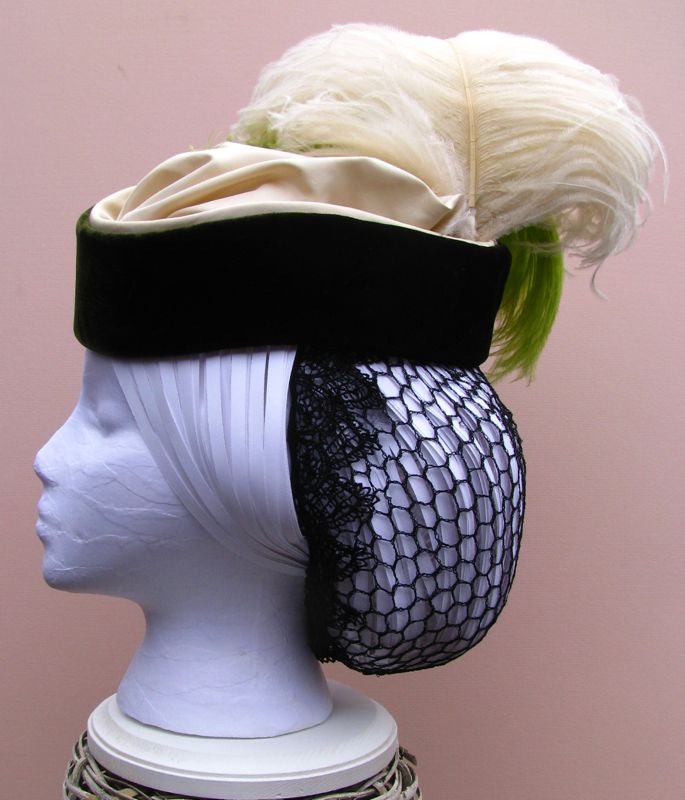
1860s hat from the other side.
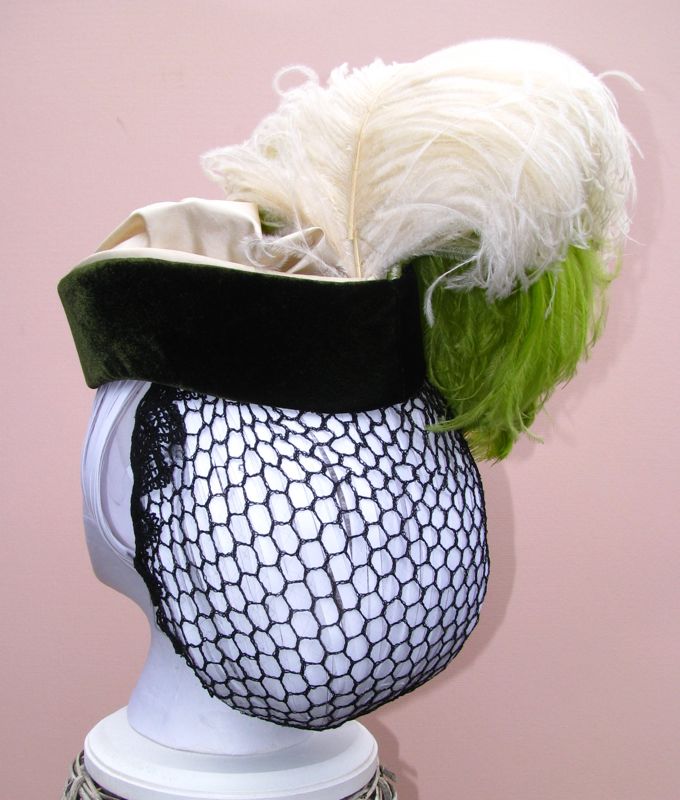
1860s hat from the back besides the strips there is padding under so that the snood puffs out.
