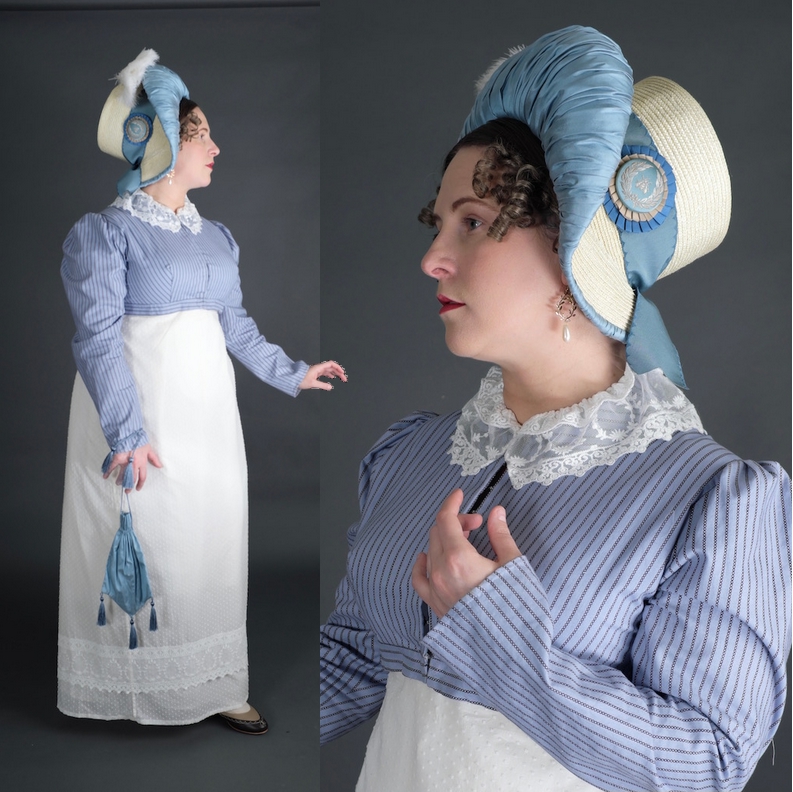
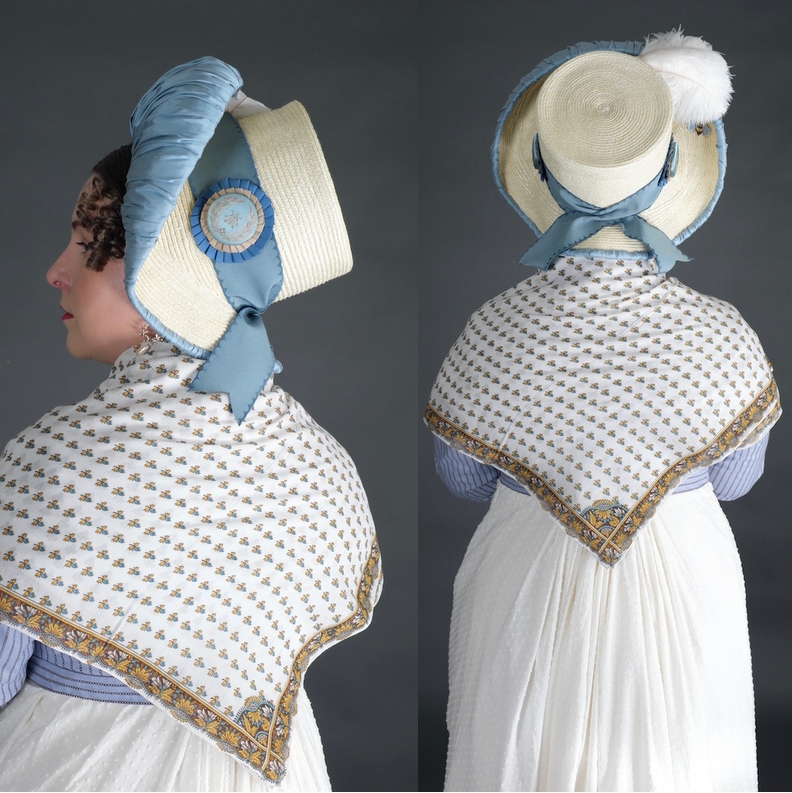
This cockade was made from two lengths of silk taffeta folded on one side and pleated on a regular 1/2″ pleater board, not a ribbon board. The blue strip was wider than the gold. The center has a 2″ covered button with Napoleon’s crest, A Bee surrounded with a Laurel wreath.
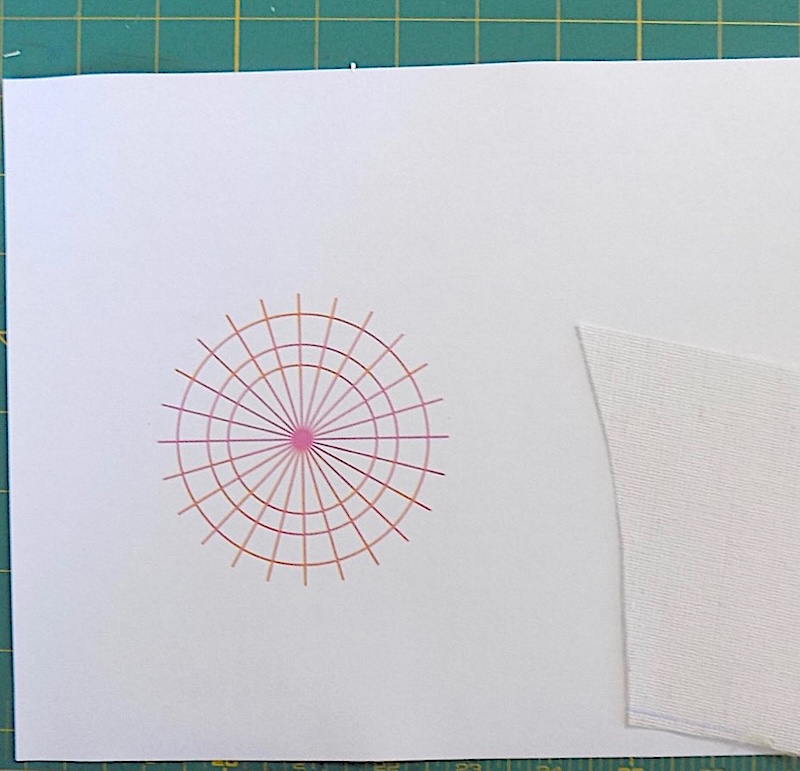
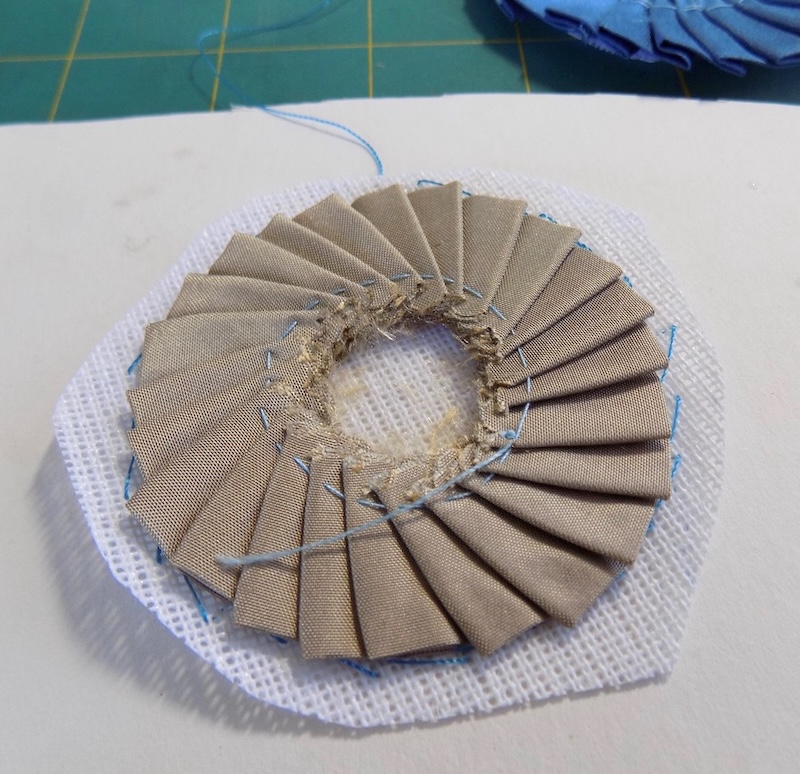
1) I drew a 3 1/4″ circle with a 2 3/8″ circle inside that and a 1 7/8″ circle inside that. These are the outer boundaries of the layers. I divided that into 24 sections made from 12 lines going right through the center.
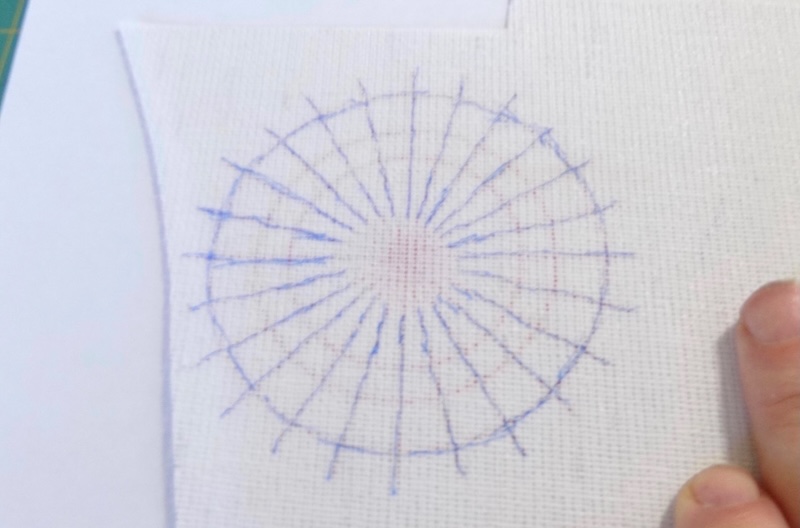
2) I transferred the outer circle and the lines to one piece of single lightweight buckram. I also transferred the next circle and lines to another piece of buckram.
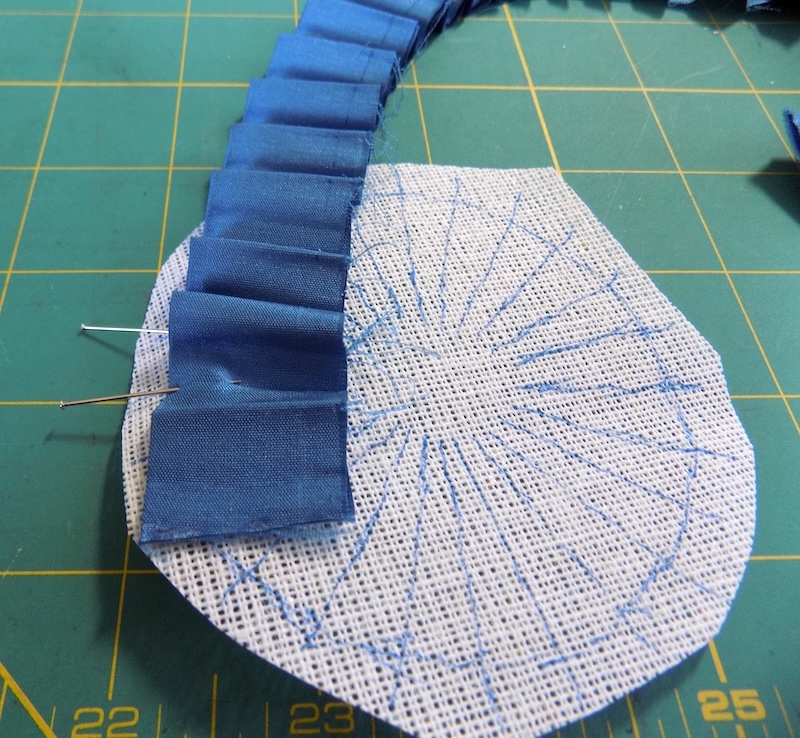
3) From a 26″ yards, 2.5″ wide folded in half and ironed, I made the entire length into standard 1/2″ knife pleats.
Starting from the first valley fold I pinned the fold down to one of the lines, then pinned down the lower later of that pleat at the next line.
4) I took a stitch through the buckram onto the position the pins were taking along the outer circle. Moved the pins to the next pleat clock wise. Tack those down and continued around the entire circle. To the end.
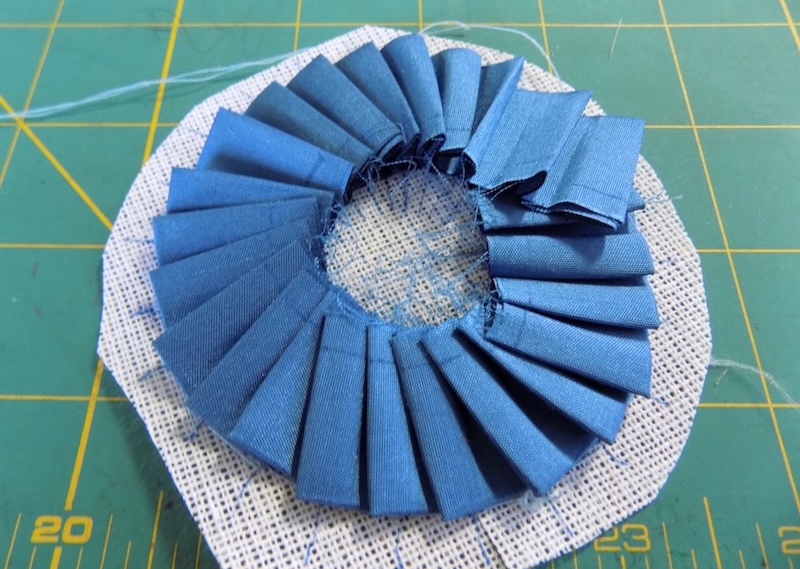
5) I cut away the two extra pleats and tucked the cut edge down under the first pleat.
6) I took a small stitch through the fold but just a small stitch. Make sure they are the same distance from the cut edge ~1/4″.
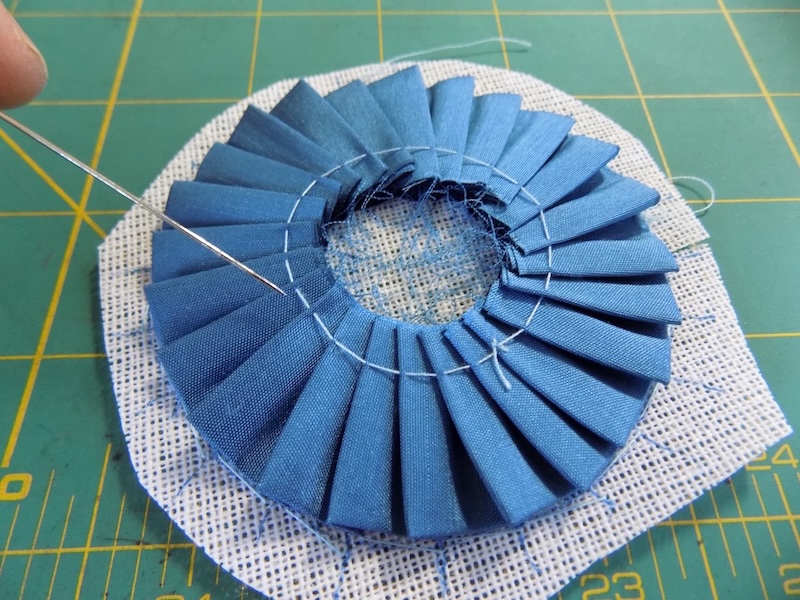
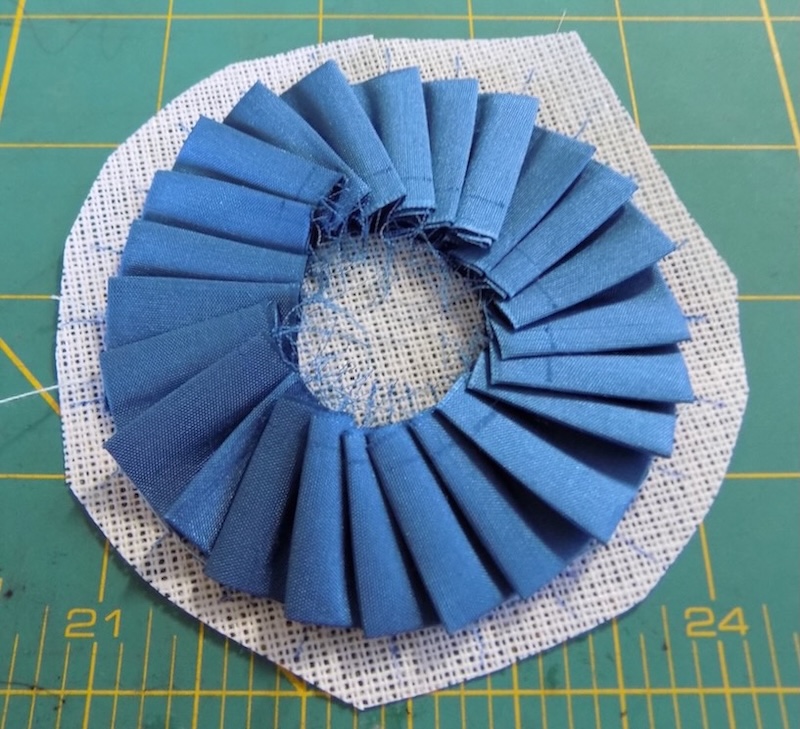
7) Pull on the stitching until the hole is as small as it will get and the pleats start to lay flat. Use a needle probe the distance between each pleat is even.
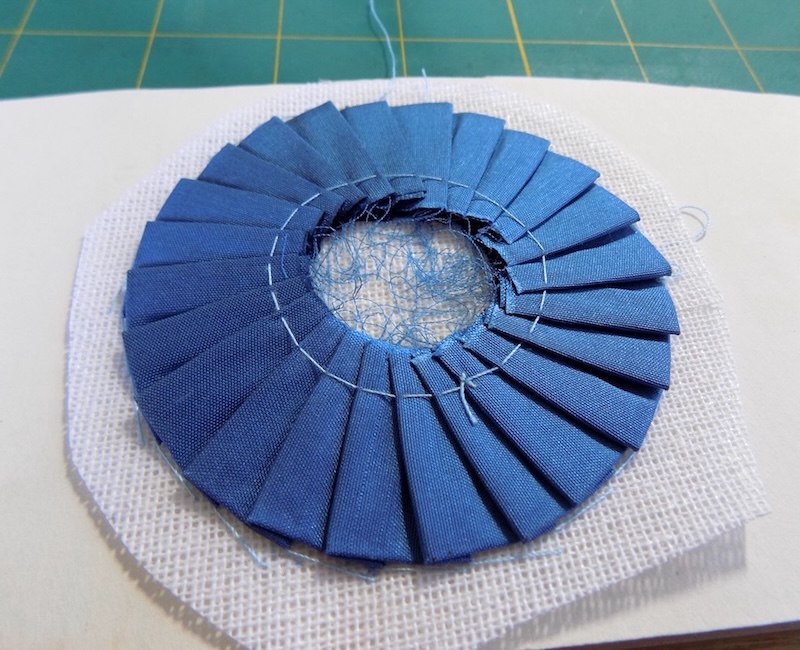
8) Knot off your thread. Press it flat.
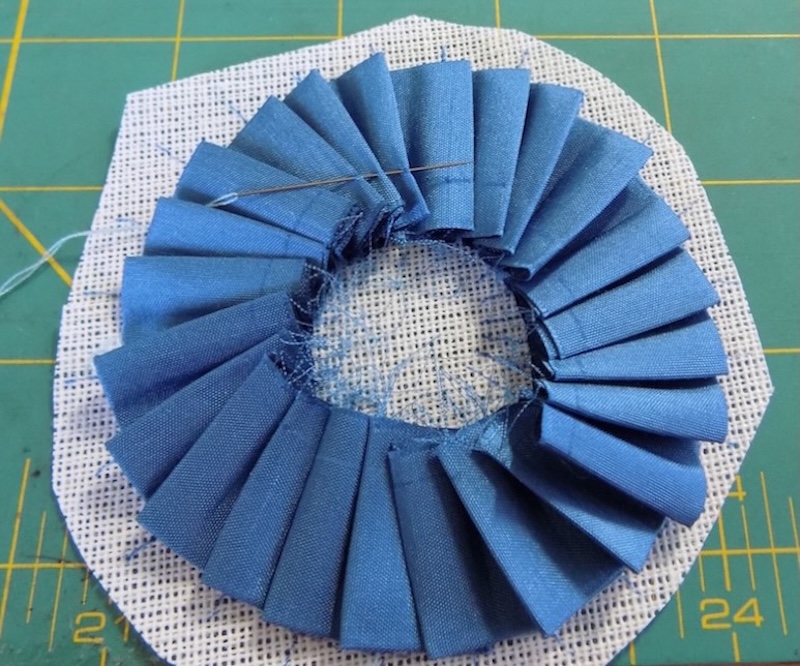
9) Sew a basting stitch through to buckram through each pleat. Remove the stitching you used in the forth step to tack the outside edge to the buckram. Cut back the buckram so it will not show ~1/2″ from the outside edge.
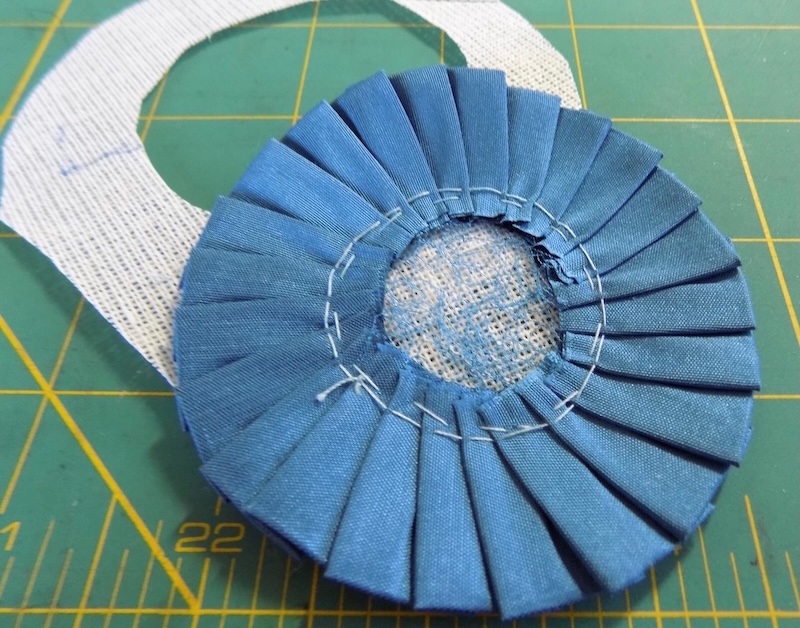
10) If needs be sew the edge of the last pleat down so it will not fray.
11) For the second layer repeat the same steps but you should start with a 1/3″ knife pleat. You will need the same ~26″of 2″ wide fabric folded and pressed long ways.
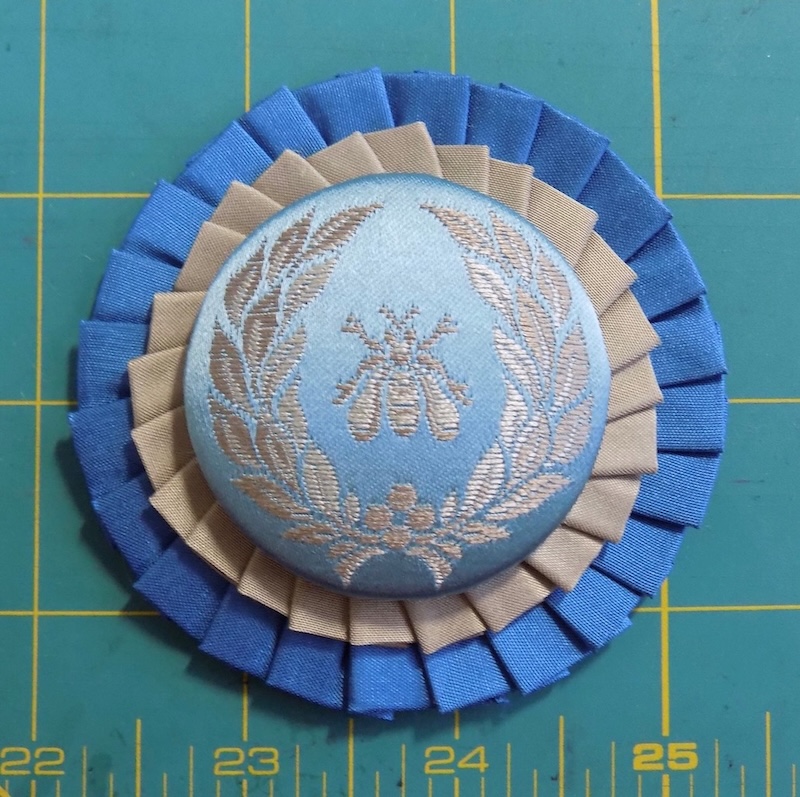
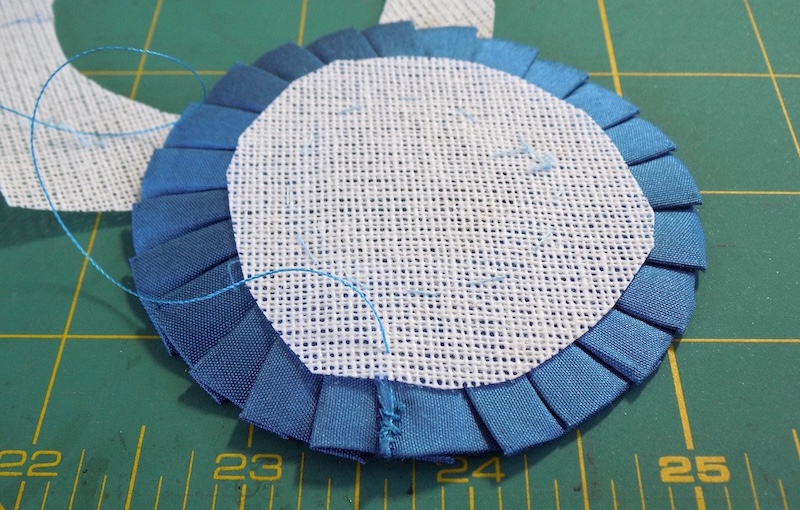
12) This is the finished cockade I know I would have done better with a pleater and petersham. I have made petersham cockades the you don’t need to control the outside edge at all just make sure that you choose the correct width of petersham that is one half as wide as the cockade you want. Then use the stitch in step 6-8 and tighten it as much as possible. Flip the cockade over and do the stitch on the other side. Do the stitching just in from the very edge.
This is a double cockade I made for my Wellington hat. It was make from two different widths of petersham. When gathered the hole in the center was only large enough to get the loop in the covered button through to the back. The entire cockade is sewn on using the loop on the button, no extra stitches necessary.