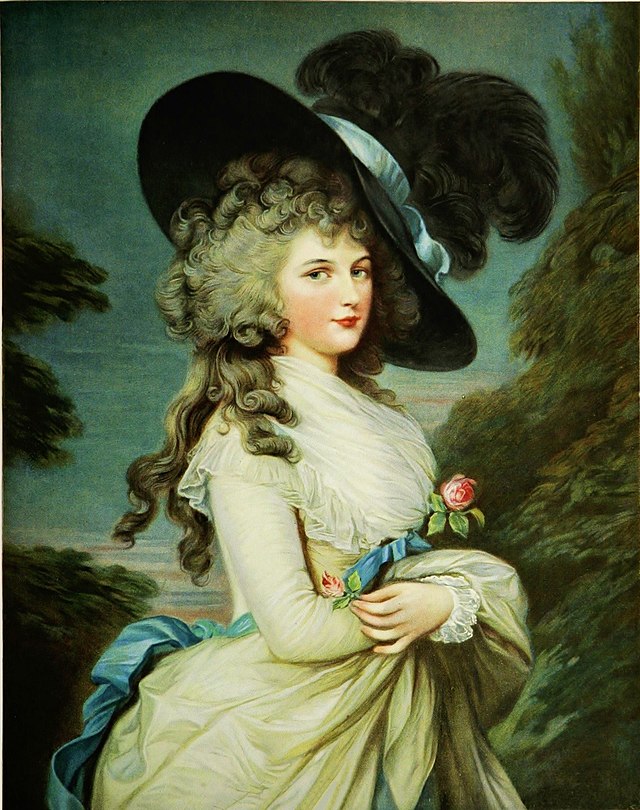
I wanted to recreate something similar to the hat worn in the movie The Duchess. And like this black straw hat worn by the real Duchess of Devonshire. The plan was to do as little sewing of rows of plait as possible. It is a large brimmed hat. I figured the best way to make it would be to make it from two hats leaving as much intact on each as possible.
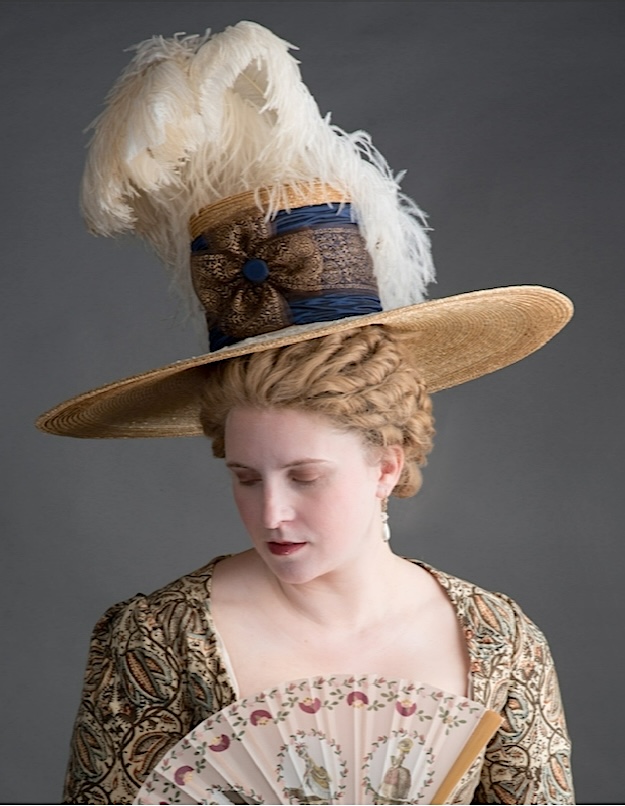
Model: Laurie Tavan
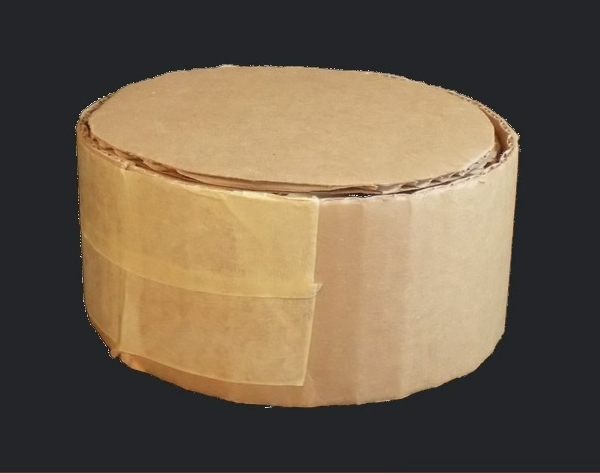
This hat took the greater part of the two hats to create. The blanks had 7 mm wide plait and with medium sized crowns. The block I used was made from cardboard 6” around and 3” tall and was used twice to get the full 6” height of the crown. If you want to see more on blocking straw hats check out this article.
The crown tip and 3” down the sides, plus the last 2” of the finished outside edge of the 7” brim, came from Hat 1. Hat 2 added 3” to the lower part of the crown sides and the majority of the brim.
I took the two straw sun hats apart, they are sewn with a chain stitch once a thread is cut and you can find the correct thread to pull they come apart quite easily leaving no little threads to pick. One could use a seam ripper but that leaves hundreds of short pieces of thread that have to be removed before you can sew. You can take apart as little or as much as you want.
I used the majority of the crown from one hat and separated the plait to reuse on the outside edge to make the extra 2 or so inches to the brim. The brim came intact from hat two. A 3″ section for the crown sides was also taken from hat two. I made a cardboard block on which I blocked the crown from hat one and the crown sides from hat two. I not only had to sew rows of straw to the outside edge of the brim to make it larger I had to sew rows of straw to the inside of the brim to make the head opening smaller. When the blocked crown was dry I sewed it to the brim along the base.
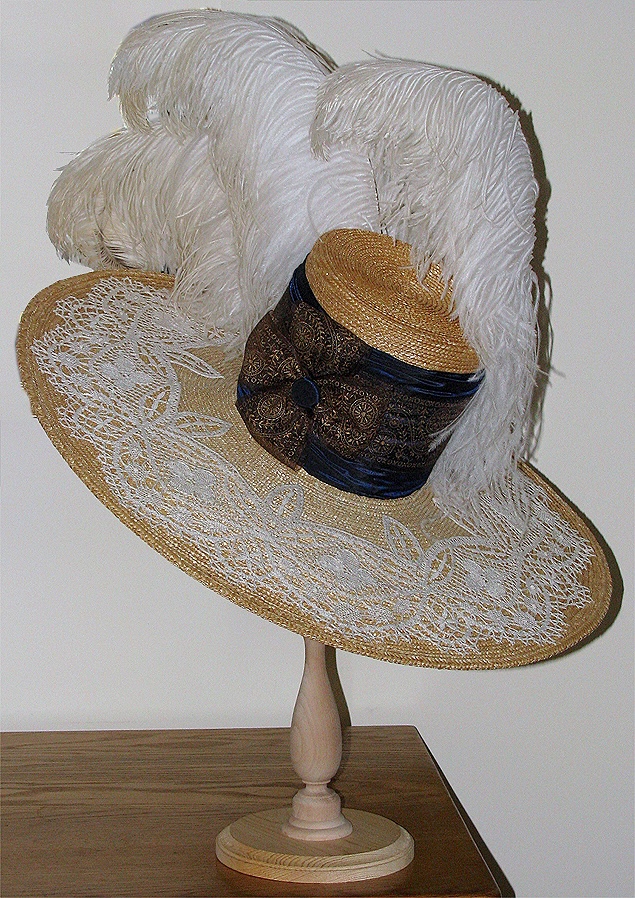
I didn’t want to create a copy of the one in the movie but I did want to make a hat with the same proportions and I liked the lace on the upper brim and the shirred wide hatband and bow. I just made one bow on the side instead of several down the center front because I wanted to add ostrich plumes.
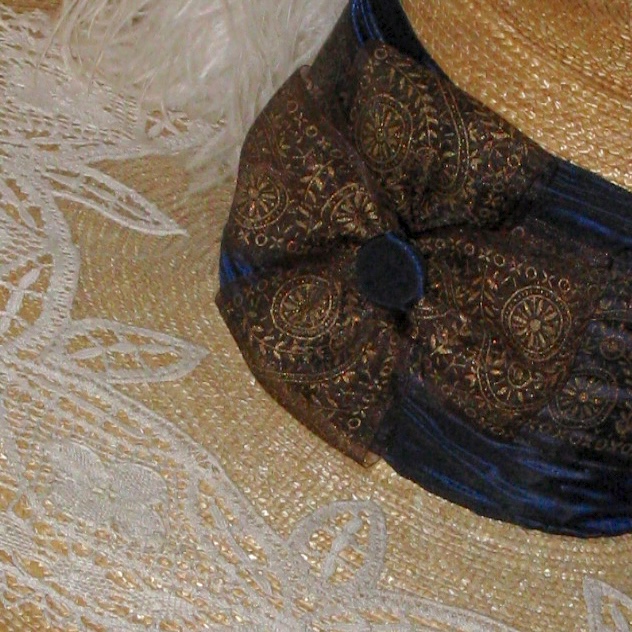
I used a very wide blue-black ribbon for the band and over that I have a sheer ribbon with gold metallic designs in the center of the band. It also makes the bow. I had to adjust the shirring so that it is above and below the sheer ribbon. I did this when I was tacking down the ribbon, if I had left it un-shirred then it would have been as tall as the crown. I added a covered button in the middle of the bow.

I bought a lace tabletop piece at Lacis in Berkeley CA. It is vintage but not from the period. It is bobbin lace which is period but the pattern is one that was popular much later. It had a solid linen center which I carefully cut away and then I tacked the lace to a piece of netting.
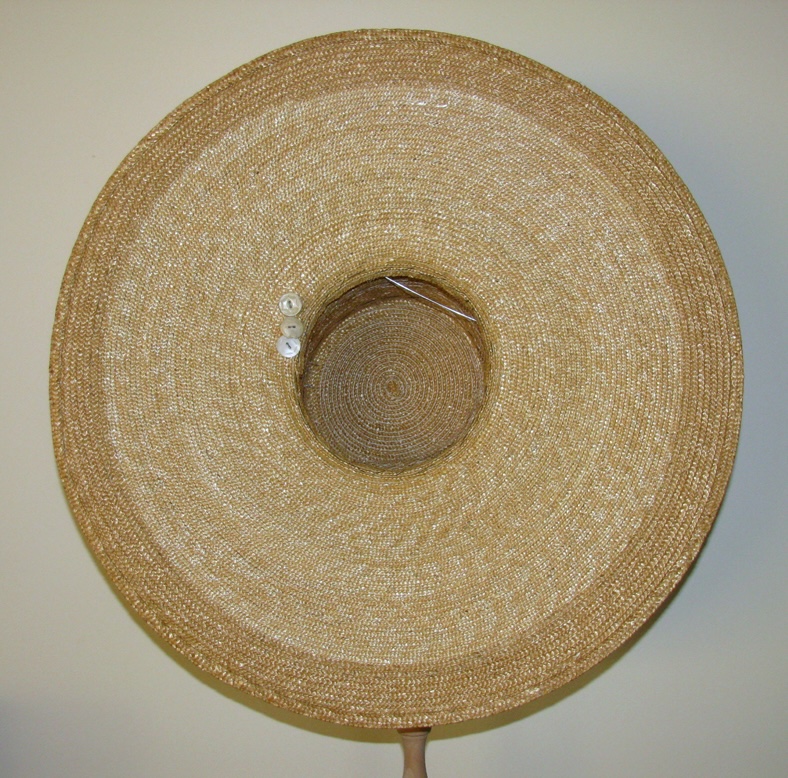
This is the underside of the hat. One thing that really stands out is the color difference between the original brim and the extra I added. That is because I used an old hat that I have had for years. It has aged and turned darker while in storage.
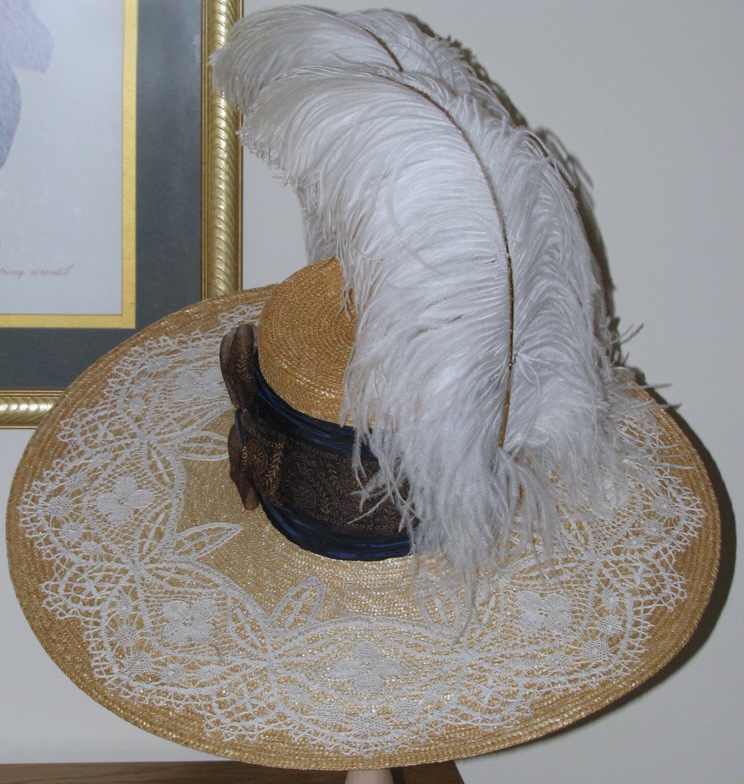
The three buttons on the right of the head opening are supports for the ostrich stems on the other side. A 5″ length of wire is folded in half and that is slipped into the holes of the buttons and thru the straw. On the other side the wire is twisted and if the stems of the feathers are hollow the wire is slipped up the inside of the stem.
I’m not sure if you can see this but inside the hat the thread that sews the straw together is thicker and lighter than on the rest of the hat. There are two reasons for that. With a chain stitch the inside or under side of the hat has the loop part of the chain and it shows much more and the straw darkened with age but the thread did not.
So whenever you can choose to have it out of sight on your finished hat. Because I covered the upper brim with the lace I chose to flip the brim. If you are planning to cover the under brim with fabric then have the looped side of the brim on the under brim.
This is the back of the hat. While the ends of the plumes are being supported with wires that go thru the buttons the mid level of the plumes are being held in place with swing tacks. You can see a good shot of a swing tack on my Edwardian Hat two-thirds down the page.
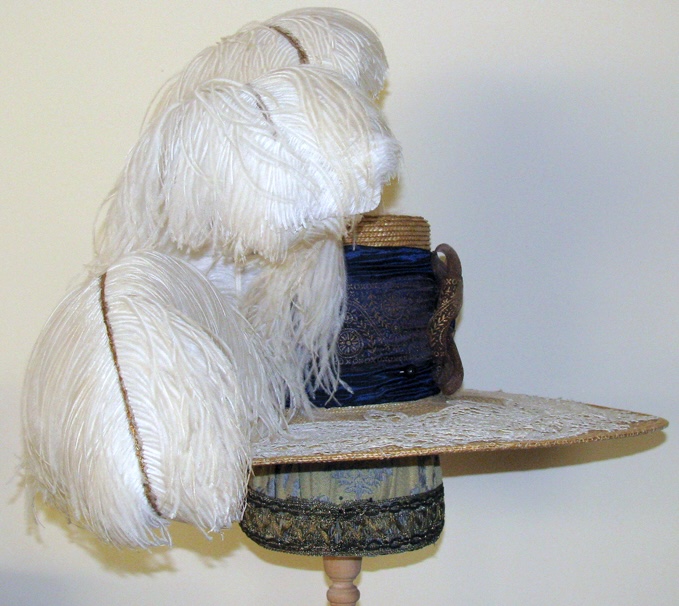
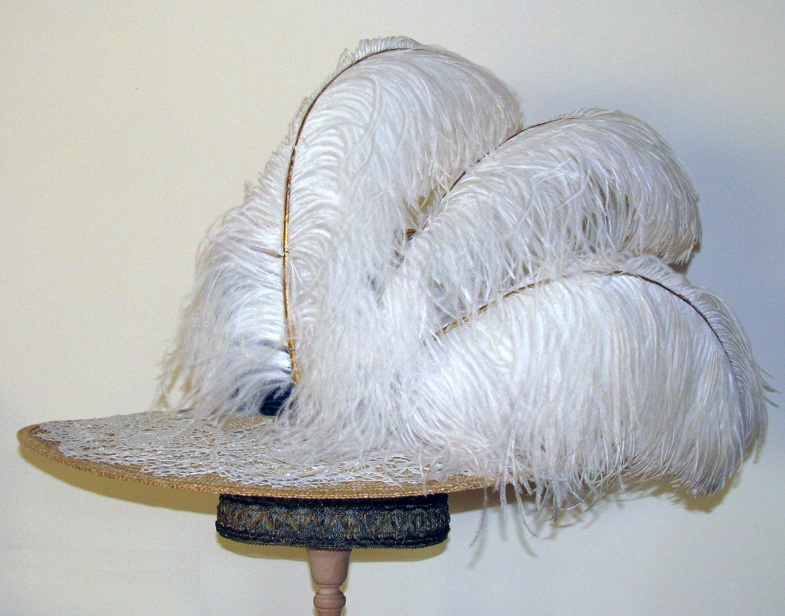
This picture from the feather side of the hat shows how the feathers fan out and do not overlap. Note: In the pictures of Laurie Tavan at the start of this article the feathers are not arranged as they should be. In order to get this hat in a hatbox I had to cut the swing tacks and she did not know how to resew them.
I used three natural white ostrich plumes. My friend Pam covered the stem with gold leaf and they needed a good hat to show them off. Look in the picture above they really glow in the camera flash.
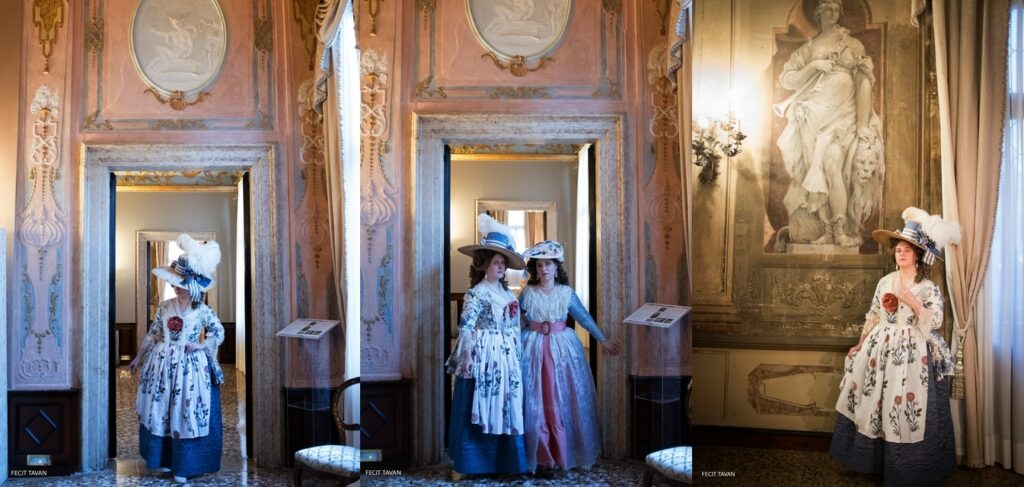
Laurie and Robbin modeling a redressed version of the same straw hat in a period setting.