
Some years ago Laurie Tavan and I started making a Regency Pelisse to go with a feather muff that I had made in another collaboration with, Stephanie Flora.
For Laurie’s journey thru this collaboration is on her Instagram page @laurietavan. Check out her Instagram Highlights under “Pelisse Collab” .
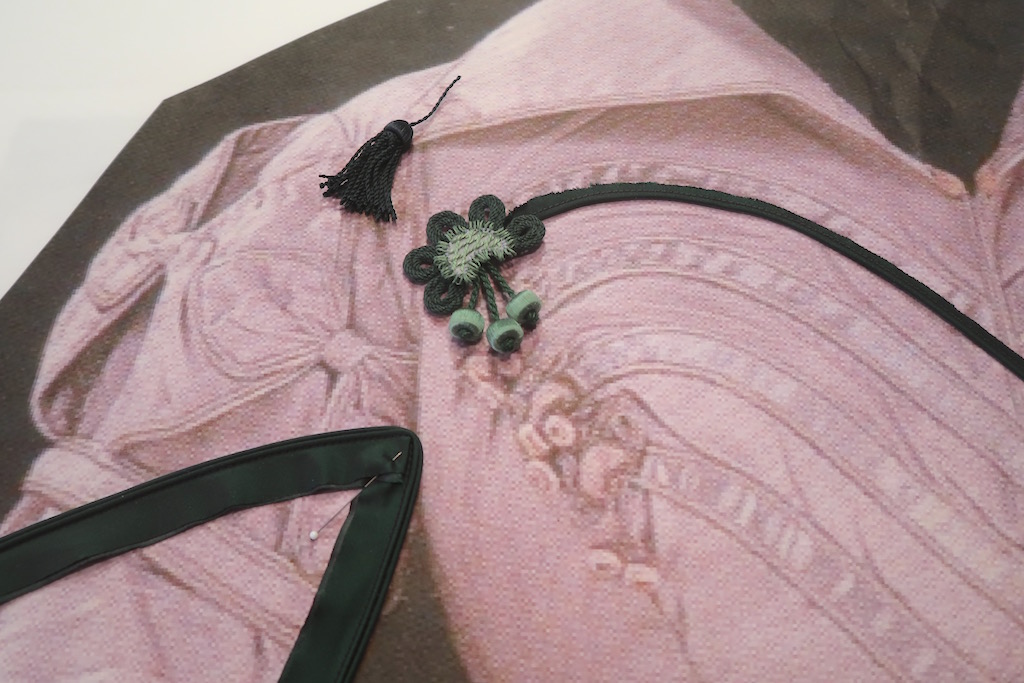
The idea was to add all the elements from this extant pelisse in the V&A collections. First step was to blow up the photos of the V&A garment to life size and then one by one experiment with the best way to recreate the individual elements. Laurie patterned the garment and I worked on the decorations. There were frogs and tassels and double piping to make.
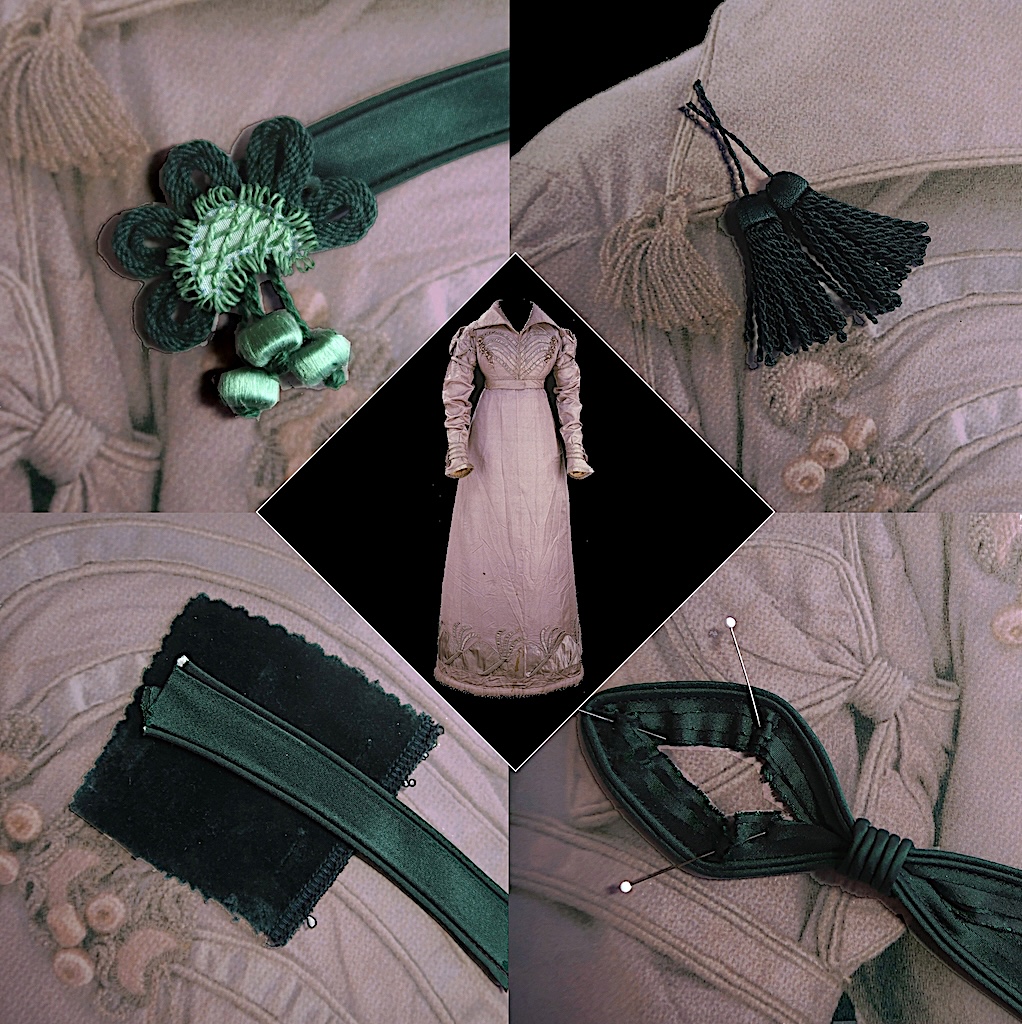
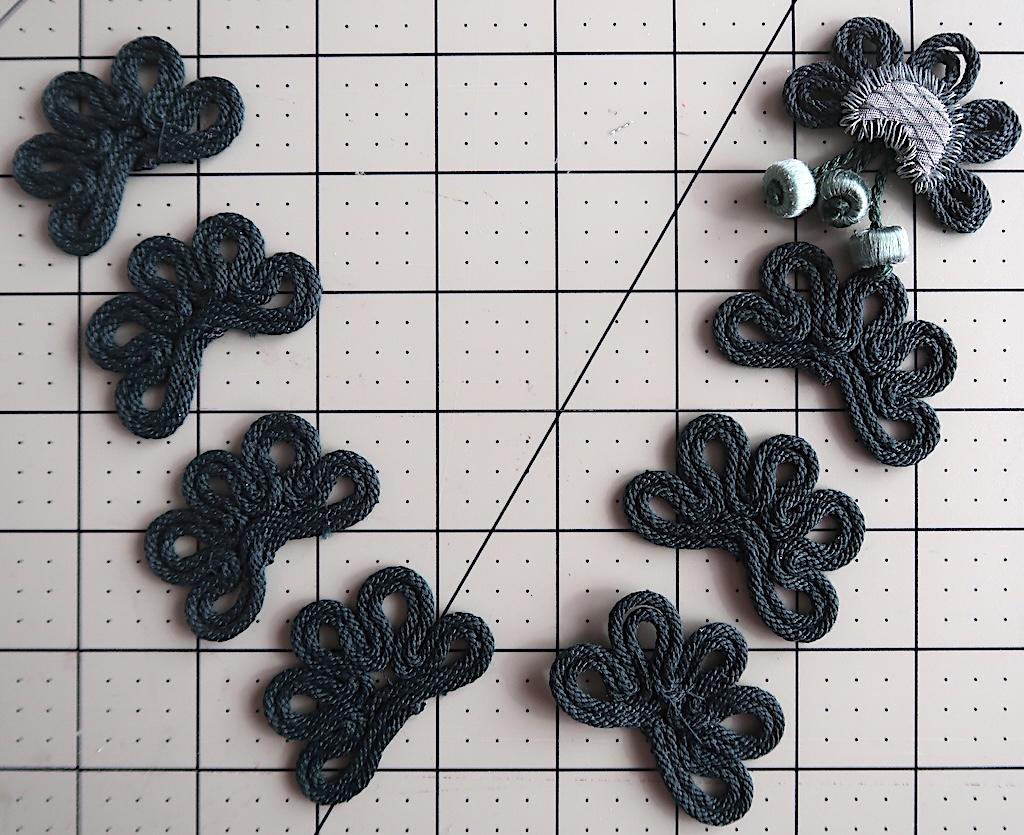
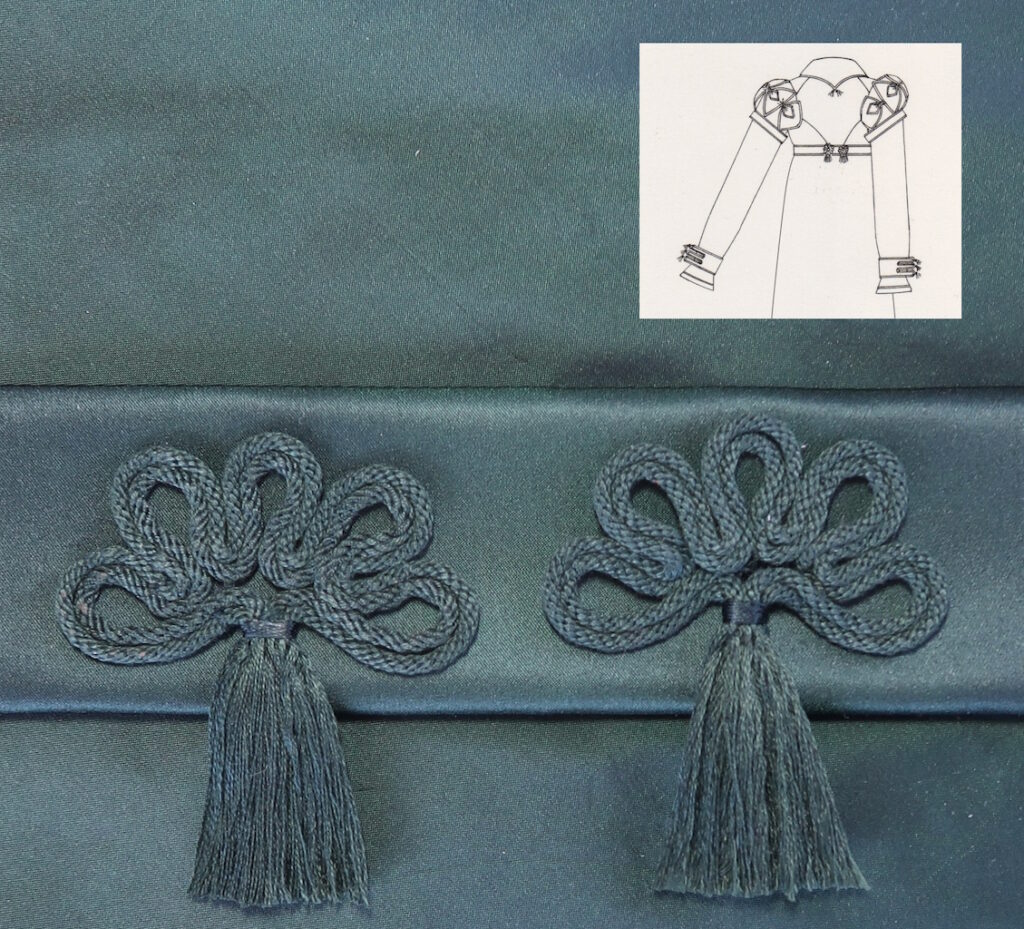
Frogs
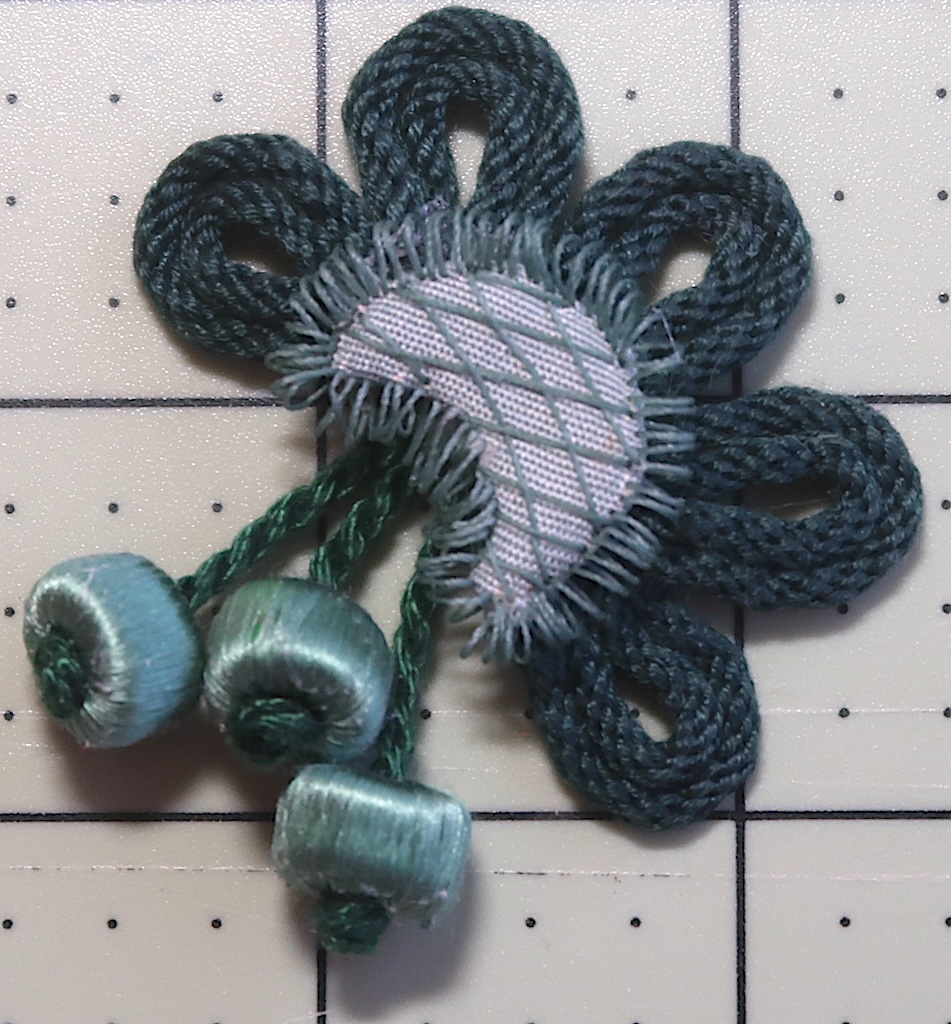
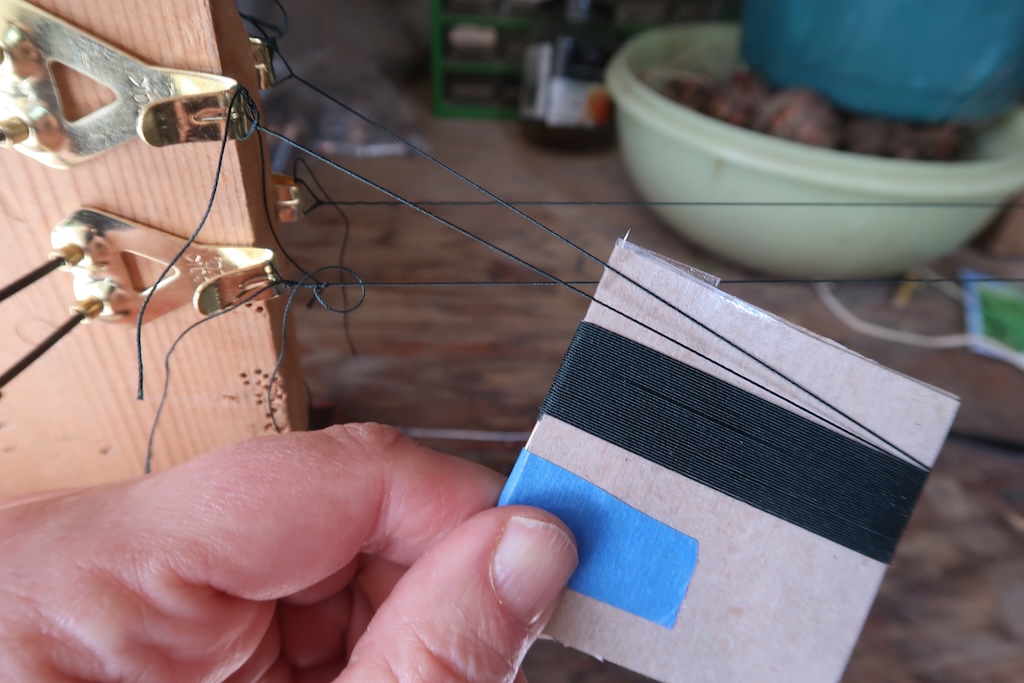
The frogs were the most complex element. It had two types of cord, silk covered not round but donut shaped beads, a center crescent with a hatched embroidery pattern and a sort of thread spring that ran around the outside of the crescent.
I made a sample on to see if it passed muster then, had to recreate 7 more. It started with felt shapes. They are felt and not cardboard because I needed to sew into them to attach the hatching and spring.
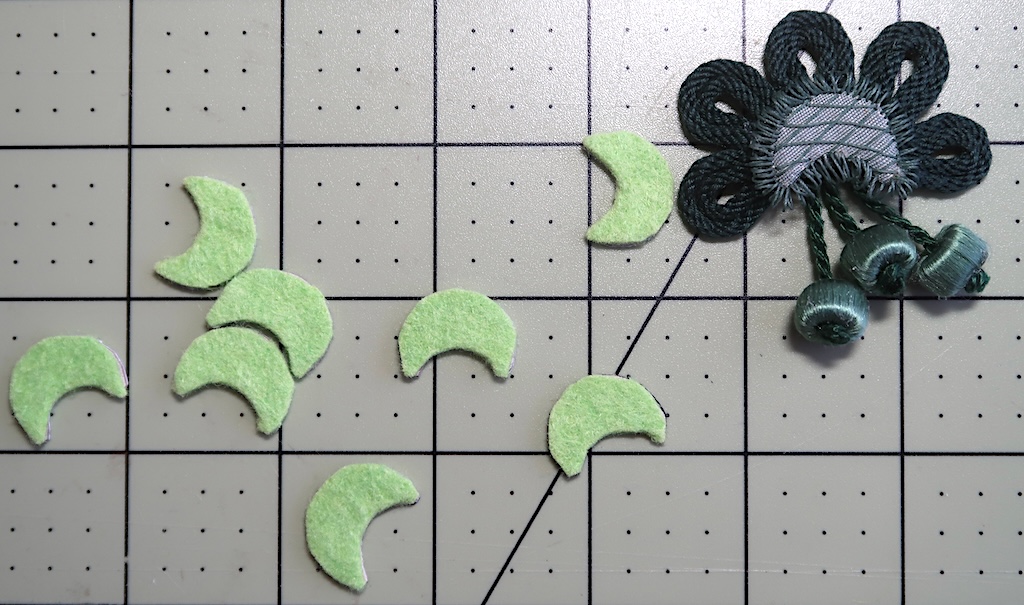
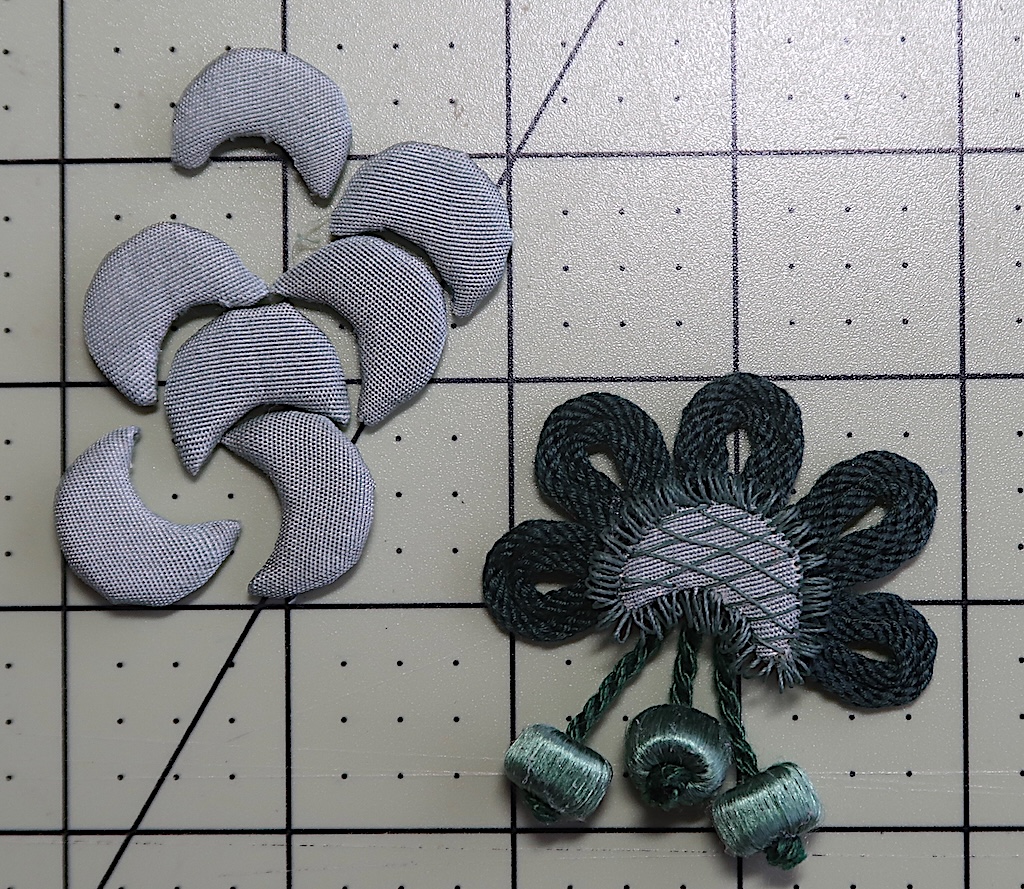
I covered them with a thickish fabric by clipping the 1/4″ seam allowance and gluing the seam allowance to the back. I could then use some of the stiffened threads that will be used for the springs (below) to sew cross hatch stitches across the crescent. I did draw the lines with disappearing pen first so I had something to follow.
In order to create the spring I stiffened lengths of heavy thread with 1/2 strength PVA glue. When dryI wrapped the stiffened threads around a metal knitting needle and steamed the thread. I let that cool and slipped the spring off the needle. I had to tack the string around the outside edge of the crescent. I then set those aside for later.
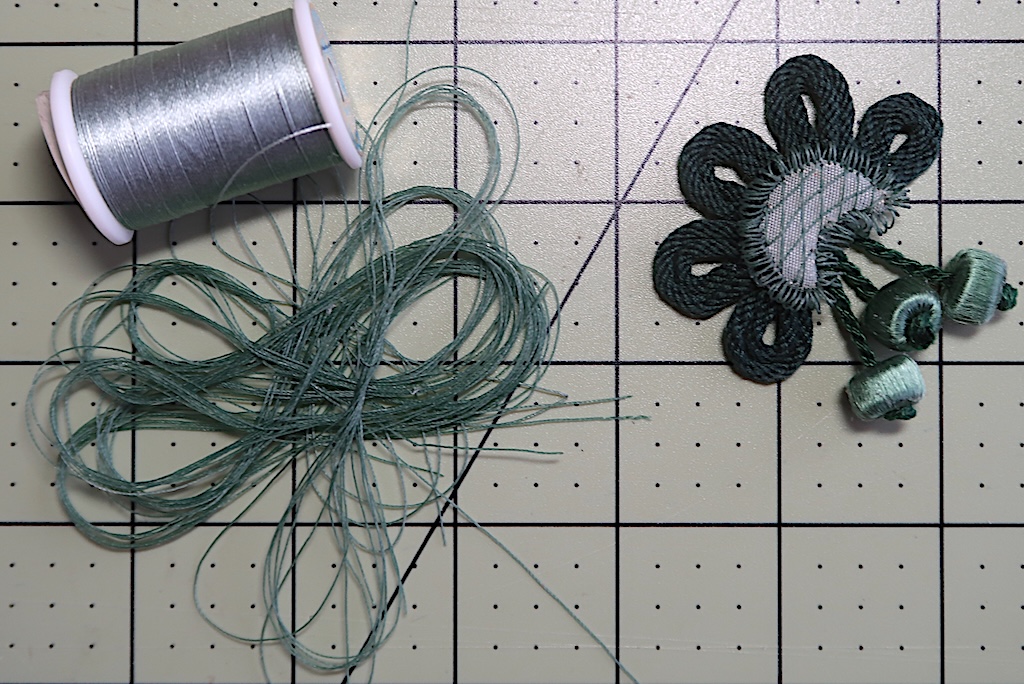
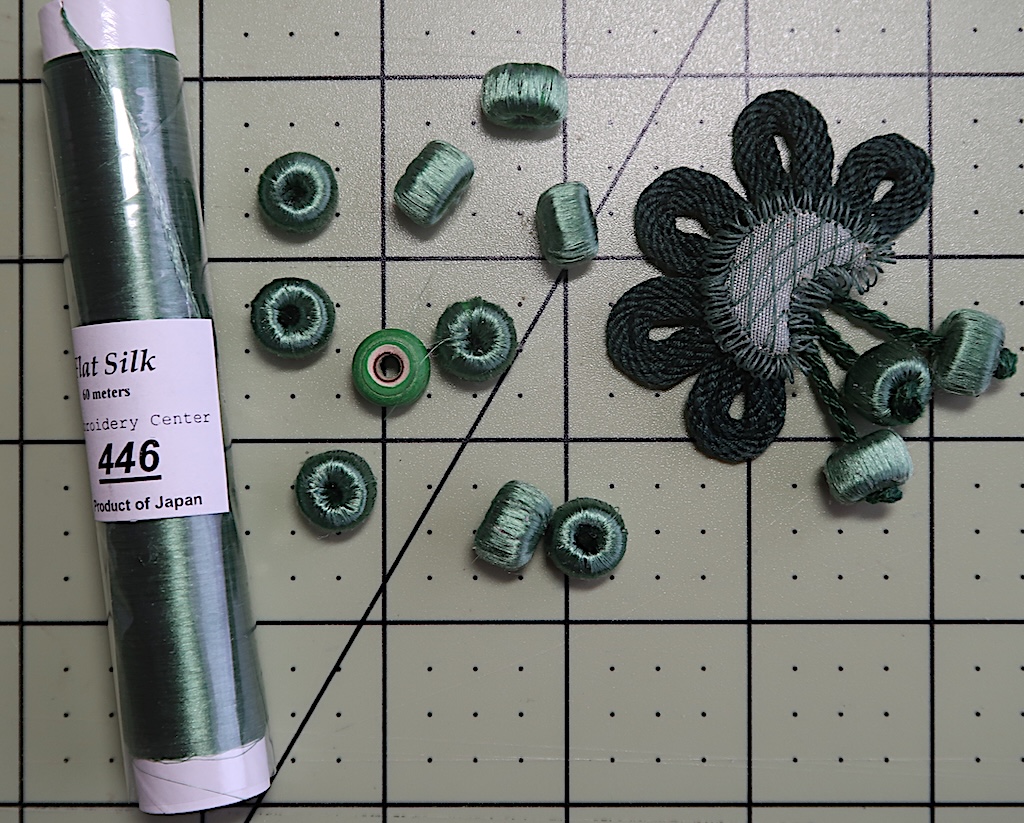
I first had to drill out the holes in my wooden beads. They were painted green donut shaped beads but the hold was a little too small and they did not have the depression in the center that the extant ones had so, I used a larger drill bit to add that. You can see that in one of the center beads which was not covered with flat silk thread yet. The flat silk thread I used is on the left.
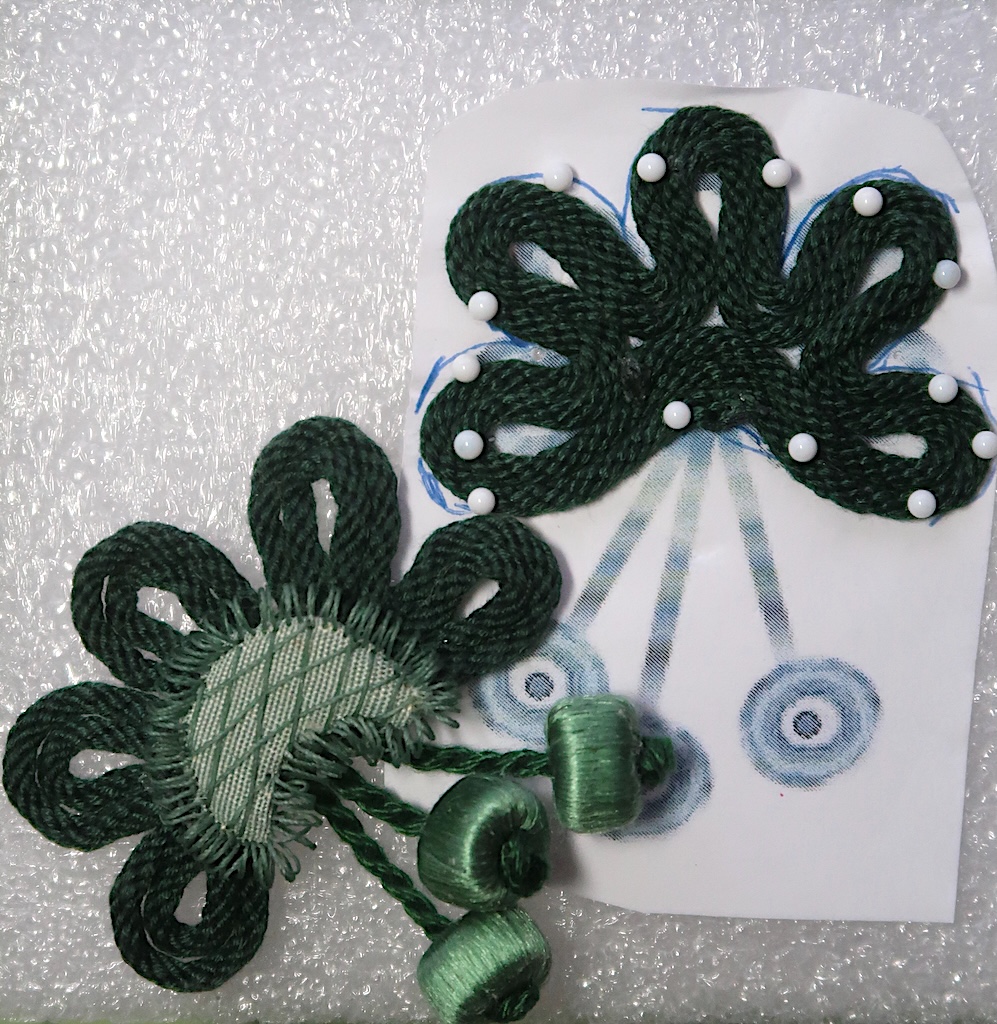
I made a drawing of what the loops at the top should look like and pinned that to a foam board so I could follow it with my braided cord. Once the shape was set then I had to sew a few semi-circles thru the cord around the center to hold it’s shape. I did not just go out and find cord of the right diameter and color. The cord was made for me by a good friend from DMC embroidery floss. I think we bought the last 22 packs of this color before they discontinued it. I could then glue the crescents over the loops.
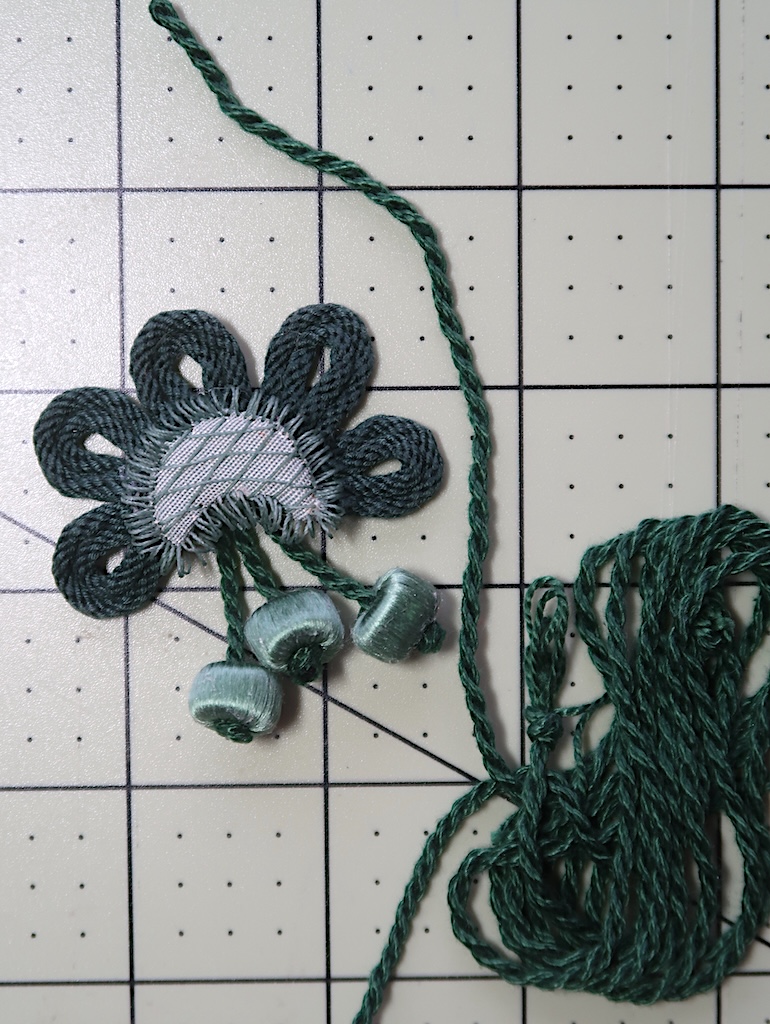
The cord that the covered beads hang from is not a braided cord but a twist cord. I made that with the same color DMC that of the other cord. One on a single cord and the outer two on the same cord. These were sewn to the back of the loops. They are just on the cord because they can’t slide past the knot in the cord.
To follow the progression, the loops are the bottom layer.
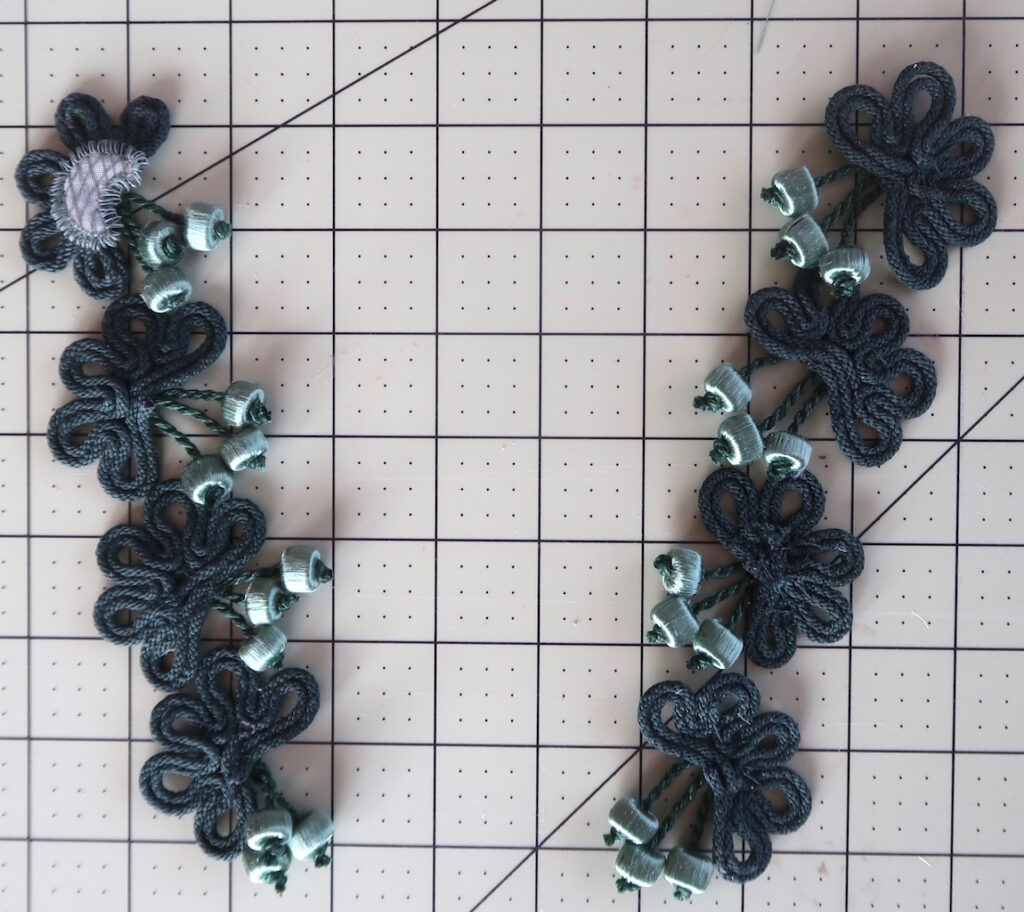
Then the silk covered beads are sewn on the loops by their twist cords.
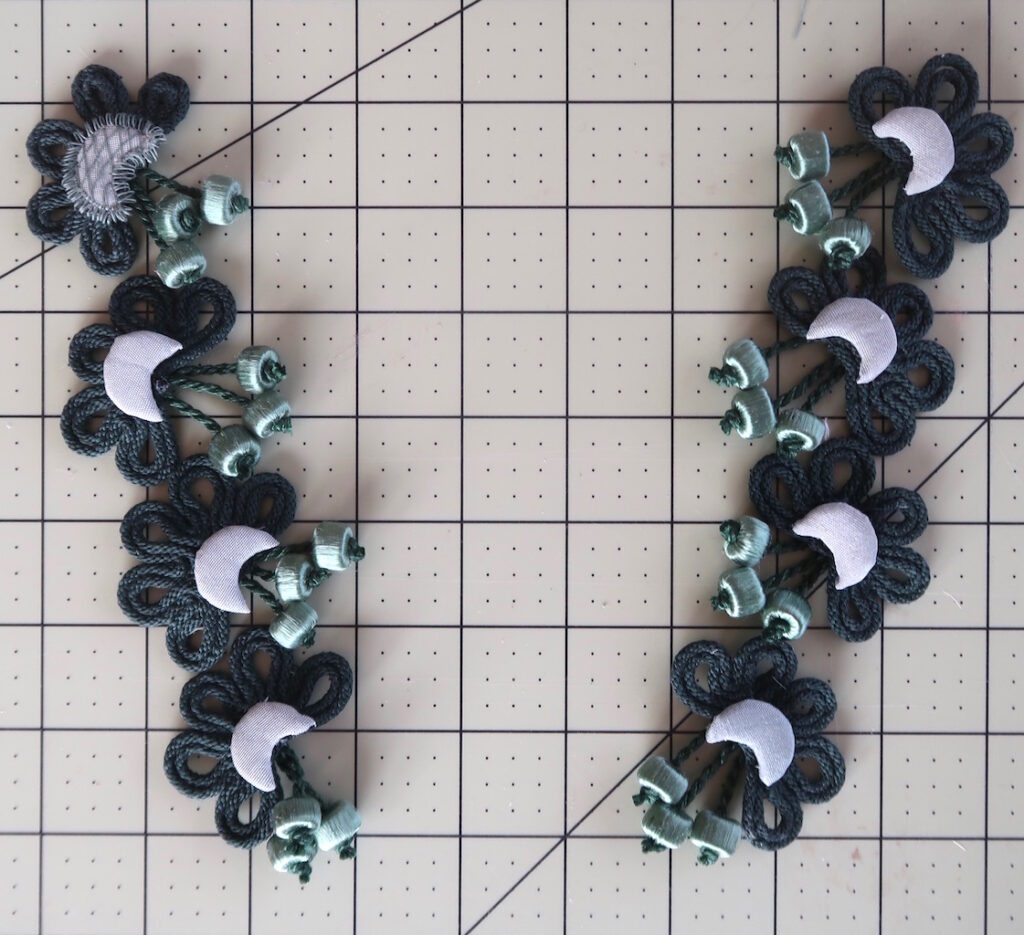
The crescents are above all that. But they do need to be embroidered and the thread strings need to be added.
Piping and Cording
From my full size print of the extant pelisse I could get a measurement of the width of the pipings I needed to make and also the total amounts of the three different types double piping, single piping and covered cord.
As seen on the right there needed to be yards of fabric covered cord for the sleeve cap sections. I learned how this was done by an experienced sewer of home dec but that was on 1/4″ thick piping. So making it with this tiny cord and with silk taffeta was a challenge. But it did work. The secret is to use a piece of piping twice as long as your bias fabric strip. With a zipper foot of course start sewing at one end, when you reach the end of your fabric turn the fabric and sew right over the cord. You have to trim the seam allowance down to about the width of the cord. Then start sliding the fabric to the other side of the cord. It might be a little tight at first but once it get started it slides fairly easily.
There also needed to be single piping. This is Laura’s test of the satin strips with taffeta single piping for the bodice.
I made yards and yards of double piping. Most of the elements of the pelisse take double piping like the sleeve puff elements, the cuffs and the collar. I never made any before but I have make lots of single so, I just experimented. finally ended up using a little wider bias fabric and first sewing a single piece of cording and then adding the second piece and sewing down again. The first row of stitches don’t show if you make sure you second row of cording is tight against the first before you sew the second stitching..
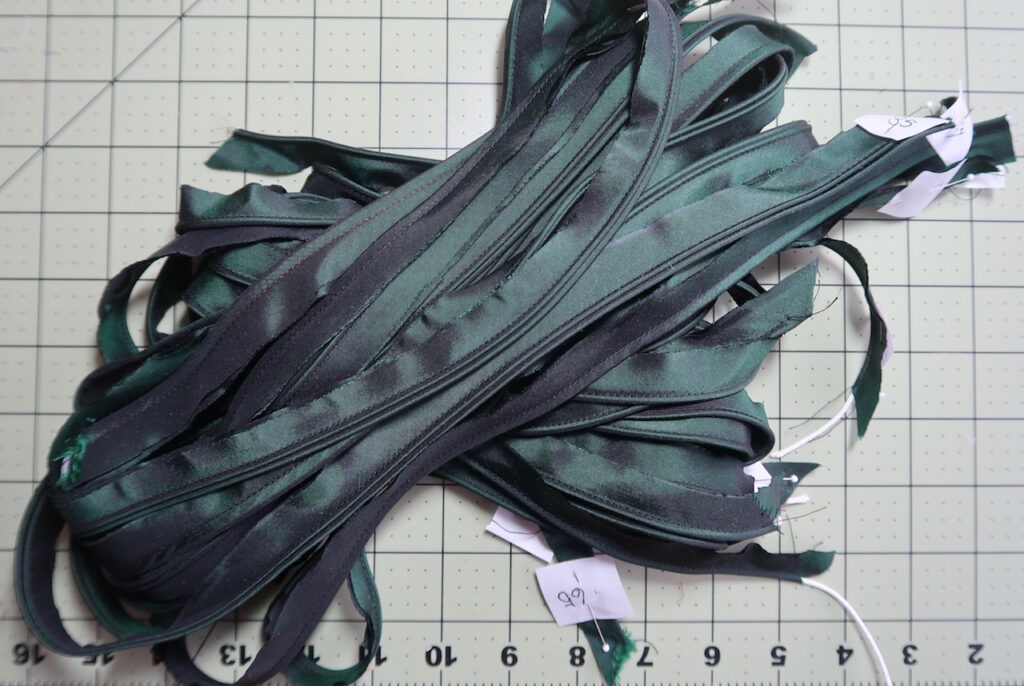
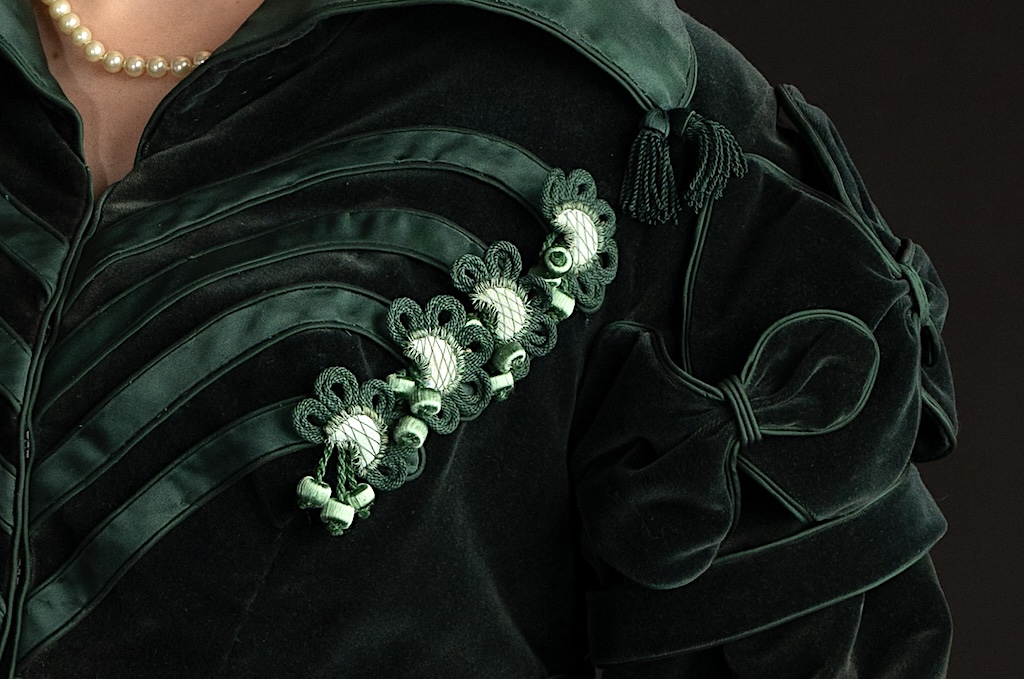
All the types of piping and cording coming together in a small area of the left shoulder.There is double piping on the sleeve puff sections and the collar. There is single piping on the satin appliquéd strips and the sleeve band. There is the covered piping to gather up the sleeve puff sections.
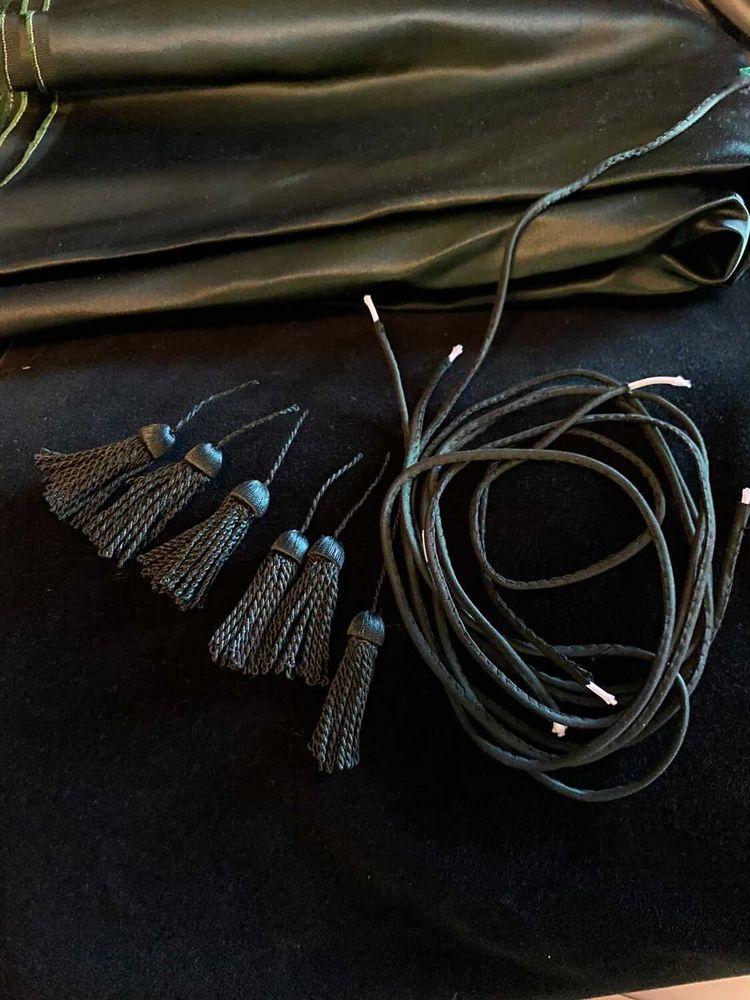
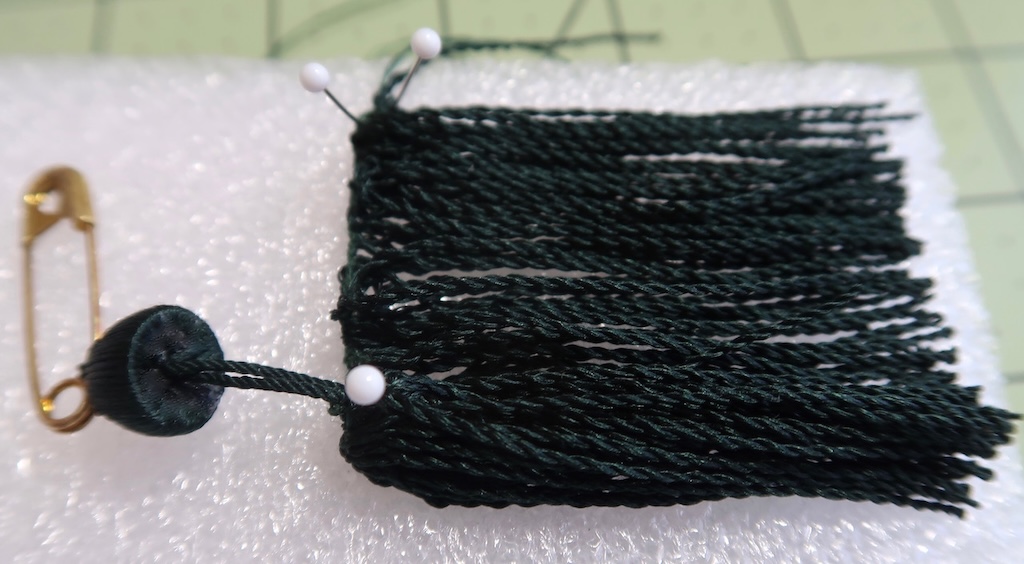
Tassels X3
There were three different types of tassels on the garment. The ones on the left are the easiest by far and the type of tassels I have made forever. Single thread tassels. all I needed to do was to have extra cord hang down from the motif and unravel the cord (check back to the first segment to see how to make a motif like this). Around the loose threads to stop the unraveling.
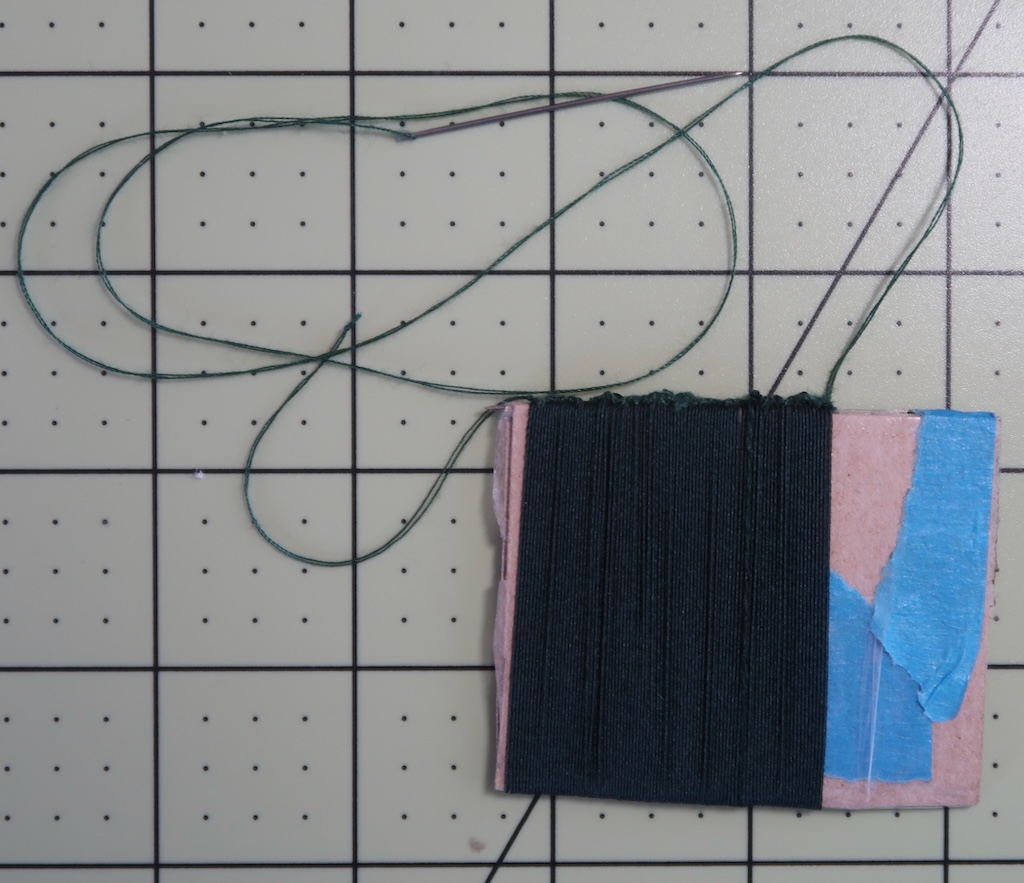
These are the second type. I had never made “twisted cord tassels” before. If you are not familiar with this type of tassel the difference is that instead of single threads making up the fringe of the tassel there are twists cords making up the fringe. Each twist cord has to be connected to the next twist cord by a single strand of the twisted cord. That means you cannot just make a long length of twist cord and loop it back and forth the length of the fringe. So I had to figure out how change my normal twist cord making to get short measured lengths of twist cord from the long twisted cord which then I could bundle to make the fringe you see on these tassels.
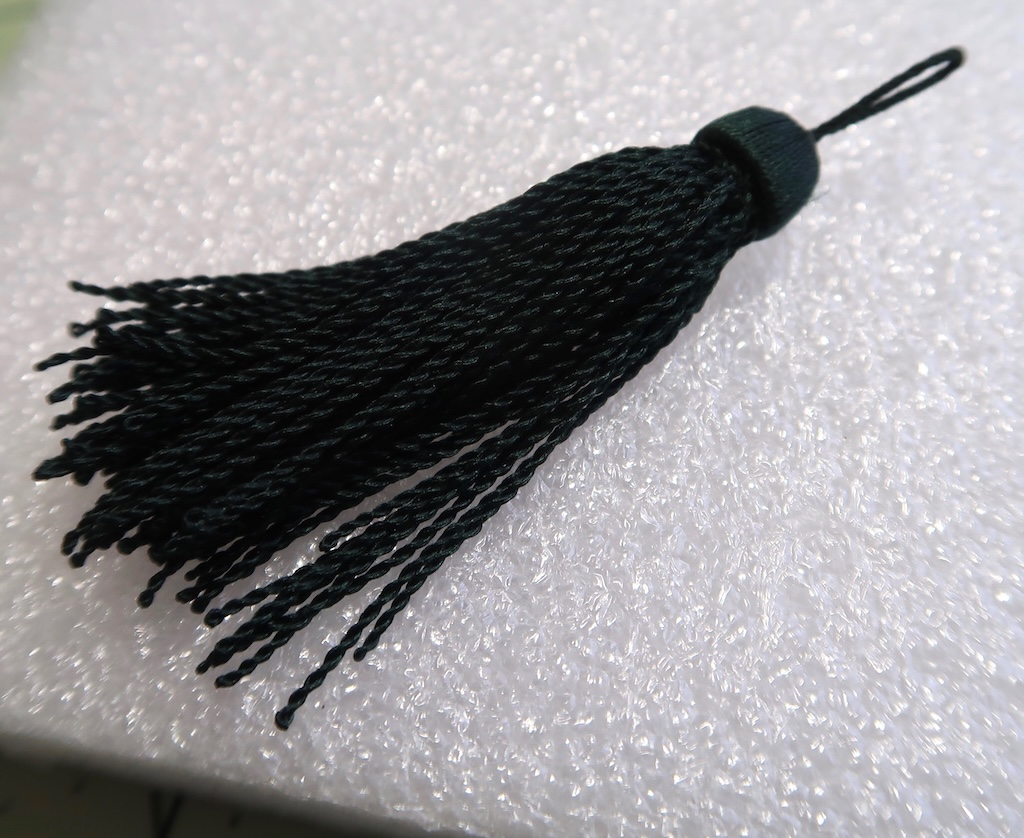
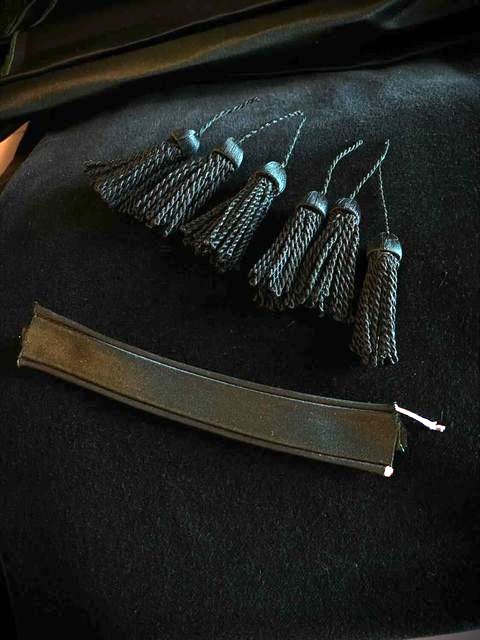
The next type is the same type just longer I needed to make 6 of this type. I made the shorter ones for the collar (picture above) in about the same manner but with a single drill for the twist. When I got to making the longer ones I wanted something quicker and more efficient. See below.
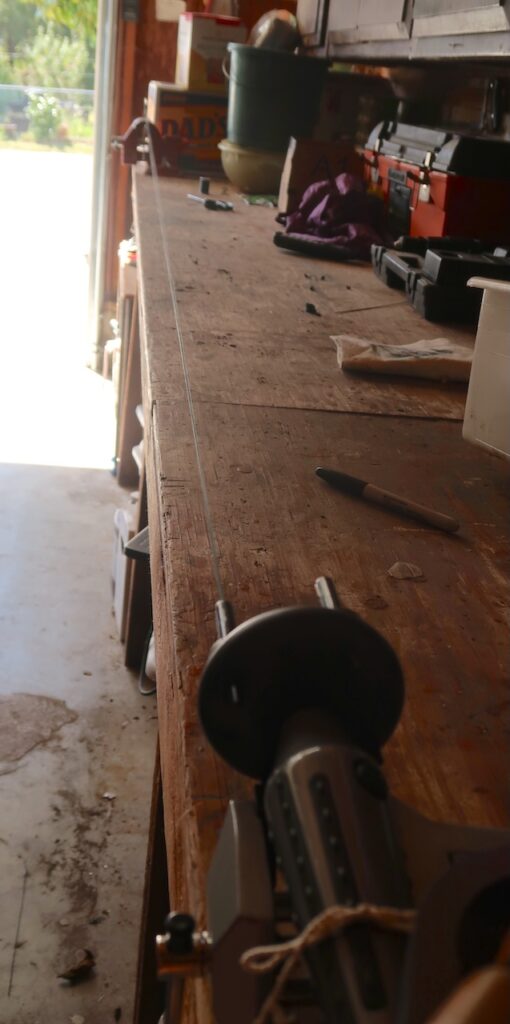
I have a Lacis IG07 * Cord Maker & Fringe Twister III, 4-Ply so I figured I could make 4 strands at once. I set it up on my workbench in the garage and anchored it in a vice so it could not move while I was threading it. .
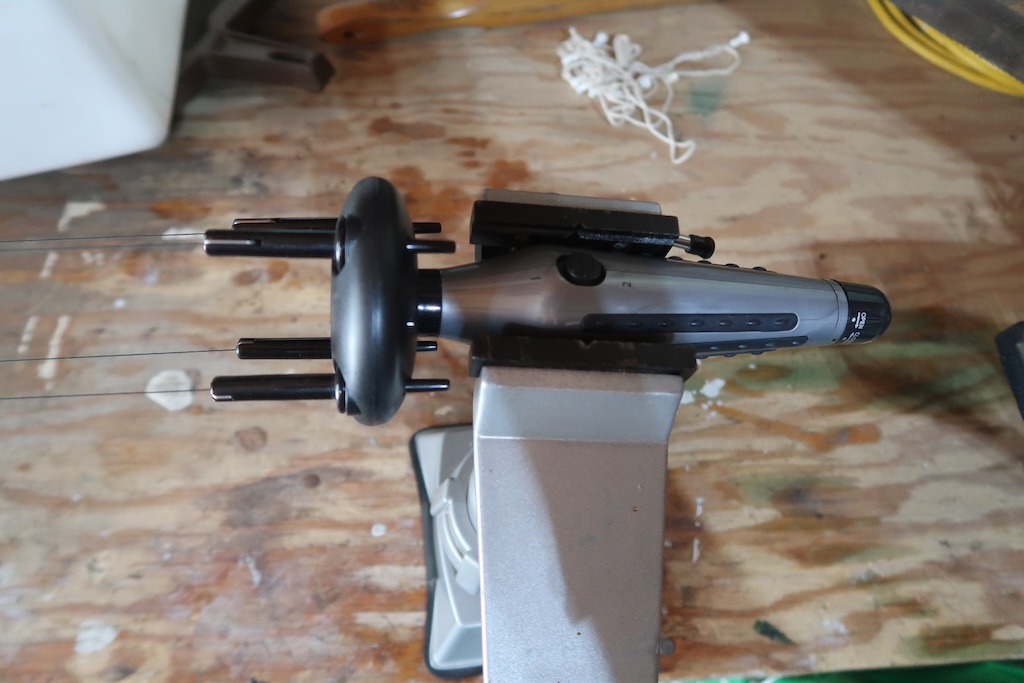
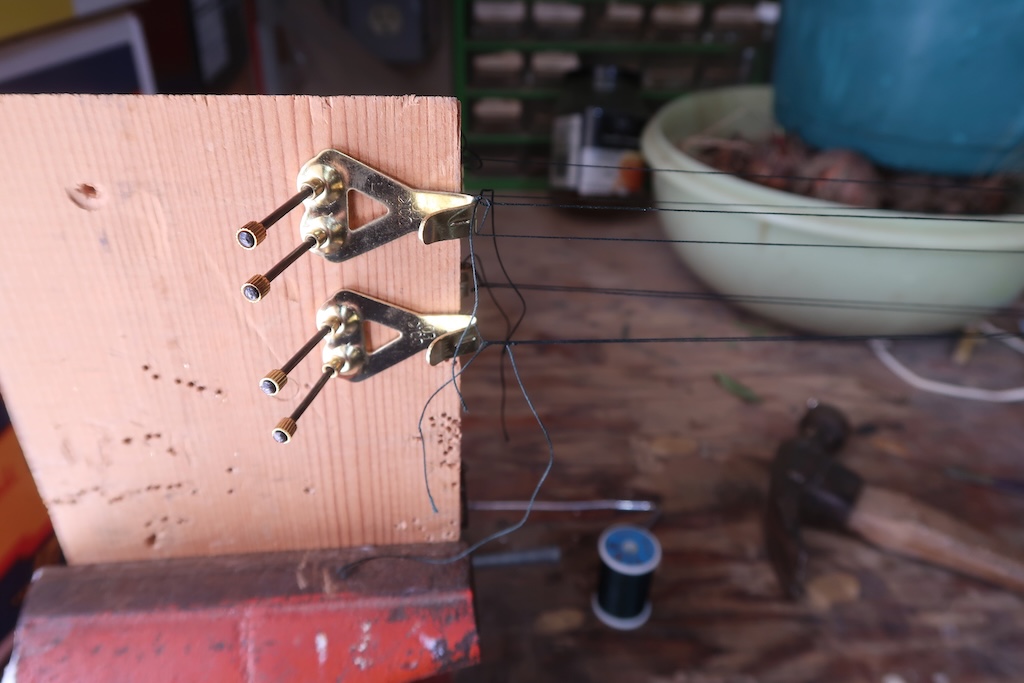
On the other end of my workbench I added a piece of wood with four hooks, one for each of the 4 bundles of thread from the cord maker on the other side of the bench.
My guess is that the lengths of my multiple thread wraps were about 15 ft. long.
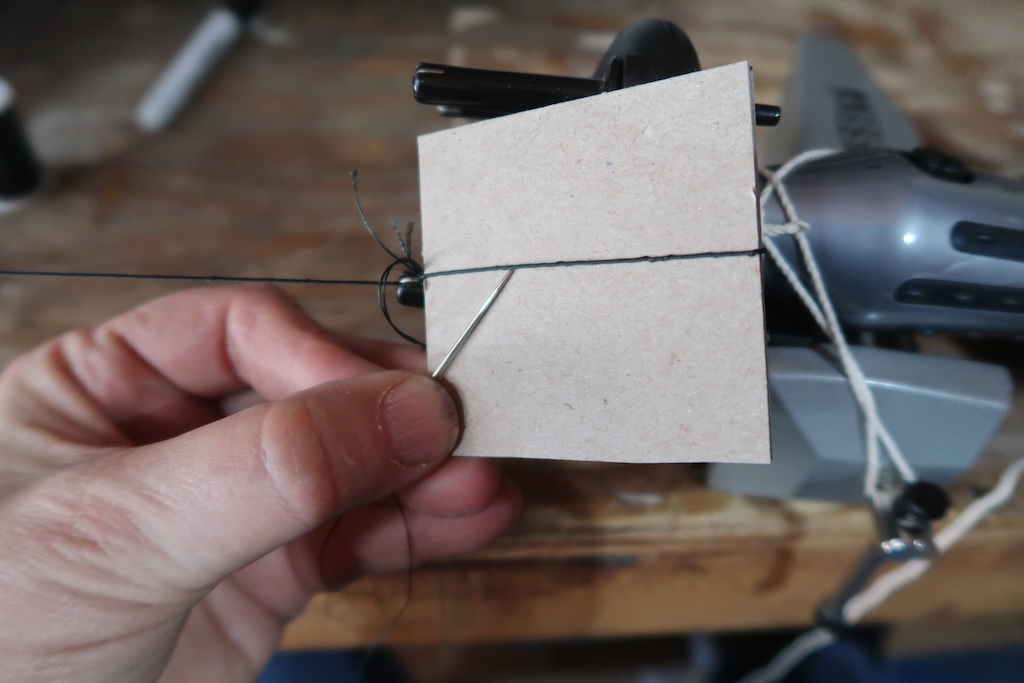
Next using a thick cardboard square the length of the fringe I want for my tassels I transfer the first length of the twisted cord to the cardboard wrapping it around one time. The I need to slip the thread off the hoop of the cord maker.
Tape down the end threads and continue to wrap the cord around the cardboard getting ever closer to the hooks. It’s was important to keep tension on the twisted cord all the way.
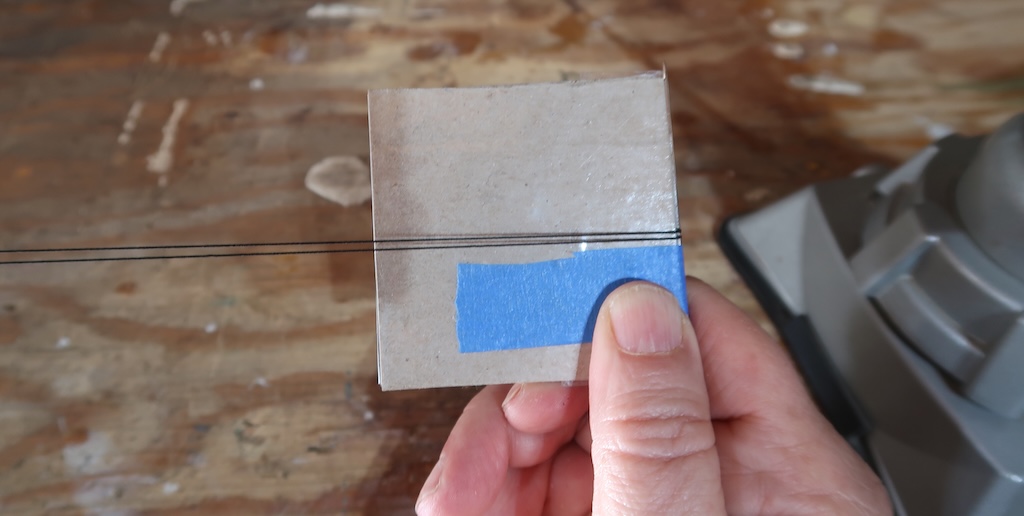
More wraps.
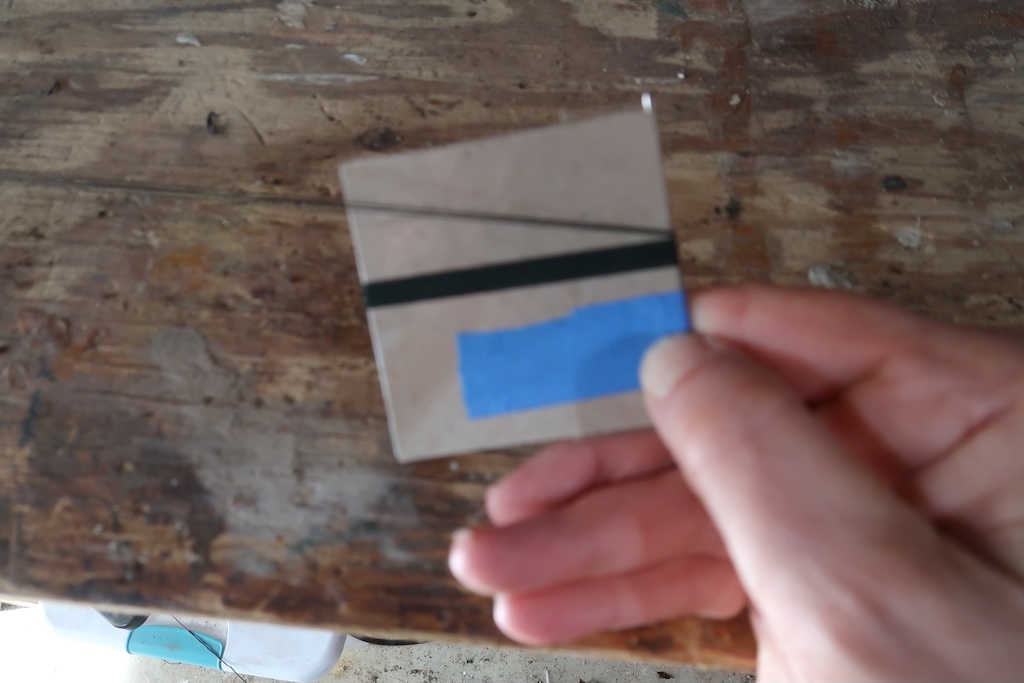
After doing one at a time I decided to do the two opposite hooks of twisted cord on the one card. This worked really well.
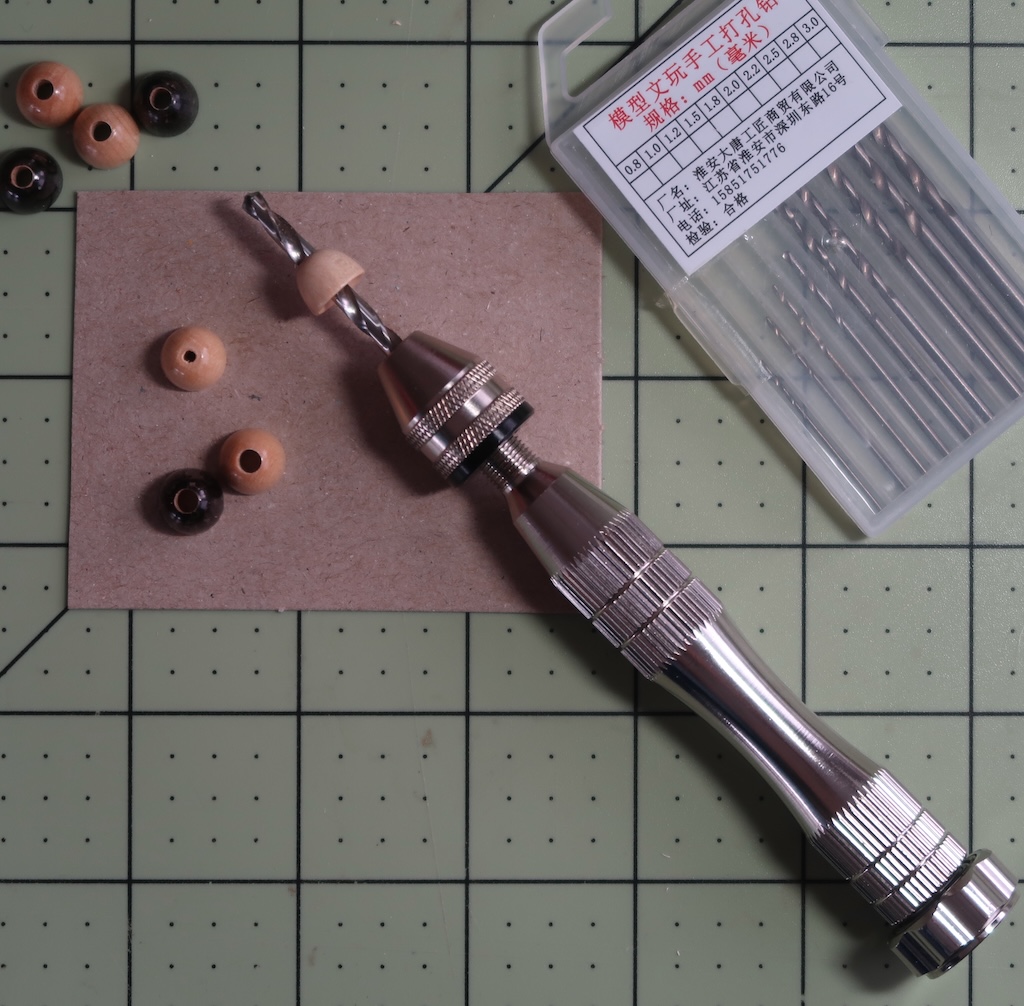
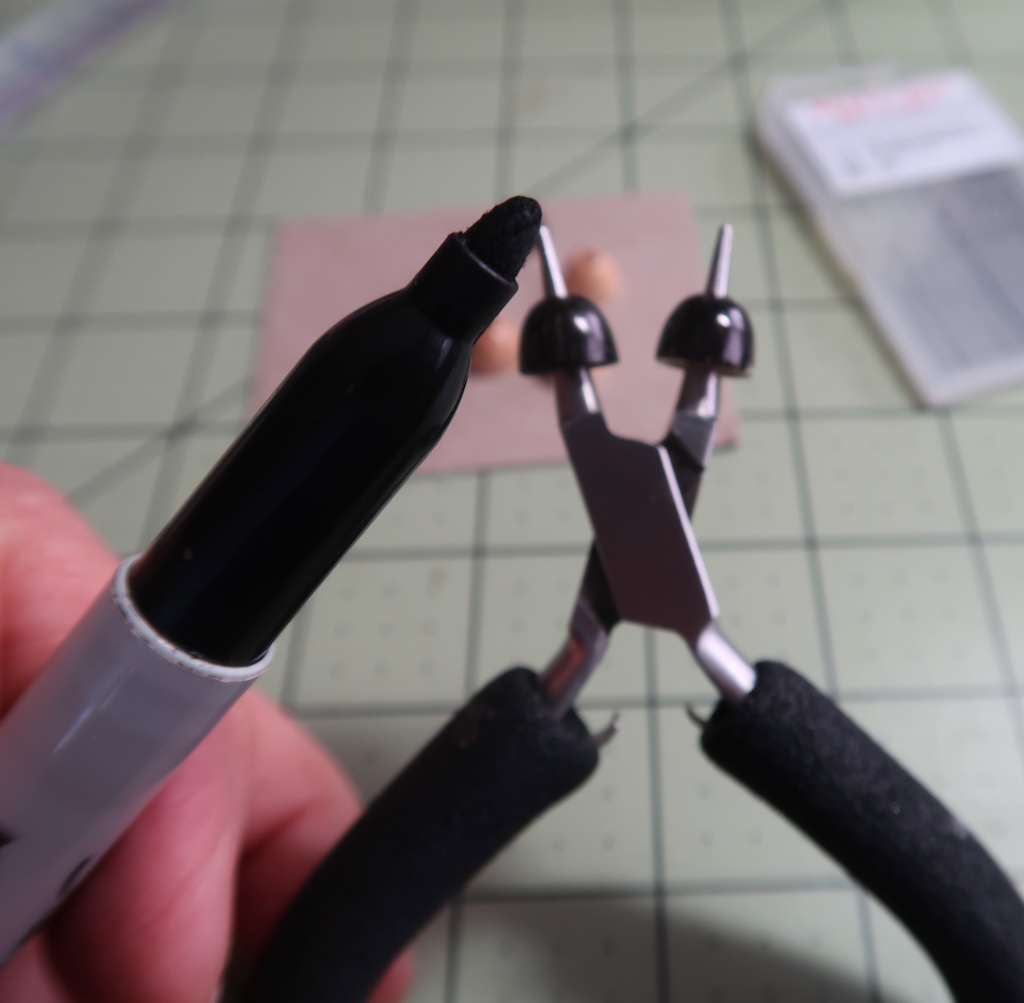
To move on with tassel making I needed a wood bead for the body to hang the fringe from. I found some wood beads but as usual the hole was not large enough so I used my little hand drill to enlarge the hole to 3mm.
Then I turned them black with a marker. I could have turned them dark green but the green thread was so dark the black worked well so the light brown from the wood did not show thru. I then covered the beads with the same silk thread I used to make the tassel twists. #50 weight.
If you want to know more about tassel making click here……..
With a board full of twisted cord I added a double thread to a long needle to thread across the top edge of the board.
I carefully removed the board making sure that the thread I just added stayed at the top and each round of threads twisted together from the bottom to the top. This was helped by doing it over my styrofoam block and adding pins as needed.

I tightened up the twist by pulling on the thread and looped one twist thru the thread covered bead (body). This marks the very center of the fringe. I then tightly spiraled the fringe around the center to the end. Then I could use the needle and thread from before to sew the spirals together so it could not come apart.
Just sliding the covered bead down the loop should be enough to keep the tassel together but I did add a drop of glue near the center of the loop where it met the spiral of the twists.
Sleeve Cuffs
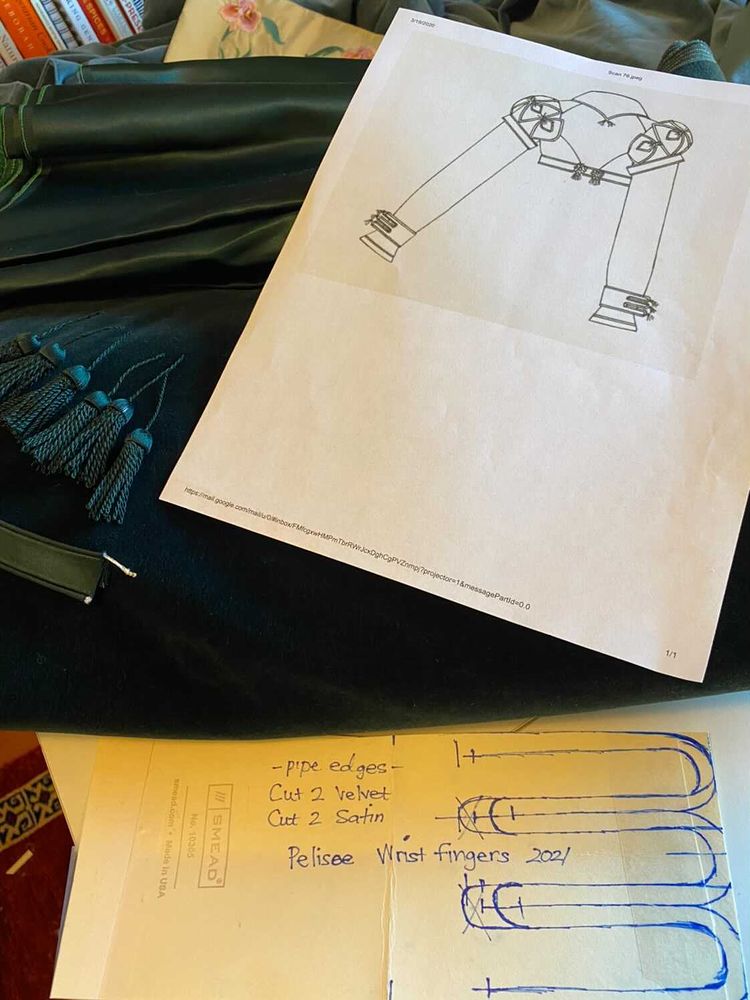
Laura drew up a pattern for the sleeve cuffs. These are not the usual cuffs but more of a stand along cuff to tighten the sleeve around the wrist. These sleeves are long and go down to about the fingers.
I followed the pattern, adding double piping to the velvet and lining that with silk taffeta. I had to sew the lining (top) to the velvet by hand because there was on where to turn the cuff right sides out. Besides this worked much better that trying to sew thru all those layers on the machine.

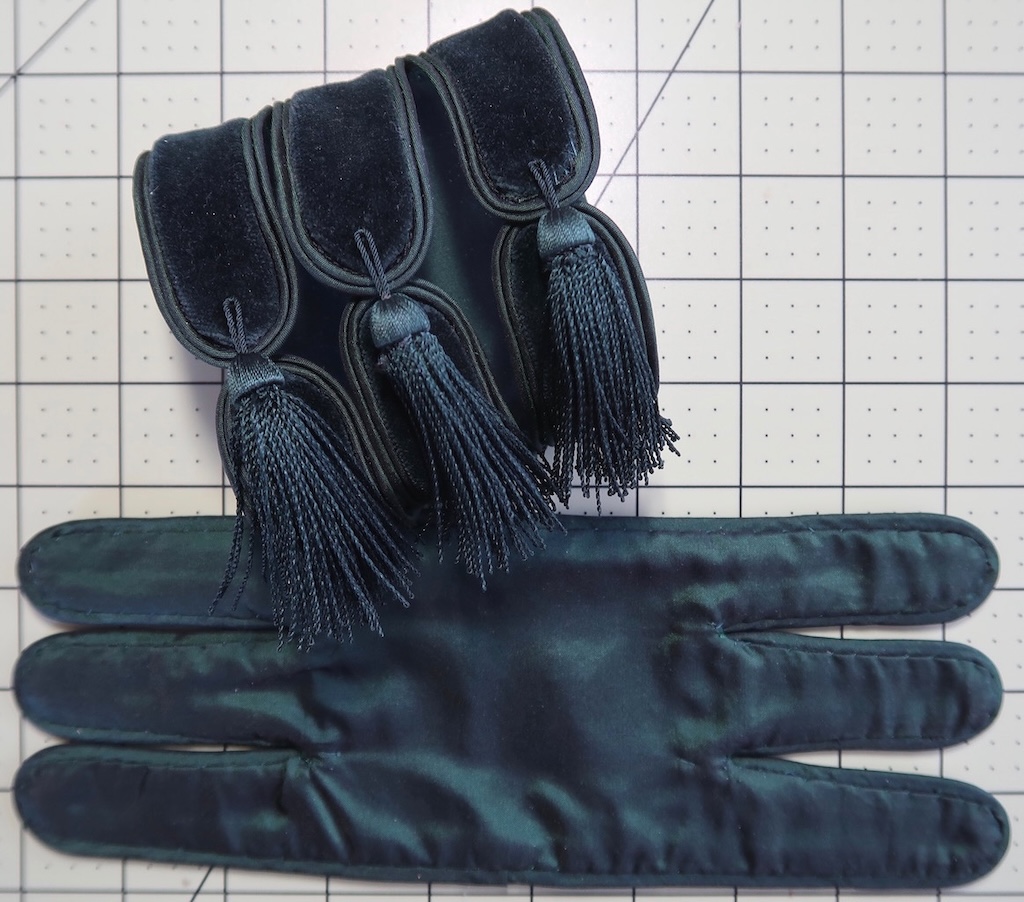
This is my first try to see what it might look like with the tassels. Now I have to figure out how to make them workable closures.

I figured it out! There needed to be a small button on one side and I could use the loop from the tassel to slip the button through. Each button has a very small wooden bead inside and the same silk taffeta from the double piping is covering it.
Here are mine compared to the extant. I really could not see all that much because of the angle.
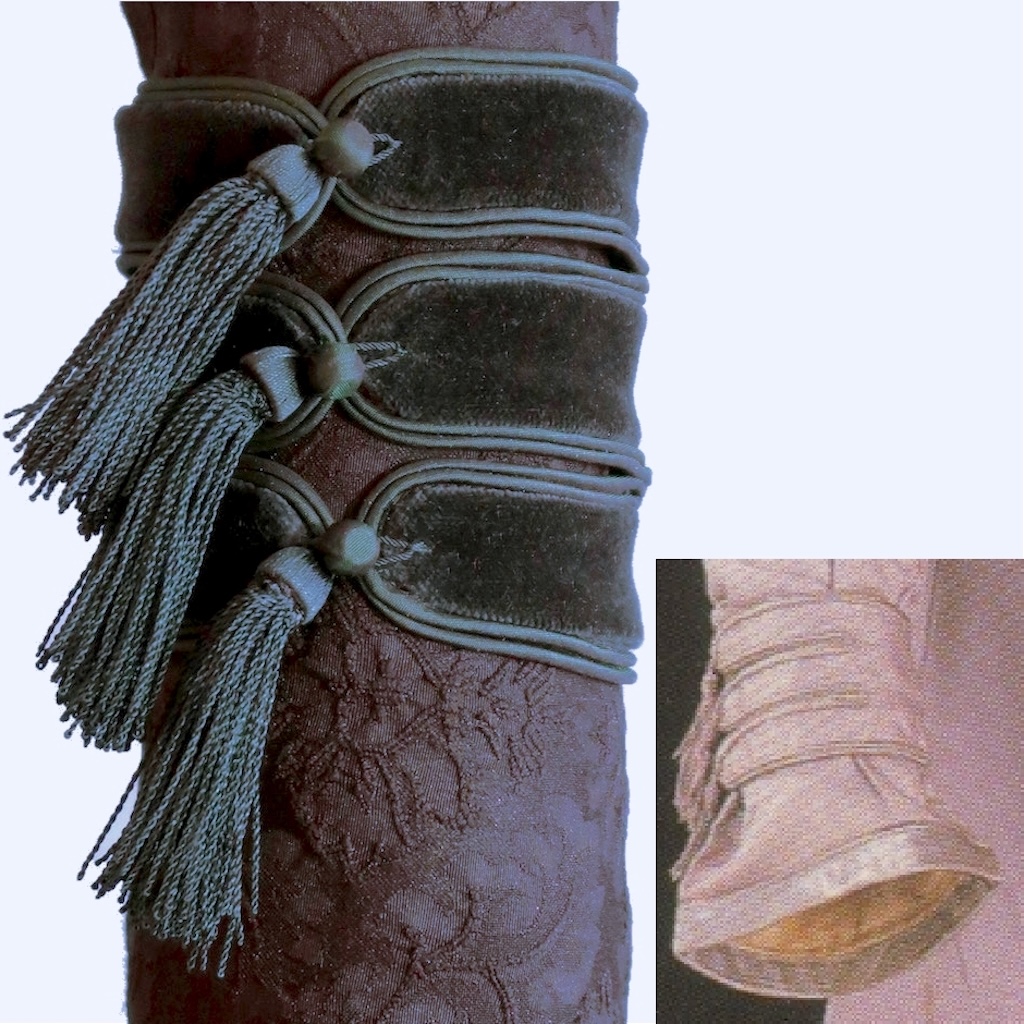
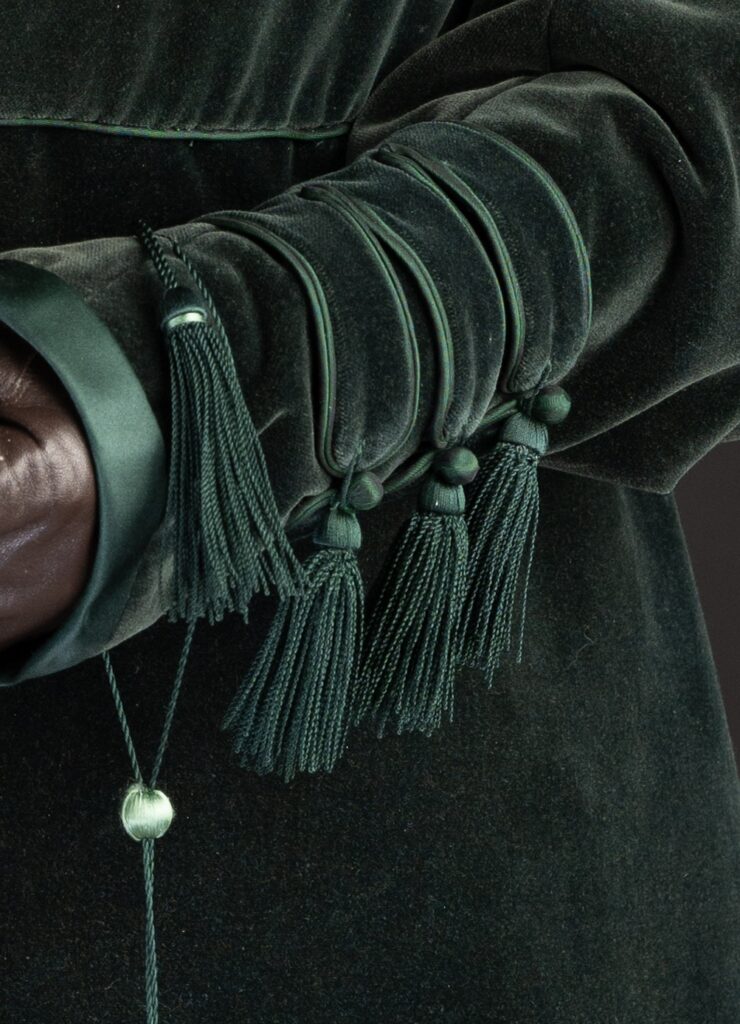
Here is a close up of the cuff in action with the tassel closures working plus a similar tassel part of the tassel set from the muff.
I would like both Laurie Tavan and Jeremy Tavan for the wonderful photos of Laurie in the Pelisse some of which I used I. this article. The photos have so much detail that I can almost reach out and touch things and there are so many shots and angles it was easy to find what I wanted to zoom in on.