These pages where originally set up for an 18th C men’s waistcoat class at Costume College. The students in this class constructed an 18th Century Men’s Waistcoat from a pattern taken off an extant garment in the collection of the Lacis Museum of Lace and Textiles in Berkeley CA. We discussed period construction but used sewing machines and more modern construction steps in class. The pattern will comes with sizes S, M, L & XL and two slightly different views. The embroidery plan included with the pattern is totally optional and should be done before you cut out your fabric
The Waistcoat we chose from the Lacis collection is a white silk with delightful silk embroidery. Only the front outside layer is left and there was at some point in time a shorting of the waistcoat and an addition of a collar. The pocket flaps are missing but the outline still shows as a color change in the silk fabric.

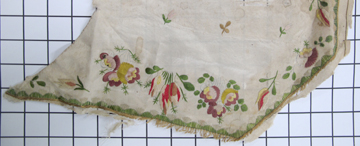
When I compared the shape and style of this waistcoat to the patterns in Norah Waugh’s “The Cut of Men’s Clothes
1600-1900″ I found that it was closest to the 1770 waistcoat. I also figured that it had been shortened about 3 to 4″ most likely as the styles changed in the 1780s and early 90s. This would have given enough fabric to create the stand-up collar, which also came into style in the 80s and early 90s. I don’t think it was cut down in girth on the left side at all but was cut on the right side (as you are looking at it).
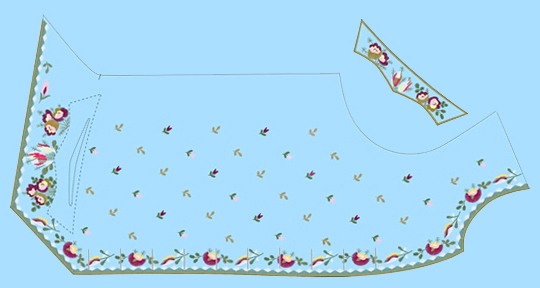
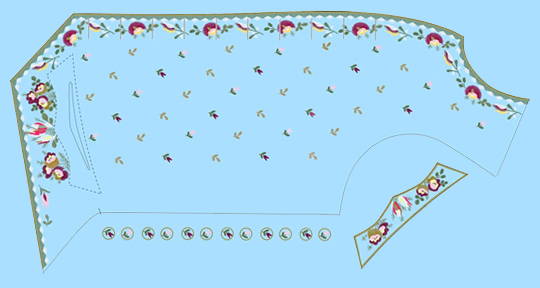
This is what the vest might have looked like after it had been embroidered and before it was cut apart by the tailor to be sewn. I show it on blue background only because there is some white embroidery in places.
The V&A has some very good examples of Period Waistcoats much like the one we will be making in class, looking thru them might help you with fabric and trim selection. Just do an online search of their collection to see them.
Picking a Pattern
The sizing on this pattern is based on chest size. Chose the pattern that includes your chest size rounded up to an even number. Check your waist size against the waist size on the pattern. If you waist size is larger by more that an inch or two I recommend using view B. View B has a large split up the back seam. This split will expand to fit a larger waist and you can tie the string in the back accordingly. This is historically accurate. View A is more fitted but you can also leave it a little larger (less fitted) and add ties to adjust the fit.
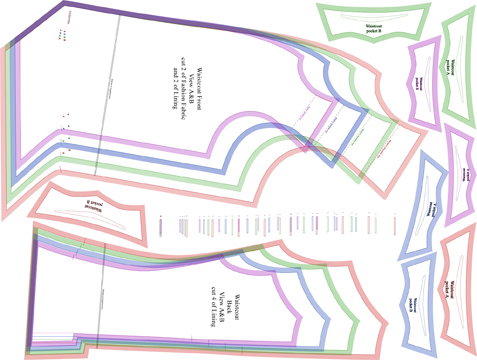
Fabric Requirements Fashion Fabric
You will need at least 1 yard at 45 wide for the Waistcoat front and pocket flaps for the small. 11/8 for the Medium, 11/4 for the Large and XL. If you are trying to center a large motif and pick special places for covered buttons then you might need a little more. I suggest that you take the pattern with you to the fabric store. Your fabric could be a medium to heavy weight silk, light to medium-weight velvet or lightweight home decorating fabric.
Fabric RequirementsLining
For the linings and the waistcoat back you will need a 1 3/4 of 60 wide. This should be linen. You can of course use less if you only make the back one layer. In the 18 C that was done but the construction is a little more difficult.
Making a Muslin
We need you to come to class having already chosen you pattern, cut it out, made a muslin with it and transferred the changes back to you paper pattern ready to lay it out on your final fabric in class. If you have never done this before the pictures and text below should help.
After you pick your pattern size based on chest size measurement cut it out and compare it to the wearer. This is the best time to decide if it will be too long or too short. Most waistcoats from this period are around 30” long but for what height of man? From the portraits I have studied it seems that they mostly end at the upper thigh Check the V&A’s collection for waistcoats in the 1770’s target date to get an idea where they should end. One could be make their waistcoat an inch or so longer but this length would be fine as well.
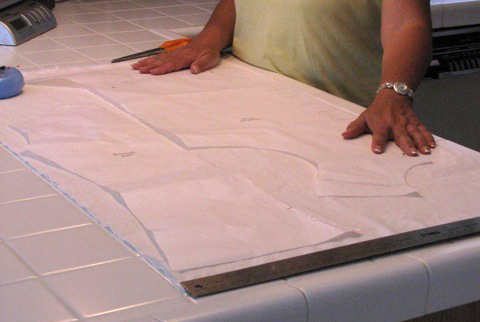
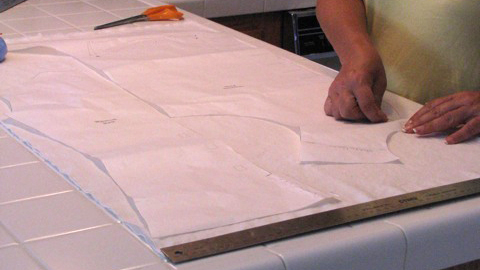
Lay out you paper pattern on some inexpensive fabric. These steps are being shown on View A.
To make a muslin you only need two fronts and two backs. The fabric here is folded double.
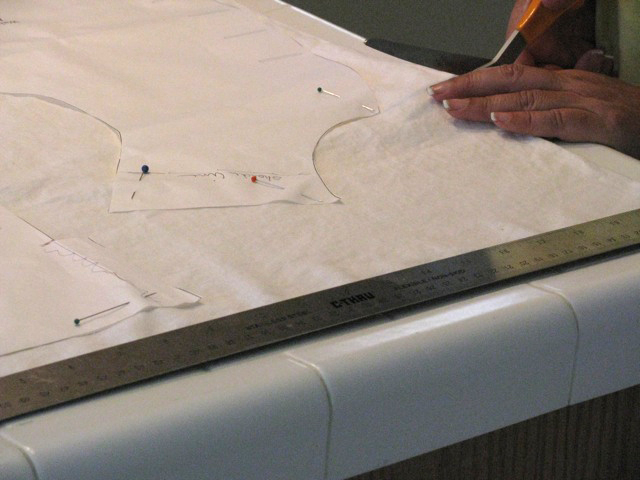
Cut out fabric and sew the center back, shoulder and side seams. Use a long stitch that will be easy to remove. Clip the seam allowances around the armholes.
Try it on the person it is intended for or a dress form of the person. Make sure that you check for fit over what they will be wearing or something of similar thickness. Pin the waistcoat closed in front with about an inch overlap, as shown in picture.
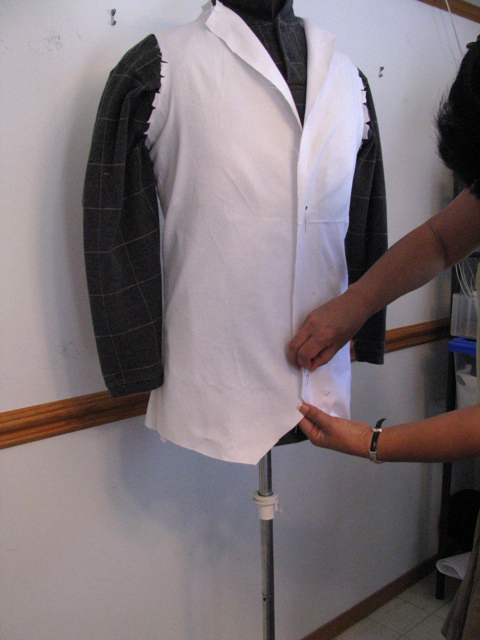
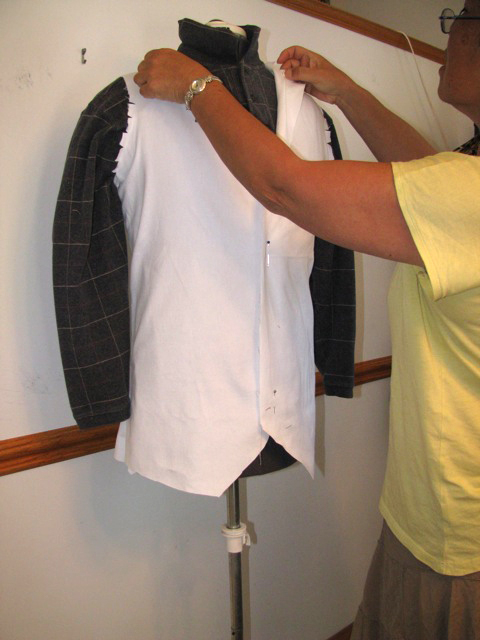
Make sure that the shoulder area is adjusted properly.
Clip the seam allowances at the neck and armhole if you haven’t yet.
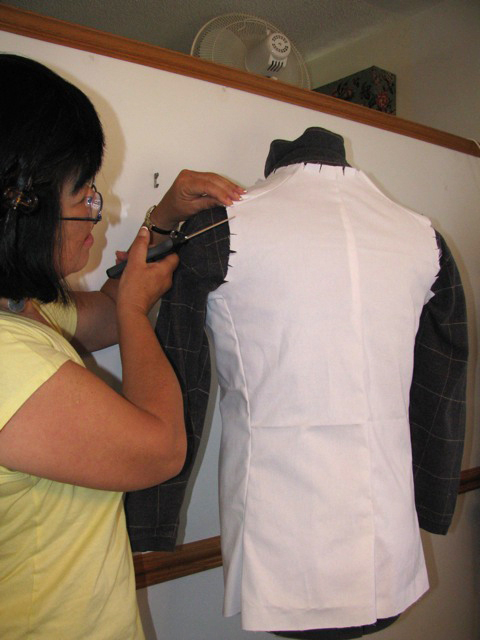
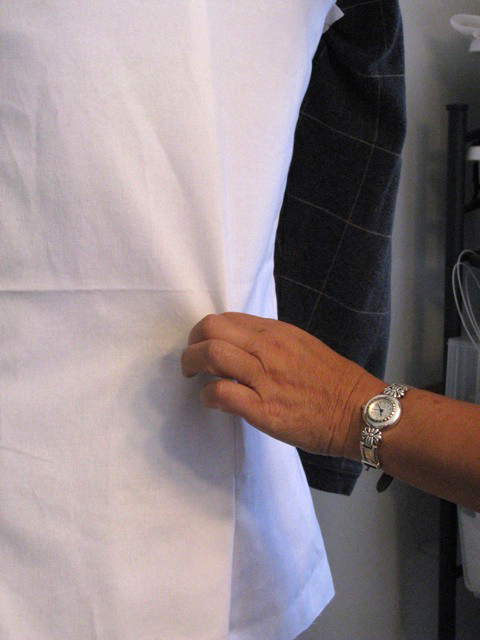
Check the back seam for fit.
Use safety pins to adjust the seam. Gail is using the pins to take in about 1/4″ near the neck opening.
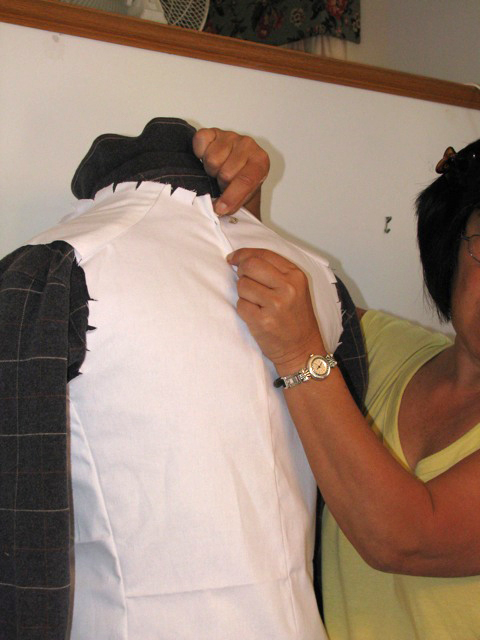
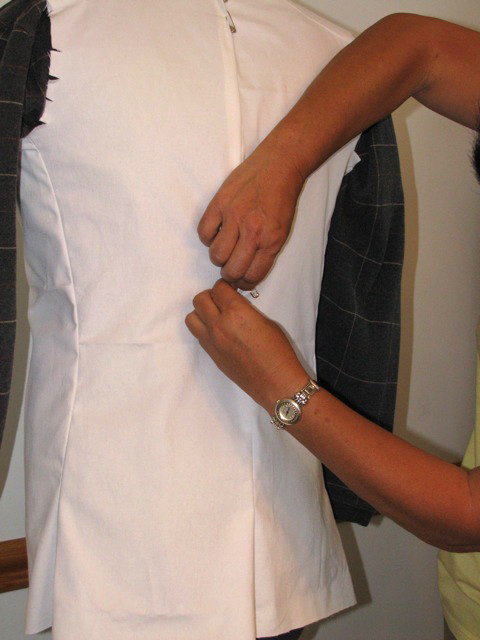
Here Gail is using the pins to take about 1/2 inch from the back seam near the waist.
This picture shows the final pinning, nothing needed to be taken out in the shoulder blade area.
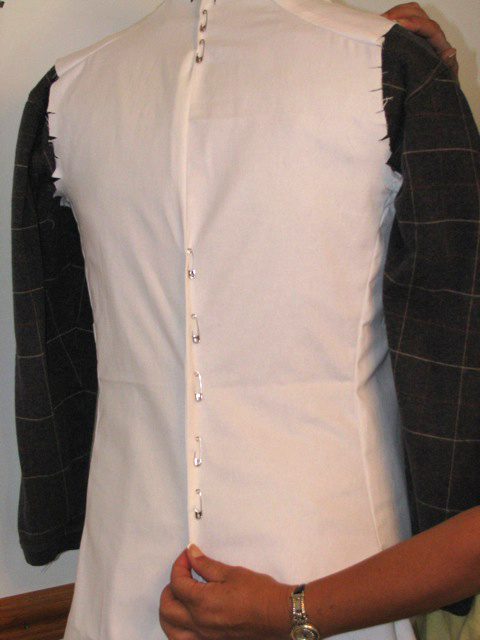
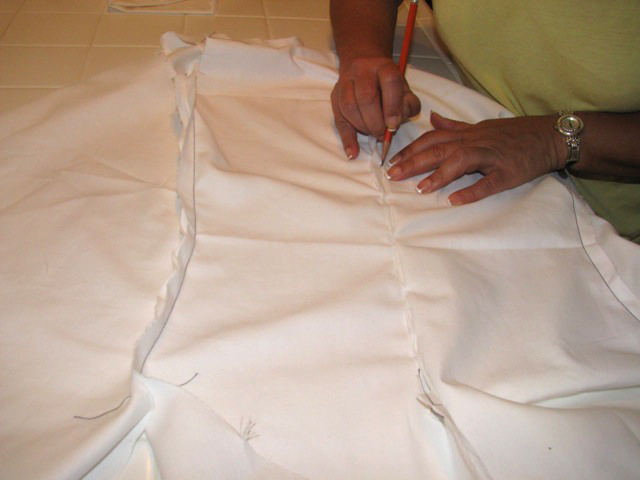
Remove the muslin. From the inside, mark the fabric near each pin.
This photo shows the marks for the new seamline.
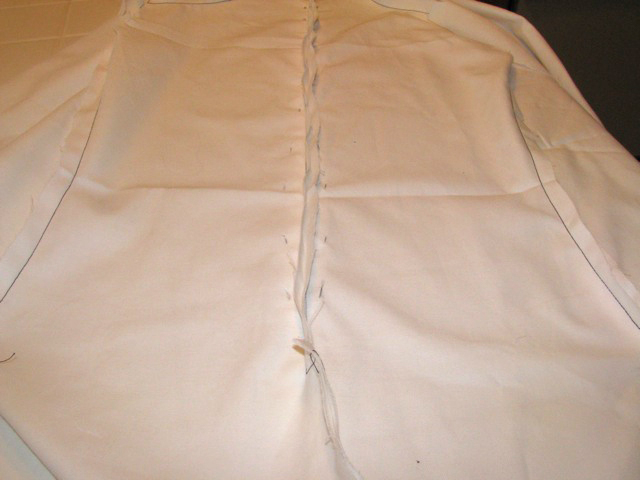
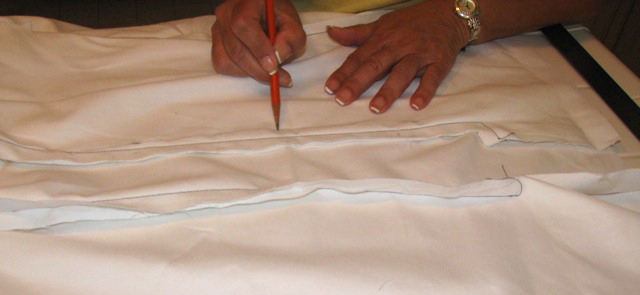
Draw a smooth line between the marks.
Pick out the old seam and sew the seam on the new lines. Try on for fit again.
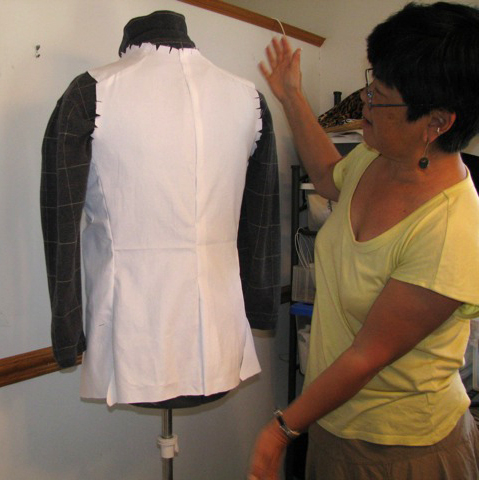
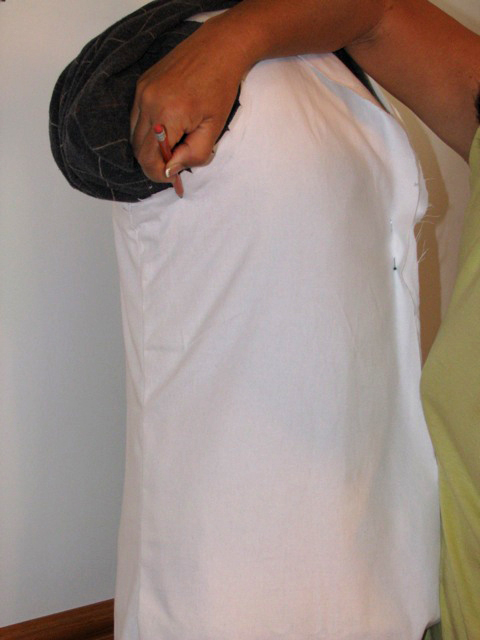
If the armhole seems a little too high re-mark it.
At this point you have two options some people use their muslins as final patterns to cut from but most people use the muslins to make the changes back to the paper pattern. We recommend this because the paper is easier to see pattern thru.
Transfer your changes back to the paper and you will be ready for class and ready to go to the fabric store and pick out some fantastic fabric.
I did add some links at the bottom of the page. If you look thru them you will have better picture in your mind of what would make a great 18C Waistcoat.
Test Waistcoat View
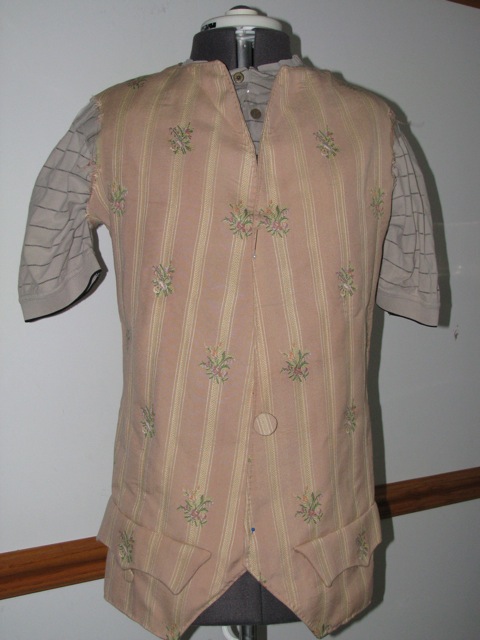
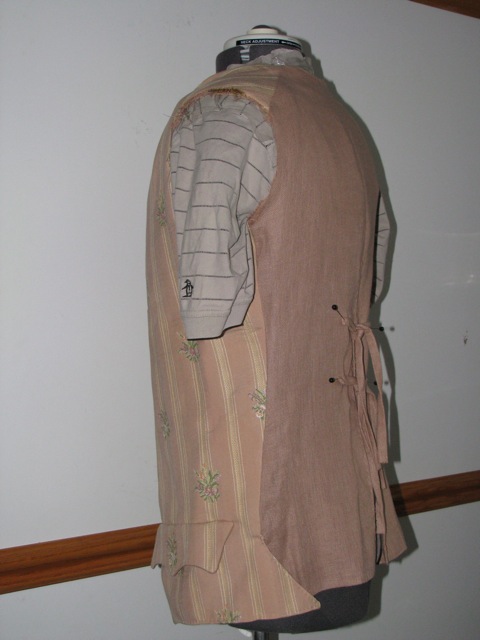
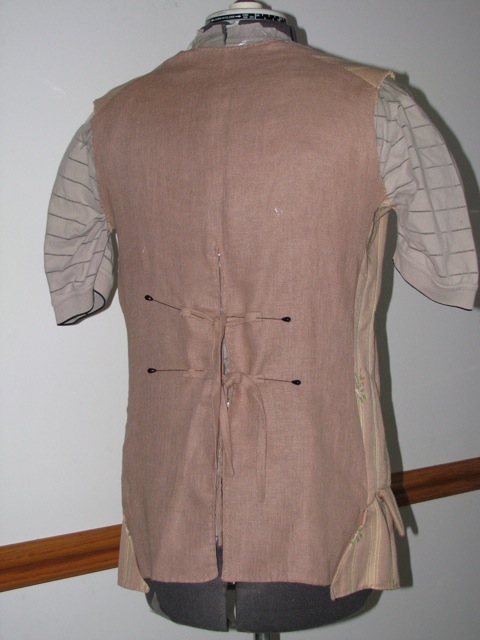
I made a sample waistcoat from View B. I used a cotton upholstery fabric with stripes and floral designs in the weave. It was not cut on the straight of grain of the pattern but just slightly off which is what gives the upside down “V” in the stripes. The lining is a rose color linen fabric. It is not finished at the armhole and it does not have buttons or buttonholes yet. I have only pinned 4 (two sets) and not 6 of the back ties into place.
A couple Waistcoat link from the same period
Wikipedia page has a group of 8 paintings 3/4 of the way down the page